To install RamComm on your workstation, please follow the steps described below.
1. Download the last release of RamComm from the link Axel Technology will provide to you:
http://www.axeltechnology.com/public/RAM/RamCommm_Setup.exe
2. Run the installer
3. Define the Install path (ex: C:\RADIO_TV)
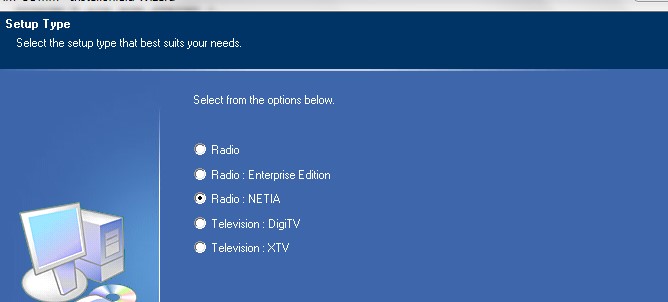
4. In the RamComm control panel of the installer, choose the NETIA model
5. Define a broadcaster (ex: name of your radio)
6. Reboot your system
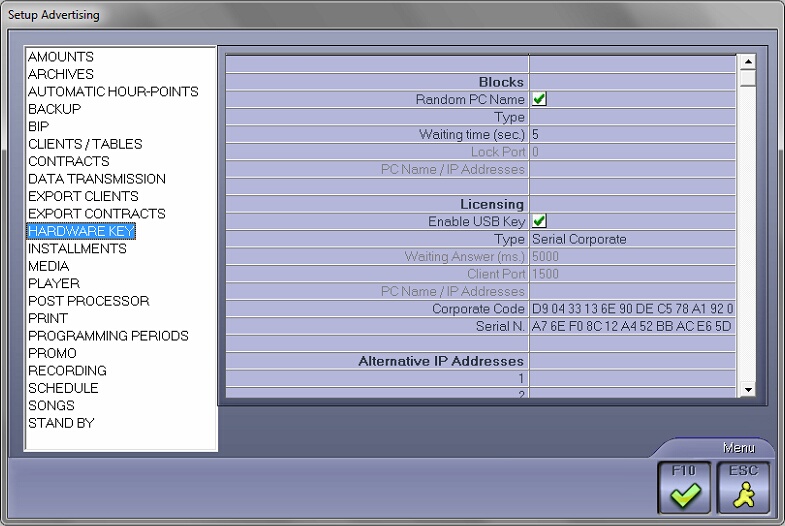
7. Go to 'Utility' > 'Setup' > 'Advertising'. A new popup is displayed. Go to HARDWARE KEY and activate the software with one of the corporate code Axel Technology will provide you with (insert the corporate code, then go to 'Utility' > 'Information' to find the ACTIVATION CODE and call Axel Technology to give it to them. They will activate your license):
8. Now, go to SCHEDULE and define here the access paths for reconciliation (remember to set one path per channel). You must store the XML reconciliation files sent by Netia's Air-DDO in C:\RADIO_TV\XML_REPORT\*NAME_OF_YOUR_CHANNEL\* (cf. Federall Service setup) :
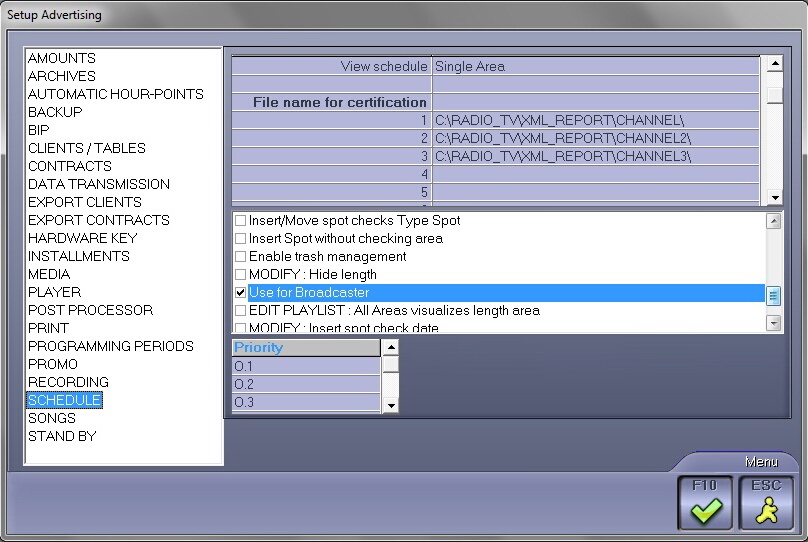
! Do not forget to tick the following option:
•Modifying hour-points changes programming card
•Inserting hour-points changes clients hour points
•Deleting hour-points changes programming card
•Use for Broadcaster
Click on F10 to validate your settings.
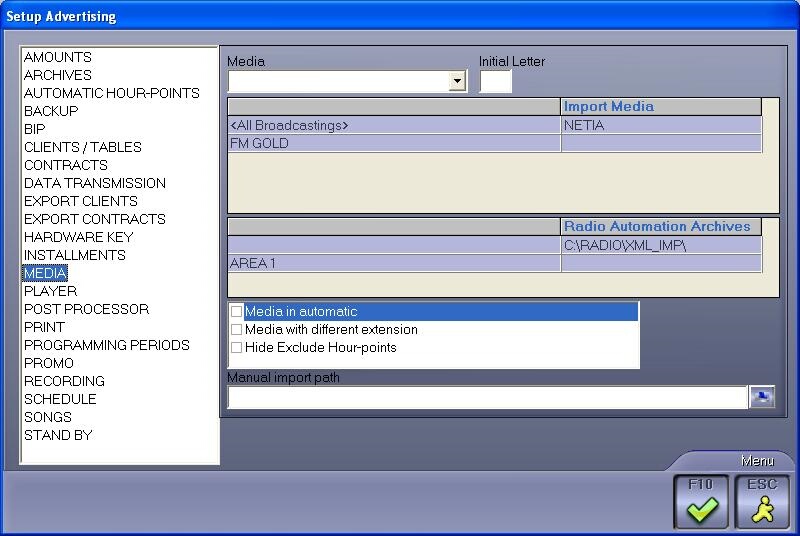
9. Go to the MEDIA section and enter the path to the folder where all the XML files sent by Federall Service are. They contain the metadata for items marked as RTB (Ready-to-Broadcast).
10. Then, go to 'Identifying' > 'Tables' to set up the different entities related to your radio station.
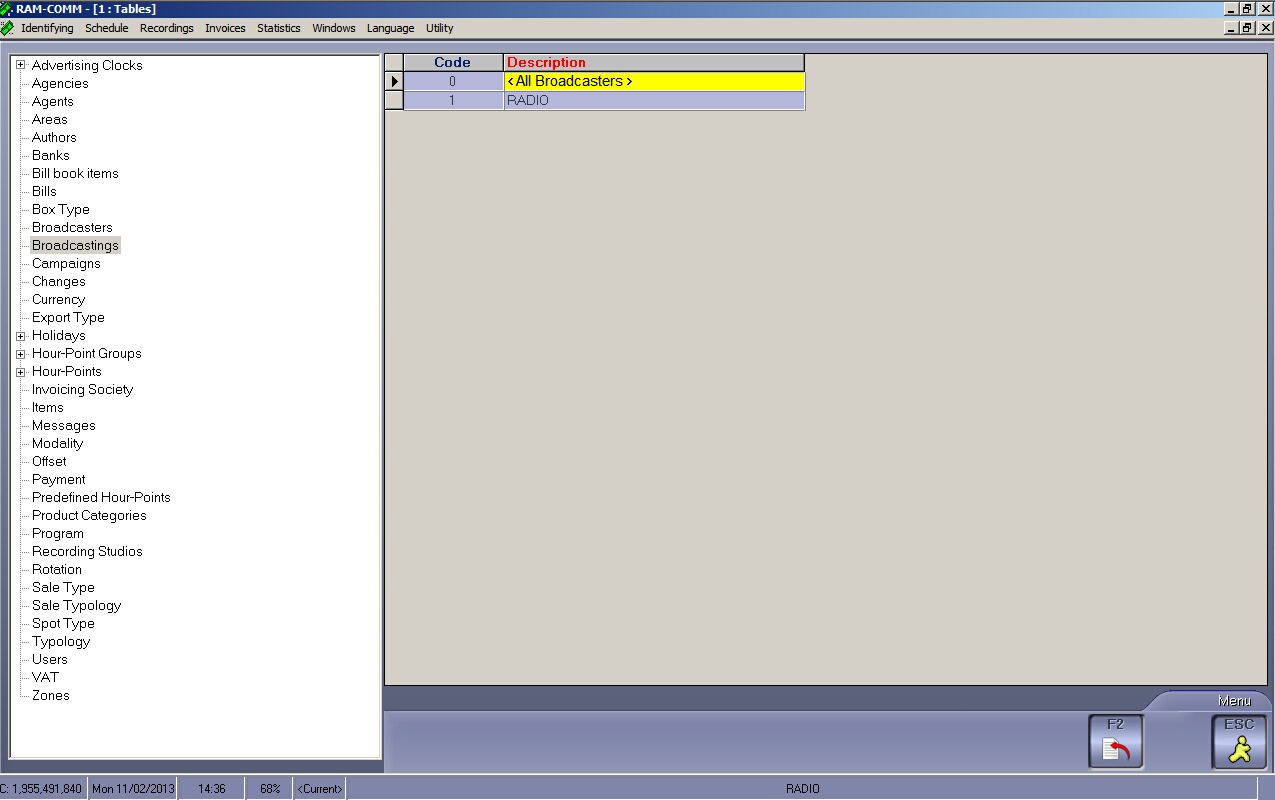
Here are some key concepts to understand:
•BROADCASTING: Name of your radio network or Radio site location. (e.g. your station is called NETIA RADIO and therefore, you can use this name or, alternatively, its headquarters are located in New York, so BROADCASTING will be "NEW-YORK").
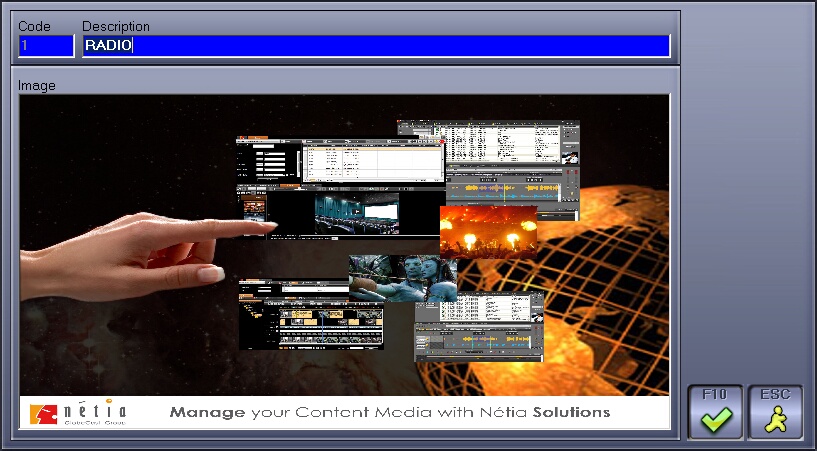
Double-click on line with code number 1 and enter the name of your Broadcasting entity.
Optionally, you can add an image of your logo by double-clicking on the Image Area.
(It will be used as a background wallpaper for RamComm)
Click on F10 to validate.
•BROADCASTER: Name of your channels (e.g. "Sports FM" , "Kids FM" , "News FM" ...)
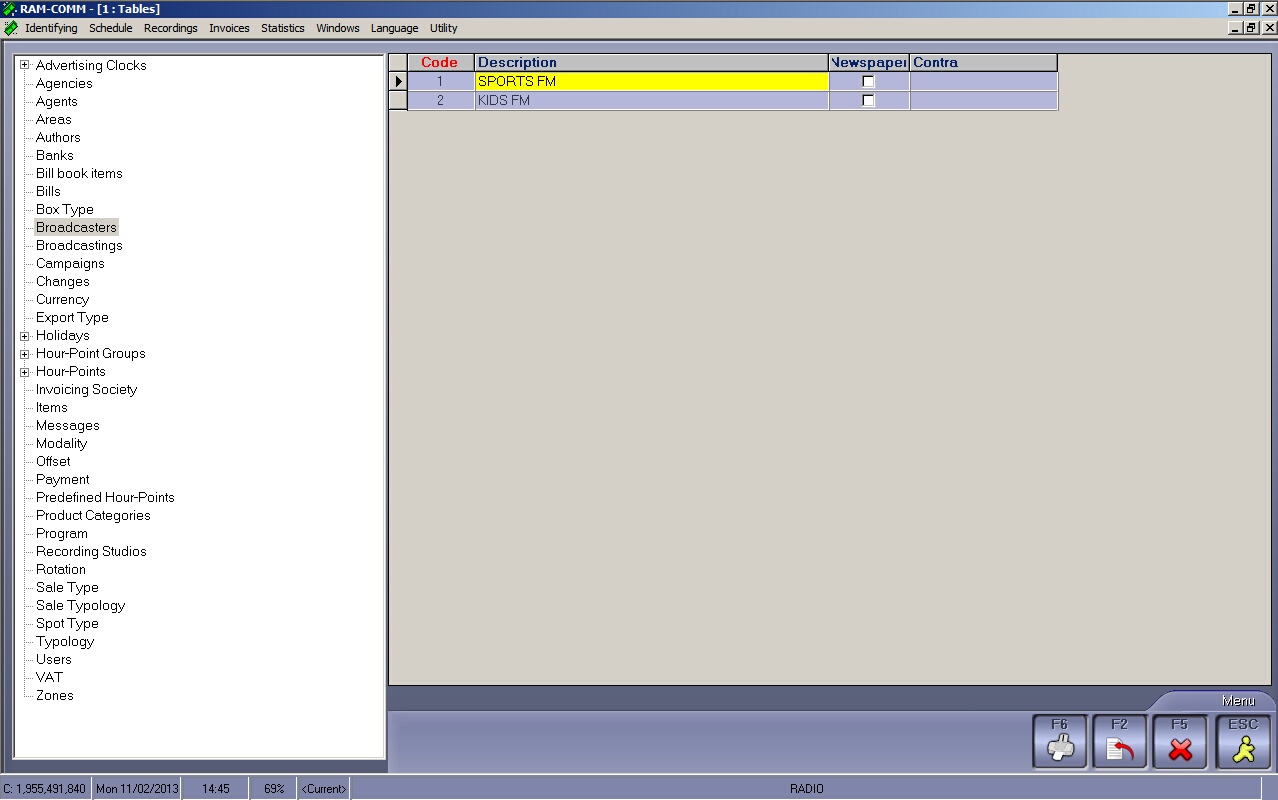
Double-click on the first line or click on F2 to insert a new line.
A new popup allowing you to enter the name of your broadcaster will be displayed.

Click on F10 to validate.
•AREA: Channel's coverage area. Usually, there is one area per channel except when a channel has several local radio broadcast stations (e.g. "Sports FM" may have different service areas with a different programming for California, Florida, Michigan...)
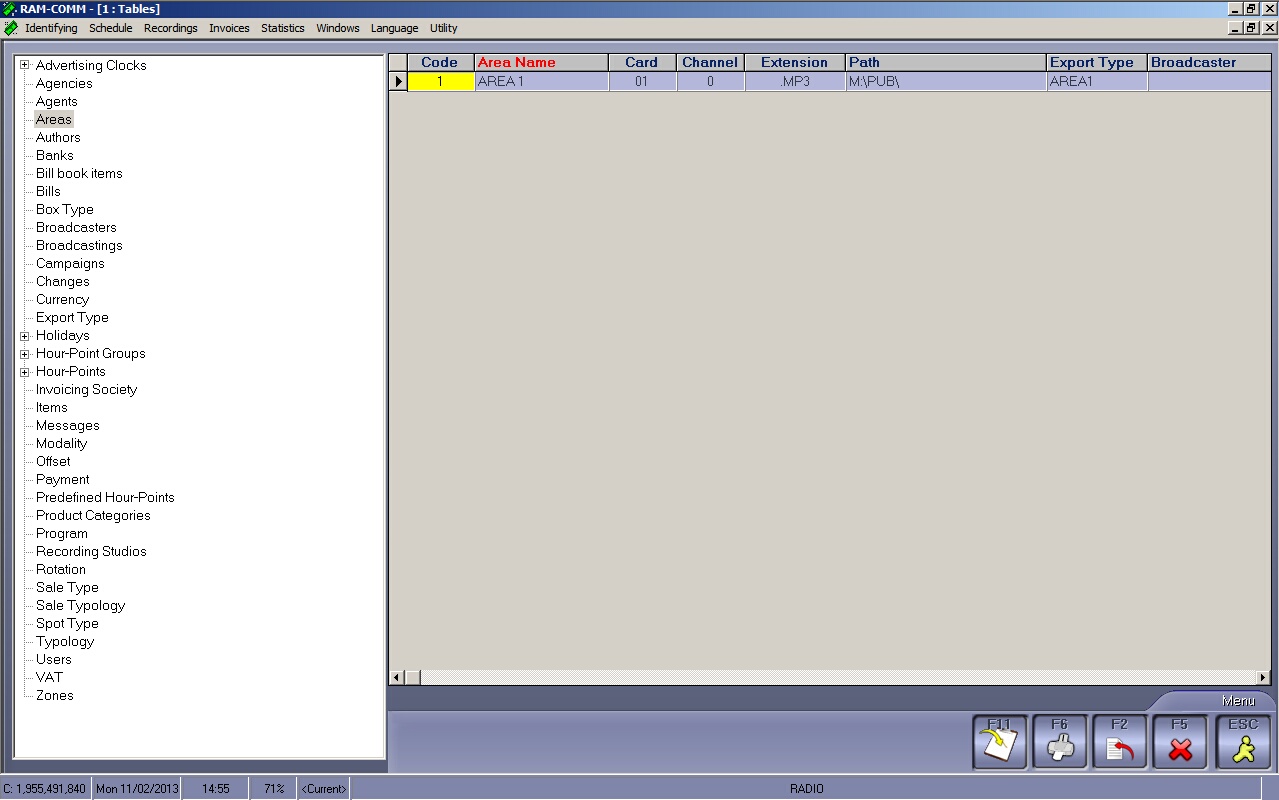
Double-click on the first line or click on F2 to insert a new line.
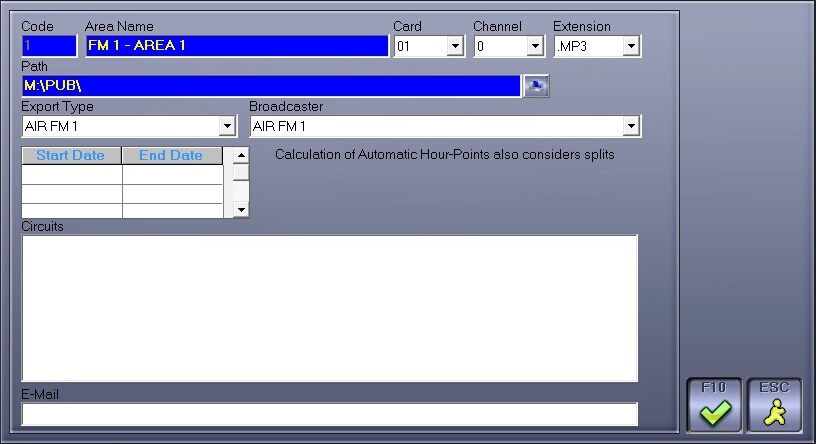
•Area name: Set AREA1
•Card: set value to '01'
•Channel: set value to '0'
•Extension: set value to .MP3
•Path: access folder to the spots used by RamComm (not used with RadioAssist: sound items are ingested via Federall Service)
•Export Type: NC
•Broadcaster: choose the broadcaster, which is associated to your area (e.g. for AREA 1, choose BROADCASTER 1)
Click on F10 to validate your settings.