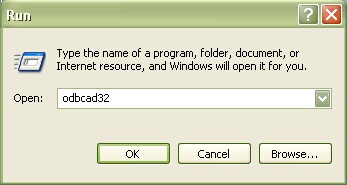
Before installing Administrator, it is necessary to create 2 ODBC data sources to be able to connect to the database servers.
To do so, go to Task bar > Start Menu > Execute > Open: type odbcad32 and click on ![]() to run the ODBC data sources administrator.
to run the ODBC data sources administrator.
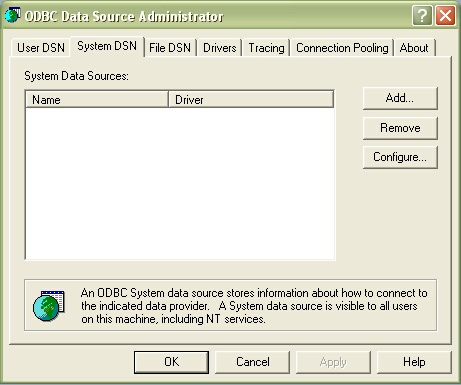
•Select the "System DSN" tab, and then click on ![]() .
.
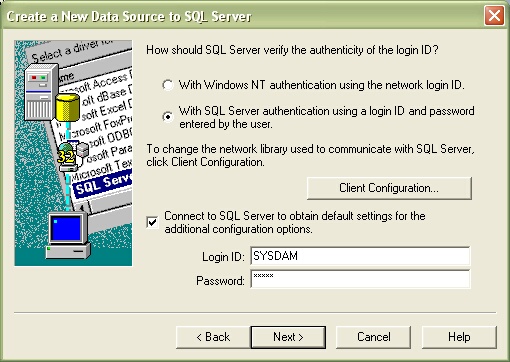
•Select the “SQL Server” pilot, and then click on ![]() .
.

•To create a new data source pointing to SQL Server, in the "Name" field, type the name of your ODBC data source. In the "Server" field, type the IP address of your database server.

•Tick the option “With SQL Server authentication using a login ID and password entered by the user” and then, in the "Login ID" field, type SYSADM. In the Password field, enter the password SYSADM.
•If the default database is not ABC8 yet, open the combo box and select ABC8.
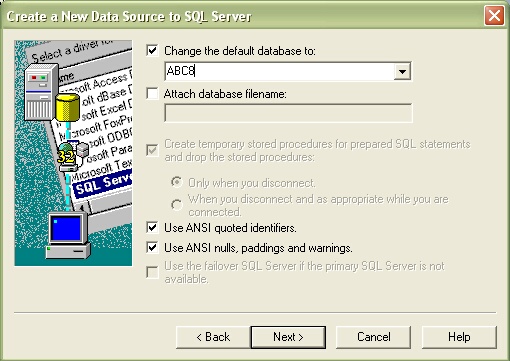
Click on ![]() .
.
•When your ODBC data source is created, click on “Test Data Source”.
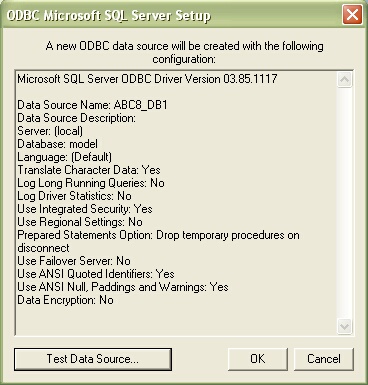
Once the test has been successfully achieved, the following window appears. Then, click on OK.
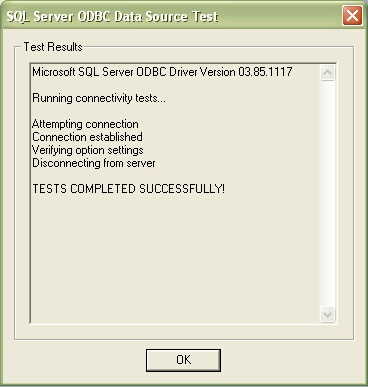
Click on OK to end the ODBC data source creation.
•To create a new ODBC data source, in order to be able to connect to the second database server containing the backup database, start the operation all over again without forgetting to use a different name to reference this data source.