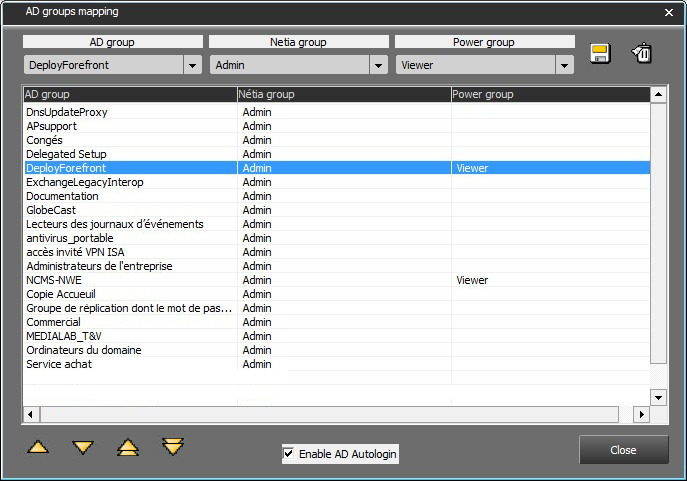
By clicking on the ![]() button, the setting screen opens :
button, the setting screen opens :

This screen displays :
•An AD group list.
•A Netia group list.
•A Power group list.
•A mapping grid.
•An activation box to tick.
To add a mapping :
Select the "AD group" from the list.
Then select in the "Netia group" list, the group to link with this mapping.
Eventually add a "Power group" from the list.
Then click on ![]() .
.
A new line is added to the grid.
The lines order can be modified by selecting a line and moving it using the following buttons : ![]()
![]()
1 2 3 4
1.Move the line up 1 notch.
2.Move the line down 1 notch.
3.Move to 1st position.
4.Move to last position.