1.Introduction to Radio-Assist
1.1.Opening Radio-Assist
To open Radio-Assist, you can :
Click on the "Radio-Assist" icon available on your desk, and press "Enter" on the keyboard. (Or double-click on the "Radio-Assist" icon )
Once Radio-Assist is launched, you have to log in.
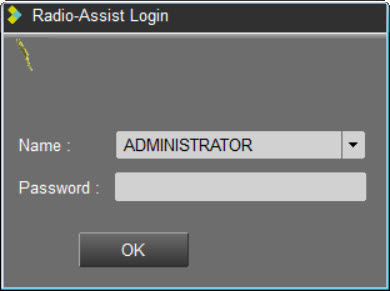
1.2.Log in
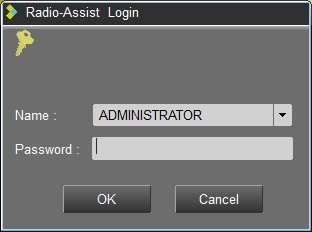
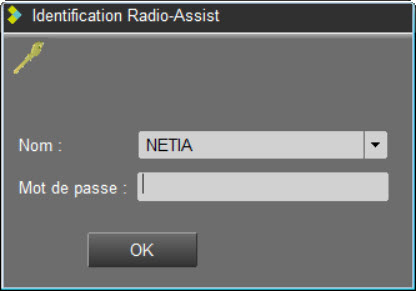
Once Radio-assist is launched, an identification window is displayed :

In the dropdown list, choose your name and enter your password.
When you log in, Radio-Assist loads your profile ("Journalist", "technician"...). Thus, it displays only the tools that you need and gives you certain rights.
1.3.Multisite connection
When you start Radio-Assist, the following window opens :
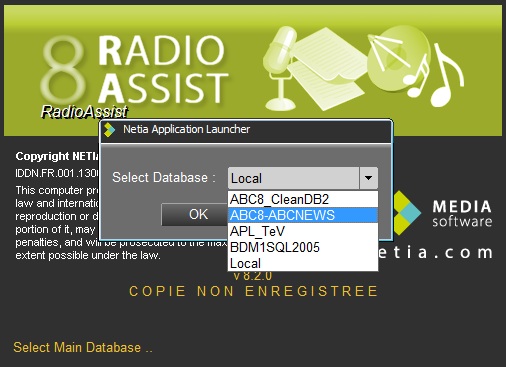
Choose the remote database name to connect to and click on  .
.
The following window will allow you to connect with your username and password
When you log in under your name, Radio-Assist loads your profile ("Journalist" profile, "technician" profile ...), displays only the tools you need and gives you a number of rights.
In the case of a connection with the Active Directory service:
connection to the local base : auto connection
connection to another AD database : auto connection (the database must allow autologinAD)
connection to a base outside AD : login request
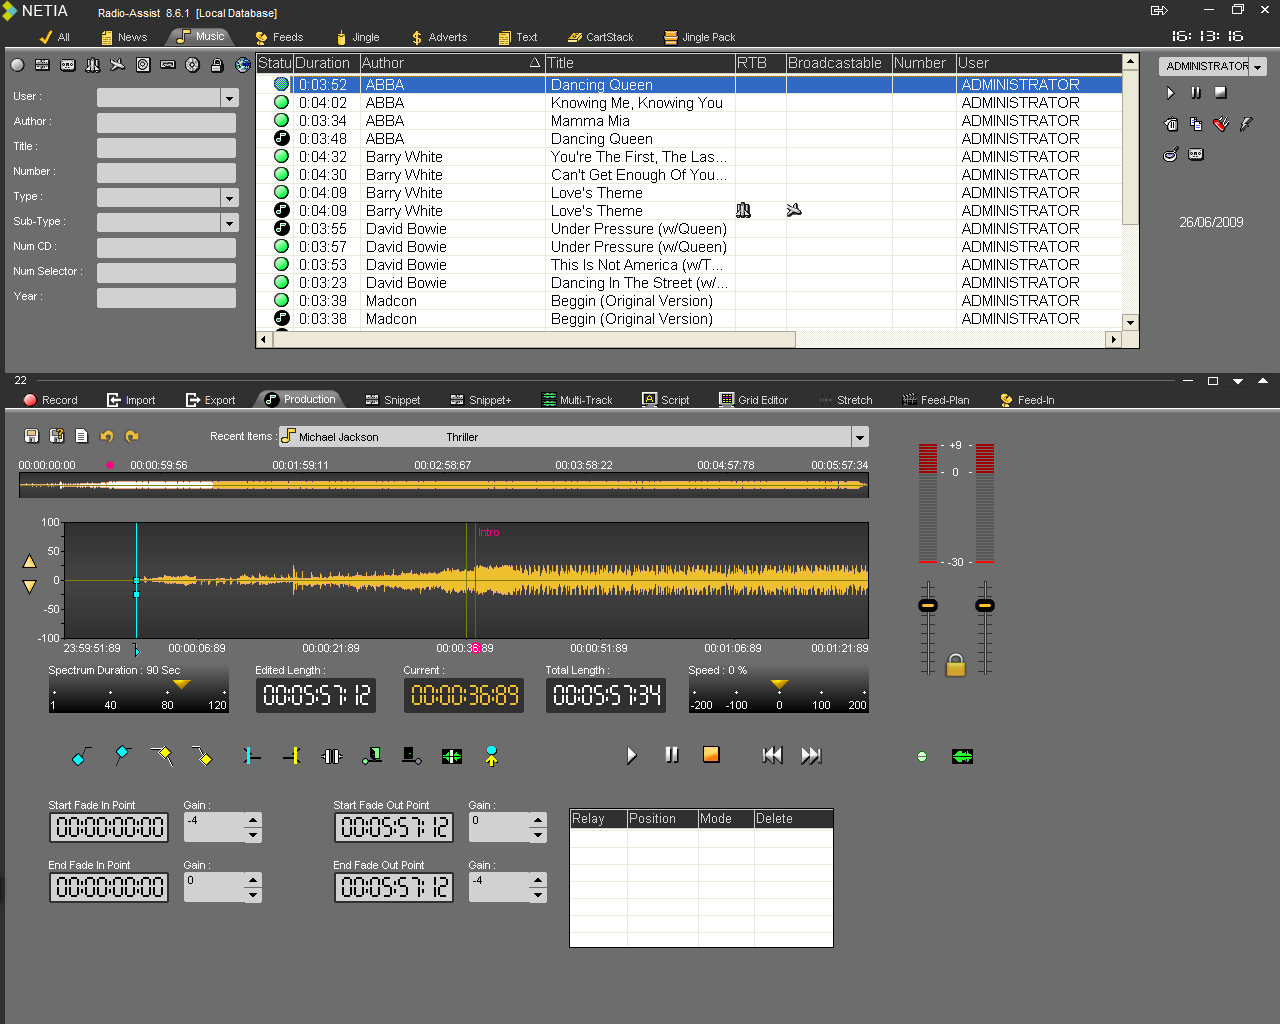
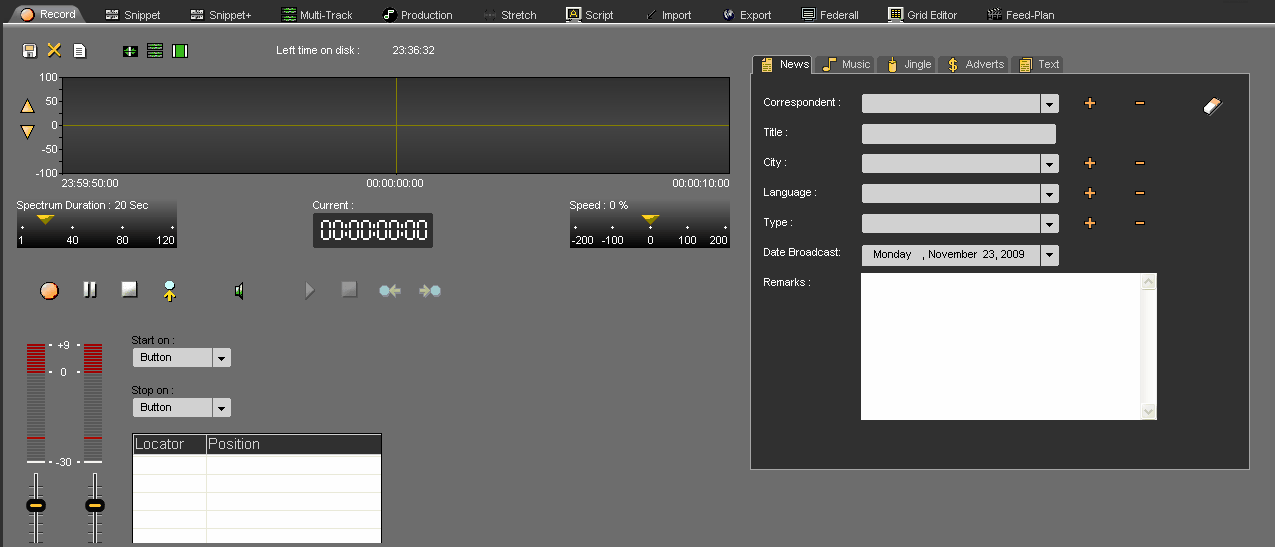
1.4.Introducing Radio-Assist : User interface
Radio-Assist is divided into two sections :
The upper part shows the database called the Browser.
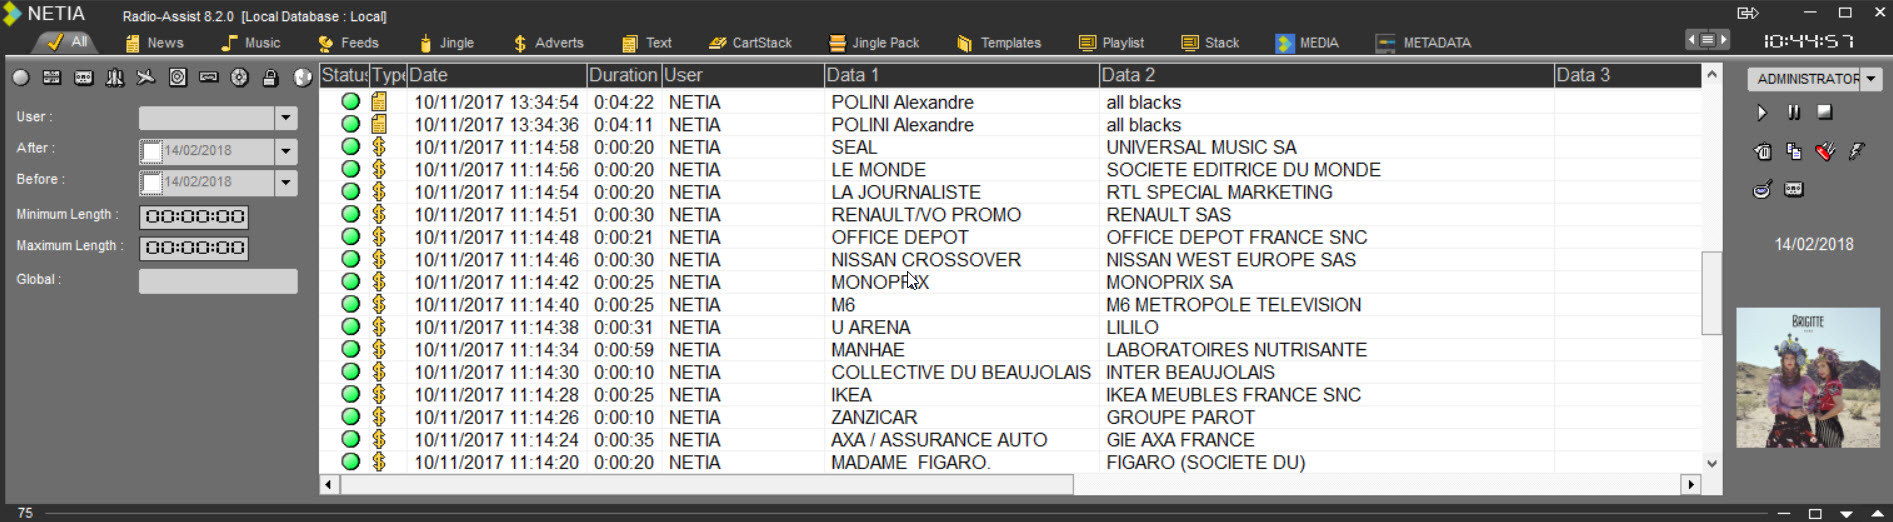
The lower part shows the workspace.
Each tab represents one tool. A single click on the tab displays the tool.

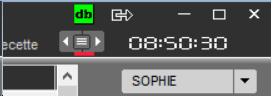
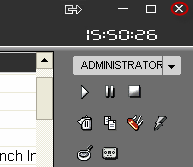
1.5.Locking Radio-Assist
You can log out from Radio-Assist without closing the application.
Click on the "Lock button" available at the right hand corner of the screen  .
.
Thus, the next user who wants to use Radio-Assist, has to log in with his name and his password.
This function prevents one user from being connected under another name.
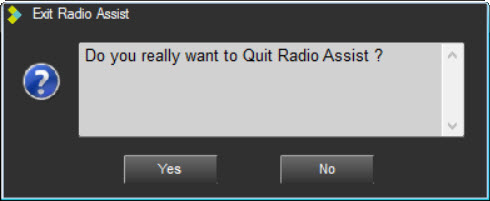
1.6.Closing Radio-Assist
To close Radio-Assist, click on the black cross available in the right hand corner :
A message is displayed to confirm.
2.Activity Watcher
2.1.Presentation
Activity Watcher is a module of Radio-Assist. It allows you to trace back all the actions performed by Radio-Assist users (and services), in your radio station network.
NOTE :
Activating different logs available for "Activity Watcher" will increase the database size. Therefore, you will have to monitor this size by watching the number of logs, or modifying the database server capacity.
2.1.1.Menu
The Activity Watcher menu bar allows you to:
- Refresh the list of traced events (120 possible traceable actions*)

- Clear the list of traced events and reinitialized the filters 
(the list is not deleted from the database. Only the Purge can do it
depending on your admin settings.)
- Save this list as a .csv file (usable with a spreadsheet program) 
- Select the list of actions to trace in Activity Watcher 
The system administrator decides whether all users have access to this button or not.
Tick or untick the criterium you want to trace in the Activity Watcher configuration window: you can select or unselect all criteria by using the 2 dedicated buttons.
The selected items will not only be displayed in the Activity Watcher report, they will also be written in the database. (if events are not selected, they will not be written in the database).
Note that if you change the settings on a machine, you will have to restart the workstation for changes to be applied.

(* to know the complete list of events, see chapter 3)
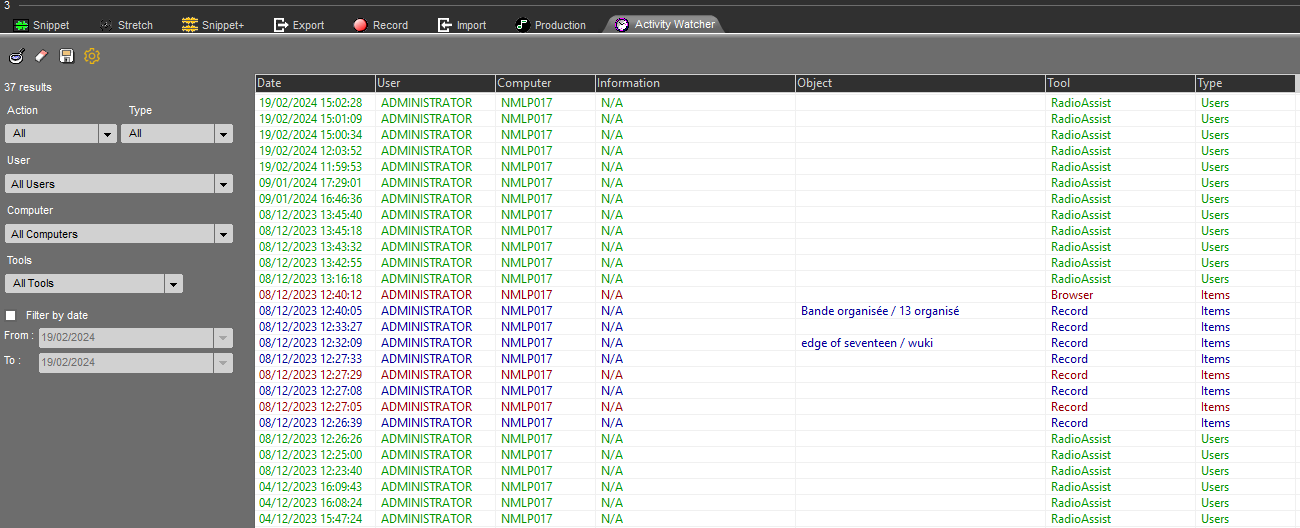
2.1.2.Activity Watcher Report
The Activity Watcher report displays the list of actions performed on the system by Radio-Assist users.
To see the complete list of activities, click on  in the Menu bar.
If you are interested in one Sound item, you can double-click on it to make it the only visible item in the list. It will also be automatically highlighted in the Browser (you can also quickly find it back by using the Ctrl+O shortcut...)
You can also use filters for your searches (see next chapters)
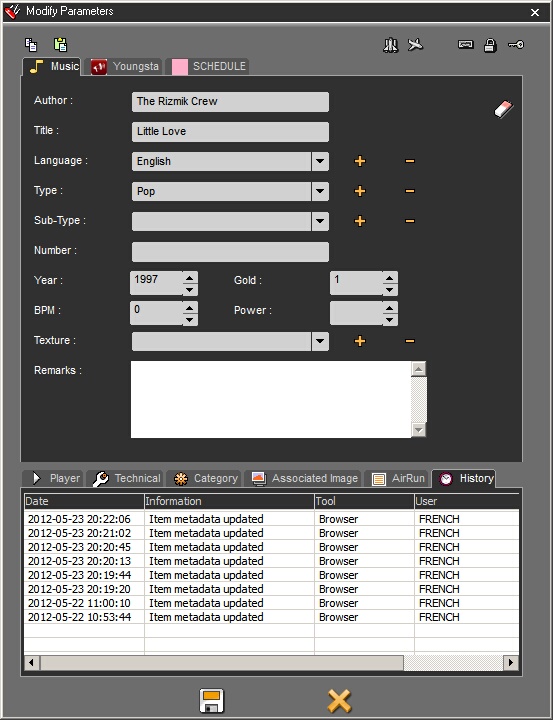
All modifications done on a sound item are visible in its metadata sheet, in the "History" tab:
2.1.3.Filter by Action
When you access the report of activities performed on the system by Radio-Assist users, you have the possibility to search for a specific type of action.
In the drop-down list, you have the possibility to choose which type of action you want to display:
- ALL (9 types of action)
- Created
- Updated
- Deleted
- Undeleted
- Login
- Archived
- Urgent
- Restore
- Export
A color code helps you to know what the nature of the action that has been performed is:
Red (deletion), Green (log in & out), Blue (creation), Black (update)…
Note :
In the case of deleting an item from the database, once the item is deleted, all logs linked to this item (update, RTB, etc...) will be deleted. Only one line will be kept : item deleted.
This line will be kept in Activity Watcher the number of days set in the Purge tool, in the Air Run tab.
2.1.4.Filter by Type
When you access the report of activities performed on the system by Radio-Assist users, you have the possibility to search the list of events by filtering on the type of items that have been impacted by users actions.
There are 6 types of items likely to be impacted by user actions:
- ALL (6 types of items)
Modifications can affect:
- Log Sheet
- Items
- Stack
- Users
- Model
- Cartstack
2.1.5.Filter by User
When you access the report of activities performed on the system by Radio-Assist users, you have the possibility to search the list of events by filtering on users. In other words, if you want to trace the list of actions performed by "Journalist X" when he or she logged in to Radio-Assist, just select his User name in the drop-down list.
2.1.6.Filter by Workstation
When you access the report of activities performed on the system by Radio-Assist users, you have the possibility to search the list of events by filtering on the name of the workstation on which the updates have been done.
2.1.7.Filter by Date
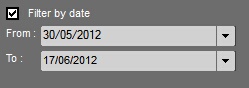
When searching for specific events in the activity report, you can use date criteria.
Tick the Box and choose 2 dates:
2.2.List of Traceable Actions
Remember that you can decide to trace an action or not by ticking or unticking the checkbox located on the right side of the line, in the Activity Watcher Configuration popup window.
ID | DESCRIPTION | TOOL |
1 | User Group Created | Administrator |
2 | User Created | Administrator |
3 | User Login | Administrator |
4 | User Logout | Administrator |
5 | User Modified | Administrator |
6 | Item archived | NWE |
7 | Item Restored | NWE |
8 | Item Created | AutoFill |
9 | Item Updated | AutoFill |
10 | Item Set as ARCHIVABLE | Browser |
11 | Item set as BROADCASTABLE | Browser |
12 | Item Copied | Browser |
13 | Playlist Remote / Local Copied | Browser |
14 | Item Local / Remote Copy Done | Browser |
15 | Playlist Remote / Local Copy Done | Browser |
16 | Item Remote / Local Copy Done | Browser |
17 | Image Imported | Browser |
18 | Image Imported | Browser |
19 | Item Masterized | Browser |
20 | Item Masterized | Browser |
21 | Item Created | Browser |
22 | Item set as Lock | Browser |
23 | Item set as URGENT | Browser |
24 | Indexing Field Modified Via Inplace Editing | Browser |
25 | Item Metadata Updated | Browser |
26 | Item Set as not ARCHIVABLE | Browser |
27 | Item Set as not BROADCASTABLE | Browser |
28 | Item set as not LOCK | Browser |
29 | Item set as not PRIVATE | Browser |
30 | Item set as not RTA | Browser |
31 | Playlist set as not RTA | Browser |
32 | Stack set as not RTA | Browser |
33 | Item set as not RTB | Browser |
34 | Playlist set as not RTB | Browser |
35 | Stack set as not RTB | Browser |
36 | Item set as not RTW | Browser |
37 | Playlist set as not RTW | Browser |
38 | Stack set as not RTW | Browser |
39 | Item set as PRIVATE | Browser |
40 | Item Restored | Browser |
41 | Item set as RTA | Browser |
42 | Playlist set as RTA | Browser |
43 | Stack set as RTA | Browser |
44 | Item set as RTB | Browser |
45 | Playlist set as RTB | Browser |
46 | Stack set as RTB | Browser |
47 | Item set as RTW | Browser |
48 | Playlist set as RTW | Browser |
49 | Stack set as RTW | Browser |
50 | Playlist Deleted | Browser |
51 | Item Deleted | Browser |
52 | Template Deleted | Browser |
53 | Stack Deleted | Browser |
54 | Undelete From Recycle Bin | Browser |
55 | Item Created | CartPrep |
56 | Item Updated | CartPrep |
57 | User Login | DatabaseBrowser |
58 | User Logout | DatabaseBrowser |
59 | Item Exported | Dispatcher |
60 | Item Created | Effects |
61 | Item Archived on CD-Rom | Export |
62 | Item Exported to Audio CD | Export |
63 | Item Exported to CD-Rom | Export |
64 | Item Exported to FTP | Export |
65 | Item Exported to HD | Export |
66 | Screen Created | FederAll |
67 | Run Created | FederAll |
68 | Program Created | FederAll |
69 | VoiceOver: Item Created | FederAll |
70 | Screen Modified | FederAll |
71 | Run Modified | FederAll |
72 | Program Modified | FederAll |
73 | Multimix: Run Modified | FederAll |
74 | Screen Deleted | FederAll |
75 | Run Deleted | FederAll |
76 | Program Deleted | FederAll |
77 | Item Created | Feed-In |
78 | Program Added | GridEditor |
79 | Program Copied | GridEditor |
80 | Playlist Created | GridEditor |
81 | Program Deleted | GridEditor |
82 | Item Created | Import |
83 | Item Updated | Import |
84 | Item Created | INumerica |
85 | Jingle Pack Created | JinglePrep |
86 | Jingle Pack Modified | JinglePrep |
87 | Item Archived | Archive |
88 | Item Created | Phone-In |
89 | User Login | Phone-In |
90 | Item Created | Production |
91 | Item Updated | Production |
92 | Send to Recycle Bin | Purge |
93 | Item Deleted | Purge |
94 | Playlist Deleted | Purge |
95 | User Login | RadioAssist |
96 | User Logout | RadioAssist |
97 | Item Recorded | Record |
98 | Normalize/Finalize | Record |
99 | Item Created | Script |
100 | Item Updated | Script |
101 | Item Created | ScriptOffice |
102 | Item Masterised | Snippet |
103 | Item Created | Snippet |
104 | Item Recorded | Snippet |
105 | Item Created | Snippet |
106 | Item Updated | Snippet |
107 | Item Masterized | Snippet+ |
108 | Item Created | Snippet+ |
109 | Item Recorded | Snippet+ |
110 | Item Created | Snippet+ |
111 | Item Updated | Snippet+ |
112 | Item Created | Stretch |
113 | Associated Image Updated | Browser |
114 | Send to Recycle Bin | Browser |
115 | Item Created | Federall |
116 | Item Updated | Federall |
117 | Item Updated | Record |
118 | Item Deleted | Record |
119 | User Deleted | Administrator |
120 | Group Deleted | Administrator |
3.AirRun
3.1.Definition of AirRun
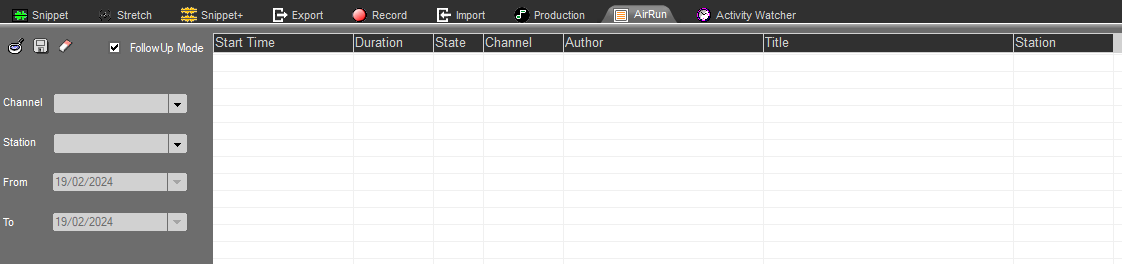
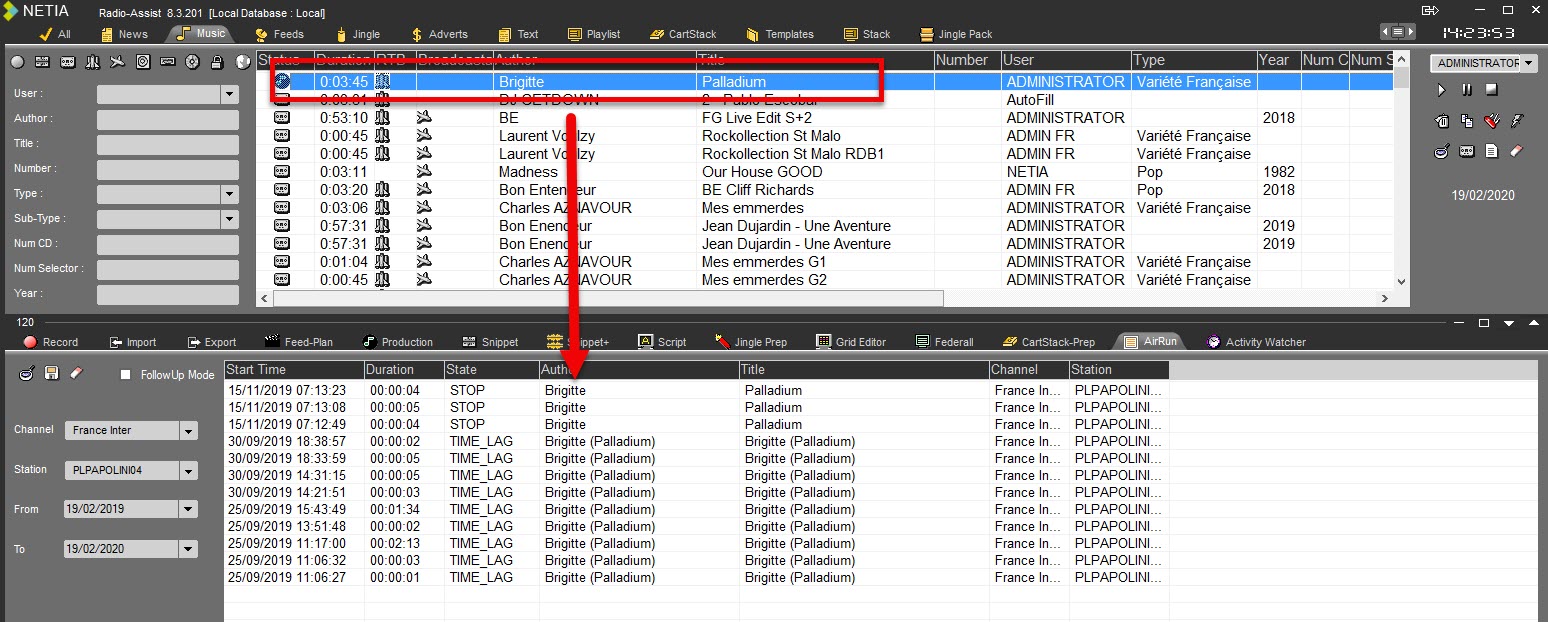
AirRun is a tab in RadioAssist allowing you to know the list of tunes that have been broadcasted (or that are being broadcasted) in AirDDO.
3.2.Consultative Mode
The consultative mode allows you to select a period of time between two dates via the calendar, so as to be able to know the history of tunes that have been played in AirDDO at that time.
The consultative mode is the mode displayed by default in AirRun. Users know they are in the consultative mode when the box "FollowUp Mode" isn't ticked : 
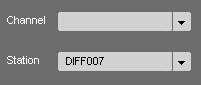
The "Channel" and "Station" fields allow you to have access to the history of elements that have been broadcast by filtering the results, by channel and by station.
To define the dates of beginning and end of the period of time considered, one can use the arrows of the drop-down menu that are located on the right side of the fields "From" and "To":
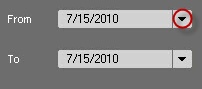
A calendar allows you to select the desired dates.
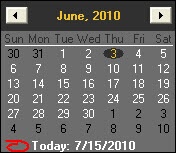
The button  refreshes the display.
3.3.FollowUp Mode
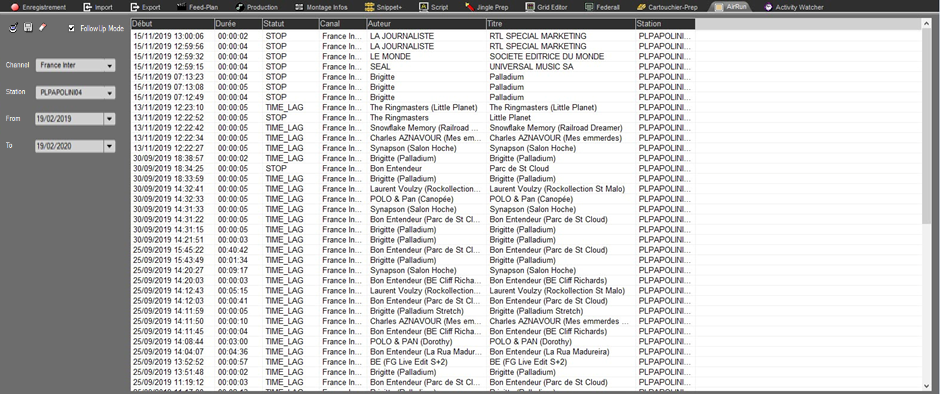
The FollowUp mode displays the list of elements that have been broadcast in the last 12 hours (this lapse of time is customizable) in AirDDO.
The FollowUp mode requires that you tick the "FollowUp mode" : 
The "Channel" and "Station" fields allow you to see the history of tracks that have been broadcast by filtering the results, by channel and by station.

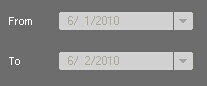
Given the fact that in the FollowUp mode, AirRun displays the list of elements that have been broadcast during the last 12 hours, the "From" and "To" fields appear in grey and are not usable:
When the fields appear in orange, this means that the sound is being broadcasted. If they appear in white, it means that the sounds have already been played.

List of different statuses:
Play: Sound is playing.
Stop : Sound is stopped.
Time_Lag : Sound is marked as false start.
Trim : The sound has been cut with the cuer.
3.4.Broadcast history for one item
If AirRun allows you to see the list of elements that have been broadcast in AirDDO between some specific dates, the tab also allows you to retrace the broadcast history of one particular track.
To do so, you have to choose the specific item via the browser, then double-click on it. The broadcast history of the selected track will appear in AirRun.
To go back to the list of all the elements that have been broadcast, all you have to do is click on the  button.
3.5."Refresh" Function
The refresh button ( ) allows you to refresh the list of elements displayed on screen, by updating it. By default, the list is automatically refreshed every 30 seconds.
When the refresh button turns to orange, it means that the search for elements to display is still going on and is not over yet.
3.6.Columns Display
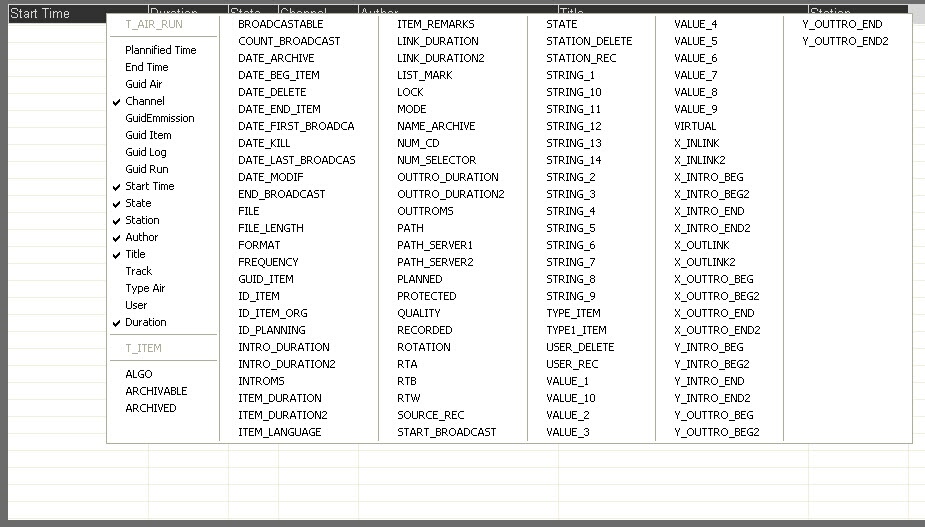
The way one wants to display the different columns in AirRun is totally customizable. You can move the columns, resize them, or add fields from the T_AIR_RUN and T_ITEM tables.
Moving a column : hover your mouse over the column header and move it to another place thanks to your mouse.
Resizing a column : hover your mouse over the separator line of a column and enlarge the column.
Adding a field : hover your mouse over the column header and right-click on it. A window menu will appear, allowing users to add as many fields as they want just by ticking on the appropriate names.
3.7.Export Broadcast Log
From the user interface, you can export your log report in a file with a CSV extension (by clicking on the floppy disk icon  ) which can be opened with a spreadsheet such as MS-Excel ©
4.Browser
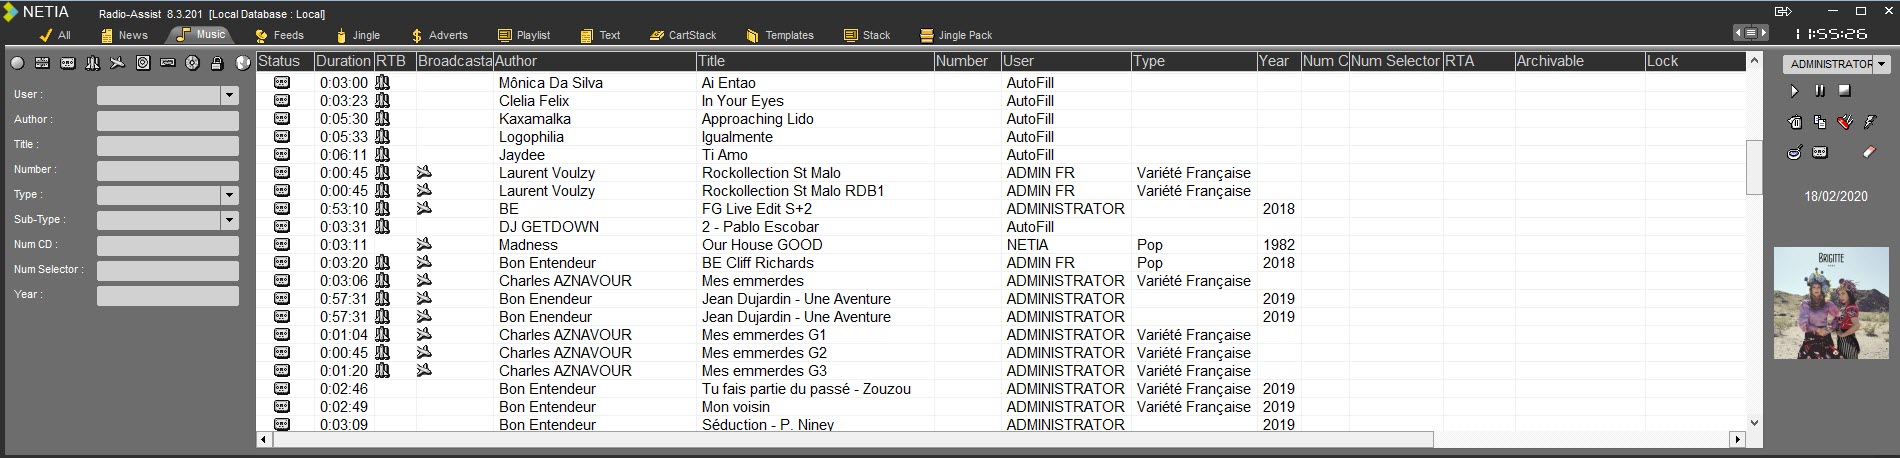
4.1.Browser definition
The Browser represents the database which gives the access to any stocked items (audio or text).
The items are ordered by categories, and some search filters are available to retrieve an item quickly.
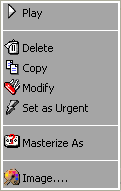
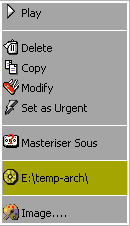
Moreover, some action buttons are available at the right side of the Browser (Play, delete, restore a deleted item, copy, modify, set as urgent, generate a master, create an empty file…).
4.2.Sound status
RAW :
 A raw item is an original file.
EDITED ITEMS :
 An edit session is a virtual file.
Several types of edited item exist (depending on the tool you use for editing).
The different edited icons :
 : edit session coming from the "Snippet" tab.
 : edit session coming from the "Multitrack" or "Snippet+" tabs.
 : edit session (called "produced item") coming from the "Production" tab.
MASTER :
 A master is the transformation of a edit session into a physical sound.
4.3.Available items in the Browser
The items available in the Browser are :
Audio items
Video items
Text items
Playlists
Stacks
Templates (created in the « Grid Editor » tab)
Cartstacks (created in the « Cartstack-prep» tab)
Jingle-Packs (created in the « Jingle-Prep» tab)
Dynamic tabs : additional tabs created on request to add more categories).
4.4.Sorting out the database
To sort out the items of the Browser by chronological order or alphabetical order, click on the column header.
If you click on the "Date" column header, your sort out the database by chronological order, increasing or decreasing.

Example: If you click on the column header having some data like the "title" column, then you sort out the database by alphabetical order.
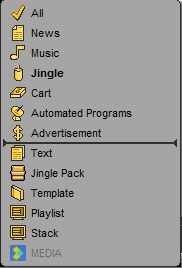
4.5.Move a tab
It is possible to move a tab of the Browser and thus change the display order.

Here, we will move the "Jingle Pack" tab and position it between the "Advertisement" and "Text" tabs.
To do this, open the list of tabs by clicking on the list button on the right  ]:
]:
The list of tabs is displayed. Click on "Jingle Pack" and move it between "Advertisement" and "Text":
The "Jingle Pack" tab is now moved.

4.6.Hide a tab
It is possible to hide one or more tabs in Browser.
To do this, open the list of tabs by clicking on  .
.
The list opens:
Here we want to hide the tab "Automated Programs"

Move the mouse on the desired tab. It is highlighted in yellow with the icon  .
.
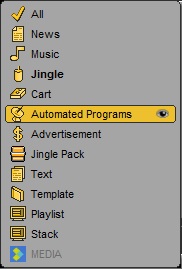
Click on  .
.

The tab is grayed out in the list and is no longer displayed in the Browser.

4.7.The search methods
Several ways for searching an item in the Browser are available.
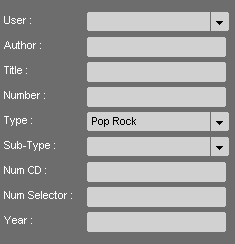
Use the different filters in the left part of the screen. You can combine them to refine your search.

- see the Original items
- see the Edited items (coming from : Snippet / Snippet+ / Production)
- see the Master items
- see the RTB items (Ready-To-Broadcast)
- see the Broadcastable items
- see the RTA items (Ready-To-Archive)
- see the Archivable items
- see the Archived items
- see the locked items
- see the RTW items (Ready-To-Web) which will be retrieved by the Dispatcher* application.
(*Dispatcher retrieves the sounds and convert them into multiple formats for multiple destinations delivery).
NB: when the filter is green, it means that it is activated and that all the elements corresponding to the selected criteria are displayed in the Browser. On the opposite, when the filter is red, it means that you can see only the items which are not corresponding to the selected status.
 = the filter is not active (all the items are displayed, whether they are RTB or not)
 = the filter is active (only the RTB items are displayed)
 = the filter is negative (only the items which are not RTB are displayed)
You can use the different indexing fields (the search is not case sensitive but accents are taken into account).
Attention : when you make a new search, do not forget to delete the previous one by taking the filters off. To do so, you can do a left click on the “Reset” icon 
 or a right click on the "refresh" icon . All filters are cleared.
OR
Drag and drop from the item list to a chosen search field.
Example : in the Browser, select Mariah, and drop it to the "author" field. The Browser displays the item list containing "mariah" in the "author" field.
NB : you can use this search method on any fields.
OR
You can search two terms or more simultaneously by using the "OR".
Example : if you type "Volta" OR "Silversun" in the « author » field, the Browser displays the item list containing "Volta" and/or "Silversun".
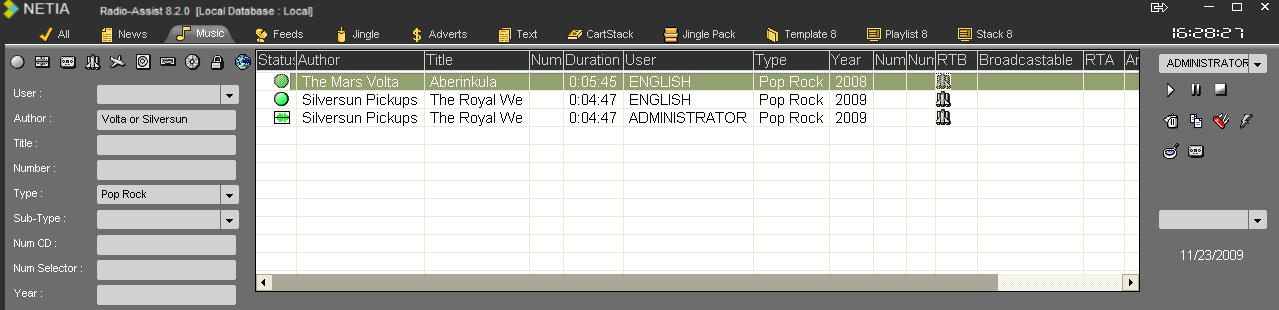
Attention : if you use this search method, the « OR » must be in CAPITAL LETTERS.
NB : if you do not know in which category your item is stored, go to the "All" category, and enter a keyword in the "global" field. The search is done on the whole database.
Once the search is done, the result is displayed.
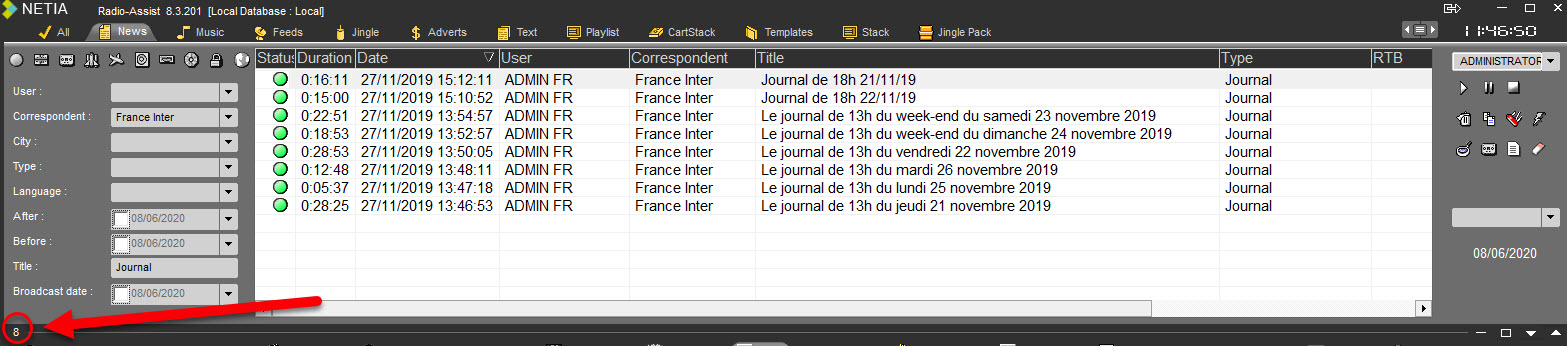
The number of éléments is displayed on the lower left.
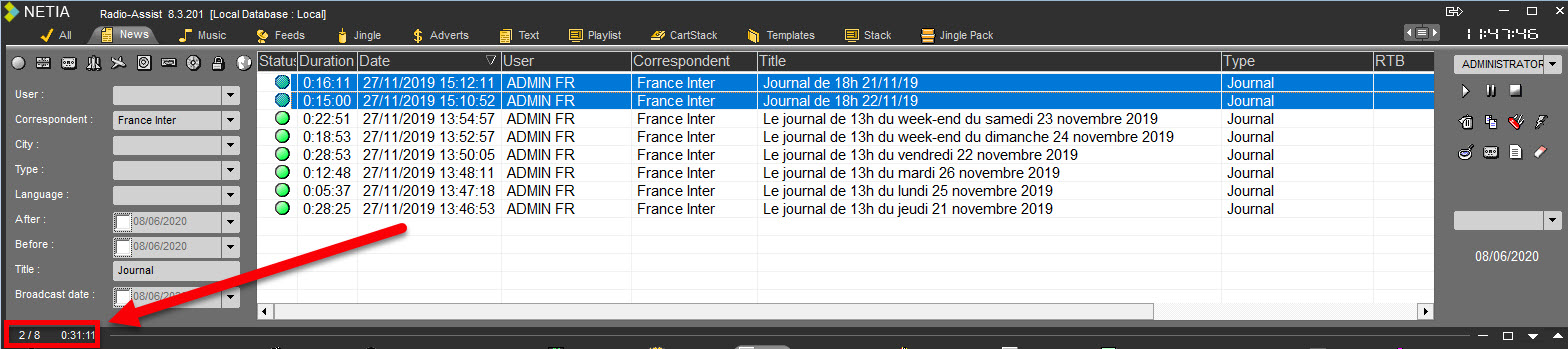
And if you do a multi selection of items is the list, the number of items over the total and the total duration of these items is displayed.
- FullText search criteria
Certain search criteria, depending on the configuration of your tabs, can perform a FullText search. This allows you to perform advanced searches in text-type metadata (e.g. the transcription of an audio file).
Here are the different possibilities offered by a FullText search criteria :
Classic search
To carry out a classique search, simply type the phrase you are looking for.
For example: "The president opened the meeting".
The search will return all items whose text metadata contains this phrase (this search is not case-sensitive).
The different operators
4.7.1.The following operators are implemented in FullText search criteria: or, and and near.
4.7.2.Operator Or
This operator is written in RadioAssist as "or" and is not case-sensitive.
So if you search for "president or session", the search will return all items whose text metadata contains the word "president", all items containing the word "session" and all items containing both words.
4.7.3.Operator And
This operator is written in RadioAssist as "and" and is not case-sensitive.
So if you search for "president and session", the search will only show you items whose text metadata contains the word "president" and the word "session".
This search does not take into account the distance between the two words
4.7.4.Operator Near
In RadioAssist, this operator is written as "near" and is not case-sensitive.
So if you search for "president near session", the search will only return items whose text metadata contains the word "president" and the word "session". The two words must be close for the search to return this item.
Advanced Search
The "*" character can be used as wildcard. If you search for "pres*", the search will return all items whose text metadata contains "president", but also "pressure", "prescribe", "presa" and any other combination.
This "*" character must be placed in the last position.
4.8.Initializing a search
To reinitialize a search (it means taking all filters out), click on the "Refresh" button.  .
.
4.9.Saving a search
Once you have made a search, you have the possibility to save it.
To do so, place your mouse on the category. the cursor turns blue.

Double-click on the category. A window is displayed.
Enter the search title. Then, click on the "floppy disk" icon to save it.

Your search is saved. Then you can edit it anytime.
4.10.Editing a search
To edit a search which has been saved :
Place your mouse on the category where you have saved your search. The cursor turns blue.

Click on the category. A window is displayed.
Select the search you want to edit and click on the "folder" icon to edit it.
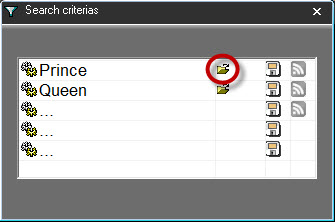
Your search is edited.
4.11.Playing an item (Ctrl+P)
You can play an item from the Browser and define the speed (from very slow to very fast). To do so :
Select an item in the Browser.
Click on "Play" 
A progress bar is displayed. And a volume button to set the sound level as well.
By clicking on the Lock icon, it is possible to modify separately the level for the left and/or the right channel.

While playing a sound, or even when it is paused, if you click a second time on the button  , it will place the cursor 5 seconds before the end.
Do a right click on the progress bar. a window is shown as follows :
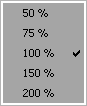
Choose the speed of your item.
For information :
50% : Plays very slowly
75% : Plays slowly
100% : Plays normally
150% : Plays quickly
200% : Plays very quickly
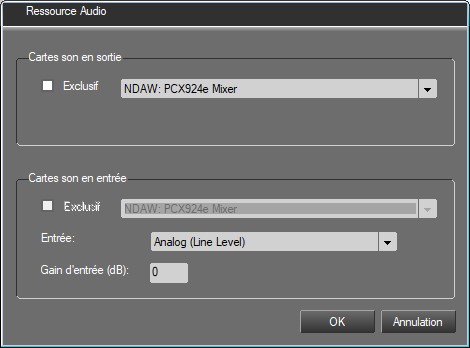
4.12.Audio resource selection
The audio resource selection window lists the different visible soundboards and allows to select the one we want to use with RadioAssist.
Netia audio engine can only access soundboards which are visible through the Wasapi windows protocol and also Digigram SoundBoard accessed natively through their NP/HR driver.
We call the Audio Resource selection window by clicking on the Speaker icon located on the top right of RadioAssist with the other Browser’s icons.
On initial display, the audio resource selection windows shows the current soundboard being used with its use mode (shared or exclusive). If the current board got input, the bottom of the windows shows the current input selected and the possible input gain we apply on it.
Remark: future version of RadioAssist will allow to select a different card for recordings. In this version, only one card is used for both uses.
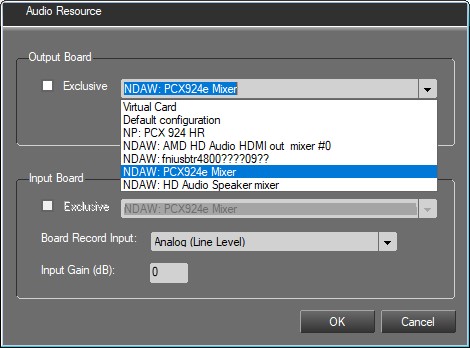
Clicking on the output combo shows the different soundboards available at the time we click.
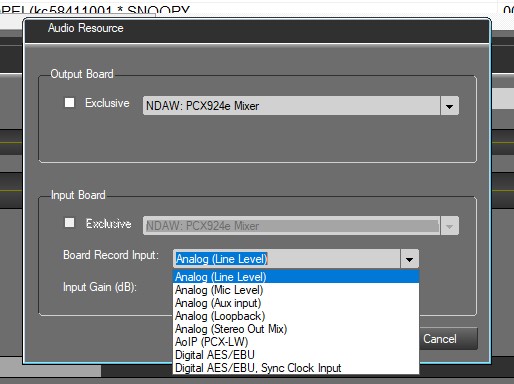
Clicking on the Board Record Input combo shows the different choices available
Warning: Some choices may not work with the selected card (ex: choosing a digital input on an analog board will lead to a failure on first record trial in the record tab)
Audio resource selection window allows to choose a different soundboard than the one which was chosen and configured by the administrator using RadioAssistSetup.
The board selected will remain the one selected during the whole RadioAssist session unless we choose another one. Quitting RadioAssist and launching it again will make us come back on the “administrator” choice.
We can also come back to the administrator configuration by selecting “Default Configuration” in the output combo list. All administrator’s choices are then applied (use mode, input and gain selection), just like when we first start RadioAssist.
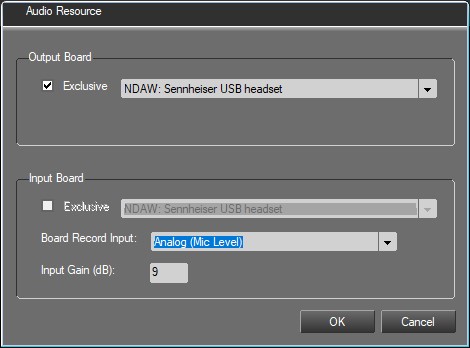
Main advantage of the audio resource window is to be able to use “a just plugged in” USB device, immediately in RadioAssist (eg Headset). To do that, just plug in the new resource, wait a little until windows detect it (a black mic icon should appear quickly) and click on the Speaker Icon. The new audio resource will appear in the output combo list. Select it, choose the desired use mode (shared or exclusive). If it got inputs, you may possibly choose a different one and set an input gain. Clicking on OK will trigger the soundboard switch.
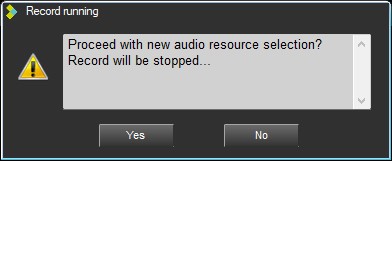
Remark: when clicking on OK to trigger the new selection, a control is done on the current soundboard to see if recording or playing is going on. If this is the case a message box appears, telling us that record or play will be stopped if we continue.
Device endpoint selection
In the device / endpoint selection dropdown
The user can select between the following “system” choices (always made available to the user).
Automatic allocation: The application will try to allocate the first free audio resource it can find.
Use Windows Default: The application will try to allocate the audio resource defined as “Default” in Windows
Virtual card: The application will use an internal “virtual” audio card to simulate I/O. This kind of function is also known as “null audio” in some third-party software. This is used for testing or when no audio device is available on the machine (like a server for instance).
Default configuration: The application will use the configuration set by the administrator for that machine.
And some dynamically listed choices starting either by:
NDAW: Audio device endpoint accessible via WASAPI and WDM driver. In this mode a single device will appear once per active connected endpoint (ex: speaker and headphone) or once per channel for multichannel device. Unconnected endpoints will not appear. Since version 8.6.x, RadioAssist supports connection and disconnection of audio devices at runtime. The list will be updated as user connects a new endpoint on an existing device (like a headphone) or plugs a new device (like a USB audio interface). Users can also select the newly detected audio interface without restarting.
NP: Digigram audio device accessible via Digigram proprietary legacy NP API. This mode is available for backward compatibility but is now obsolete due to the technology being phased out by Digigram. In that mode a multichannel card will appear once, and its channel must be set in the “output channel” field.
The input device endpoint/channel used by RadioAssist is the one matching the selected output device (same device or same device and channel for multichannel devices). This is the current behavior, selection of a different device for output and input is planned for a future release, therefore the input device selection combo has been disabled for the moment.
Note that a Digigram card may appear both as a NDAW and NP card if supported by NP drivers and the drivers have been configured accordingly.
See examples below of how different audio device may appear:
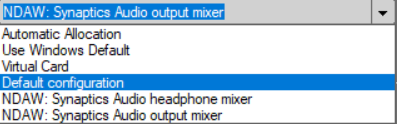
Audio device / endpoint on a laptop’s Synaptics chipset
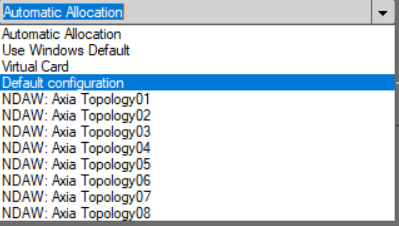
8 channel AXIA virtual audio over IP driver
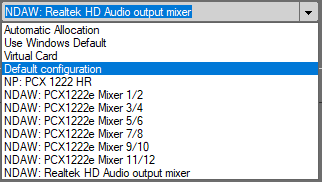
Digigram PCX 1222e detected via its WDM and NP driver
[Output channel]
In the specific case of accessing a multichannel (essentially for Digigram cards via NP drivers), this allows specifying which channel to use.
0 = First free channel
N = mono input number starting from 1. When in stereo, increase value by two for the next stereo pair.
Ex: 1 is channel one or left of first stereo pair. 4 is channel 4 or right channel of second stereo pair. 5 is channel 5 or third stereo pair …
[Record channel]
This allows the user to select which connection to use for the input device endpoint / channel. As of RadioAssist 8.7.x all possible connections supported by RadioAssist are listed, even if the device endpoint / channel does not support that type of connection. Netia audio engine maps well known drivers I/O to this legacy static input list. Implementation of a dynamic list of connection is planned for a future release.
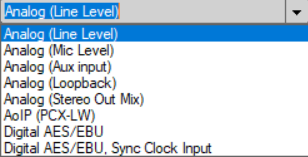
Input connection selection dropdown
Analog (Line Level): To select line level connection for cards that have one. Note that this is also the “default” connection when there is no specific mapping for an audio device driver. Counterintuitively you may have to select “Analog (Line Level)” for AES only device or AoIP driver that do not have a specific mapping implemented in the Netia Audio Engine.
Analog (Mic Level): To select microphone connection if the audio device has one.
Analog (Aux input): To select Auxiliary input connection if the audio device has one.
Analog (Loopback): Available for audio devices accessed via WASAPI (NDAW prefixed). Not available via NP drivers. Allows to record a copy of the output stream of an output device endpoint. Usage limited to shared mode. Enables scenario where a user can for instance record audio or video played in a web browser without going through and analogue loop or a mixer feeding back and output to an input. (see for more information).
Analog (Stereo Out Mix): Allows for a similar function as loopback. This requires a specific implementation by the driver vendor in its WDM driver. This is available for legacy reasons and is being replaced by the “loopback” input.
AoIP (PCX-LX): Specific AoIP input for (now obsolete) Digigram LX cards.
Digital AES/EBU: Select for using AES/EBU (digital) connection using embedded clock signal.
Digital AES/EBU, Sync Clock Input: Select for using AES/EBU (digital) connection but set the audio device to use the dedicated device clock connection for reference clock signal.
Input gain:
Gain applied on the input signal prior to reaching RadioAssist. Use this for meter calibration purposes.
Shared/Exclusive mode:
The shared mode and its opposite the exclusive mode are features dictating if an audio resource is shared or not during its use by Netia software.
Shared mode:
In shared mode, the selected audio resource can be used simultaneously by several applications.
In this mode the Netia applications I/O go through the Windows audio engine, which allows the mixing of input and output streams of multiple applications. This allows situations where two mixed audio streams can be heard at the same time, one played through RadioAssist and another through a third-party software.
Window's audio engine performs sampling format conversions where necessary, making this mode more "compatible" with many cards but can add some dithering related noise and add latency. This mode also allows access to the Windows digital loopback to record the output of a device via a virtual input (loopback) cloning the audio stream sent to the output of the device. This enables users, for example, to play a YouTube clip in their browser and record its audio directly in RadioAssist etc.
This mode is therefore the recommended mode for office PCs or some production platforms.
Exclusive mode:
If Netia software is being used in exclusive mode on an audio resource, no other application will be able to allocate and therefore use that same audio resource.
The exclusive mode theoretically allows lower latency because it gives direct access to the drivers of the card without going through the Windows mixer. However, this requires that the driver supports the format requested by the Netia audio engine, which is in the most general case 48kHz, stereo, 16 bits. Depending on the implementation of the driver this may require manually setting the format at the Windows level in the audio config dialogs for the card.
For this reason, Netia usually recommends using exclusive mode on playout machines.
Specific considerations for Digigram cards:
Please note that these modes do not apply to the use of Digigram cards via their native NP/HR driver (when selecting the Digigram card via its drivers prefixed by “PCX” in the Netia audio device selector). These concepts do not exist in this case. A PCX card allocated via its Digigram drivers is necessarily allocated exclusively.
On the other hand, the shared mode will be operational for the same PCX allocated through NDAWave7 (driver prefixed by NDAW or DX depending on the version), as exclusive/shared modes are features of WASAPI.
Specific consideration for AoIP virtual audio cards drivers:
Regarding AOIP virtual audio cards, it is recommended to use shared mode even on playback machines due to performance issue of WDM drivers of some manufacturers (such as Dante and LAWO) in exclusive mode. It may also be necessary to adjust some parameters depending on the drivers used (for example the AXIA driver requires increasing the nLatency parameter to 30 ms).
More info on WASAPI's exclusive mode:
and on WASAPI in general:
4.13.Adding a new item

A new item can be added by clicking on the button on the right side of the Browser window.
It is used to create :
- an empty item witout physical item for the SOUND, VIDEO, TEXT or IMAGE items
- a contact
- a basket
- a cartstack
- a Jingle Pack
For the following type :
- Project
- Edit from Snippet/Snippet+ or Multitrack
- Playlist/Stack/Template
- Asset
- Event
...the dedicated tool should be used
An item linked to a project cannot be deleted (first delete the project, the window allowing to delete the linked items is not implemented in this case)
An item linked to a asset cannot be deleted (first delete the asset, the window allowing to delete the linked items is not implemented in this case)
When deleting an item (whatever the type of deletion is : final or sent to the bin), the item is deleted from the baskets including this item. If restauring an item, this item will not be replaced in the baskets where it was before the deletion.
Palylists/Stack/Templates
LocSchedule/LocTemplate
Cartstacks
Jingle Packs
...cannot be sent to the bin.
4.14.Deleting an item (Ctrl+D)
To delete an item from the Browser , select the item and do a left click on the "Trash" icon at the right side of the Browser or do a right click on the selected item. the "Delete" function is displayed in a menu.
Attention : It is not possible to delete :
A item belonging to another user (except if the right is given)
An item with the RTB and/or Broadcastable validation(s).
A
An item in use
4.15.Restoring a deleted item
To restore a deleted item, do a right click on the "Trash can" icon  .
.
The following window is displayed with the list of the deleted items in the chosen category.

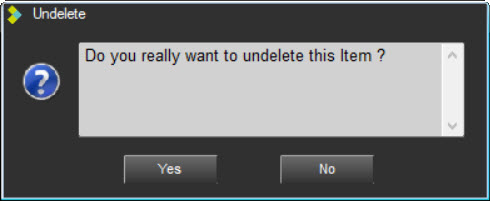
Select the item to restore and click on "Undelete".
A message is displayed to confirm the restoration. Click on "Yes".
To retrieve the restored item in the Browser, either use the search filters at the left side of the Browser, or refresh the Browser with the "Refresh" icon .
Attention : To restore a deleted item, you must get the right to do it (right given by the administrator).
IMPORTANT :
An EDL can be deleted even if a RAW or other associated EDLs exist. Only the EDL will be deleted (and will go into the bin).
You can delete a RAW even if an EDL is already in the bin.
When deleting a RAW, the existing associated EDLs will also be deleted but an information box that lists the associated EDLs allows you to cancel the deletion of the RAW and the associated EDLs.
When restoring one of the EDLs put in the bin, the RAW is also automatically restored without any information. Unless the RAW has been purged.
When restoring the RAW from the bin, the RAW is the only one restored and the EDLs remain in the bin.
4.16.Deleting a playlist
In the Browser, go to the "Playlist" category.
Select the playlist to delete.
Either do a right click on it, the "Delete" function is displayed, or click on the "Trash can" icon available at the right side of the Browser.
A message to confirm the deletion is displayed. Click on "Yes" to confirm the deletion or "No" to cancel the action.
Attention : it is not possible to delete a playlist with the RTB validation (you must remove the validation first).
4.17.Deleting a stack
In the Browser, go to the "Stack" category.
Select the stack to delete.
Either do a right click on it, the "Delete" function is displayed, or click on the "Trash can" icon available at the right side of the Browser.
A message to confirm the deletion is displayed. Click on "Yes" to confirm the deletion or "No" to cancel the action.
Attention : it is not possible to delete a stack with the RTB validation (you must remove the validation first).
4.18.Deleting a template
In the Browser, go to the "Template" category.
Select the template to delete.
Either do a right click on it, the "Delete" function is displayed, or click on the "Trash can" icon available at the right side of the Browser.
A message to confirm the deletion is displayed. Click on "Yes" to confirm the deletion or "No" to cancel the action.
4.19.Copying an item (Ctrl+L)
The « Copy » function  is used to copy an item which will have the name of the user doing this copy.
In the Browser, select the item to copy.
Click on "Copy".
The information card is displayed. Modify the data if needed.
Click on the "Floppy disk" icon to copy the file.
NB : This function is available by doing a right click on the item you want to copy.
4.20.Modifying an audio item (Ctrl+M)
The "Modify"  function is used to modify the data of a selected item (name of the correspondant, title, category…).
In the Browser, select the item to modify.
Click on "Modify".
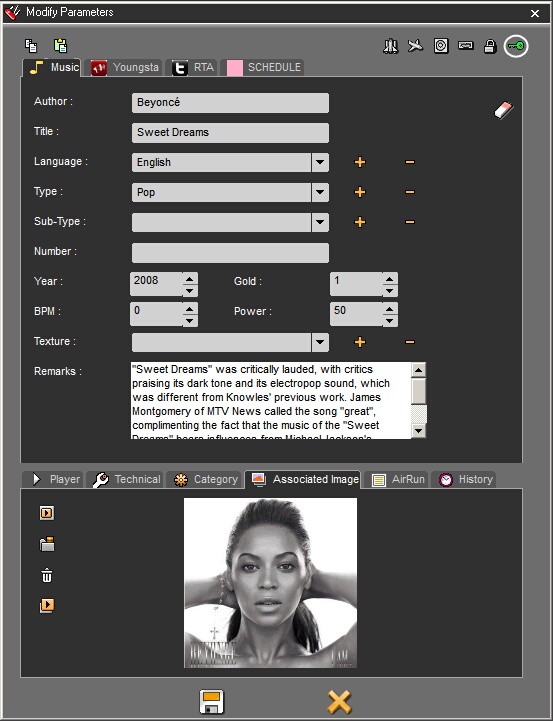
A window is displayed to modify the data
Click on the "Floppy disk" icon to save the modifications.
NB : This function is available by doing a right click on the item you want to modify.
 Indexing Sheets
In the upper part of this popup, users can enter or edit the metadata relative to the selected item.
In the lower part, you will find :
Player Tab : pre-listen your audio item
Composition Tab : for displaying and modifying the list of elements that make up a master
Technical Tab : check the set of information relative to the creation of the item.
Category Tab : link your item with a music category (Hot 20, Top 100, Gold 80…)
Associated Image Tab : display the image associated to your item, usually the album cover.
AirRun tab : display the informations about when the item was broadcasted.
Schedule History : Display when the item was ou will be broadcasted.
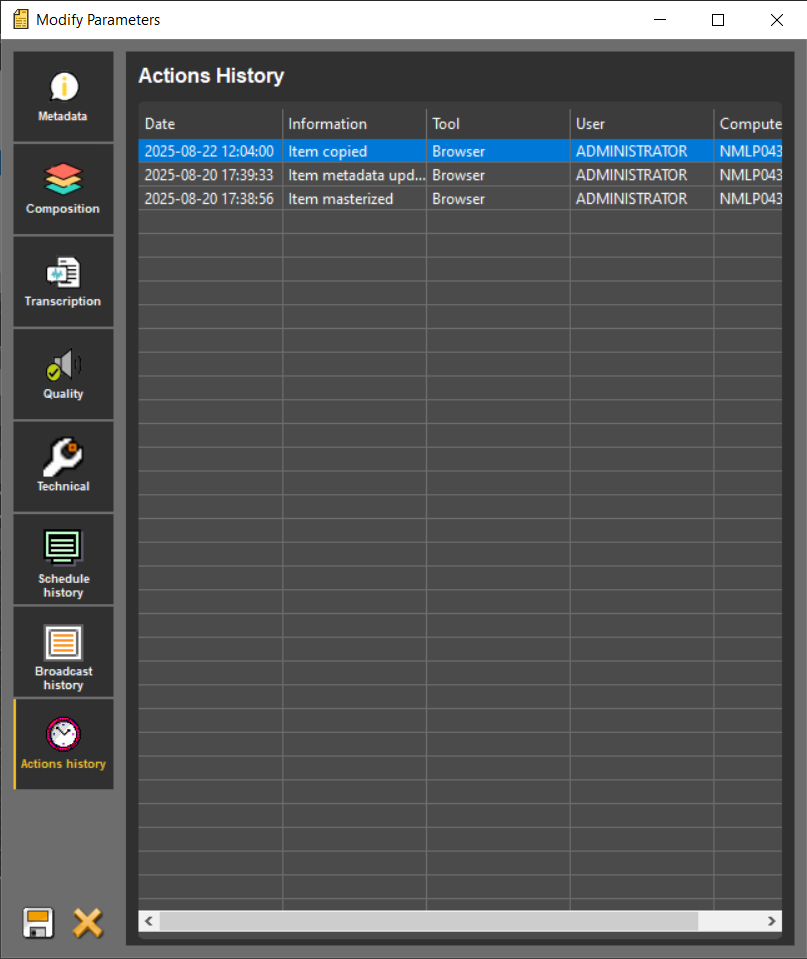
History : Displays all the action done on the item (modified, flagged RTB, unflagged, etc...)
When you access the database in Remote mode, the display of the indexing sheet is the same.
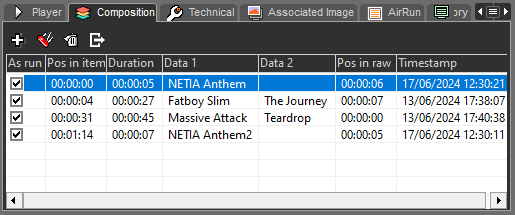
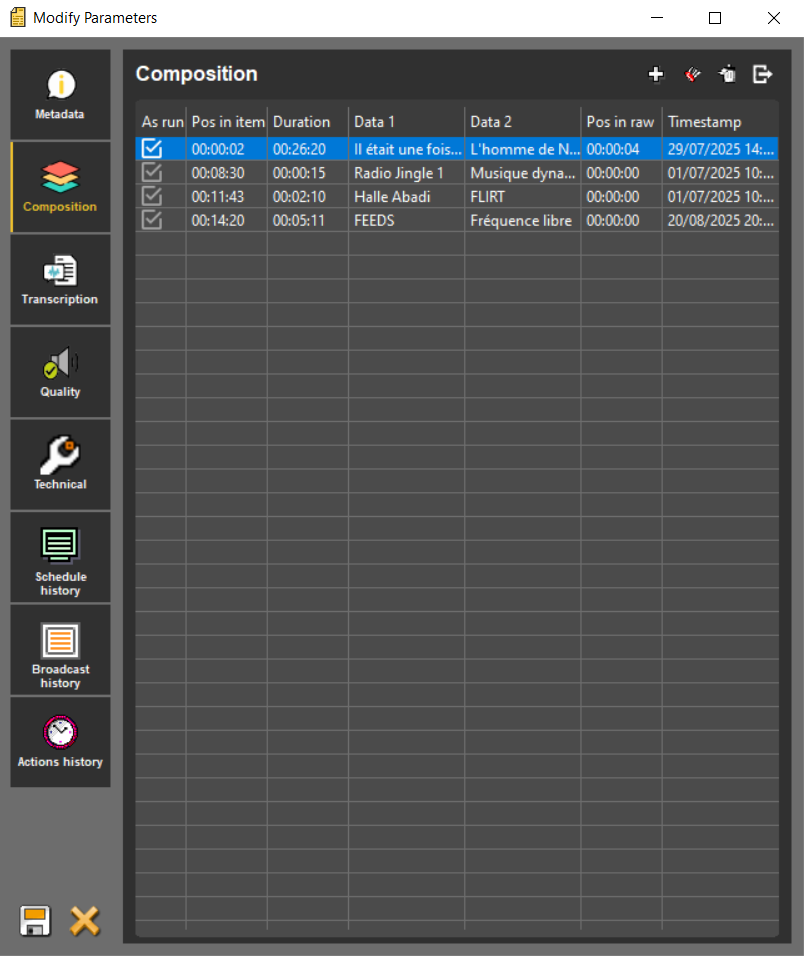
4.20.1. Composition
When a Snippet, Snippet+ editing, cartstack, playlist, etc is mastered, the list of items that make it up is saved and can be viewed in this tab. This makes it possible to find positions, durations, text data 1 and text data 1 (Author and Title, for example), positions and timestamps in their raws, that these elements had in the original editing, cartstack or playlist.
Below is a diagram describing the Composition data of an element mastered from an editing :
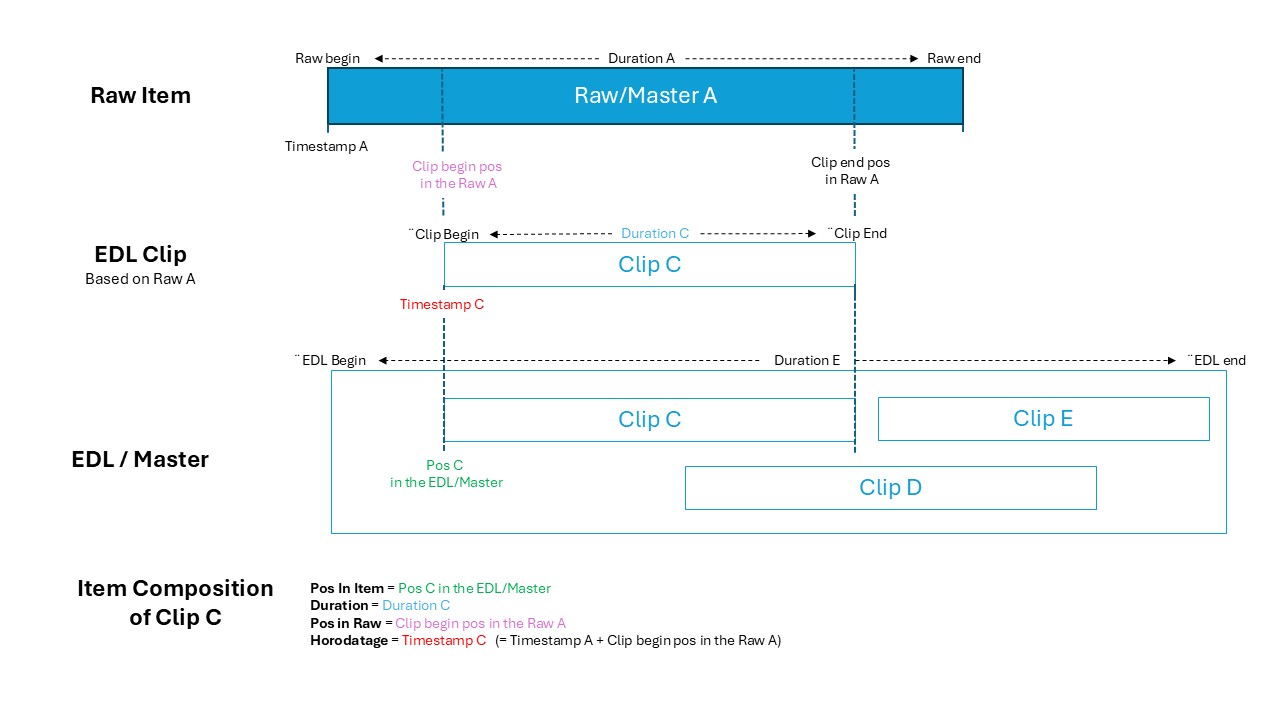
 It is possible to delete, modify, add custom elements and export this list. Please note : Any changes made to the composition of a master will only be saved when the index card is saved.
- Add
Custom elements can be added to the composition. To do this, simply :
- Click on the “Add” button
- Enter the desired data
- Validate
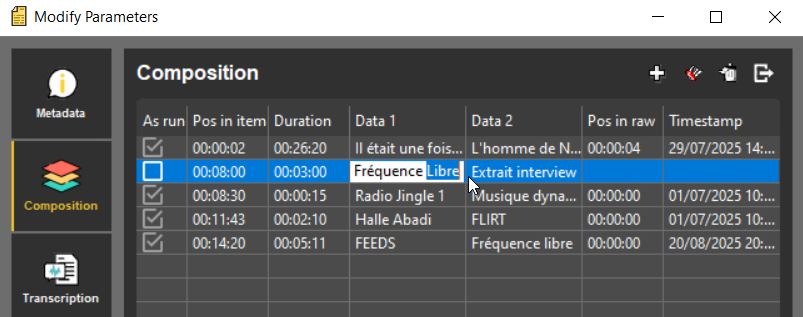
To recognize them, the custom element lines are gray.
- Modify
It is also possible to modify the components that make up a master. Note that this in no way affects the original assembly, cartridge case or playlist. There are two ways of doing this :
- With the edit window :
- Click on the “Edit” button
- Modify the desired data
- Validate
- By modifying data directly in the table:
- Double-click on a cell
- Make the desired changes
- Click outside the cell or press the “Enter” key to validate (“Escape” key to cancel)
When modifying time data directly in the table, it is possible to increment or decrement the value using the “Up” and “Down” keys on the keyboard. Time data may not exceed 24 hours.
- Delete
You can delete elements from your master. To do this :
- Click on the “delete” button
- Export
 Finally, you can export elements from your master (in csv format only for the moment). To do this :
- Click on the “export” button
4.21.New index cards (from the 8.12 version)
4.21.1.General operation
With the addition of new features such as transcription and soundcheck, the indexing form had to evolve to offer a better experience. It is divided into different sections that will be identical in Remote mode (access to a remote database).
Metadata section:
The metadata section contains all the data you can add or modify, as well as a player and the list of flags.

Composition section:
When a Snippet, Snippet+, title sequence, or cue sheet is mastered, the list of elements that compose it is saved and can be viewed in this tab. This allows you to find the start positions, durations, and text 1 and text 2 data (e.g., Author and Title) that these elements had in the original edit, title sequence, or cue sheet.
It is possible to delete, modify, and add custom elements to this list. Please note, however, that any changes made to the composition of a master will only be saved when its indexing file is saved.
- Add
 It is possible to add custom elements to the composition. To do so, simply:
- Clic on the add button
- Enter the desired data
- Clic on validate
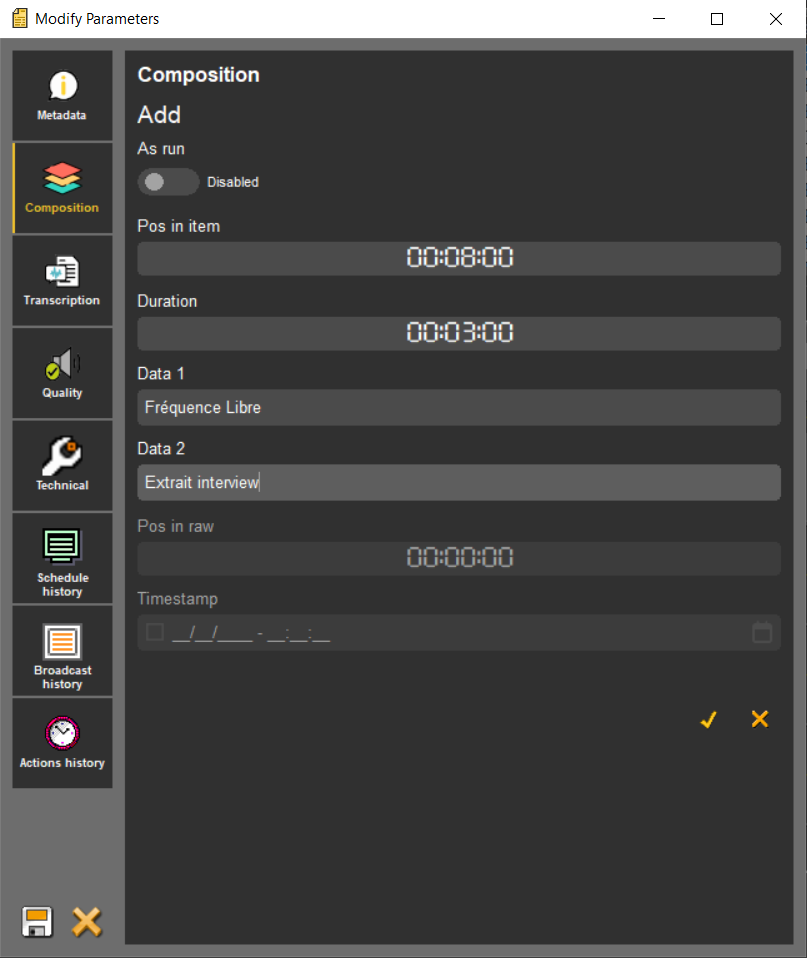
To recognize them, custom element lines are gray.
- Modify
It is also possible to modify the elements that make up a master. Note that this does not affect the editing, the title card, or the original script. There are two ways to do this:
- Via the edit window:
- Clic on the « Modify » button
- Edited the desired data
- Validate

- By modifying the data directly in the table:
- Double-click on a cell
- Make the desired change
- Click outside the cell or press the “Enter” key to confirm (press the “Escape” key to cancel)
When modifying time data directly in the table, you can increase or decrease the value using the “Up” and “Down” keys on the keyboard. This time data cannot exceed 24 hours.
- Delete
It is finally possible to delete elements from our master. To do this:
- Clic on the « Delete » button
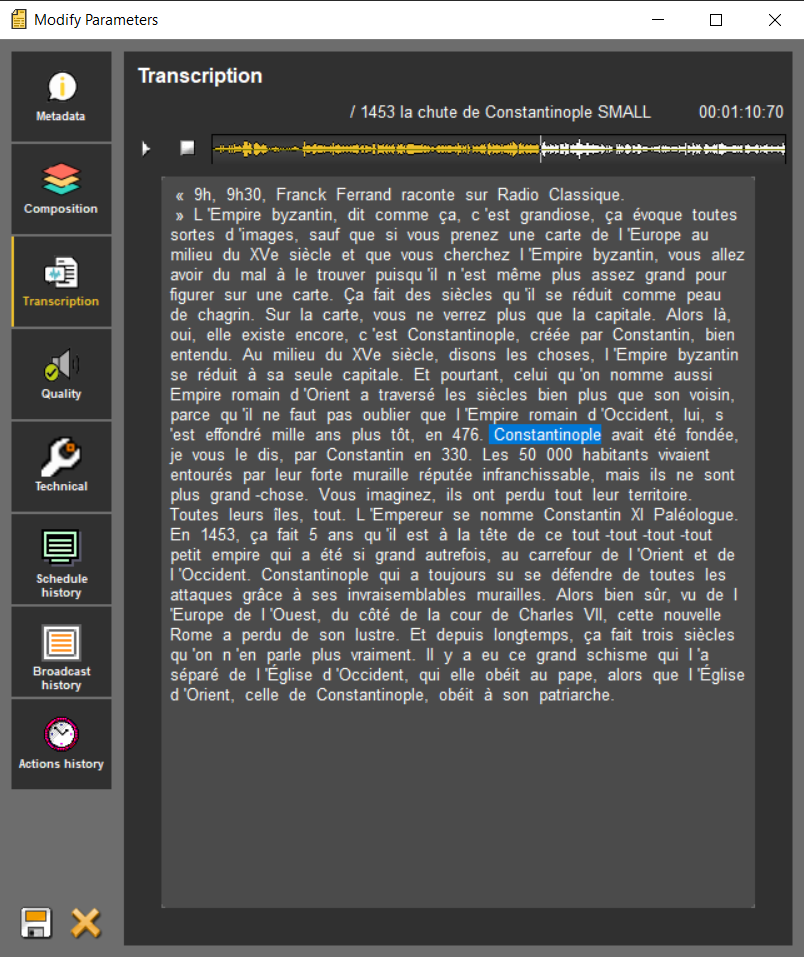
Transcription section:
The third section contains the transcription of the item if it has been generated beforehand. The transcription can be viewed by anyone, even users who do not have the right to start a transcription on an item.
This section is divided into two parts: the first contains a simple player and the second contains the text area for the transcription. To make it easier to follow along while listening, the word being heard is highlighted in the text. You can move through the audio by clicking on the words, and if you move through the player, the highlighted word is also updated.
Quality section:
The fourth section presents the sound analysis once it has been performed. A reminder of the analysis criteria is visible for each field. If the value obtained does not match, the field appears as an error.
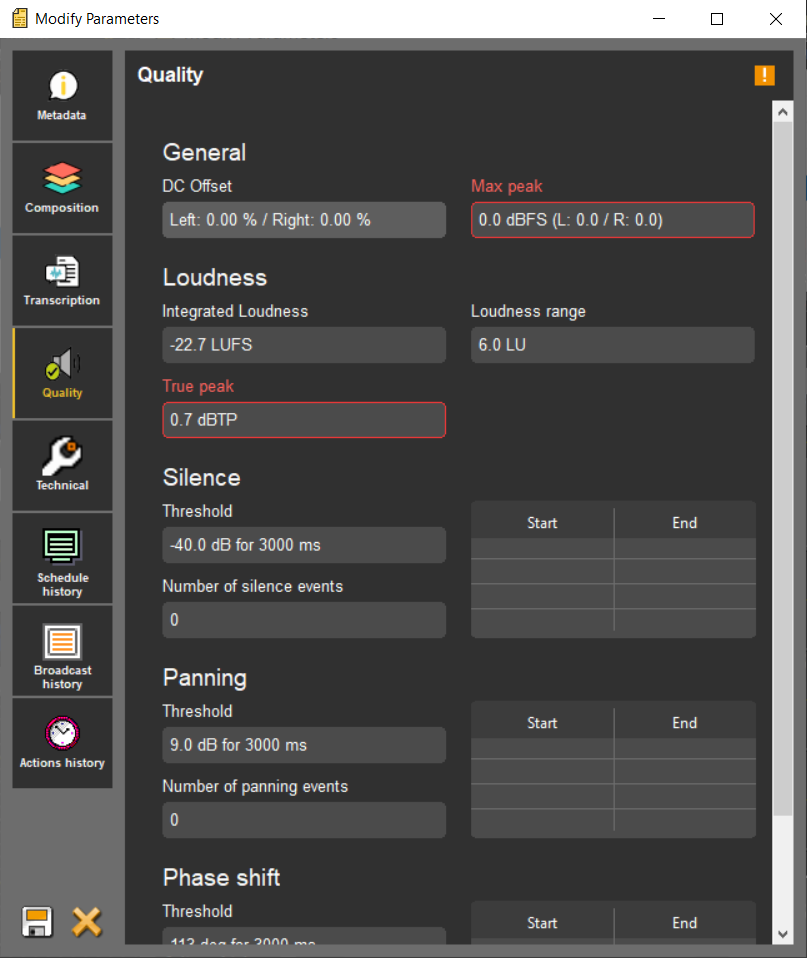
If you want to manually validate a sound that has one or more alerts, you can click on the orange exclamation mark in the top right corner. A modal window will open, allowing you to confirm that you want to validate the sound quality. The criteria that identified errors will remain red even after manual validation.
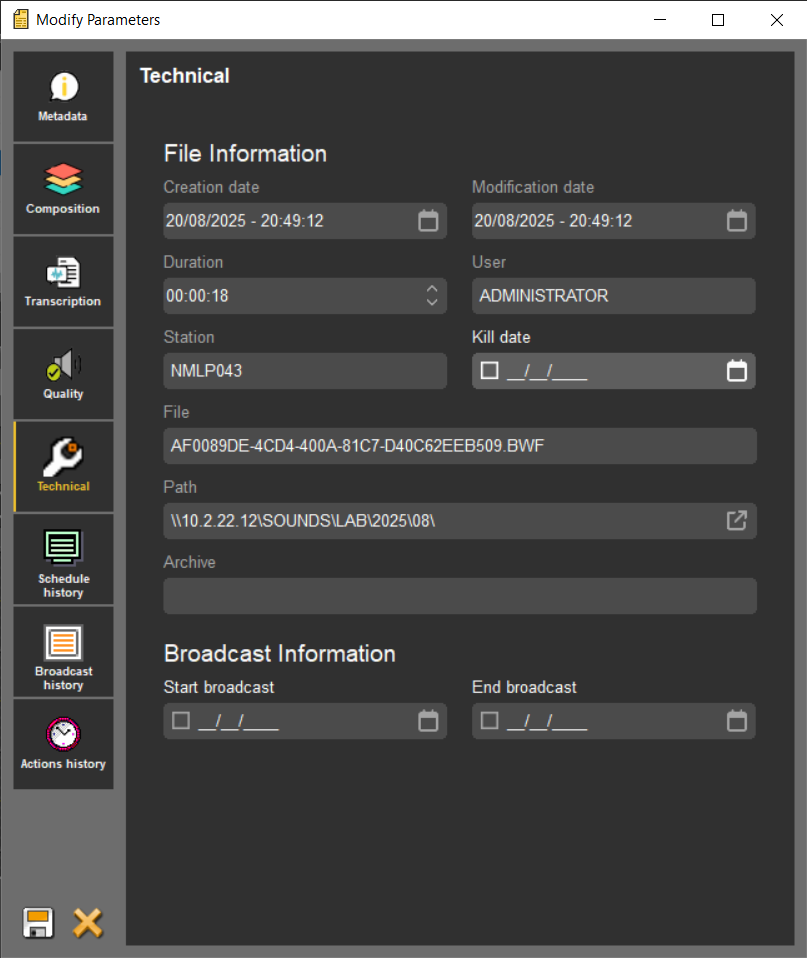
Technical section:
A Technical tab provides information about the selected item. This includes, for example, the creation date, last modification date, duration, user who created it, distribution start date, etc.
History tables:
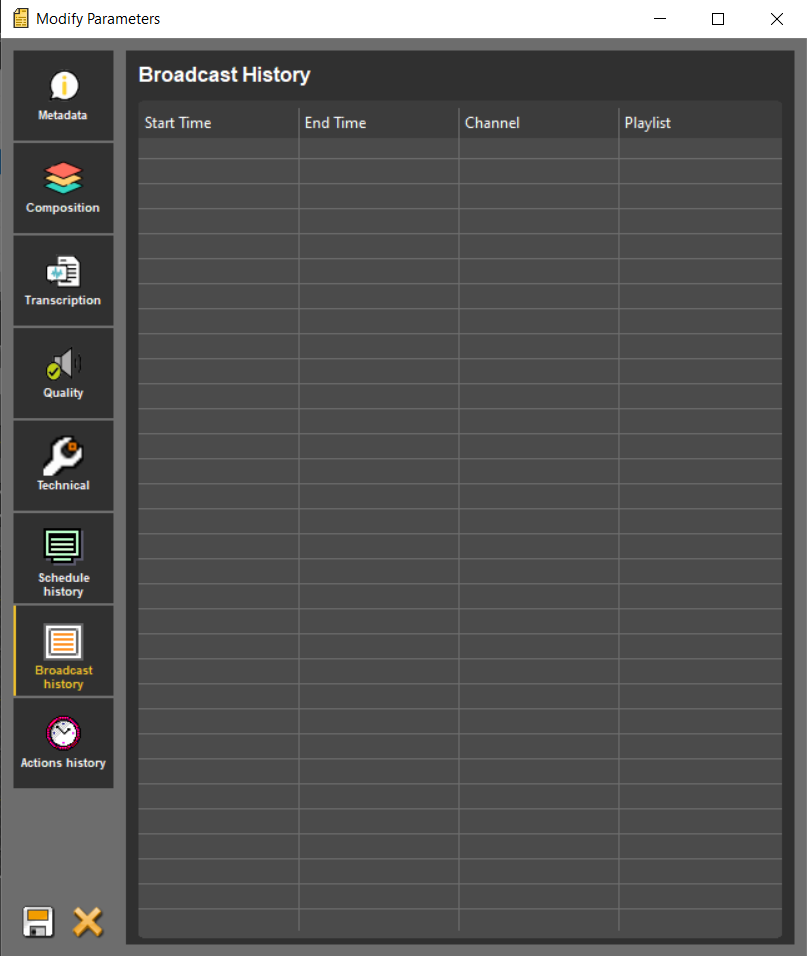
Finally, three sections are available to access the various histories related to the item:
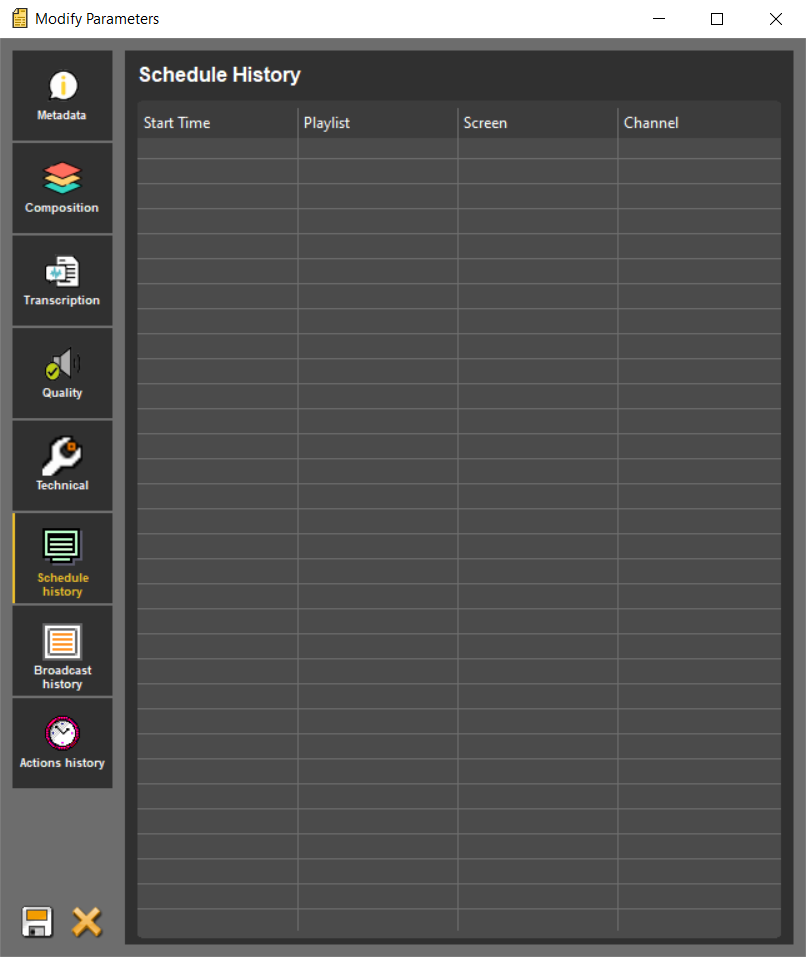 |  |
- The “Schedule History” history, which displays all sound scheduling information (past and future)
- A “Broadcast history” tab, which displays all sound broadcasts (start and end times, channel, conduct)
- The “Actions history” shows all changes made to the audio (PAD, non-PAD, modified, etc.)
4.21.2.Behavior changes with the new form
Some workflows have been adapted or simplified to make it easier to use the new indexing form.
- When saving from an editing tool, the default destination tab and the active tab in the Browser
4.22."Set as urgent" function
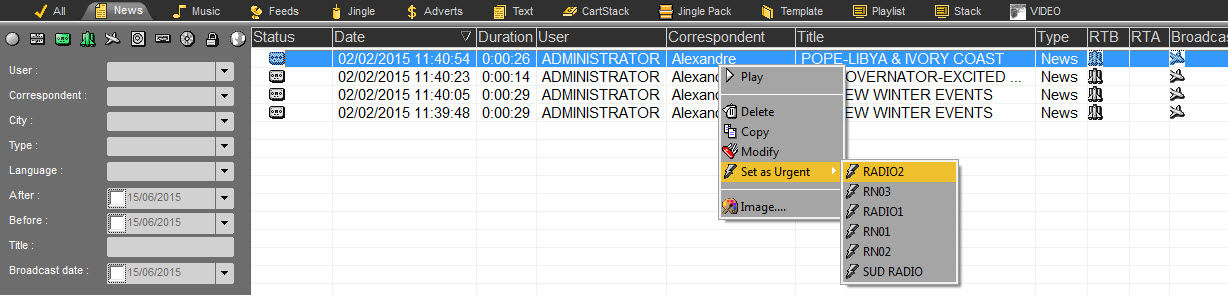
The "Set as urgent" function  is designed to send an audio item to the Hot-Box of Air–DDO (playout system) to notify the technician that the item must be broadcasted urgently (because it is not planned in the playlist).
To send an item as urgent, select it first and click on the "Set as urgent" function  . In multi-channel mode, all channels will be notified.
If you work in multi-channel mode, do a right click on the item to send. In this case, the list of the available channels is displayed. You can choose on which channel you want to send the item then.
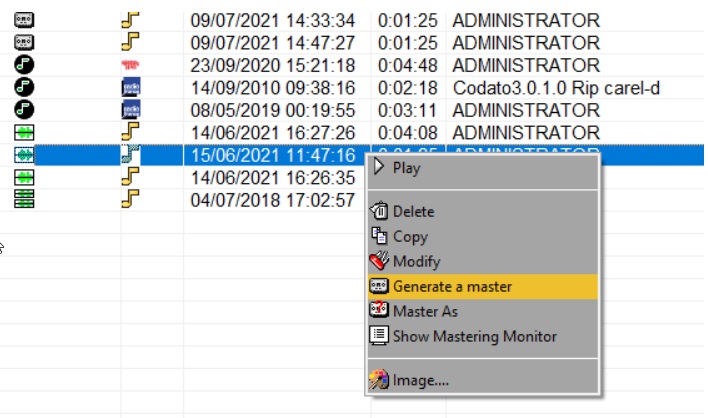
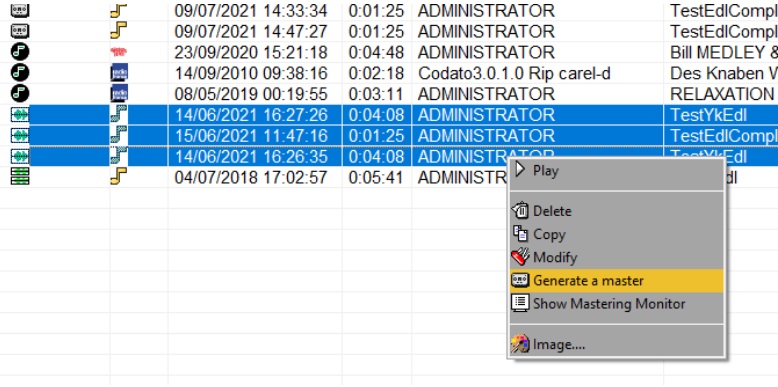
4.23.Generating a master (Ctrl+G)
To generate a master, select the edit session coming from Snippet, Snippet+ or Multitrack and click on the "Generate a master" function located at the right side of the Browser.
You can also do a right click on the selected item. The "Generate a Master" function is displayed as well.
Attention : Do not masterize items coming from the "Production" tool, otherwise you will loose all information that you have put on the sound. Moreover, it is not possible to transform an original item directly into a master.
4.24.Creating an empty file
The "New item" function  is designed to create a file without sound.
This fonction is designed to prepare files which will be associated with an audio file later on (coming from an automaton or associated with the "Masterize as" function for instance).
It is not possible to create empty sheets in a tab where the GENRE (Type) is not defined (example: ALL).
An empty record is indicated by the "sheet" icon.

4.25."Masterize As" function
The "Masterize as" function (function available by a right click on an item of the Browser or by a right click on the "Generate a Master " function) is used to associate a sound to a empty file.
4.26.Using the "Masterize As" function
To use this function you must create empty files first.
Select the audio file on which you want to associate an empty file.
Do a right click on it and choose the "Masterize as" function (or right click on the "Generate a master" icon). A window is displayed proposing a list of empty files (without audio files associated) available in the Browser.
Choose the empty file on which you want to associate the sound file.
Click on "OK".
The sound is associated to the file and the status of this audio file will be master.
4.27."Asynchrone Mastering" function
Async mastering allows users to keep working while mastering process is running.
To achieve this workflow, a mastering queue has been added to RadioAssist which allows users to queue and manage mastering jobs. Jobs are done by a background process on the user computer so users can still use RadioAssist as usual while jobs are running.
3 kind of workflow are available:
Add one item to queue: show up an indexation window that allow user to fill destination item metadata
Add multiple items to queue: allows user to queue multiple items as same time. No indexation window is displayed, and metadata are duplicated from sources items.
Add external item to queue: allows user to drag&drop an external file from local computer
Following item type can be added to mastering queue:
Raw
Master
Monotrack EDL
Multitrack EDL
Production
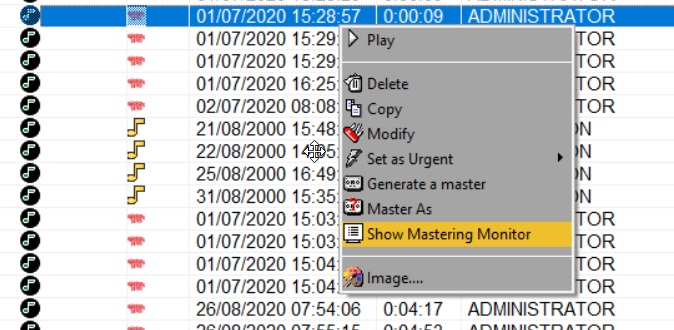
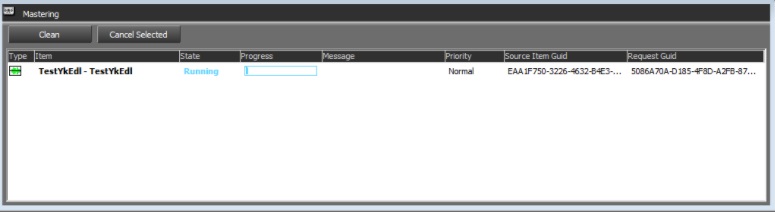
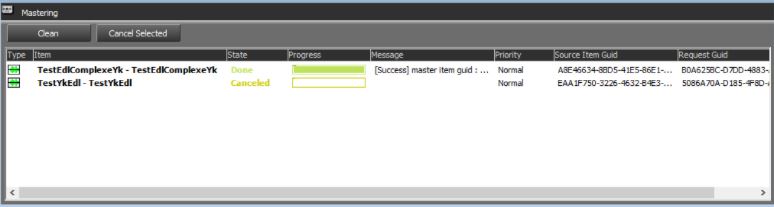
A “Mastering Monitor” window can be used to check and manage jobs status. This window display user information’s:
Type: source item type icon (prod, mono track …)
Item: source item name (under format “STRING_1 – STRING_2”)
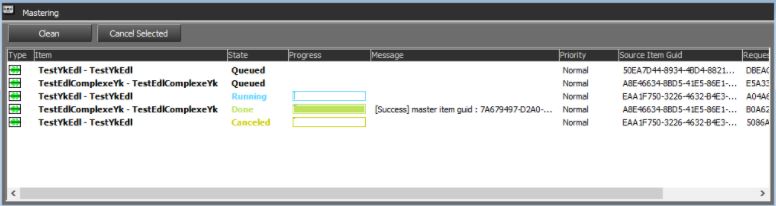
State: job current state
Queued: job’s waiting to be processed
Running: job in progress
Done: job is done, and master item is ready to be used
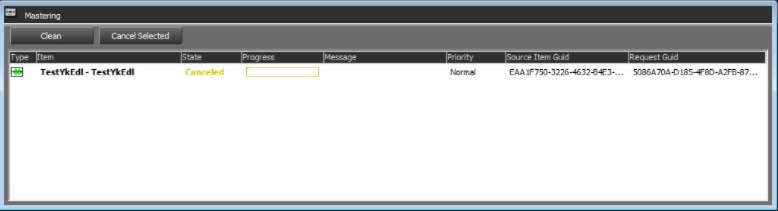
Canceled: job has been canceled by user
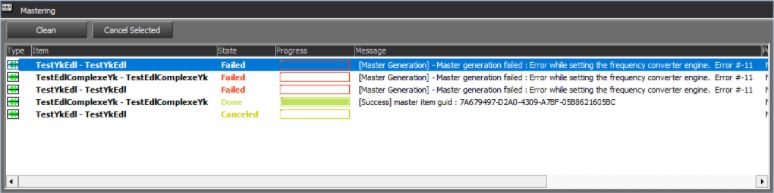
Failed: job process failed (error detail message is available in message column)
Message: display details on process, especially useful on failed job to know error details
Priority: job priority (not yet implemented)
Source item guid: source item guid from T_ITEM table
Request guid: job unique id
Notes:
Jobs in “queued” or “running” states can be canceled at any time (use “Cancel selected” button)
Mastering window can be closed/opened at any time without impact on mastering jobs
All running jobs are canceled when Radios Assist is closed Enter topic text here.
4.28.Using the "Asynchrone Mastering" function
Mastering one item (with indexation window)
Mastering multiple items (without indexation window)
Show up mastering monitor
Jobs Status
Running job
Canceled job
Done job
Queued job
Failed job
4.29.Remote Database
A remote database is designed to access a database available on another site for instance.
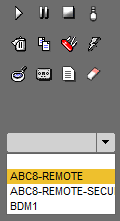
To access to a remote database, select it in the dropdownlist at the right side of the Browser :

An identification window is displayed asking your login.
Then, click on "connect to the remote database" :

The Browser displays items from the remote database.

To go back to the local database, click on "Connect to the local database"  .
.
4.30.“Asynchronous transfer” function
The transfer function allows you to send one or more elements from your station (local database) to one or more other stations (remote databases). Once connected to a remote station, it also allows you to transfer one or more elements from the latter to your own station (local database) and other remote stations.
As with Asynchronous Mastering, Asynchronous Transfer allows you to continue working while a transfer is in progress.
4.30.1. Transferring one or more items
 Select one or more elements in the browser
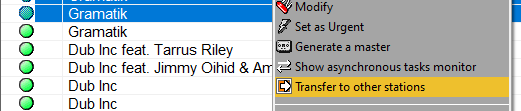 Right-click, then click “Transfer to other stations”
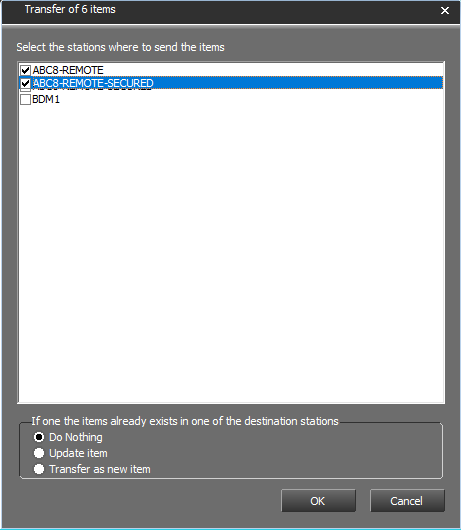 Select the stations you want to send the item(s) to. Choose the procedure to follow if the element is already present at the destination station (see point 4.30.3) then validate
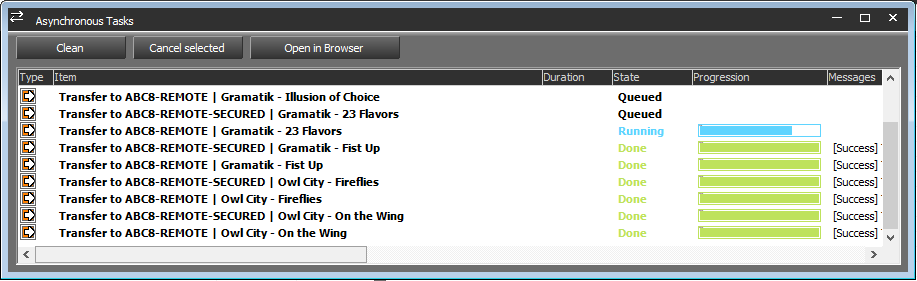 For “X” items transferred to “Y” stations, “X*Y” new tasks are added in the queue of the “Asynchronous Tasks” window
 You can interrupt or cancel transfers at any time by selecting them and then clicking on “Cancel selected”
Once a transfer is complete you can select it then click on “Select in browser” so that it is displayed in the browser. If you are connected to the station from which the element originates, the source element will be displayed. If you are connected to the destination station, the item that has just been transferred is displayed.
4.30.2. Transfer of one or more elements from a remote station
 Select the desired remote station
 Click on “Connect to remote database ”
You can now transfer one or more elements from this station to your local station and/or to other stations by repeating the different steps in point 4.30.1.
4.30.3. Sent item already present on destination station
 In case the element is already present on the destination station you can choose from these three options :
Do nothing : The item is not transferred
Update item : The item's metadata is updated. If it is an element containing sub-elements (bandolier, conduct, etc.) these sub-elements are also updated
Transfer as new element: The element is transferred as a copy of itself. If it is an element containing sub-elements (bandolier, conduct, etc.) these sub-elements are not updated.
4.31.Automatic archiving of Browser's items
To archive automatically the items of the Browser, you must use the required validations which are RTA. (Ready To Archive) and/or Archivable.
Thus, once the items have the RTA and/or Archivable validation(s), Na-Arch (the automatic archiving software from the RadioAssist range of products) can archive them automatically.
According the different radios' methods, 1 validation or 2 validations can be used.
4.32.Archived items
Once an item is archived manually or automatically, a CD icon is displayed near the status of the archived item.

(item archived but still available in the database )

(item archived and deleted from the database - see "Consulting the archived items").
If you do a right click on the archived item, the archive location (whether a path, whether a number) is shown.
4.33.Consulting the archived items
As long as an archived item is not purged, it is still possible to consult it or use it. The archived items which are still on line are recognizable thanks to a grey CD-ROM icon near the status.

However, if the archived item is purged, the data remain in the database but the audio file is no longer available.The items which are archived AND purged are recognizable thanks to an orange CD-ROM icon near the status.

If you double-click on it, a message asks you to insert the CD or to enter the path where the item has been archived.
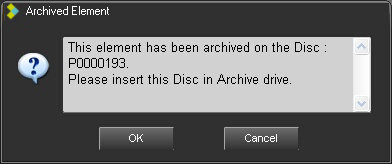
To put the audio file back in the database, insert the CD or choose the path on which the archived item is and click on "Validate".
The audio file is now available in the Browser.
4.34.Change user
The right-hand window contains a list of all existing users. To change user, click on the down arrow. A drop-down menu appears, listing all available users in the database.

Choose your name. The login window appears.
Enter your password.
Click "OK" or press "Enter" on your keyboard.
4.35.Locked items (lock icon)
Locking an item will have the following results :
- the item won't be eligible for purge
- depending on the settings made by the administrator it could be locked for user users to be used and/or modified and/or deleted

4.36.Locking an item
To lock an item, you have two ways :
Click on "Modify" . The lock icon is displayed on the sound data. . Click on it. The icon turns green .

Or In the Browser, in the "Lock" column , on the sound.

However, this item is accessible by anybody.
4.37.Printing the Browser
To print out the list of the items available in the Browser, click on the NETIA icon on the top left hand corner, or do a right click on the title bar et choose "Print Browser".
4.38.Private mode
The yellow key means that the item is "Private". Thus, only the connected user who has put the key will be able to see the item (see "Putting an item in "private").
4.39.Putting an item in "private"
To put an item in "Private", you have 2 ways :
Click on "Modify" . the key icon is displayed on the window data of the item. Click on it. The icon turns green.
Or, in the Browser, in the « private » column, on the item.

4.40.The validations
The RTB 
 and/or broadcastable validations are used to validate an item in order to broadcast it.
According the different radios' methods, 1 validation or 2 validations can be used.
4.41.Putting the RTB and/or Broadcastable validations
To put the RTB and/or Broadcastable validations, you have 3 ways :
1) When you generate a master, a window with the item data is displayed. The RTB 
 and the Broadcastable icons are available. Click on them. The icons turn red.
2) In the Browser, in the RTB and/or Broadcastable column, on the sound. Click on it (or double-click, according to the configuration), the icon(s) is/are displayed.
3) In the Browser, select the item to validate and press Ctrl + R to put the RTB validation and/or CTRL + B to put the Broadcastable validation .
4.42.Putting a playlist RTB
To put the RTB (Ready-To-Broadcast) validation on a playlist :
In the Browser, go to the "Playlist" category.
Select the playlist.
Go to the "RTB" column and double-click on it.
The "Space shuttle" icon  is displayed which means that the playlist has the RTB validation and then it is visible in the playout system.
NB : if a playlist does not have the RTB validation, it will not be visible in the playout system.
4.43.Putting a stack RTB
To put the RTB (Ready-To-Broadcast) validation on a stack :
In the Browser, go to the "Stack" category.
Select the stack.
Go to the "RTB" column and double-click on it.
The "space shuttle" icon  is displayed which means that the stack has the RTB validation and then it is visible in the playout system.
NB : if a stack does not have the RTB validation, it will not be visible in the playout system.
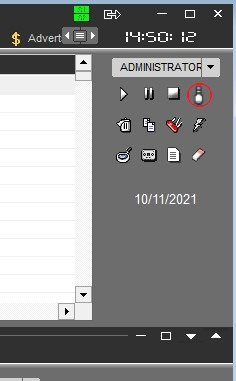
4.44.Locking Radio-Assist
You can log out from RadioAssist without closing the application.
To do so, click on the "Lock button" available at the right hand corner of the screen  .
.
Thus, the next user who wants to use RadioAssist, has to log in with his name and his password.
This function prevents one user from being connected under another name.

4.45.Changing the user
The right window contains the user list. To change the login, click on the down arrow. A dropdown list containing the user list available in the database is displayed.

Choose your name. Then, the connexion window is displayed.

Enter your password.
Click on « OK » or press « Enter » on your keyboard.
4.46.Browser Shortcuts
Ctrl + D : Deletes the selected item
Ctrl + l : Copies the selected item
Ctrl + L : Set the selected item to Lock mode.
Ctrl + M : Modifies the sound data
Ctrl + T : Launches a search
Ctrl + G : Generates a master
Ctrl + P : Play/Stop the selected item
Ctrl + R : Puts the RTB validation on the selected item
Ctrl + B : Puts the Broadcastable validation on the selected item
CTRL + / : Puts the RTA validation on the selected item
Ctrl + Master (button or dedicated line in the popup menu - when item is selected) : Masterization of selected item without opening its metadata sheet
Alt + T : displays the whole items of the database
Alt + I : Go to the "Info" category.
Alt + N : Go to the "News" category
Alt + M : Go to the "Music" category
Alt + F : Go to the "Feed" category
Alt + J : Go to the "Jingle" category
Alt + A : Go to the "Ads" category
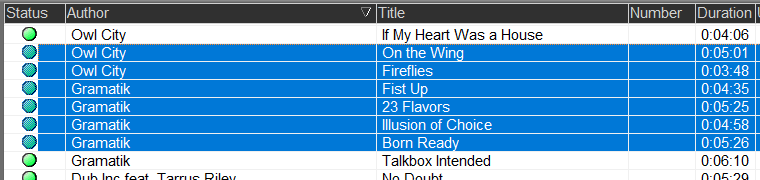
SHIFT + Select a sound then another sound lower/higher in the list: Select a group of items.
Ctrl + Select several items in the list: Select line by line.
NB : "Ctrl" and "Alt" are keyboard keys.
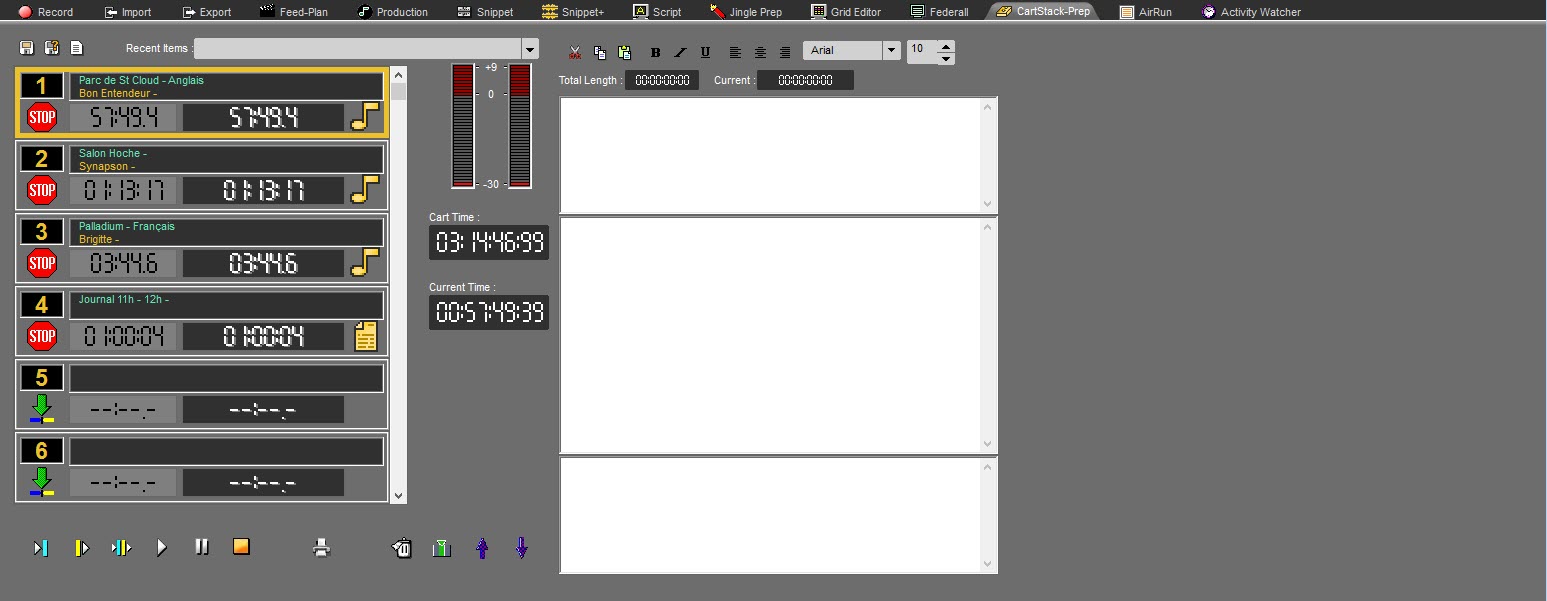
5.CartPrep CartPrep
5.1.CartPrep definition
A cartstack can be prepared via the "CartPrep" tab of the RadioAssist production station to create or modify cartstacks for broadcasting.
All edited items, ready for broadcasting and validated by technicians and presenters, are integrated into the cartstack for broadcasting as well as defining their linking mode (manual or automatic). These elements can be text, sound or both. Once edited, the cartstacks are distributed using the "AirCart" software.
Cartstacks can be used live or automatically and for sound finalising and lead-ins.
The "CartPrep" tab is divided into two sections :
The left section is used to built the cartstack, capable of holding up to 99 carts.
The right section is reserved to texts associated to the audio files.
5.2.Cart
A cart which is an item belonging to a cartstack displays the following information :
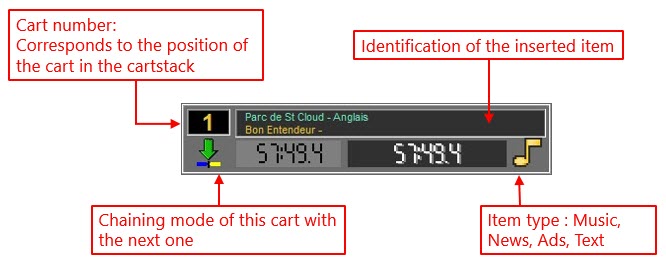
NB: The cartstack accepts all type of item from the database, which includes text documents to integrate into a cart. When broadcasting with AirCart software, these texts are visible in a dedicated window and can be used as reading material for the presenter.
5.3.Building a cartstack
To build a cartstack, just put all the sound files in chronological order from the Browser to the .
You can insert, original 

 , master or music edited items .
Two ways are available to insert items :
By drag&drop : Select an item from the browser and drop it to the cart.
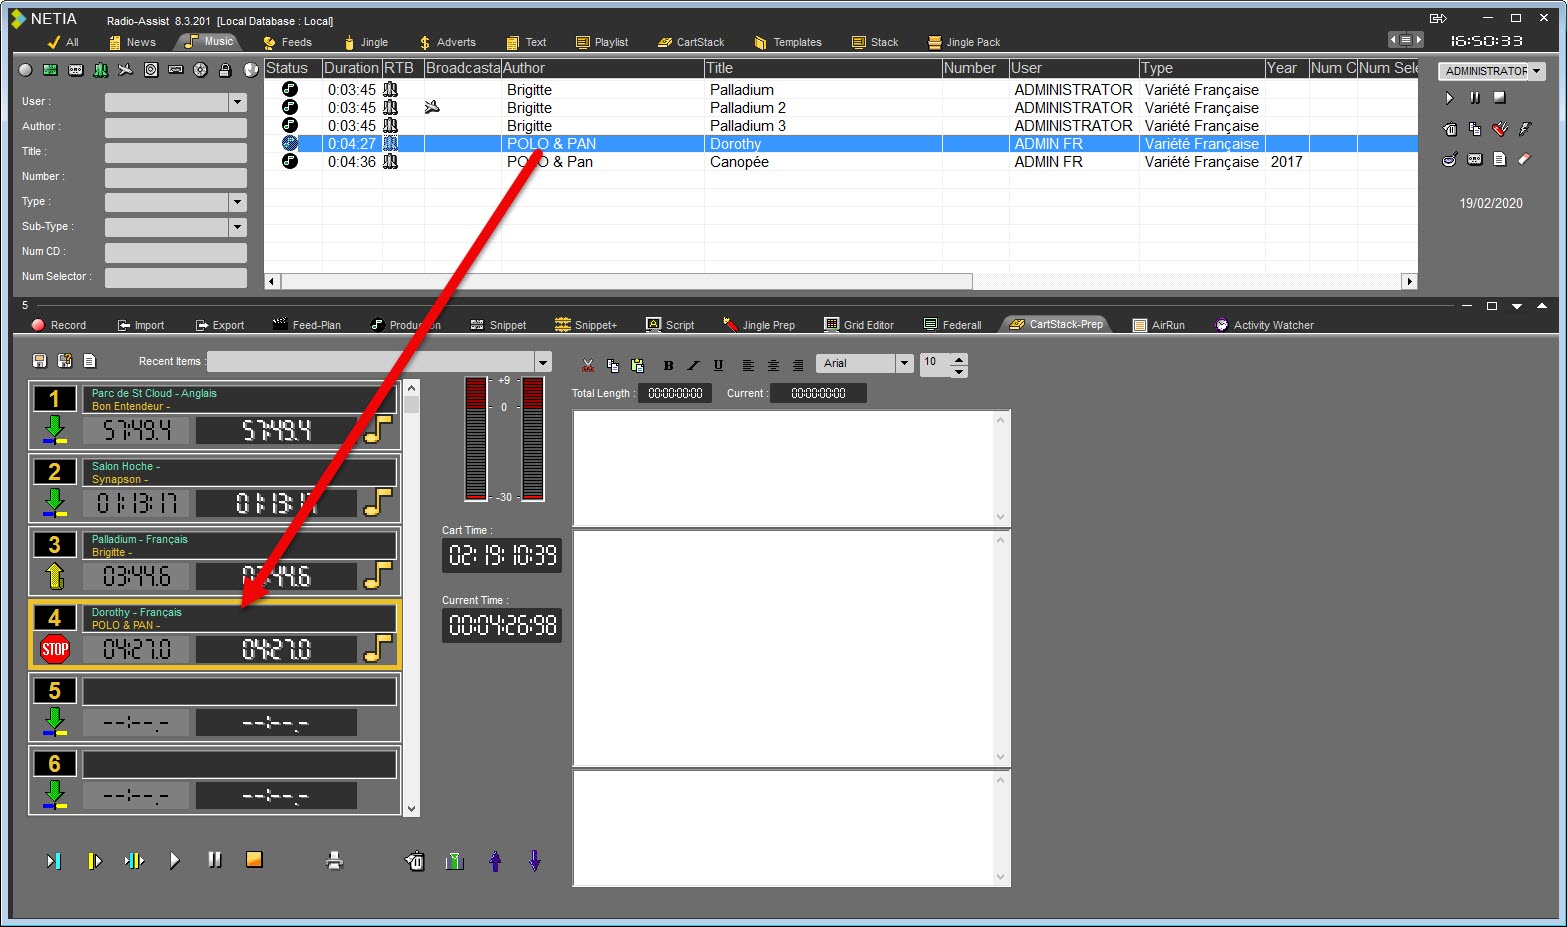
By double-click : select a cart first, then double-click on an item in the Browser.
To select a cart, just click on it. the outline of the cart turns yellow.

As soon an item is inserted in a cart, this one displays .
It is possible to find an item of a cart in the database by selecting it and using the keys "CTRL+O" (the letter).
5.4.Choosing the lead-in mode
By clicking several times on the "lead-in modes" button, the different modes are shown :
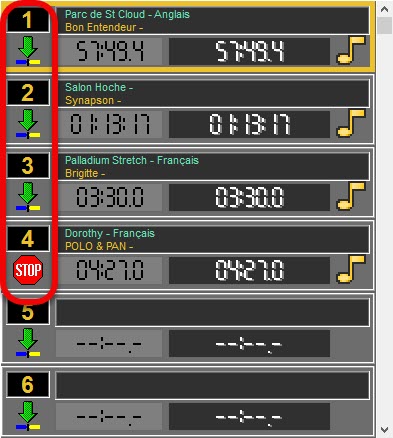
 When the blue and the yellow are back to back, it means that the next cart will lead in automatically in the "cut" mode.
 When the blue is crossed with the yellow, it means that the next cart will lead in automatically in the "mix" mode ("mix" done thanks to the Inlink and outlink points placed on a sound thanks to the "Production" tool).
 The yellow arrow pointing upwards means that when the cart has played, the cartstack will play in a loop and lead in automatically with the first file.
 The "Stop" icon means that cartstack playing will stop when the cart has played. Resumption of playing is then manual.
5.5.Playing un cartstack
Cart selection is shown by the appearance of a yellow square. When the cart is playing, the square flashes yellow / red. A red band visualises cart playing progress.
During play, the cartstack scrolls automatically and positions the played cart in second place.
 Plays the end (3s) of the selected cart file.
+ "Shift" : Plays the beginning (3s) of all carts as from the selected one.
 Plays the beginning (3s) of the selected cart file.
+ "Shift" : Plays the end (3s) of all carts as from the selected one.
 Plays the lead-in of the selected cart to the following one (3s before and 3s after).
+ "Shift" : Plays the beginning (3s) and the end (3s) of all carts as from the selected one.


 Play / Pause / Stop of the selected cart.
5.6.Replacing a sound by another one
To replace a sound, just move another into its place.
5.7.Inserting a cart
To insert a empty cart, select the cart before where you want to insert it.
Then, click on "insert"  .
.
An empty cart is inserted.
5.8.Unloading a cart
To unload a cart, select it and click on "Delete"  .
.
5.9.Printing a cartstack
To print a cartstack, click on "print"  .
.
The cartstack is printed as a playlist.
5.10.Adding a text in the cartstack
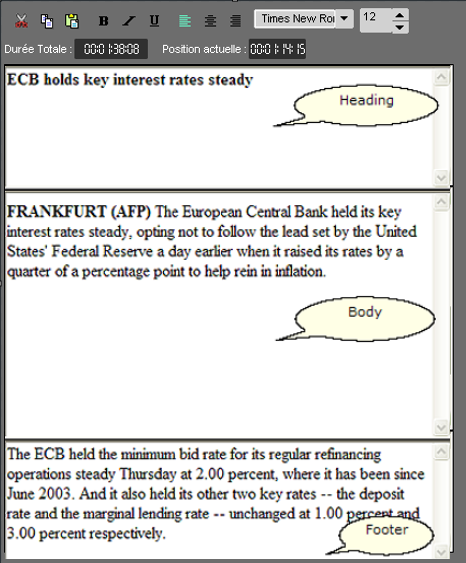
The right side of the "Cartstack editor" is reserved to the text linked to each sound file used in the cartstack.
Three text zones are predefined to help the presenter. They can be filled in with comments about the file for each cart. The first zone is designed for the announcement ("heading"), the second for comments ("body") and the third for signing off ("footer").
When a cartstack is played, the text corresponding to a cart is displayed 3s before the previous cart is over.
These texts will only be shown in AirCart.
To link a text to an audio file, select the cart first and then type your text in the right section.
All the usual word processing function are available: cut, copy, paste, etc.


 and are two counters to estimate the time needed to read the text.
5.11.Counters in Cartstack-prep
There are two counters to make cartstack building easier :
 " Cart time" : represents the total duration of the cartstack as built.
 "Current time" : represents the position of the current point on the cartstack.
It is possible to "navigate" through the sound by clicking anywhere in the counter.
 Represents the position of the current point on the cartstack
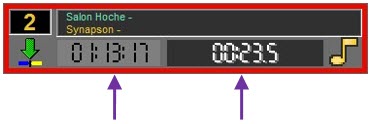
The left arrow corresponds to the "Total Time" counter. When it is pointing downwards, the counter gives the position of play in relation to the beginning of the cartstack (time which has run). When it points upwards, the counter shows the position of play in relation to the end of the cartstack (time left).
The right arrow works in the same way and corresponds to the current counter of each cart.
5.12.Saving a cartstack
To save a cartstack, use the following functions :
 Save : to save a cartstack. This cartstack is inserted in the database under the chosen category.
If modifications are done from an existing cartstack, this one is updated and the previous version is replaced by the new one.
 Save as : To save a cartstack under a new name.
If modifications are done from an existing cartstack, you will have two versions.
 New : this button releases the cartstack to create a new cartstack.
6.Record
6.1.Workflow
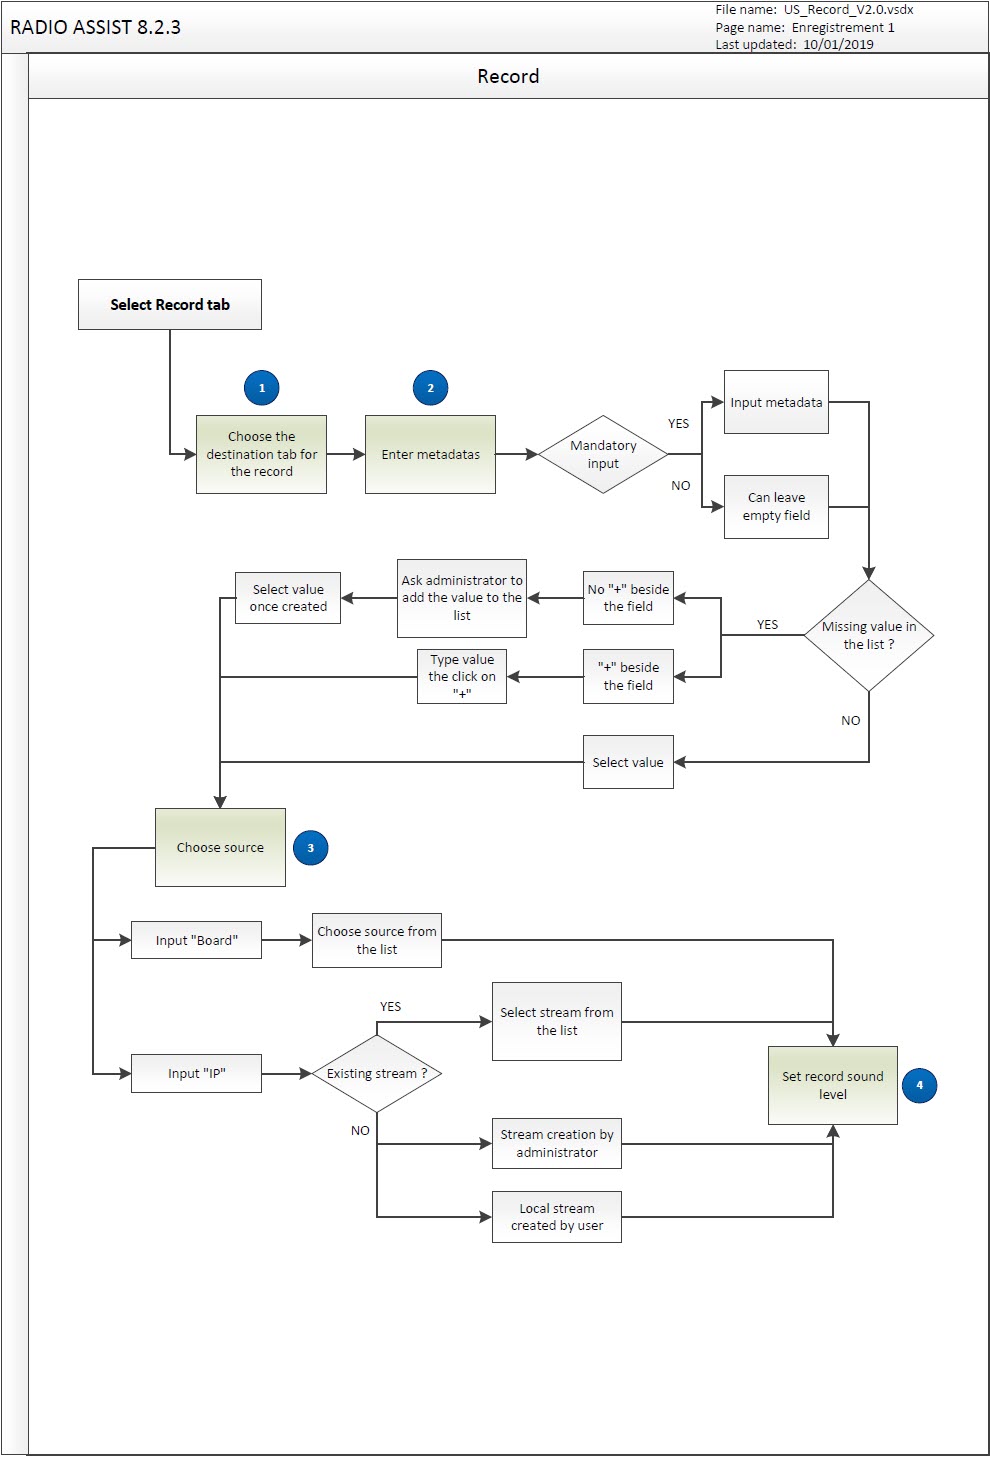
6.2.Record definition
The "Record" tool is designed to record any audio source (microphone, DAT player...).
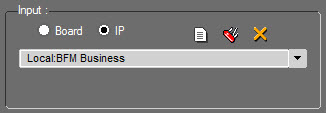
6.3.Input selection
2 audio inputs can be set :
- Audio Board
- IP stream
AUDIO BOARD Input:
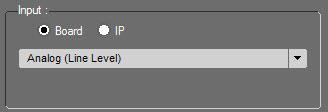
The record will be done through the audio board, meaning any input "plugged" to the workstation.
6 options are available :
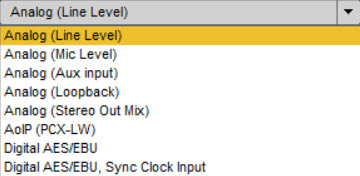
Analog (Line Level) : Analog input. It's a analog input at a line level. By default input either on the generic sound card or on a Digigram PCX.
Analog (Mic Level) : Microphone Input. Same as above with a higher sensibility on the entry line which allows record with low sound level (microphone)
Analog :(Aux input) : Analog input on the entry line available on old Digigram sound cards and for some integrated chipset on the "Aux" or "CD" input.
Analog (Stereo Mix) : Stereo Mix input.
Analog (Loop Back) : Input allowing to record what is played through the workstation (external player, internet, etc...)
NOTE: Behavior depending on the Windows version used:
Windows 7 and older versions of Windows 10: After clicking the start button of the recording, it starts immediately.
Windows 10: For the most recent versions, once you have pressed the start recording button, the recording will only be started at the first modulation detected on the computer.
Loopback and Stereo Mix are 2 variables to select input at the output of the audio board. Some chipset use 1 variable, others 2.
When the audio board/chipset has integrated effects at the exit, loopback matches the pre effects output and stereo out mix is post effects.
AoIP (PCX-LW) : Input for Digigram PCX-LiveWire audio board. Support of Digigram AoIP format.
Digital AES/EBU : Digital input. AES/EBU format using mono and stereo audio signals, quantified at 16, 20 or 24 bits.The clock is extracted from the AES signal.
Digital AES/EBU, Sync Clock Input : Digital input with AES signal. Digital input with AES/EBU format with audio signals and AES clock on several connectors. The clock is from the "AES Sync Input" connector.
IP Stream :
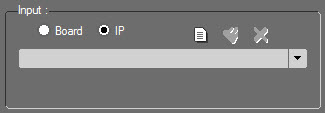
Open the list of created IP streams.
IP streams are created in the "IP Stream" tab from the Radio-Assist setup application. It is done by administrators.
They can be used by all users.
It is, however, possible to localy create an IP stream and the workstation.
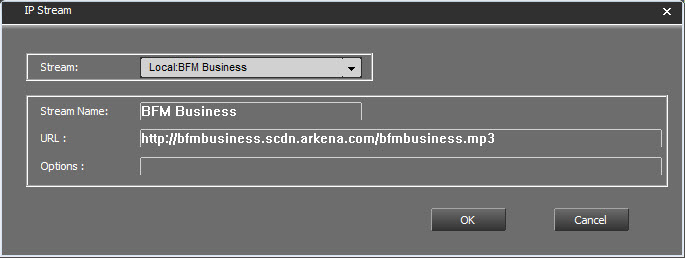
To do so, click on  .
.
The following window opens :
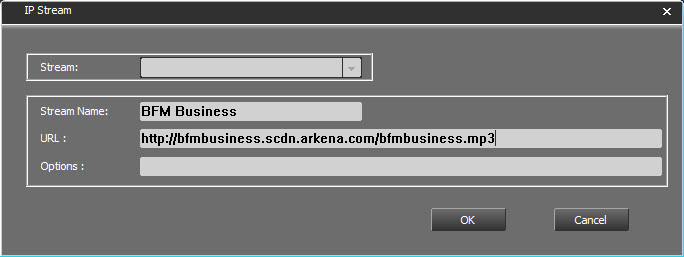
Type the stream name and the url. Here a french business radio : BFM Business.
In the "Options" field, type options for this stream.
Options : that is, all the information placed after the "?" of a " http 'get' : ?param1[;param2;…] " request in the URL Stream. If you have copied the entire URL Stream in the previous field, there is no need to re-enter the information here (concatenation between the 2 string of characters - URL stream and Options" will be done automatically).
-transcode : explicitly deactivates the transcoding operations for the flux that is being recorded.
+transcode [:gain_dB] : activates the transcoding operation while recording, with a gain level you can apply during the process. This gain replaces the level of gain by default (cf. cartes32 registry).
+data : specifies that the flux is of the ‘data’ type: it will be considered as a non-audio file. All other option become meaningless.
+pcm:fs,can,codage : identifies the flux as a linear raw/pcm, with a frequency sampling rate given in KHz, the number of channels(1=mono, 2=stereo), the coding sample (24=24 bits, 0=16 bits Motorola, 2=16 bits Intel, 4=8 bits not signed, 128=8 bits signed).
+ts-pid or +ts-num or +ts-sid or +ts-name : Only on a MPEG-TS flux : selects the subjacent flux based on a PID, an index number N°, a SID, a name.
+bitrate:debit_kbytes_S1 : limit of debit while recording, done at the value given in Kbytes/s you have specified. Only available for fluxes of the ‘data’ type, (non-audio fluxes) (Audio flux are autoregulated, based on the nominal debit of the flux).
Example of URL :
http://mp3.live.tv-radio.com/franceinfo/all/franceinfo.mp3?+transcode:-18
tcp://user:pass@127.0.0.1:80
udp://127.0.0.1:1234/?-transcode;+pcm:48,2,24
Click on 
The stream is created.
The stream can be modified by clicking on 
 or deleted by clicking on .
Select the stream to modify or delete.
Modify it, then click on  .
.
The stream is modified or deleted.
Important : Only streams created locally can be modified or deleted.
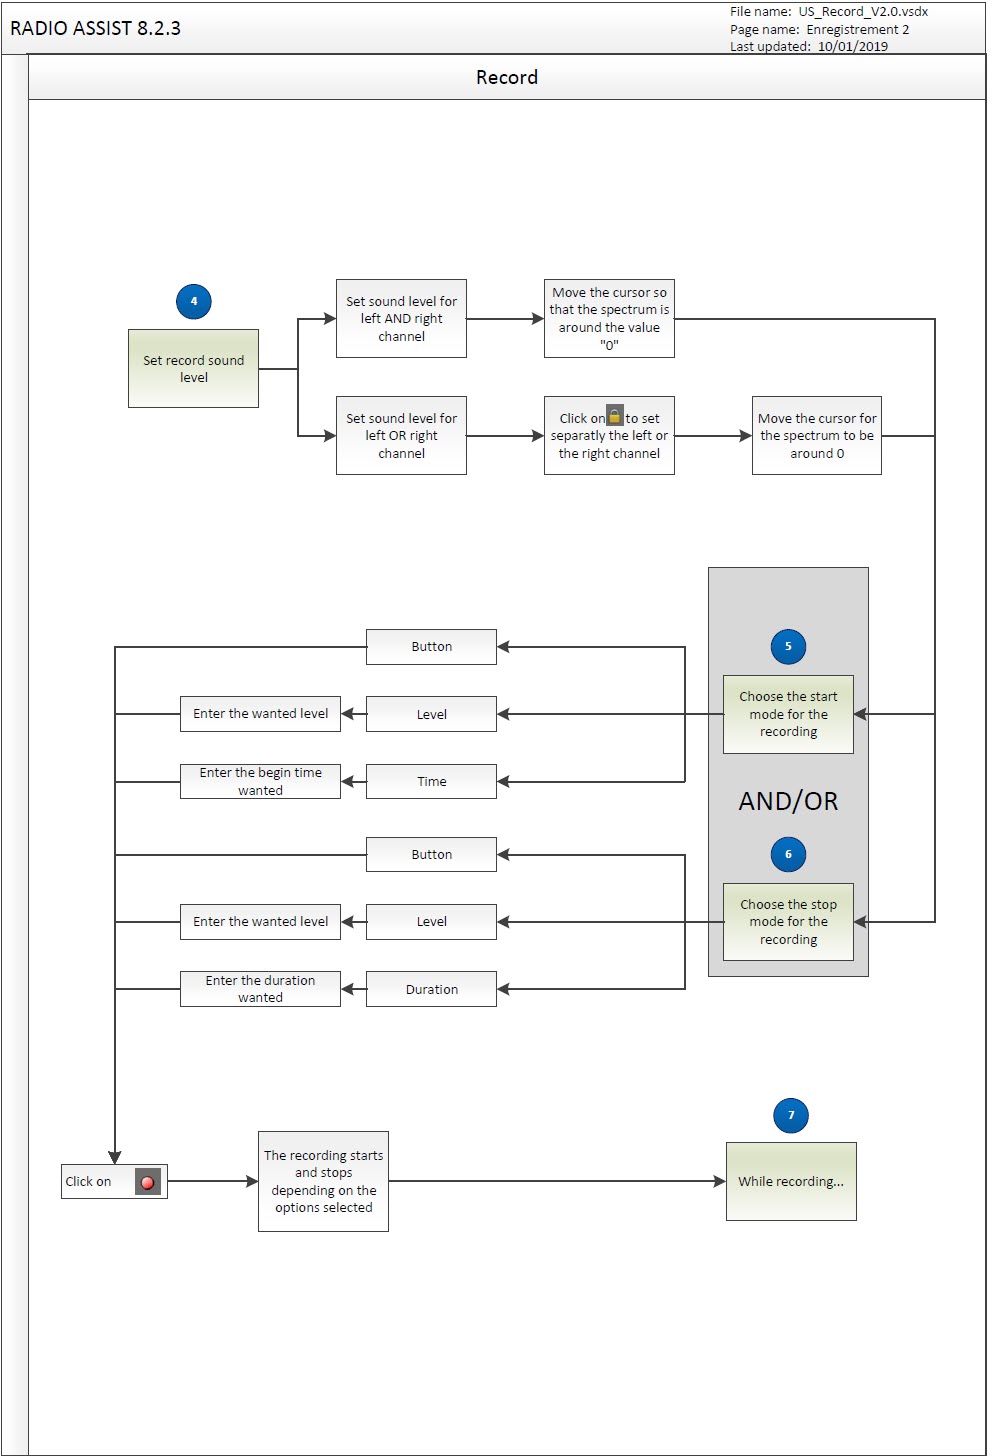
6.4.Start a recording
To start a recording, 3 options are available :
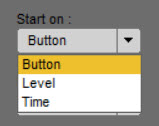
Start on button : The recording will start as soon as the button  is clicked.
For the next 2 options, first select the options then click on  . The recording will start once the values are reached.
Start on Level: (0 db by default) Can be modified. Type a value in db.
Start on Time : Select the time when to start the recording.
To stop a recording, 3 options are also available.
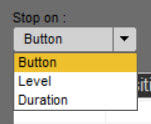
Stop on Button : Click on  . The recording is stopped.
Stop on Level : Once the level is reached, the recording stops.
Stop on Duration : Once the duration is reached, the recording stops.
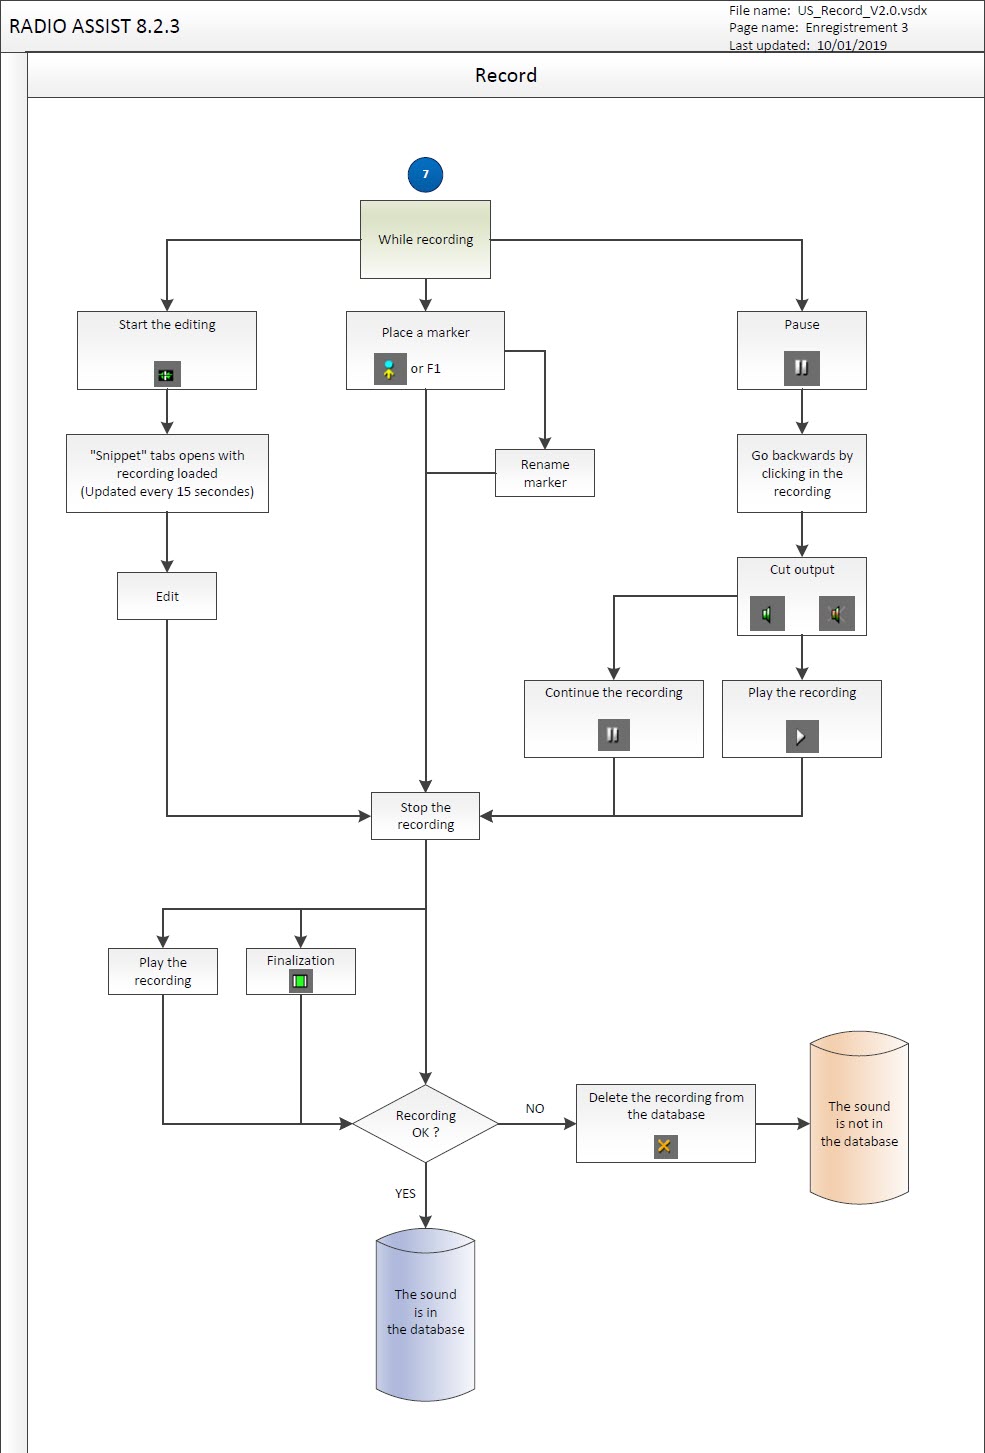
Once the recording starts, it's starts being saved in the database. It means that, once the recording is stopped, it can be seen right away in the Browser (if the tab where you saved your recording is shown in the Browser)
And if the workstation is shut down accidentally, the recording is saved until the workstation's stop.
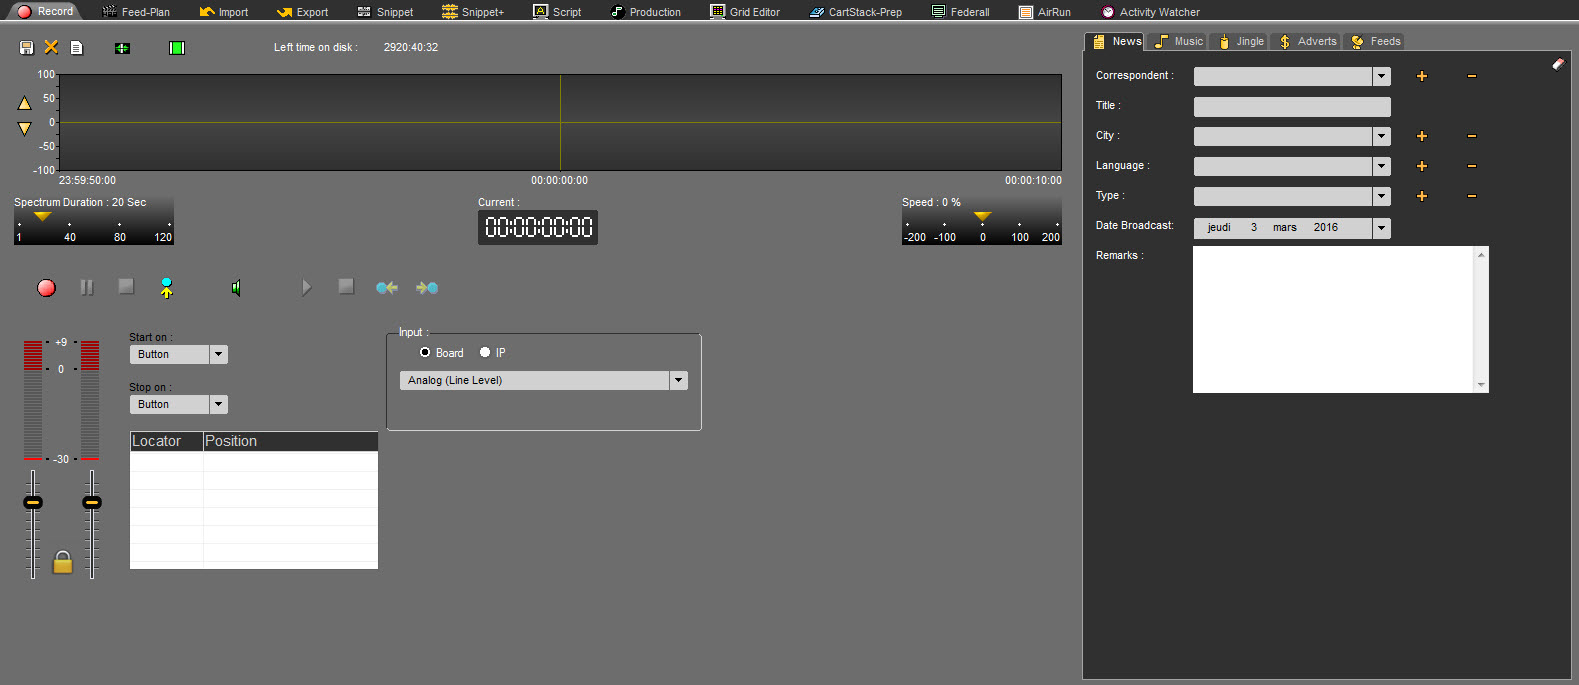
6.5.Recording an item
Click on “Record” Tab.
On the right-hand side of the screen, a card is available to identify the element and find it more easily in the Browser.
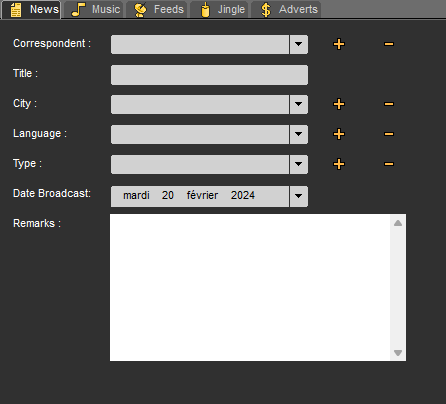
To do this
Select the category/tab in which you wish to save the recording (News, Music, Jingle...).
Enter the information relating to this item (title...).
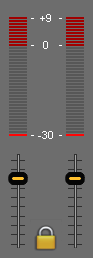
Do a sound test and adjust the levels to prevent saturation. stay in the region of 0 using the vu-meters:
To run the recording, click on "Record" 
NB: When saving, a blue mini vu-meter appears at the tab name.
To put the recording on hold, click on "Pause" 
During this pause, you can listen to what has already been recorded by clicking on the spectrum and then on the button  . The sound is played back.
Click once more on pause  to start recording again.
When your recording is right, click on, "Stop" 
In the right-hand side of the screen :
Select the category of item you have just recorded (News, Music, Jingle, etc.).
Enter the information concerning the item (title, etc.).
Then, save it by clicking on "Save"  .
.
The item is now in the database and you can it find in the Browser section under the chosen category (News, Music, Jingle, etc.). Its status will be "Raw", represented by the following symbol :  .
.
Depending on application settings, it may not be necessary to click on 
 . Saving is automatic at the end of the recording after clicking on .
NB: When a recording is triggered, the item is already present in Browser, under the "All" tab with a question mark, as it is not yet saved or indexed.
6.6.Monitoring
It is possible to monitor the incoming signal through the output of the sound card. Monitoring is controlled by the green "speaker" button.
 Monitoring enabled
 Monitoring disabled
Note: If the audio card used supports standard monitoring mode, RadioAssist will use the it to try to achieve a low latency output. If the driver does not support this mode then RadioAssist will attempt to emulate it in software playthrough mode, which adds some latency. It is therefore recommended to use a card supporting monitoring at driver level for voiceover or voicetracking scenarios.
It is possible to configure the monitoring status by at startup via the following registry key.
[HKEY_LOCAL_MACHINE\SOFTWARE\WOW6432Node\NETIA\Radio-Assist\8.0\Record]
"DefaultIsMute"="No"
6.7.Re-record an item
It is possible to re-record a sound element by overwriting a Raw or Master file in the database.
To do this, select the item to be re-recorded and drag it to the Recording tab.
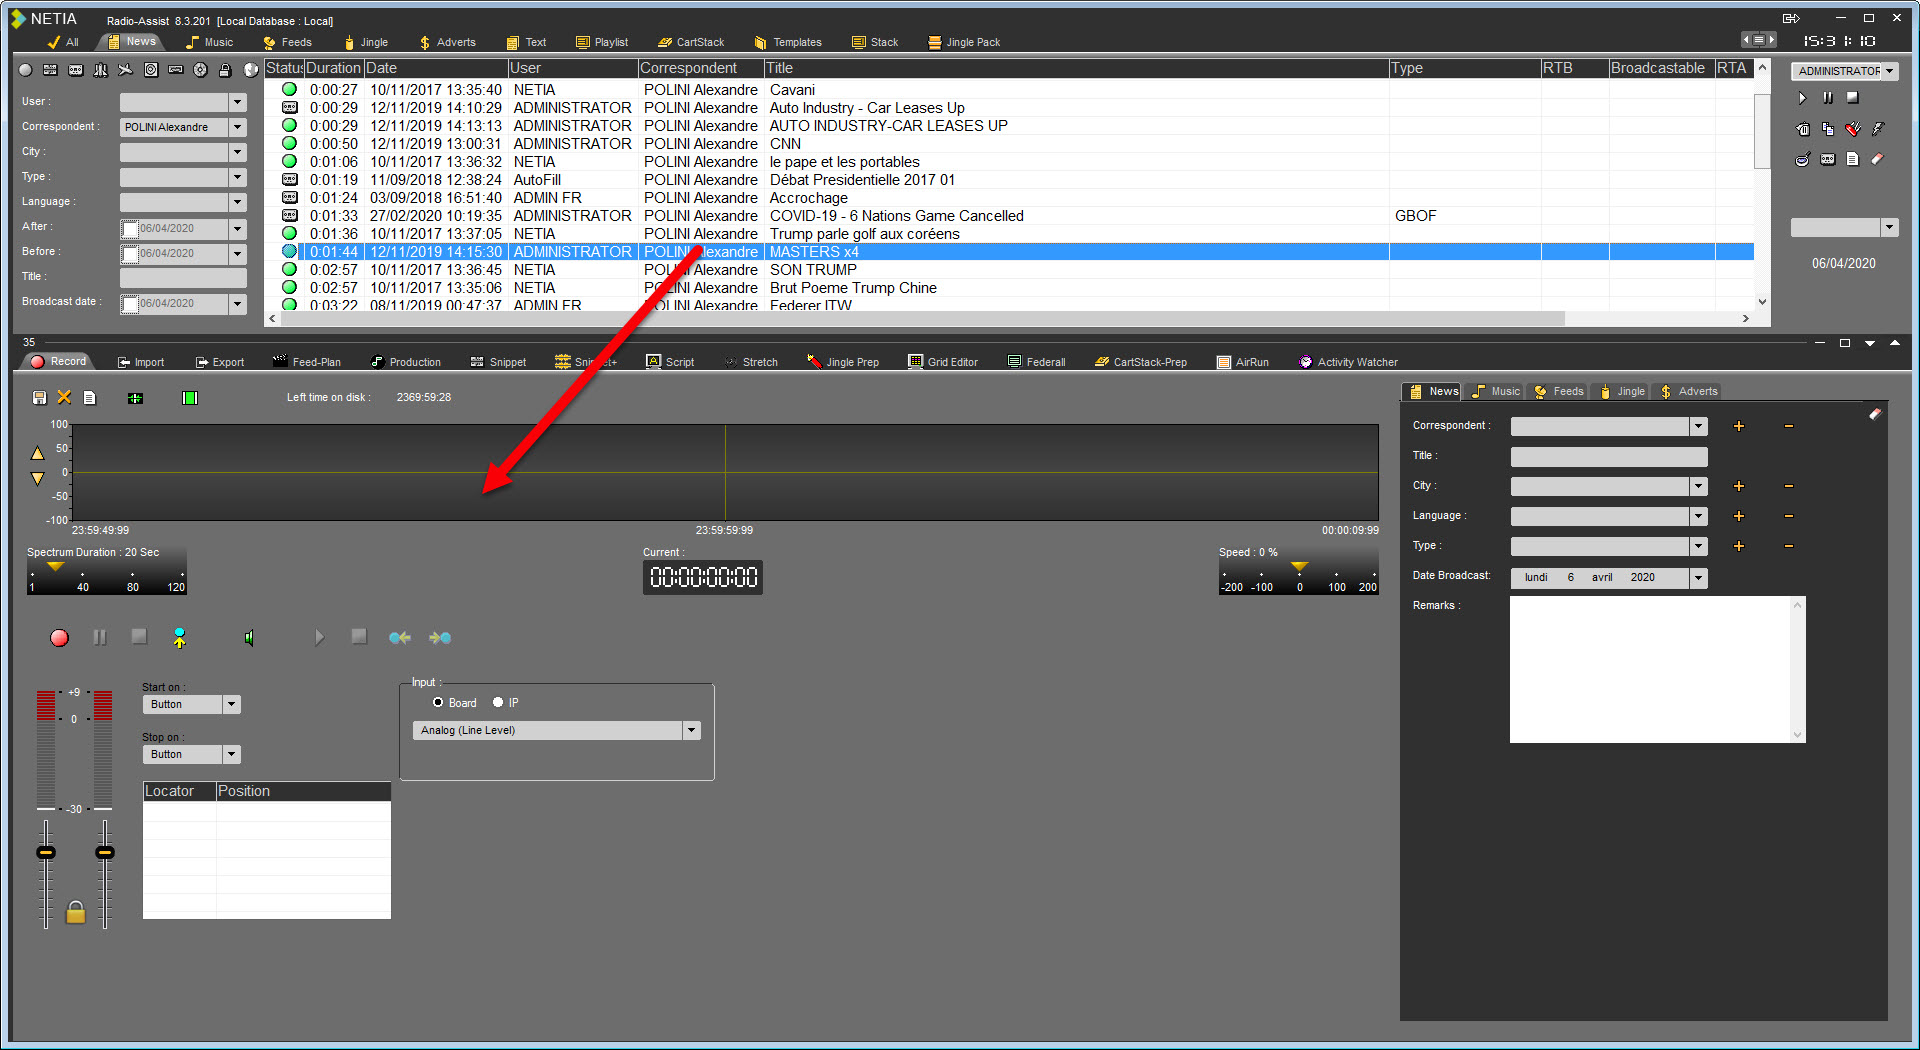
Select the source, define the sound level, the start mode and then start recording.
Once the recording is finished, the new content will replace the old one.
After a refresh of the Browser display, the item has the new duration of the new recording.
In the case of a Master, the Master disappears from the display and becomes a Raw file again.
It is possible to deactivate this feature in the registry :
[HKEY_LOCAL_MACHINE\SOFTWARE\WOW6432Node\NETIA\Radio-Assist\8.0\Record]: "Can ReRecord Item"="No"
6.8.Drop and rename markers (F1)
Markers can be registered by clicking on the "drop a marker" icon, symbolized by the following icon:
 This function is designed to drop markers.
NB : the markers are inserted at the playhead position.

All markers dropped are displayed on the wave form and in the following window as well :
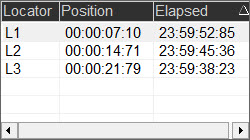
The column "Position" gives the position of the locator in relation to the beginning of the recording.
The column "Elapsed" gives the duration since the last market positioned.
If you want to rename a marker, click on its name ("L1" for instance).
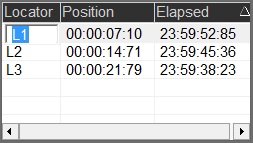
Rename it.
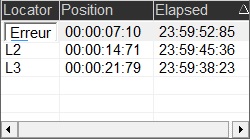
Press "enter" on your keyboard to validate.
Your marker is renamed.
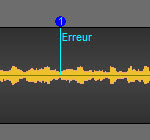
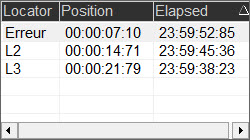
6.9."Edit" function (Snippet)
 The « Edit » function is designed to start editing in the "Snippet" tab while the record is in process. Thus, when you click on « Edit », Radio-Assist switches to the "Snippet" tab. The item is refreshed around every 15 seconds.
IMPORTANT : If you want to go back to the Record tab and back to the Snnipet tab, DO NOT click on the  button, but click on the Snippet tab.
6.10.Using the "Finalize" function
The "Finalize" function is used to delete blanks at the beginning and at the end of the recording. (see Using the "Finalize" function").
To use the "Finalize" function  :
:
Do a record.
Fill in the data.
Click on "Finalize".
If the sound contains dead air at the beginning and at the end, they will be deleted.
NB : The item has the "Raw" status  in the Browser.
6.11.Typing a text
Go to the "Record" tab.
On the right side of your screen, click on the "Text" tab.
A text window is displayed on the left side of your screen.
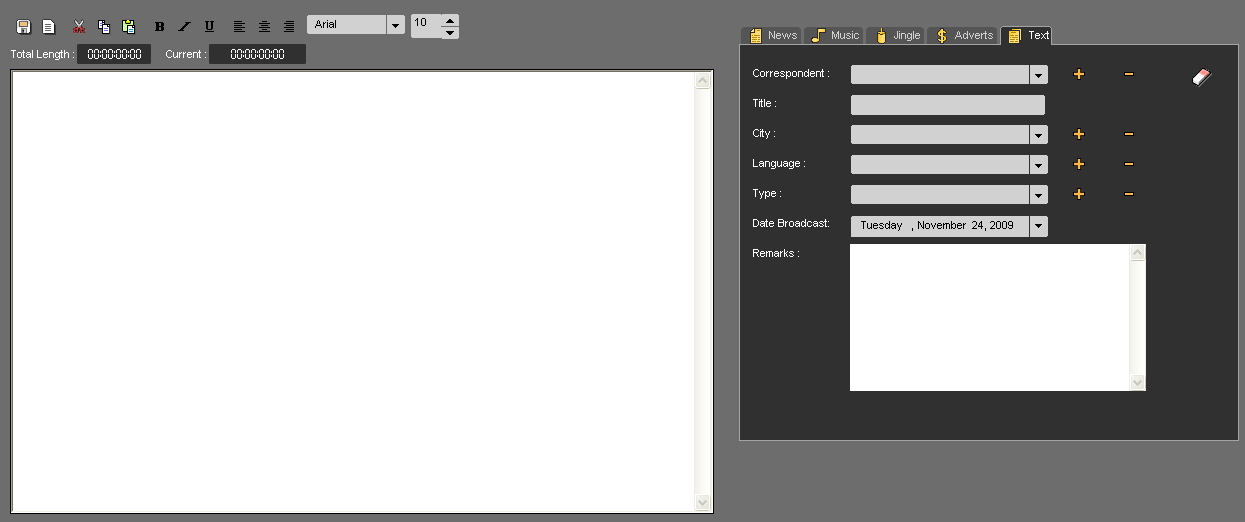
Type your text.
Once your text is typed, enter the associated data to this text.
Then click on "Save".
Your text is saved in the Browser under the "Text" category. Your text has the "Raw" status  .
.
6.12.Difference between the blank page and the red cross
When a record is started, the item is already available in the Browser, under the "All" tab category with a question mark because it is not saved yet.
When you click on the "Red cross" icon  , it means that you delete the recording from the workspace and from the Browser as well.
Whereas the "Blank page" icon means that you have finished your recording (which has been saved) and you want to make a new one.
6.13.Time left on disk
The "Time left on disk" function is designed to know the storage capacity remaining in the database.
In the following example, it remains 18 hours 29 minutes et 20 seconds to store items in the database.

6.14.Keyboard Shortcuts
F1 : Sets locators during recording or listening
F2 : Starts a new recording
Ctrl + S : Saves recording in the database
7.Export
7.1.Workflow
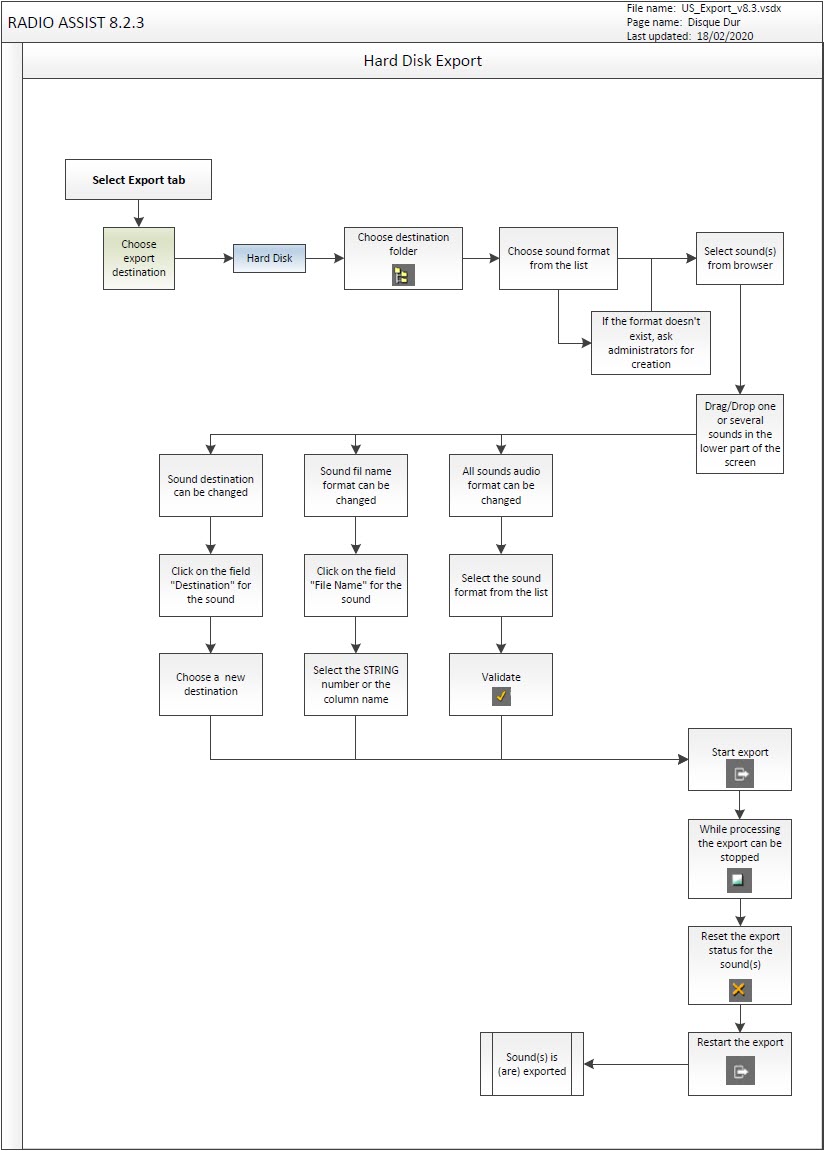
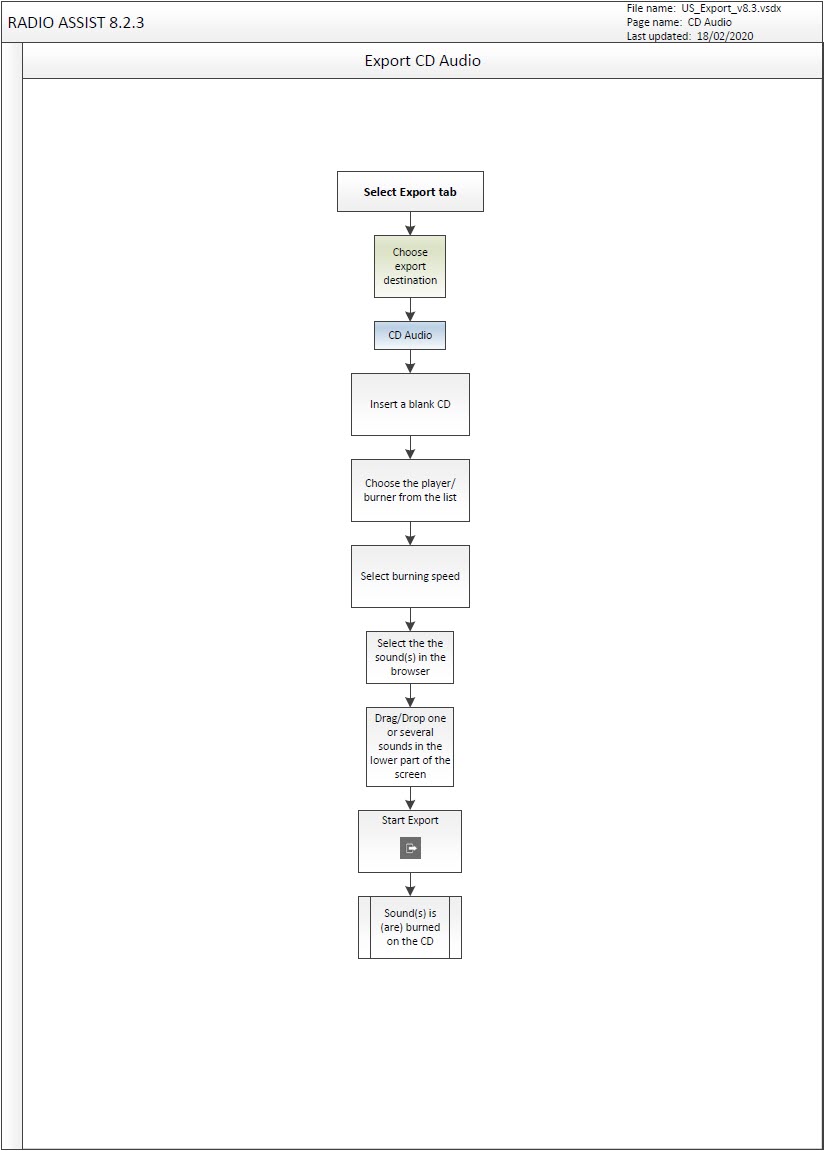
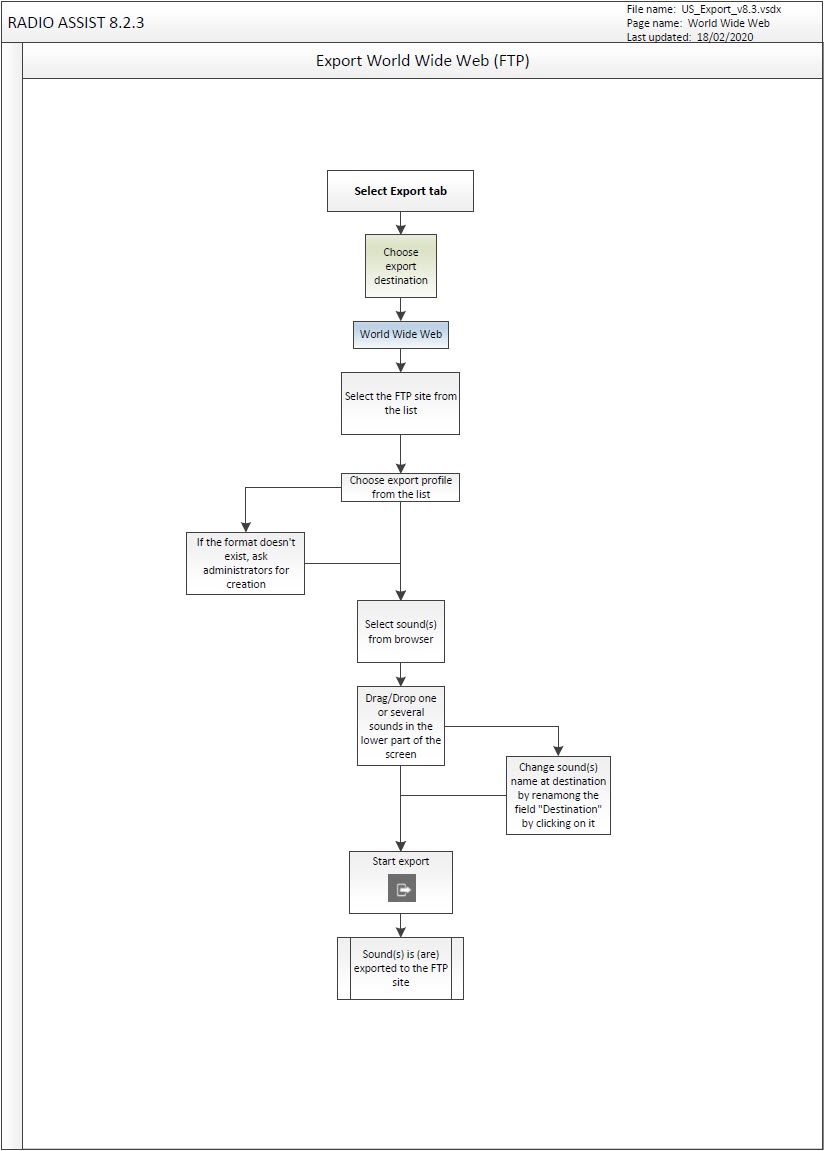
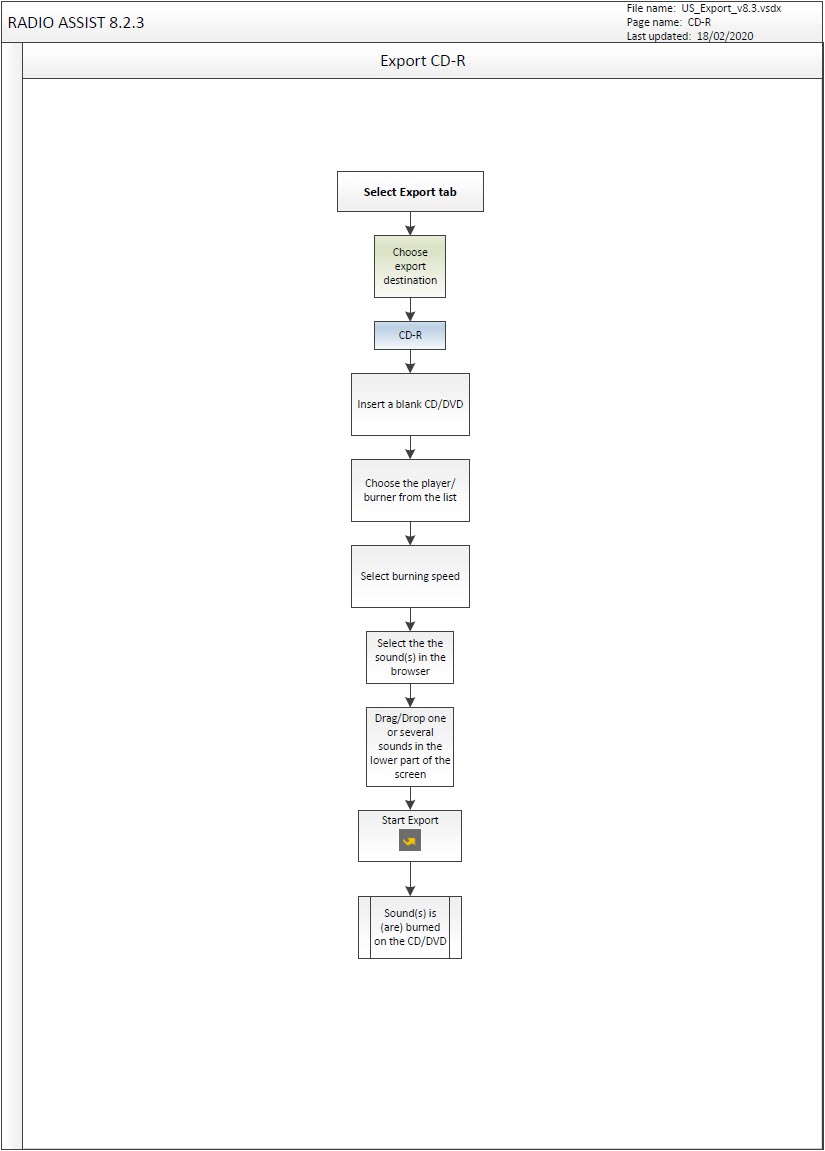
7.2.Export definition
The "Export" tool can be used to export a digital file (sound or text) from the Radio-Assist database to a target on a hard disk, network, CD audio, CD-ROM, DVD-ROM, Internet or .
The "Export" tool is divided into 3 sections :
1. The destination of the export.(Hard Disk, CD, Internet, MiniDisc,…)
2. For a Hard Drive export, the destination folder and the export format to chose from a list.
3. The item list to export.
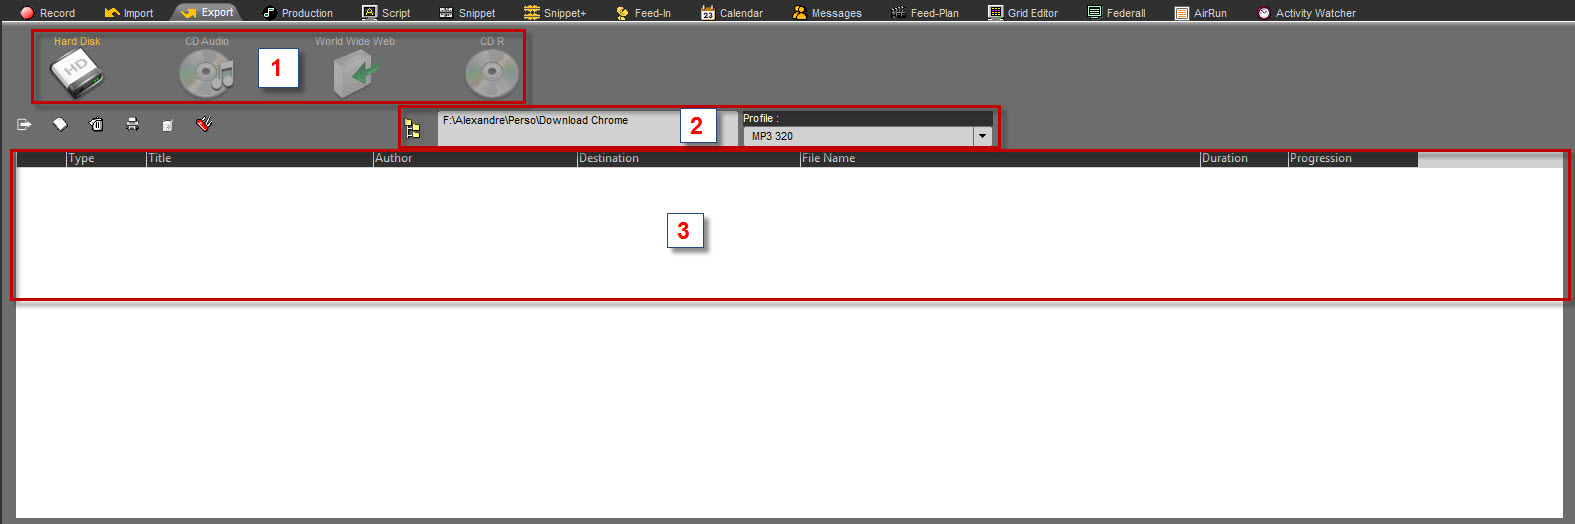
From Radio-Assist 8.11.1, export to hard disk has been modified by adding ‘export profiles’.

An ‘export profile’ includes :
- the destination directory for the exported file
- dynamic file naming parameters
- an audio encoding profile (‘Audio profile’)
For more details, see section 7.4 « Exporting to the hard disk or the network ».
7.3.Audio encoding profiles
The audio profiles are those named and created by the user : once they are defined, they are integrated into the software.
If you have user rights, you can create or modify a profile by clicking on the icon to the right of the ‘Audio profile’ drop-down menu.
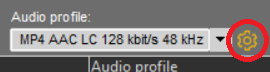
The following window appears :
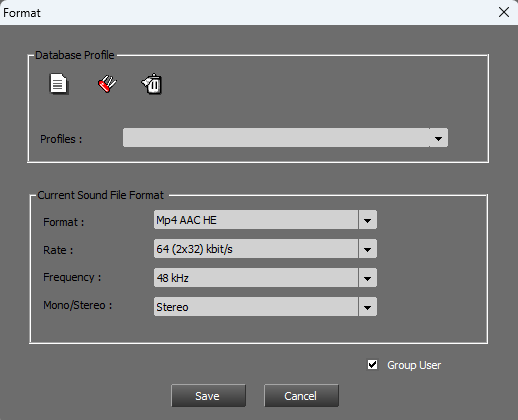
In this window (see above) you can choose to create a new profile or select an existing one.
Profiles : Name of the encoding profile
Format : encoding format corresponding to the profile
Rate : Sample rate given in kbits/s
Frequency : Frequency given in kHz
Mono / Stereo : Number of audio channels you wish to use
Click on the ‘Group User’ box to restrict this audio encoding profile to the current user group.
N.B.: Please note that the scope of ‘export profiles’ is global, which means that an ‘export profile’ cannot contain an audio encoding profile limited to a group of users. If you wish to use your ‘audio profile’ in an ‘export profile’, do not tick the ‘Group User’ box!
To create an audio profile, first click on the icon located in the upper left part of the window 
A window appears :
Enter the name you wish to associate to your profile and click on  .
.
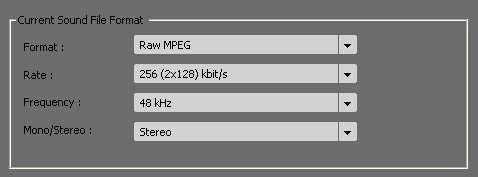
Back to the Format window, choose in the drop-down menu the settings for your Current Sound File Format. Then, clock on  .
.
From now on, the profile that has just been created will appear in the drop-down menu listing all of the existing profiles stored in Radio-Assist.
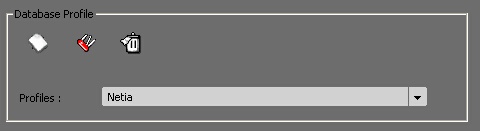
7.4.Exporting to the Hard disk or the Network
NB :The "Hard Disk" export is an Asynchronous export.
It means that you can start an export and still access all the functionality of Radio Assist while exporting.
Click on the ‘Export’ tab.
Select the "Hard-Disk" destination by clicking on it.

The tab then looks like this:

If they have been configured, the easiest thing to do is to choose an ‘export profile’:
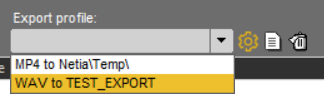
Depending on your user rights, you may not have access to all the options described below. You may only have access to the choice of an export profile: the customisation of export profiles and parameters is subject to these rights.
To manage export profiles, see section 7.6. Create or modify export profiles.
Changing the destination directory for files:
To the right of the ‘Export path’ field, click on the ‘directory’ icon  to change the destination of your export.
The Windows explorer is displayed. Select the directory where you want to export.
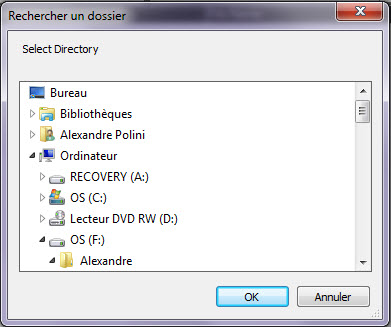
Change the name of the exported file:
Click on the button to the right of the ‘Dynamic file name’ field to access the ‘Dynamic file name editor’ dialog box:
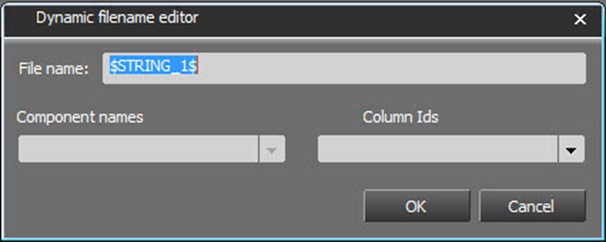
For details, see paragraph 7.5. Rename files to be exported
Then, choose your export audio format in the drop-down list.
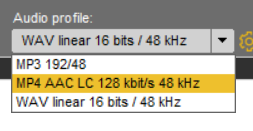
Drag and drop from the Browser to the export list the items you want to export or double-click on the item of the Browser. Items are displayed in the export list.

To modify the export profile or all the export parameters for all or a selection of items already in the list, click on the icon  at the far right of the tab (after the various parameter fields):
- If no item in the list is selected: the change applies to all items in the list.
- If one or more items in the list are selected: the change applies to the selected items.
If the export parameters of an item already exported from the list are modified, its status in the ‘Progression’ column is reset and it will be exported again the next time the export is launched.
Once items are ready, click on  .
.
Export starts. When done, all items exported will have their progression bar at "100" and green.
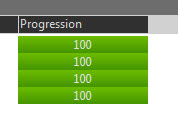
N.B.: It is also possible to launch an export individually by double-clicking in the ‘Progression’ column.
7.5.Rename files to be exported
This feature will allow you to define what would be the name of the exported file in the destination folder. It will use the different columns of the database (name, title, etc...)
IMPORTANT : This feature is only available for the "Hard Disk" export.
To define which columns to use to rename the file(s), click on the icon to the right of the ‘Dynamic file name’ field (or in the ‘File name’ column for an individual item in the list).
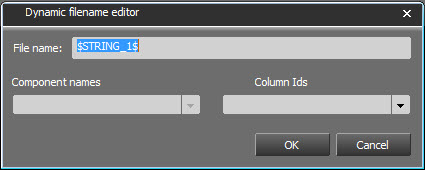
You can select either the "Component names" or the "Column Ids"
Component names :
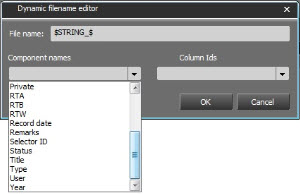
Column Ids :
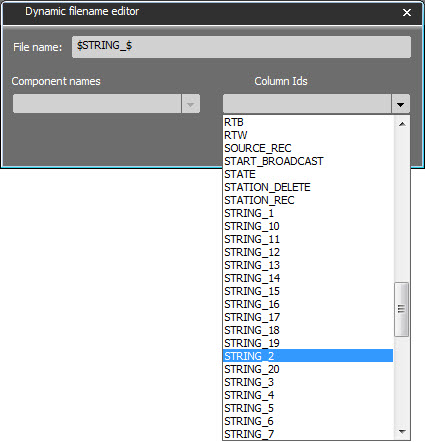

Here, you will have "Name of the item" - "Title of the item"
This selection will be applied to all the items drag and dropped for export.
If you want to modify only one item in the liste, just click on the item on the "File name" column and it will open the same window :

Make the modifiactions and click on 
The modification is done.
7.6.Create or modify ‘export profiles’
Depending on your user rights, you may not have access to export profiles customization.
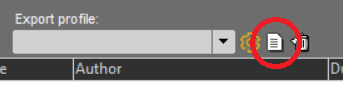
To create an export profile, click on the second icon to the right of the ‘Export profile’ drop-down menu. The ‘New export profile’ dialog window opens, with the current parameters displayed in the ‘Export path’, ‘Dynamic file name’ and ‘Audio profile’ fields.
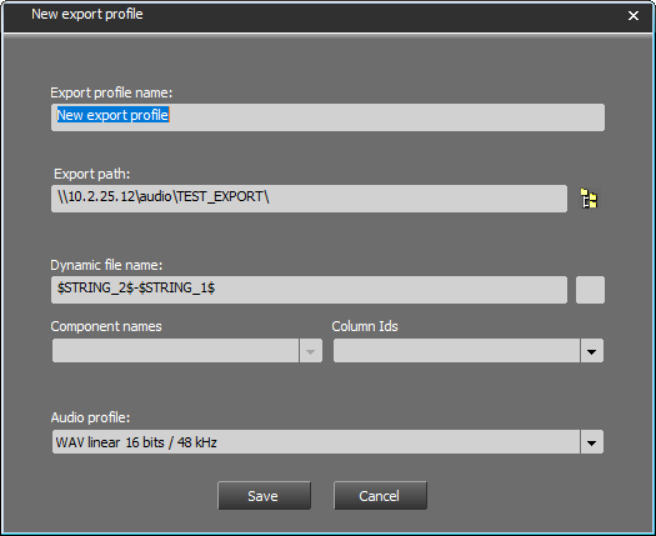
The dialogue box allows you to choose a name for this profile and modify its various parameters (for details of how the ‘Dynamic file name’ works, see section 7.5. Renaming files for export). Once you have completed your settings, click on ‘Save’.
N.B.: Only audio profiles accessible to all users are available in the ‘Audio profile’ drop-down menu. As the scope of ‘export profiles’ is global, it is not possible to create an export profile with an audio profile restricted to certain users.
See paragraph 7.3 ‘Audio encoding profiles’ for more details.
To modify an export profile, select it from the drop-down menu, then click on the first icon to the right of the drop-down menu.

The ‘Modify export profile’ dialogue box opens with the profile parameters. It is similar to the profile creation window and allows you to modify the various parameters. Once you have completed your settings, click on ‘Save’.
To delete an export profile, select it from the drop-down menu, then click on the third icon to the right of the drop-down menu. You will be asked to confirm the deletion:
7.7.Exporting to an audio CD
Select the "CD Audio" destination by clicking on it.

NB : do not forget to insert your CD in the CD-Burner.
Drag and drop from the Browser to the export list the items you want to export or double-click on the item of the Browser. Items are displayed in the export list.
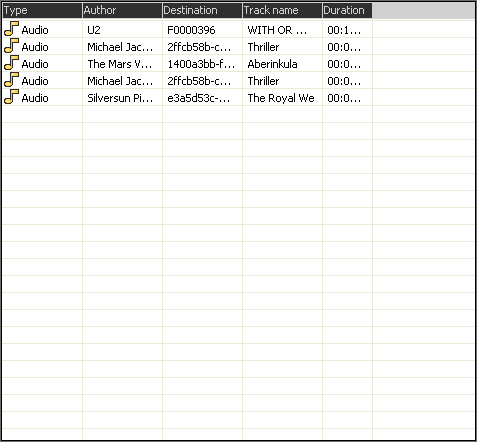
Once items are ready, click on  .
.
Export takes place and, when it is over, a message will inform you of the number of items exported.
7.8.Exporting to a CD-ROM/DVD-ROM
Select the "CD R" destination by clicking on it.

NB : do not forget to insert your CD in the CD-Burner.
Drag and drop from the Browser to the export list the items you want to export or double-click on the item of the Browser. Items are displayed in the export list.

Once items are ready, click on  .
.
Export takes place and, when it is over, a message will inform you of the number of items exported.
7.9.Exporting to an FTP site
Select the "FTP" destination by clicking on it.

Drag and drop from the Browser to the export list the items you want to export or double-click on the item of the Browser. Items are displayed in the export list.

Select the FTP site where to export from the list : 
Select the format in the list 
Once items are ready, click on  .
.
Export takes place and, when it is over, a message will inform you of the number of items exported.
7.10.Configuring an FTP site
Before importing from an FTP site or exporting to an FTP site, you have to configure the FTP settings, by filling it out the following information :
Click on 
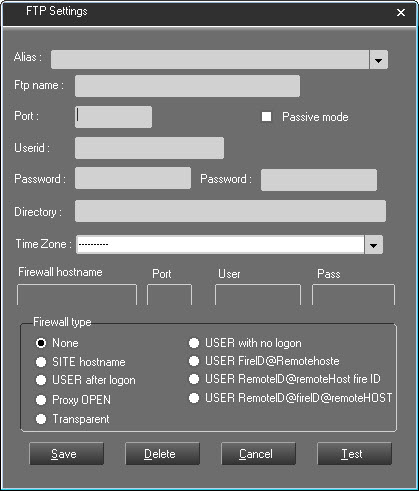
Alias : server name.
FTP name : name fo the FTP site to reach.
Port : Port defined for uploading FTP.
Passive mode : functionning mode of the FTP server. If the server works in a passive mode, the client (FTP import) must be configured in a passive mode.
Userid : user name with rights to be connected to the FTP site.
Password : password giving the right to access to the FTP site.
Directory : directory where files are stored.
Time Zone : Select the time zone of the source FTP server
Firewall Hostname : filter avoiding to access to the FTP site.
Port : defined port.
User : user name.
Pass : password.
Firewall type : list of the available firewalls.
Once done, click on "Save".
7.11.Export file formats
You can export in the following formats :
MUSICAM
RIFF WAVE
RIFF WAVE + BWF
AIFF
ADPCM
REAL AUDIO G2
WMA
LAYER2
MP3
FLAC
AES31-3, EDL only or AES31, EDL + audio file
FLACAUDIO G2
7.12.The available export destinations
The different export destinations available are :
Hard Disk or network (click on the "directory" icon and select the directory where the items that you want to export are stored).
CD-ROM (via the Hard disk)
(via the Hard disk)
DVD-ROM (via the Hard disk)
7.13.Deleting the export list
To delete the export list :
Click on  .
.
7.14.Deleting an item from the export list
To delete an item from the export list :
Select the item to delete.
Click on  .
.
The item disappears from the list.
7.15.Printing out the export list
To print out the export list, click ont the "printer" icon.

Print example :

8.Federall
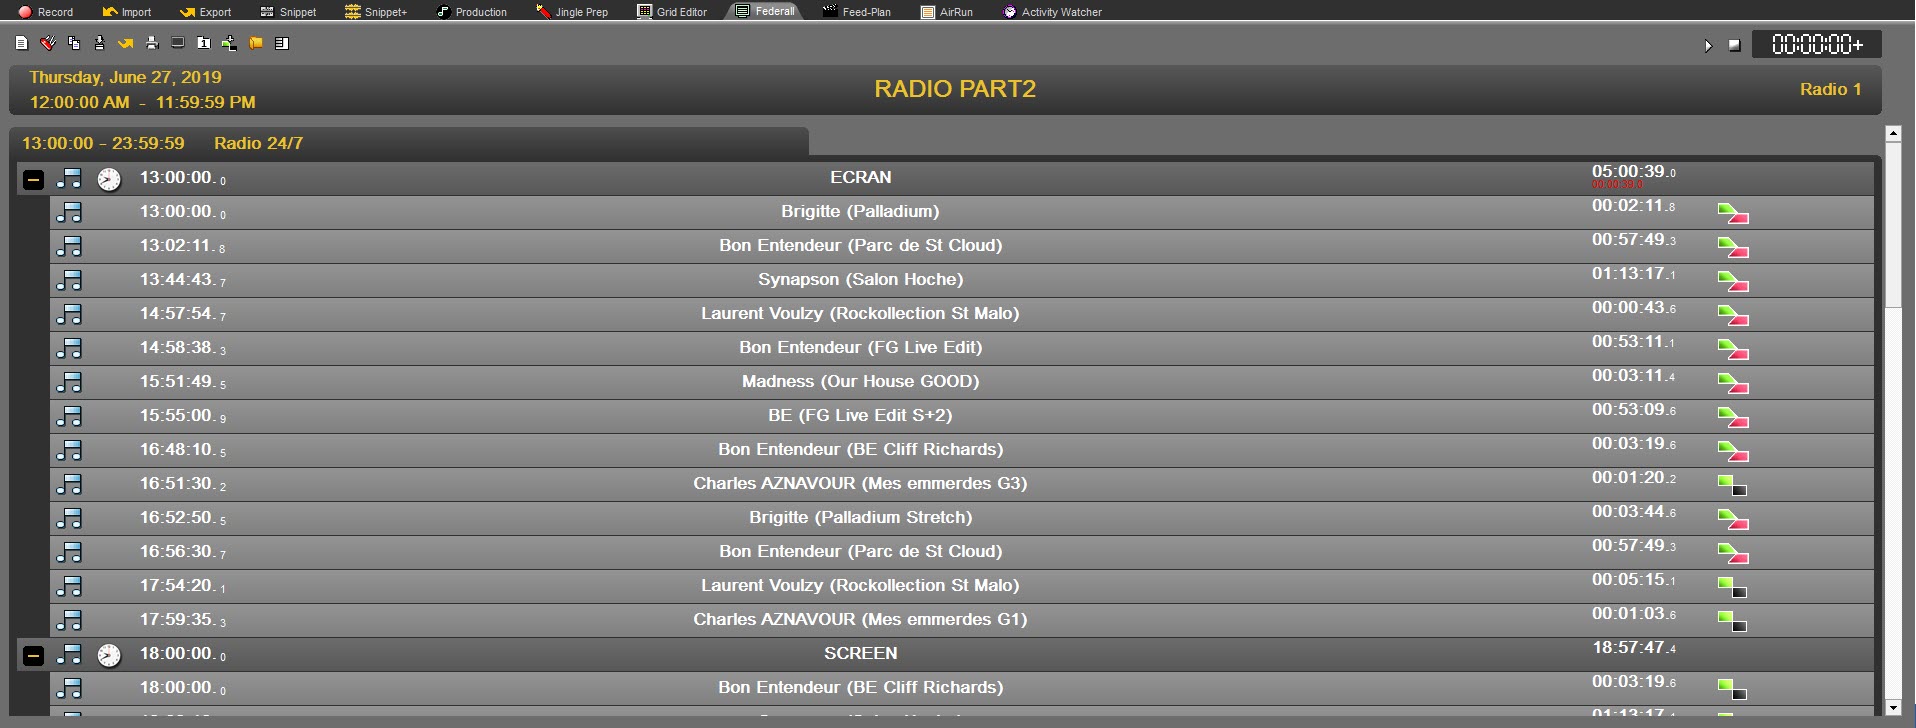
8.1.Workflow
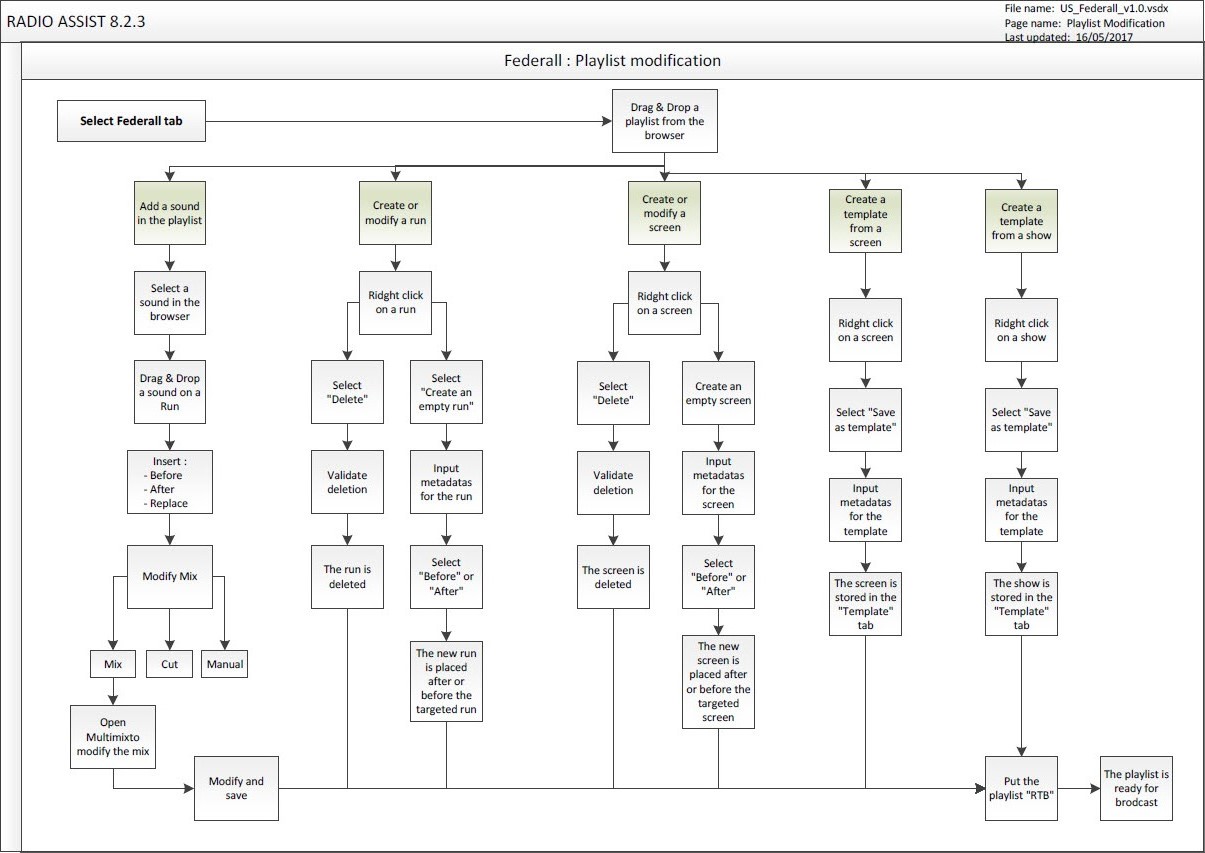
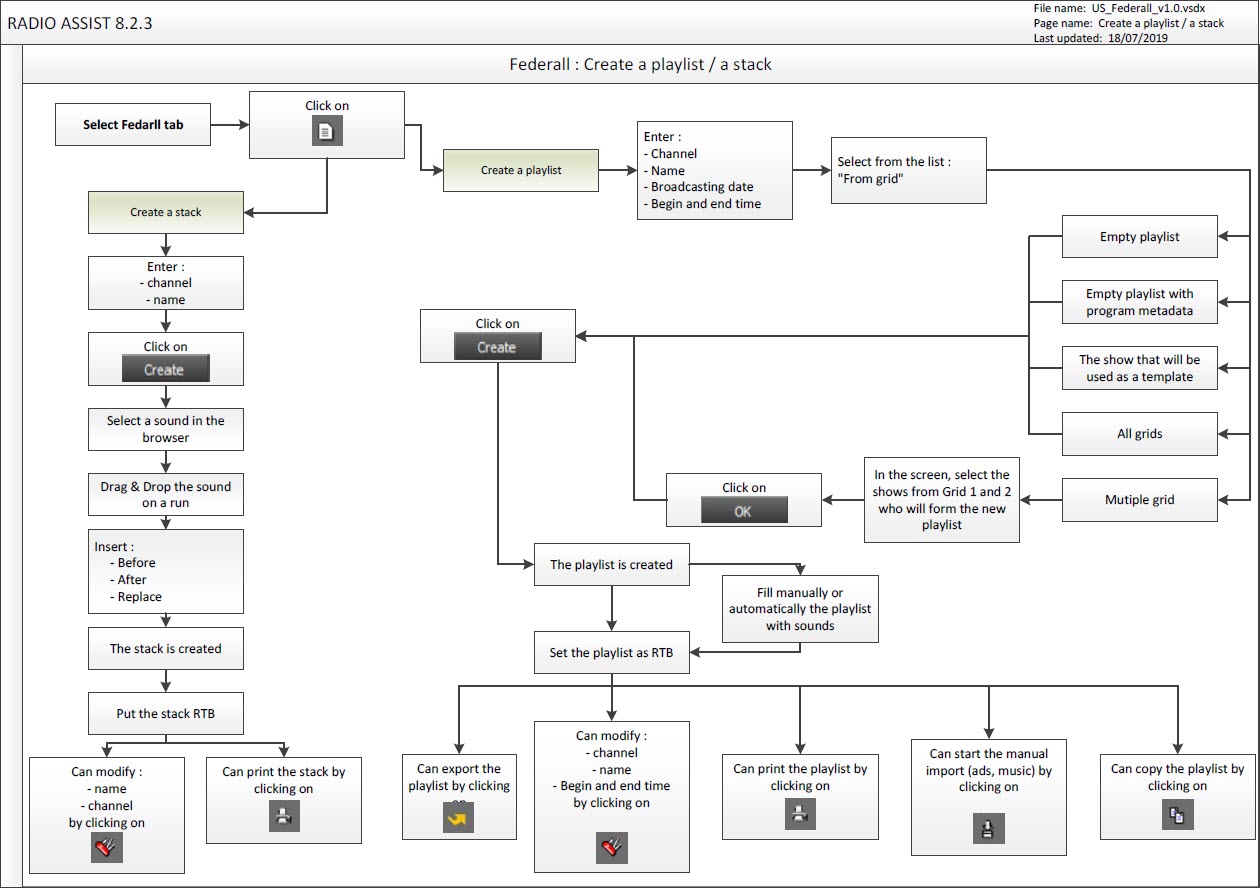
8.2.Federall definition
The "Federall" tab is a tool designed to create and modify playlists and stacks. It is the very last step before broadcast.
You can modify old playlists and stacks or new ones previously created in "Grid Editor".
Federall is used to :
Load sound files into playlists and stacks.
Create and modify playlists and stacks by adding, deleting or replacing.
Define the broadcast mode of screens in playlists.
8.3.Screen
A screen is a folder which contains one or several steps or runs and which will be broadcast consecutively. A screen is represented by a "folder" icon.
8.4.Step (Event)
A step (or event) is a sub-folder which is located in a screen.
Example : a template named "News" contains steps for each type of news : "International news", "National news", "local news" etc.
8.5.Playlist
A playlist is a series of scheduled sound and/or text items for broadcast at a specified time.

8.6.Stack
A stack is a series of non-ordered sounds which are available for the technician to use for on-demand broadcast (e.g., a set of jingles is prepared in a broadcast stack and can be played at any time).
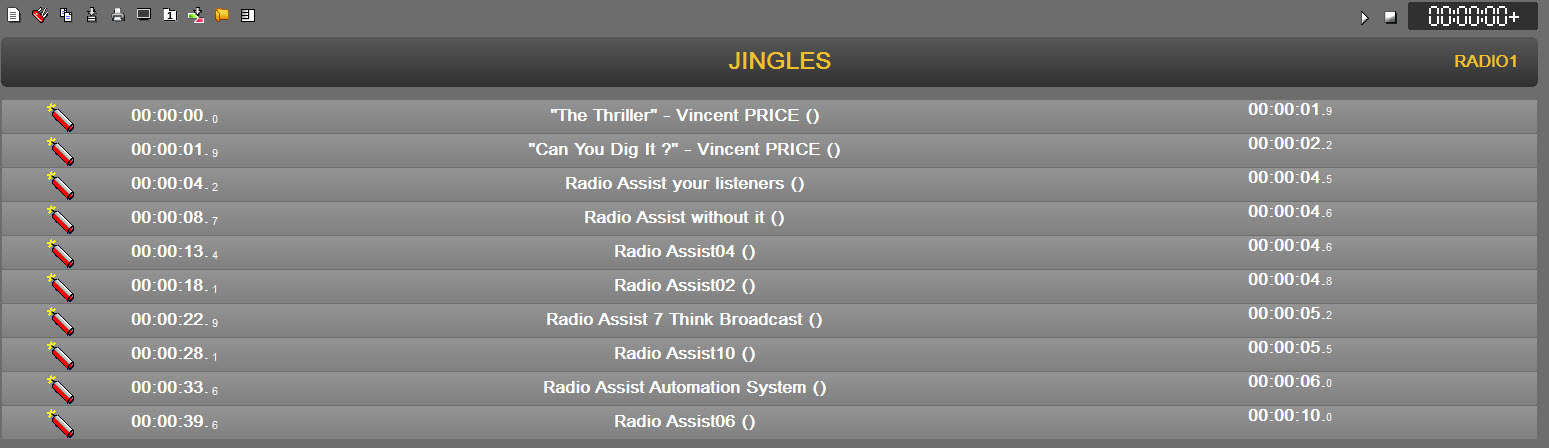
8.7.Creating a playlist
Click on the « Federall » tab.
Then, click on the "Create" icon.

A window will appear :
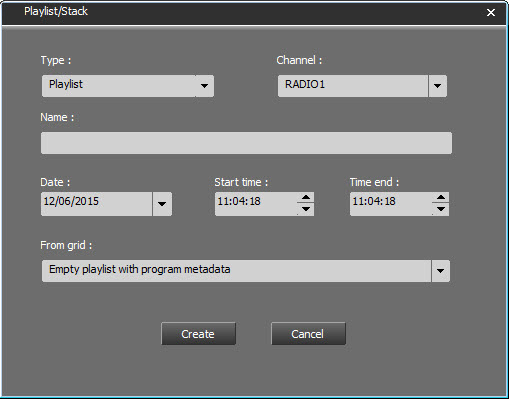
In the "Type" field, choose "Playlist".
In the case of multi-channel management, select for which channel the pipe will be created.
Choose the day for which you want to create your Playlist thanks to the calendar.
In the "From grid" field :
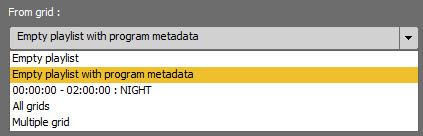
You retrieve all time slots created thanks to the "Grid Editor" tool. Five choices are available :
Empty Playlist : In this case, the Playlist is empty (for special day. Ex : Christmas) and you have to fill in manually all other parameters.
Empty playlist with program metadata : In this case when you choose a time slot, all parameters are filled in automatically.
Create a Playlist from an existing time slot created in Grid Editor. The playlist will be created with all the parameters from this time slot.
Alll grids : The playlist will be created with all the time slots from the grid #1.
Multiple Grids : By selecting this option, a new window opens : Select from Grid 1 or 2 the time slots you want to add :

Click on OK.
The playlist will be created with all the selected time slots
Click on  .
.
The created Playlist is available in the "Federall" tab and the Browser as well, under the "Playlist" category.
8.8.Copying a playlist
In the Browser, select the Playlist to copy and drag it down in the "FederAll" tab.

In the "Federall" tab, click on the "Copy" icon .

Modify the name or date and time or choose another channel (in case of Multi-Channel management) if needed.
Click on  .
.
Your Playlist is copied. It is available in the "Federall" tab and the Browser as well, under the "Playlist" category.
8.9.Modifying a playlist
In the Browser, select the playlist to modify and drag it down in the "FederAll" tab.

In the "Federall" tab, click on the "Modify" icon  .
.
Modify the parameters (day, time, channel...).
Click on  .
.
Your playlist is modified. It is available in the "Federall" tab and the Browser as well, under the "Playlist" category.
8.10.Export a playlist
It is possible to export the playlist to an xml file for other uses.
To do this select the playlist in the Radio Assist Browser and drag it to the Federall tab.
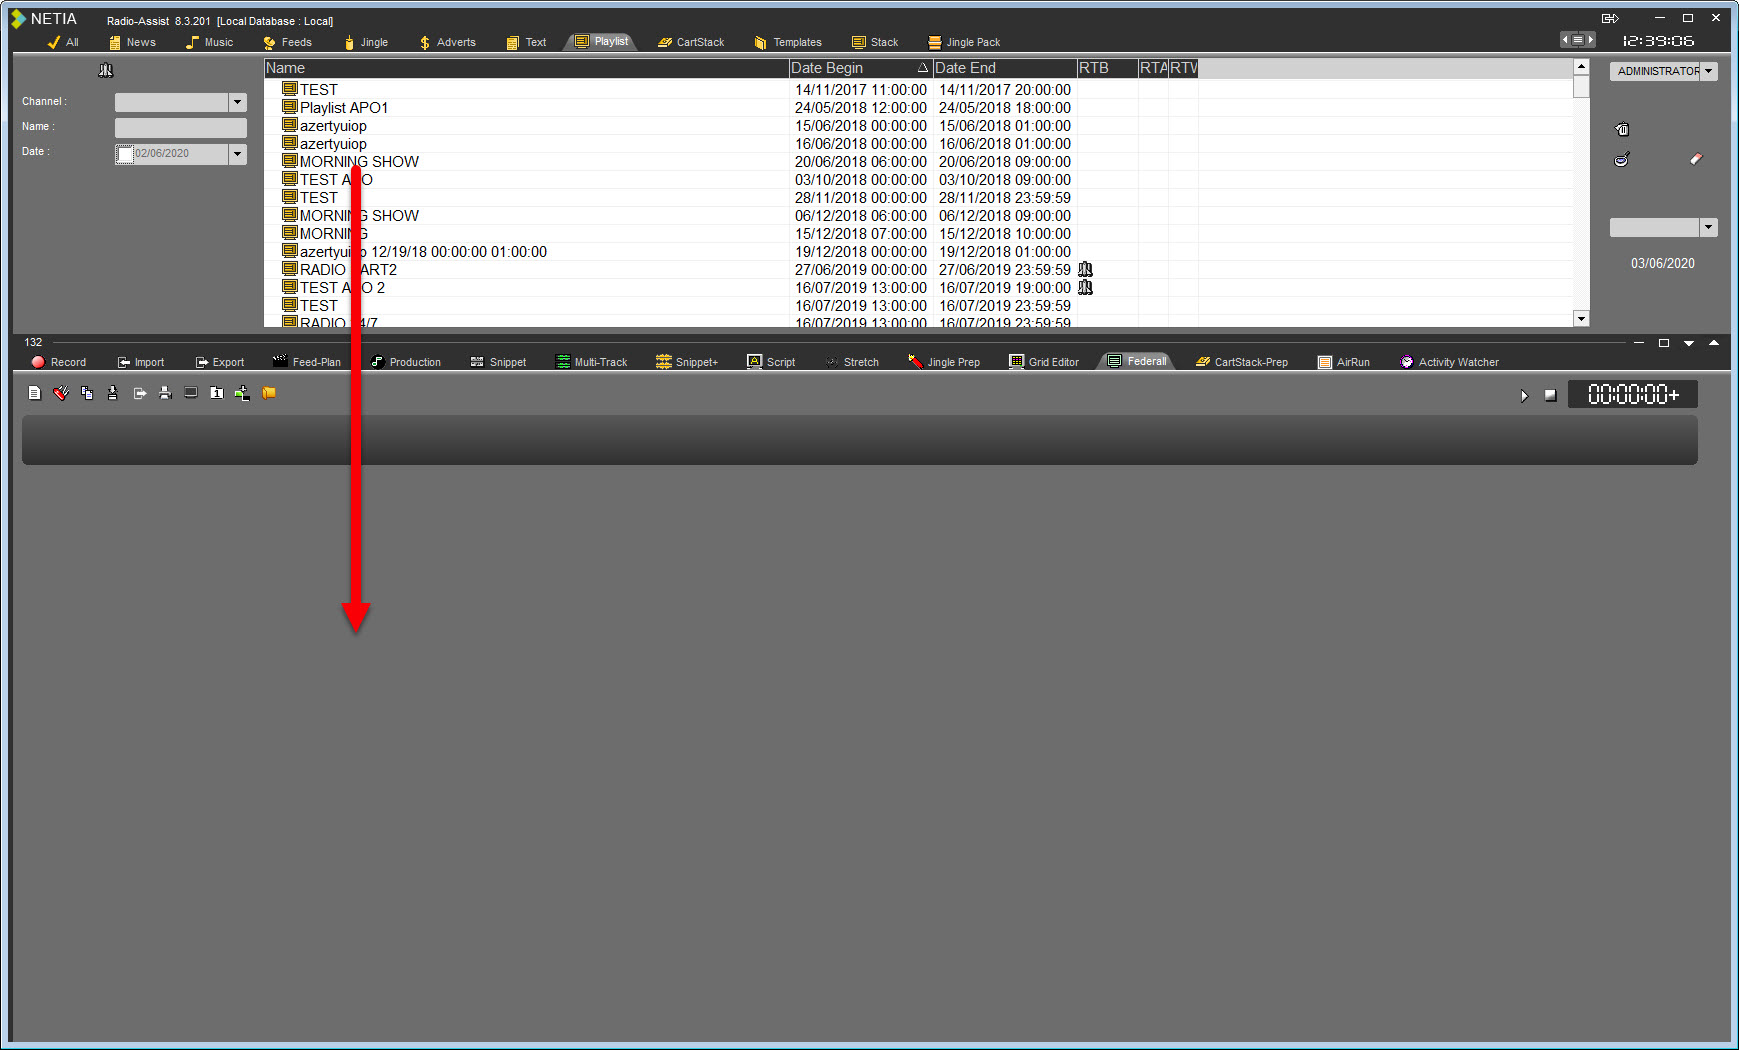
Once the playlist is loaded, click on  .
.
A window opens:
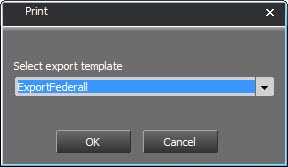
Select from the list the export format to use.
These formats will have been created by the administrator before.
Click on  .
.
The export is done and a message warns you of its realization.
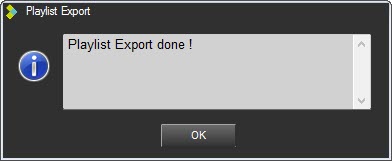
Click on  .
.
The xml file is in the folder defined when the export was created.
8.11.Manual Import
The import of third party software items (add and/or music scheduling) into the playlist can be done automatically via Federal Service.
It can also be done manually, on demand, by clicking on the button .
The following window opens:
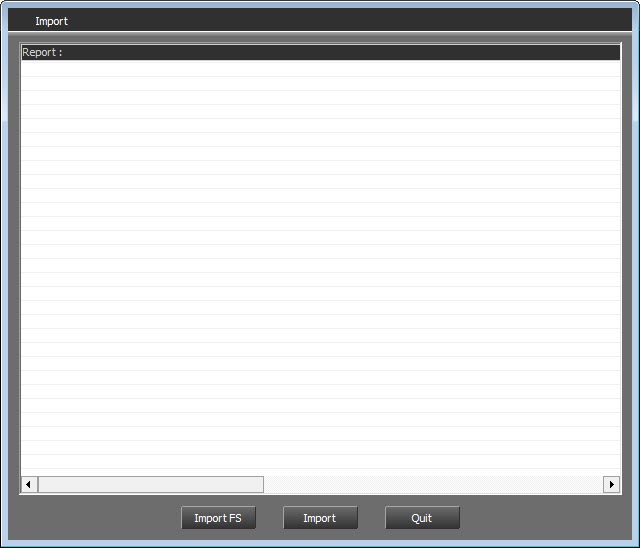
2 import choices are available:
 : This button is used to restart Federall Service and the parameterized imports. This will start the import from any workstation.
OU
 : This button will launch an import attached to the loaded playlist.
8.12.Metadata Items
It is possible to create Metadata items.
These elements make it possible to add additional information at the screen level.
This information is saved in the database and allows to enrich the Datacasting.
8.12.1.Create and add a Metadata item
To create a Metadata item, in the Browser click on  on the right of the screen
The following windows opens :
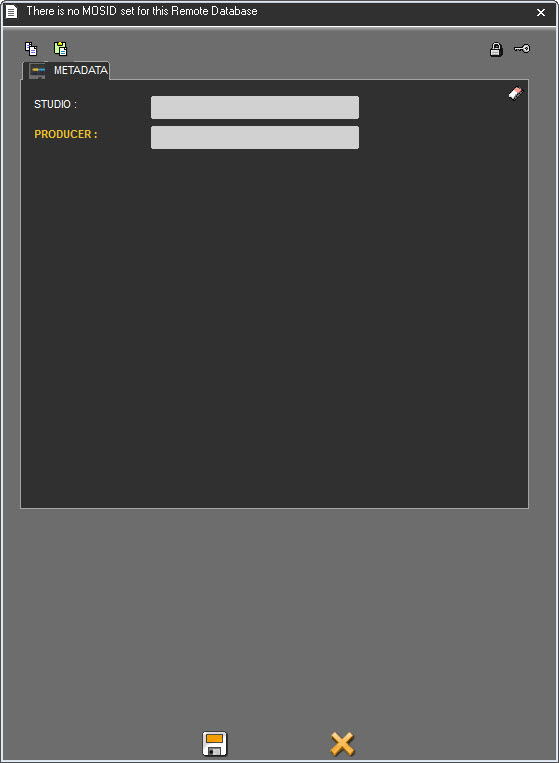
Enter all the informations and click on  .
.
The item is created in the database with the icon  .
.

Once the item is created, it can be added to a screen.
IMPORTANT: These items created in the database will be used as "ORGINAL".
That is, whenever an original item is added in a playlist or a playlist is generated using an original, a copy will be created in the database but without an icon in the browser.
To add a Metadata item, load a playlist the drag and drop an item on a screen.

Once dropped in the playlist, we see that a new item has been created in the browser, but without the icon  .
.
This means that each time an original item is used, as many new elements as use will be created.
An original that will serve to create as many different metadata depending on the screens.
If you drag and drop an item on a screen where an item is already present, it will be possible to replace the existing element.
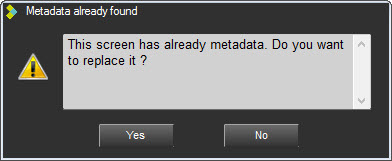
Clicking YES will replace the item and create a new item in the database.
8.12.2.Modify a Metadata item
To modify a Metadata item, right clic on the icon  and right click.
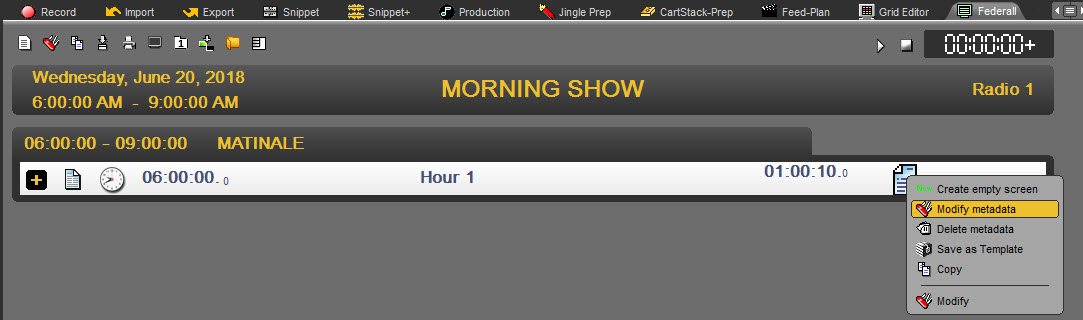
Select "Modify Metadata".
The following window opens :
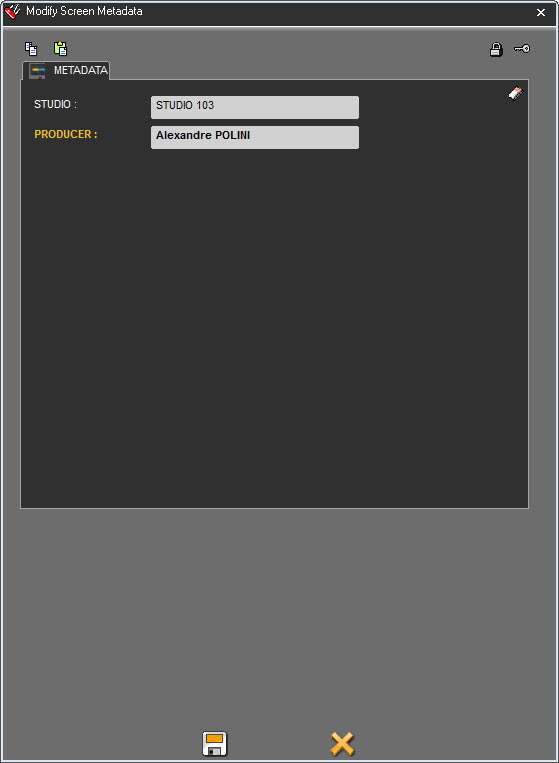
Make the modifications and click on  .
.
Metadatas are saved.
8.12.3.Delete a Metadata item
To delete a Metadata item, right clic on the icon  and right click.
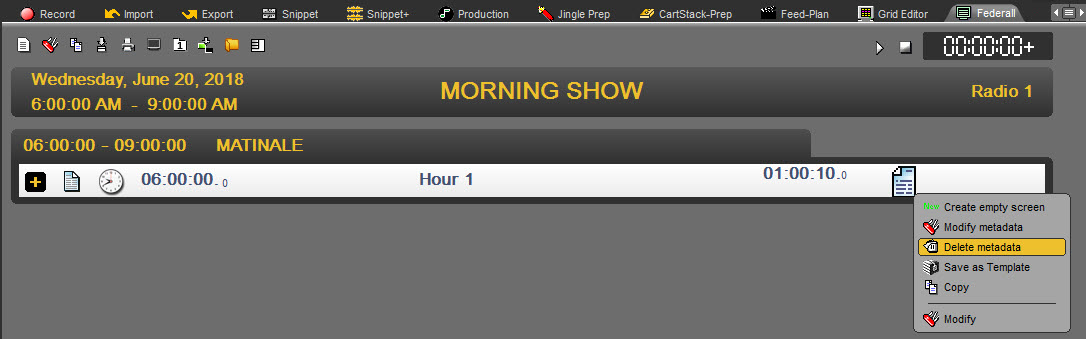
Select "Delete Metadata".

Click on YES.
Metadatas are deleted from the screen.
8.13.Deleting a playlist
In the Browser, go to the "Playlist" category.
Select the playlist to delete.
Either do a right click on it, the "Delete" function is displayed, or click on the "trash can" icon  available at the right side of the Browser.
A message to confirm the deletion is displayed. Click on "YES" to confirm the deletion or "NO" to cancel the action.
Attention : it is not possible to delete a playlist with the RTB validation (you must remove the validation first).
8.14.Filling in a playlist
In the Browser, select the audio and/or text items and insert them by drag and drop.
You can insert :
before a screen (break)
after a screen (break)
before a step (event) (you have to open the screen (break) first)
after a step (event) (you have to open the screen (break) first)
Or, you can replace a step (event).
IMPORTANT : In order for the playlists to play automatically one after the other in AirDDO in "Full Auto" mode, there must be at least 3 STEPS/RUNS in the playlists.
8.15.Creating a stack
Click on the "Federall" tab.
Then, click on the following icon.

In the "Type" field, choose "Stack".
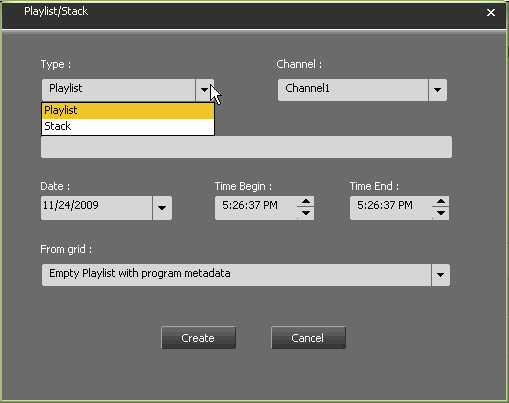
As a stack does not have any broadcast date or time, these fields are not shown.
Type the stack name.
Click on  .
.
The created Stack is available in the "Federall" tab and the Browser as well, under the "Stack" category.
8.16.Load a stack
From the browser select a stack
Drag and drop the stack in Federall
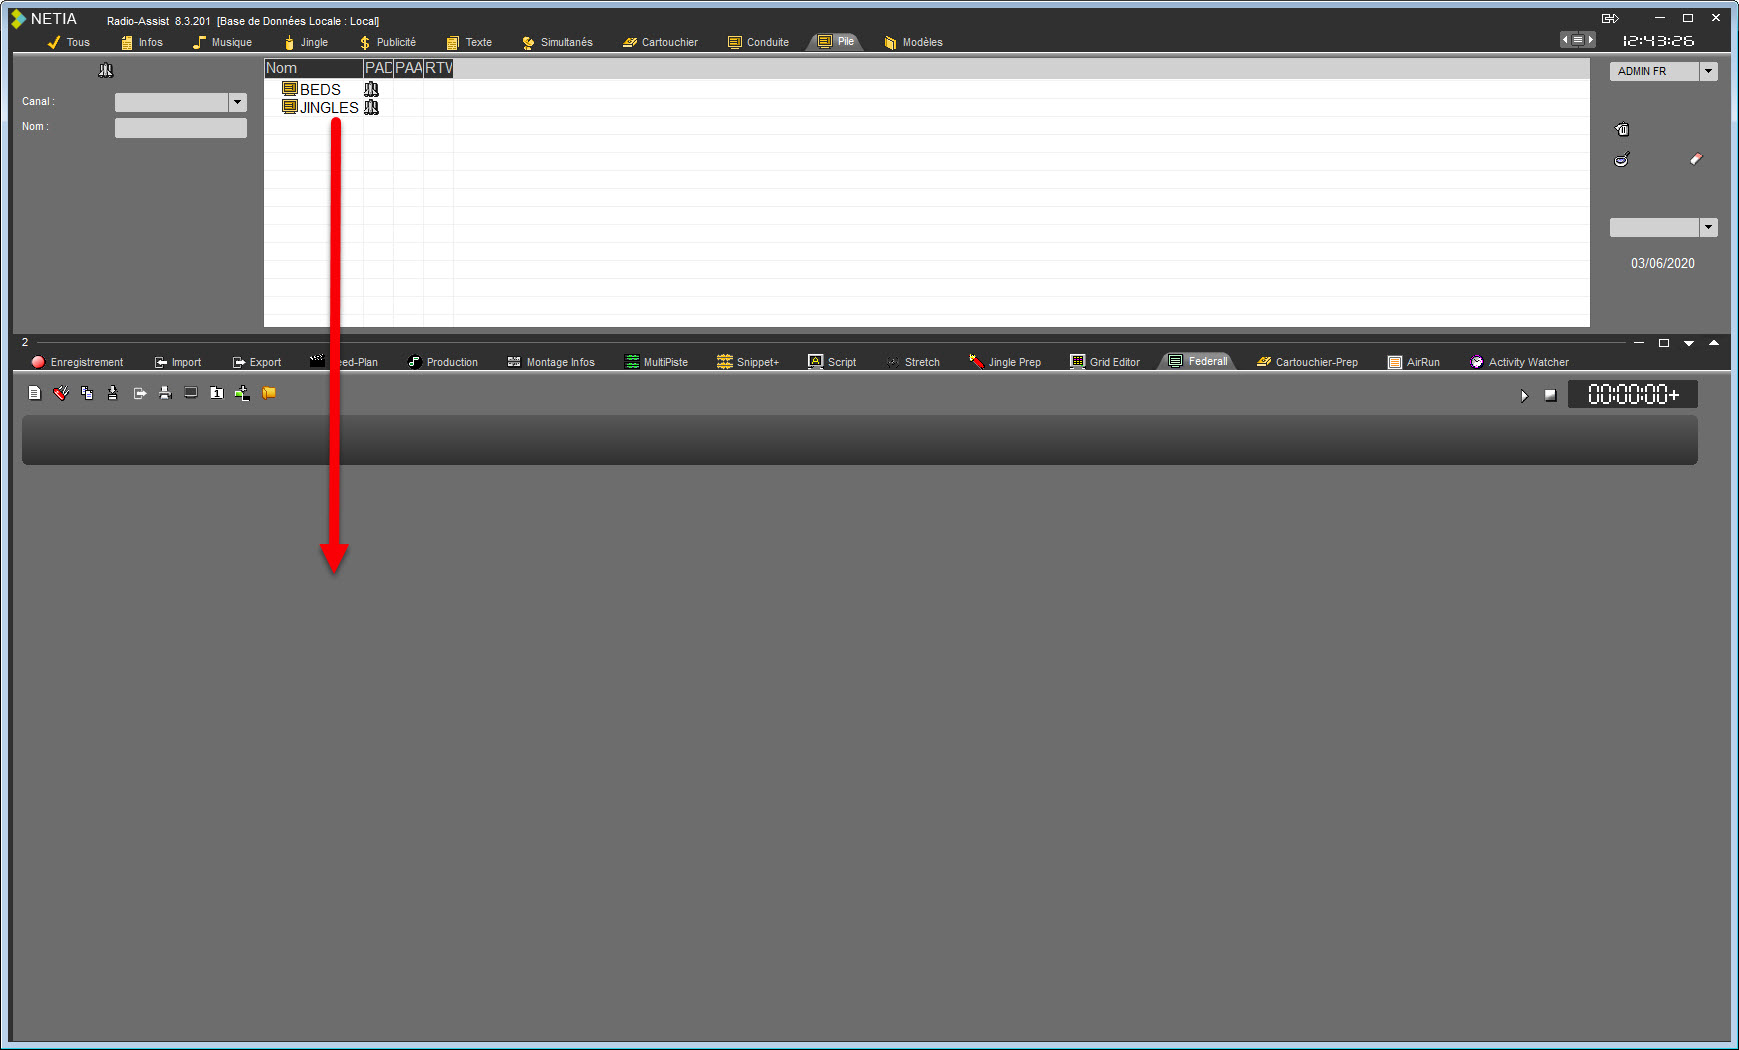
The stack is loaded.
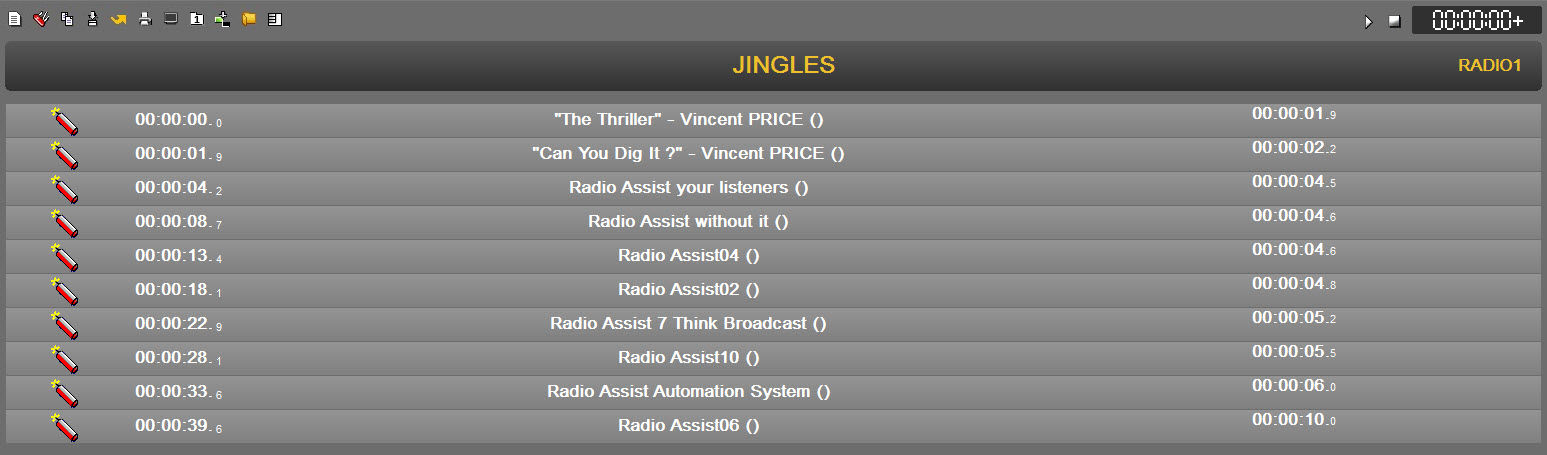
8.17.Fill a stack
After the stack has been charged :
Select in the Browser the sound or text element and insert them by drag and drop.
You can instert element by :
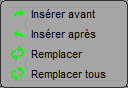
Before a sound,
After a sound,
Replace a sound,
simultaneous replacement of several identical sounds.
8.18.Copying a stack
In the Browser, select the stack to copy and drag it down in the "FederAll" tab.

In the "Federall" tab, click on the "Copy" icon.

Modify the name or choose another channel ( in case of Multi-Channel management) if needed.
Click on  .
.
Your stack is copied. It is available in the "Federall" tab and the Browser as well, under the "stack" category.
8.19.Modifying a stack
In the Browser, select the stack to modify drag it down in the "FederAll" tab.
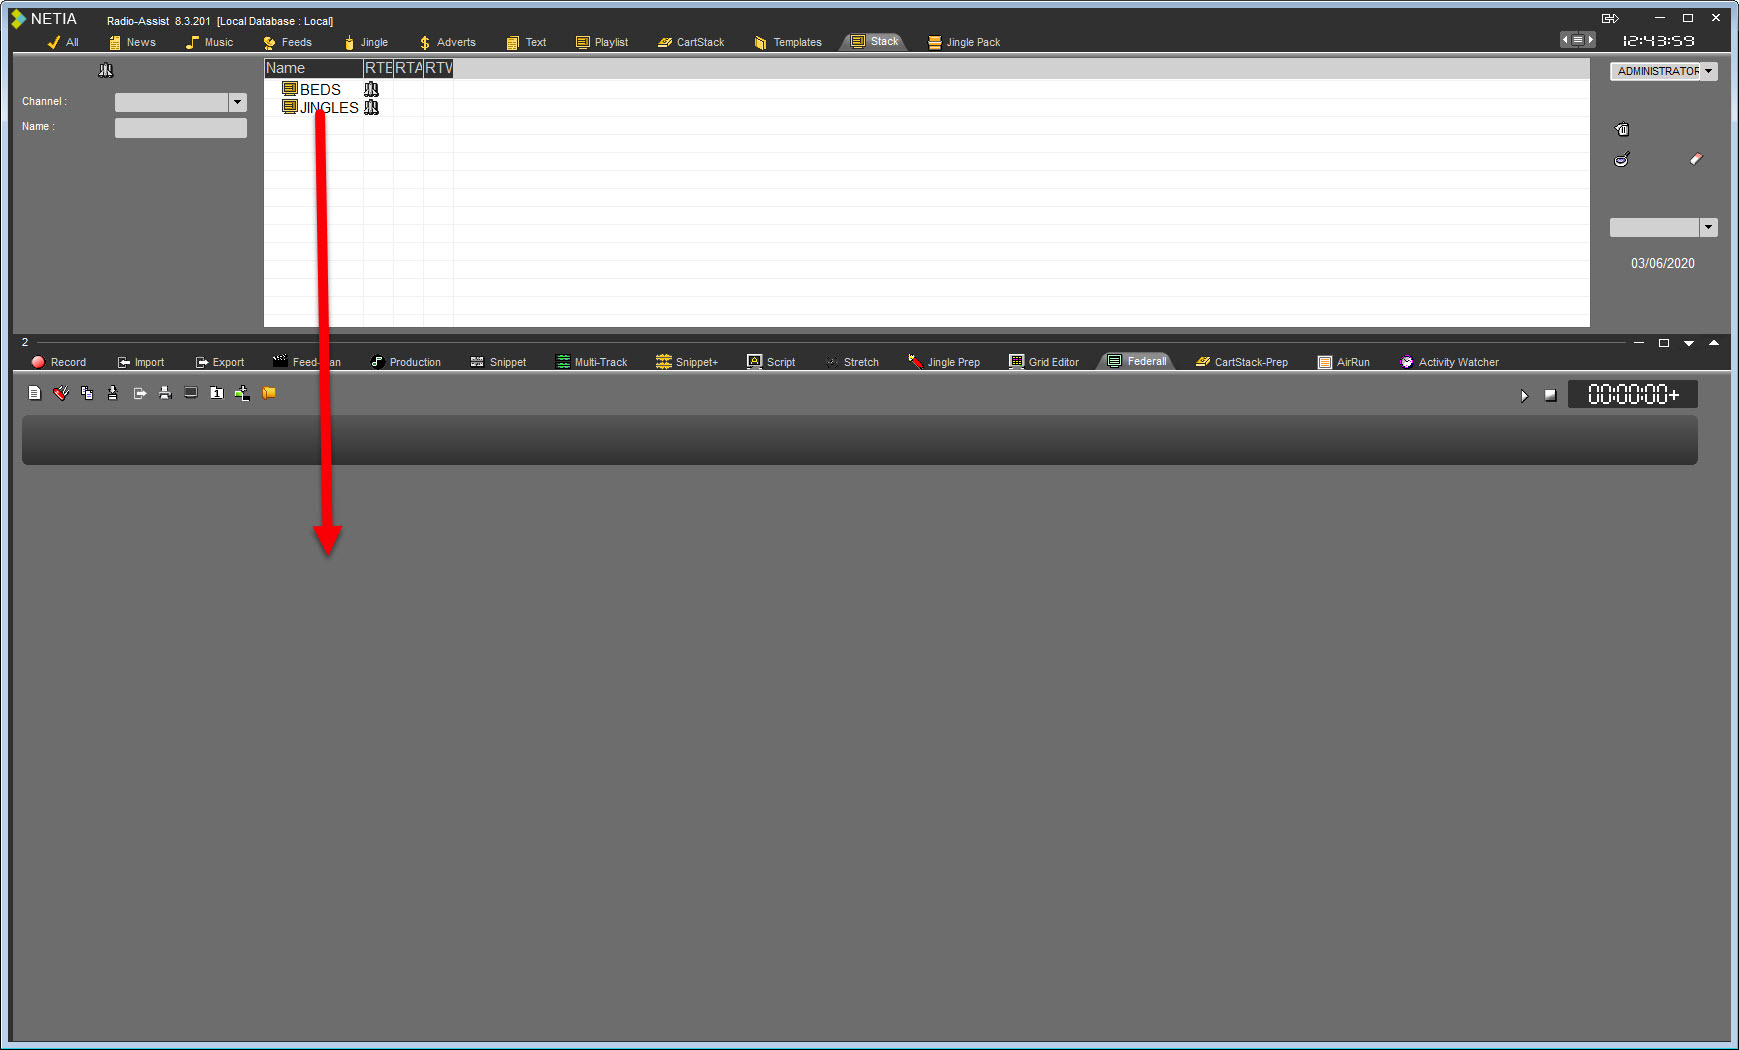
In the "Federall" tab, click on the "Modify" icon  .
.
Modify the parameters (name or channel).
Click on  .
.
Your stack is modified. It is available in the "Federall" tab and the Browser as well, under the "stack" category.
8.20.Deleting a stack
In the Browser, go to the "Stack" category.
Select the stack to delete.
Either do a right click on it, the « delete » function is displayed, or click on the "trash can" icon  available at the right side of the Browser.
A message to confirm the deletion is displayed. Click on « Yes» to confirm the deletion or « no » to cancel the action.
Attention : it is not possible to delete a stack with the RTB validation (you must remove the validation first).
8.21.Multimix / Voice-track / Stretch
The "Multimix" tool allows the realization of mixes between the consecutive sound elements of the playlist.
It is also possible to record on a track (voice-track function) and also to "stretch" an element.
Through the various functions made available, the sequence of elements and voice can be modified.
8.21.1.Multimix
Select in the playlist a step and right click on it. A menu appears. Choose the "Multimix" function.
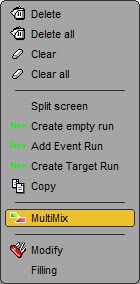
8.21.2.Voice Track
The Voice Track allows you to record a sound element between 2 sounds of the playlist.
8.21.3.Stretch
It is possible in Multimix, to apply a "stretch" on an element.
To do this click on  .
.
The following window opens :
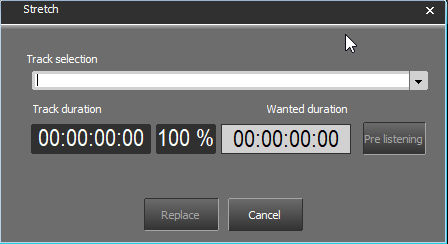
Select from the list one of the 4 items displayed to "stretch".
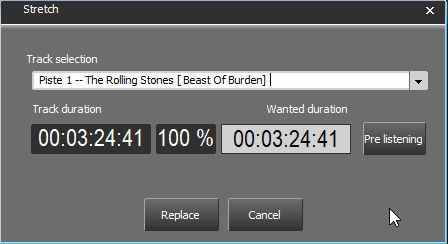
Enter the new desired duration in the field "Wanted duration"
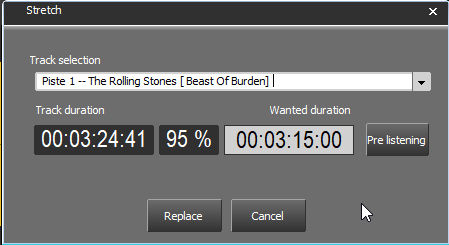
The percentage value is displayed.
NOTE: It is important to stay within a range of +/- 10%. Beyond, the distortion will be too important.
It is possible to preview the result by clicking on  .
.
For example, for a sound with a duration of 3'44 ''; the following values are proposed:
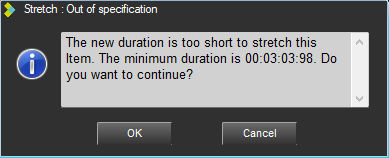
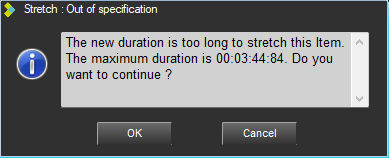
Once you have entered the correct duration, click on  .
.
The save window opens:
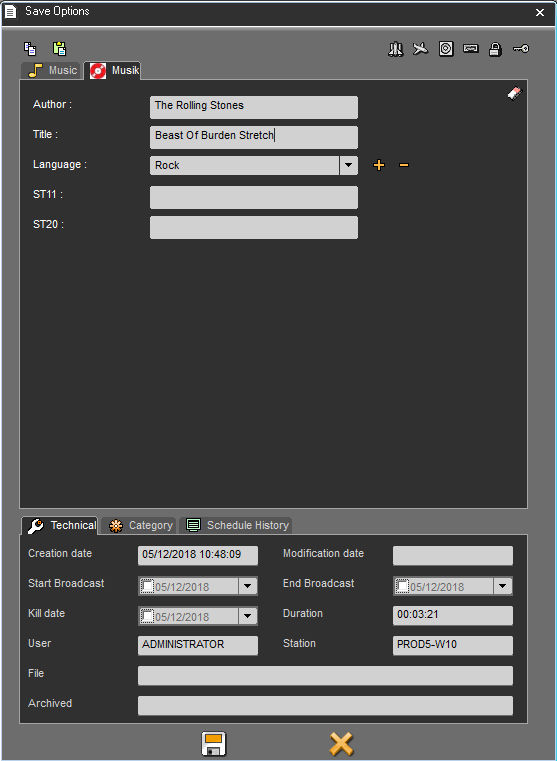
Fill in the necessary fields and click on  .
.
The stretch starts:
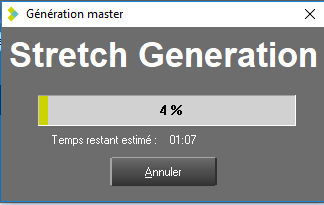 .
.
The sound is added to the database and is changed in the playlist :

8.22.Lock duration
The "Lock duration" function is designed to lock the step duration (this function is available by a right click on an empty step only).
Example : if you lock the duration at 30 secondes, this duration will stay the same for the duration calculation of the playlist. Event by putting a sound longer or shorter than 30 secondes.
For exemple, this feature can be used for a news bed during the news headlines. Usually the headlines are 20 secondes long but you can put a bed of 1 minute if you need more time when headlines are going to be longer due to important news.
8.23.Choosing the lead-in mode
When you insert an item in the playlist, you can choose the lead-in mode by default.
To apply a specific lead-in modes, « cut » 

 , « mix » or « manual » each time that you insert an item, click on the icon available at the left side of the screen. Each time that you click, you modify the lead-in mode.

8.23.1."Hide" function
This function is used to hide the identity line of a screen when it only contains a single program step.
To return to the default display mode, click on the "Hide" icon again.
8.24.Putting a playlist RTB
To put the RTB (Ready-To-Broadcast) validation on a playlist :
In the Browser, go to the "Playlist" category.
Select the playlist.
Go to the "RTB" column and double-click on it.
The "space shuttle" icon  is displayed which means that the playlist has the RTB validation and then it is visible in the playout system.
NB : if a playlist does not have the RTB validation, it will not be visible in the playout system.
8.25.Putting a stack RTB
To put the RTB (Ready-To-Broadcast) validation on a stack :
In the Browser, go to the "Stack" category.
Select the stack.
Go to the "RTB" column and double-click on it.
The "space shuttle" icon  is displayed which means that the stack has the RTB validation and then it is visible in the playout system.
NB : if a stack does not have the RTB validation, it will not be visible in the playout system.
8.26.Playing an item from the playlist
To Play an item from the playlist :
Double-click on it. the sound is loaded in the player.

NB : when you play a sound, the player is set 4 seconds before the end of the sound (configuration). If you want to play the beginning of the sound, click on the counter to go back to the beginning of the sound.
Moreover, the player is able to play the "cut" or "mix" lead-in modes.
8.27.Deleting a screen
To delete a screen from the playlist :
In the playlist, select the screen to delete.
Do a right click on it.
Choose the "Delete" option.
The screen is deleted.
8.28.Deleting a step
To delete a step in the playlist :
In the playlist, select the step to delete.
Do a right click on it.
Choose the "Delete" option.
The step is deleted.
By using the "Delete all" option, you will delete all the items who have the same name as the one you're deleting in the playlist.
Info: If you want to find back the file that has been inserted into the step in the database, you can use the following shortcut: CTRL + O.
8.29.Clearing a step
To clear a step in the playlist :
In the playlist, select the step to clear.
Do a right click on it.
Choose the "Clear" function.
The step is cleared.
Info: By using the "Clear all" option, you will clear all the same runs in the playlist as the one you're clearing.
8.30.Printing a playlist
To print out a playlist :
Drag and drop the playlist from the Browser to the Federall tab.
Click on "Print"  .
.
Select one of the 2 choices available :
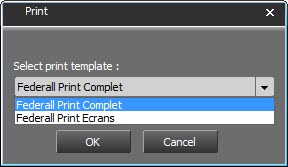
Federall Print Complet (Full print) or Federall Print Ecrans (Screens)
Then click on OK and choose the printer.
Result :
Print complet :
The print will show all screens and runs.
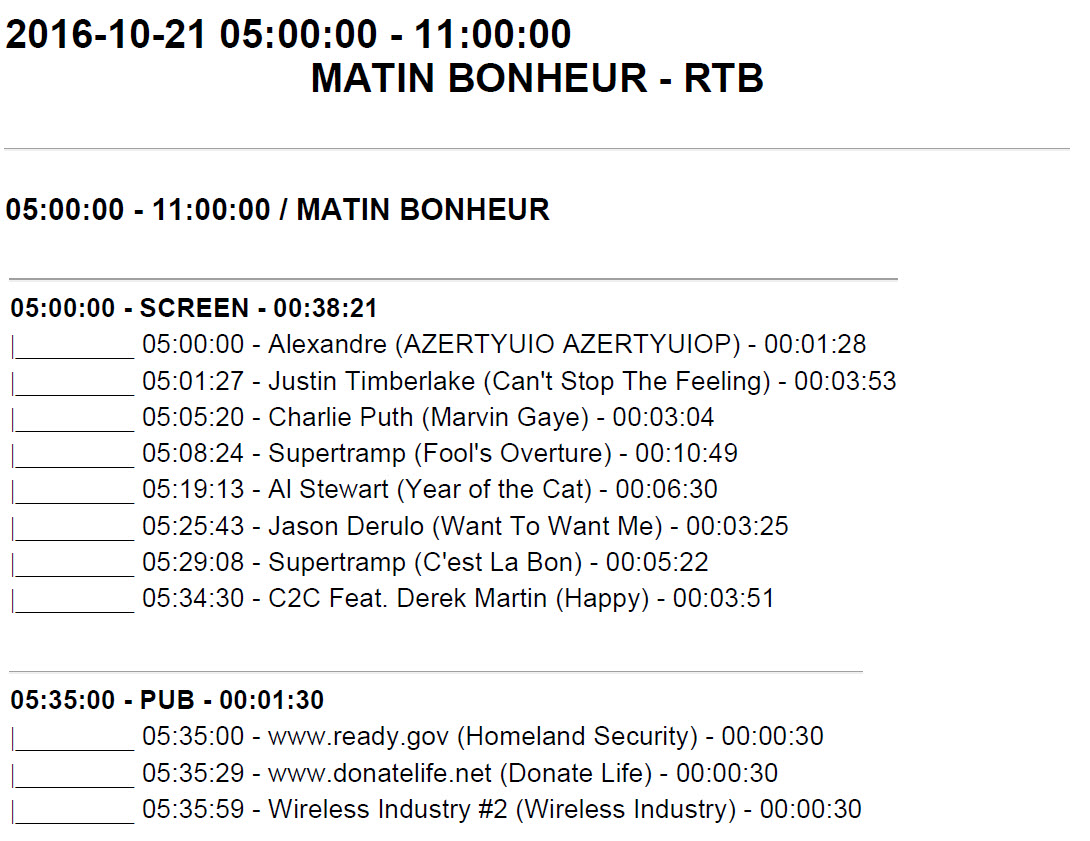
Print Ecrans :
The print will only show the screens.
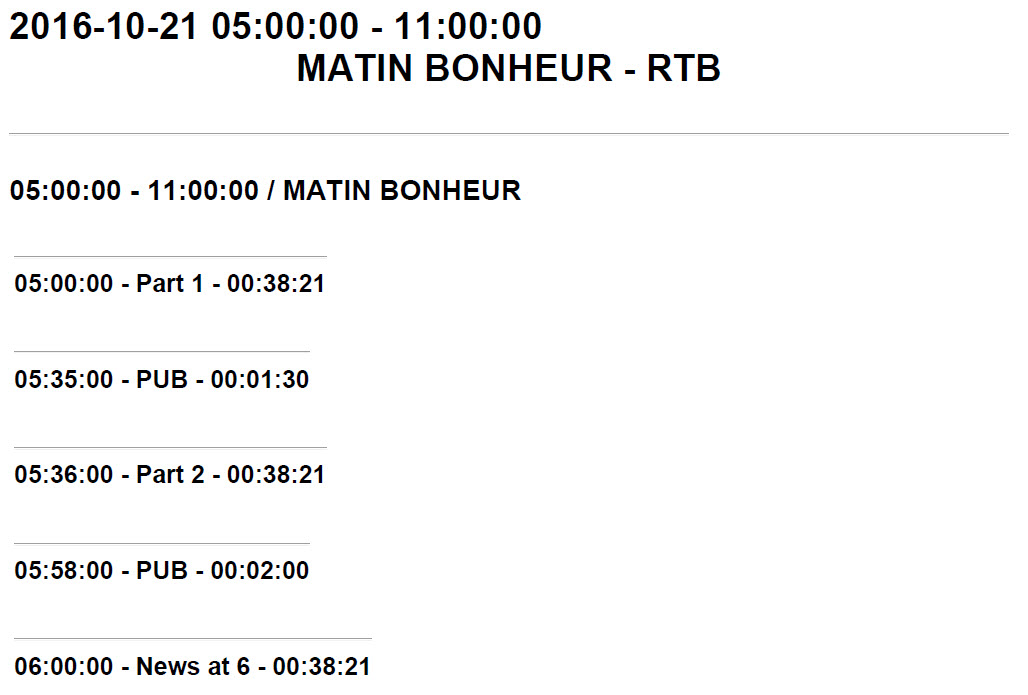
It is possible to define its own printing format where you can add the desired information, an image (logo, etc ...).
For this you need to create an XSL sheet. See with the administrator.
8.31.Broadcast modes
The broadcast modes are the following :

IMPORTANT: The actions of the following broadcast modes are described in the case of an AirDDO in automatic mode. In the case of an AirDDO in manual mode, it is the studio technician who will decide to start the screens by activating the faders.
Floating Time : The screen is broadcasted automatically after the previous screen (broadcast time is adapted) 
OnTime : The screen is broadcasted automatically at the set time. 
Near OnTime : The screen is broadcasted at a set time. Nonetheless, Air-DDO will wait for the song (which is on air in the previous screen) to be over before starting the new screen :
Time limit : Screen with automatic broadcast at a set time + start screen. If broadcast of the previous screen ends during window countdown, this screen will be broadcasted. If it is not over, the Auto window screen will not be broadcasted and the broadcast program will go to the next screen in the playlist. 
Time Limit forced : Screen with an automatic broadcast time. Same procedure as "Time Limit" except that the screen is automatically broadcasted at the end of the defined window. 
Sync OnTime : Same procedure as "Time Limit". The difference is that the screen is started with GPI. 
To define a window, fill in the following parameters :
Begin time : To specify the time screen broadcast starts (HH:MM:SS).
Begin limit : To set a time lapse before the start time (HH:MM:SS).
End limit : To set a time lapse after the start time (HH:MM:SS).
Off time : Screen with an automatic start time which is automatically calculated according to the end of the broadcast time set by the user.  End time: time set for screen broadcast to end.
IMPORTANT : These broadcast modes are defined in "Grid Editor" and "Feder-All" but they are used in AirDDO (playout system belonging to the RadioAssist range of products).
8.32.Events On Screen
Input Events allow you to trigger an action when the screen starts going On-Air.
8.32.1.INPUT EVENTS
Air-DDO awaits an event to start broadcasting the screen. At the beginning of the screen, Air-DDO receives an event. This starting mode can only be used with TIME LIMIT and TIME LIMIT FORCED modes (indeed, ON TIME mode will be triggered based on the exact hour).
To create a new Input Event, complete the popup with the name and the parameters of the events, then click on  . Your event now appears in the drop-down menu and you can use it on any screen.
GPI
This type of event allows you to start the screen on reception of a GPI command.
Name : name given to the event
Duration : N/A
GPI# : number allocated to you GPI command, which will trigger the screen.
Type : ON or OFF or TOGGLE or INVERT ...
COM
This type of event allows you to trigger the broadcasting of a screen on reception of the COM command.
Name : name given to the event
Duration : N/A
The fields "Data", "Parity", "Num Com", "Baud Rate", "WordLenght" and "Stopbits" correspond to the configuration of your COM port.
IP
This type of event allows you to trigger the broadcasting of a screen on reception of the IP command.
Name : name given to the event
Duration : N/A
Address : IP address
Data : IP command sent
Port : IP port number
TTl : Time To live (value fixed at 255 by default)
Type : UDP or TCP
8.32.2.OUTPUT EVENTS:
Here, Air-DDO sends a command. The command can be sent at the beginning or at the end of the screen.
To create a new output event, complete the popup with the name and the parameters of the events, then click on  . Your event now appears in the drop-down list and it can be used on any other screen.
GPI
An output GPI event means Air-DDO sends a GPI command when the screen starts (for example, the ON-AIR light is on when broadcasting starts).
Name : name given to the event
Duration : N/A
GPI# : number allowing you to identify the GPI command to launch.
Type : ON or OFF or TOGGLE or INVERT ...
Offset : L’Offset defines the position from which the GPI command is sent.
COM
An output COM event means Air-DDO sends a command which triggers a COM command.
Name : name given to the event
Duration : N/A
The fields "Data", "Parity", "Num Com", "Baud Rate", "Wordlenght", Stopbits" correspond to your port COM settings
Offset : the Offset defines the position from which the COM command is sent.
IP
An output IP event means Air-DDO sends an IP command.
Name : name given to the event
Duration : N/A
Address : IP Adress
Data : IP command sent
Port : IP port
TTl : Time To live (value fixed at 255 by default)
Type : UDP or TCP
Offset : the offset position defines defines the position from which the IP command is sent
RECORD COMMAND
Name : name given to the event
Duration : N/A
Address : listening address
Ident : command identifier
Data : IP command sent
Port : Listening port
TTl : Time To live (value fixed at 255 by default)
Type : UDP or TCP
Action : Start or Pause or Stop
Offset : the offset position defines defines the position from which the command is sent
FADE AUTO
The FADE AUTO event only works with the ON TIME and OFF TIME modes. When the FADE AUTO option is activated, it means the screen will start on time, operating a fade out on the previous item (instead of cutting it abruptly).
Name : name given to the event
Duration : N/A (Leave this value to "0")
Duration (ms) : Duration in milliseconds of the fade out (1000 ms = 1 second)
Level : sound level to reach at the end of the fade out curve
Offset (ms) : The Offset defines the position of the beginning of the fade.
If the value is fixed to 0 = the fade out will start at the beginning of the ON TIME/OFFTIME screen,

If the offset is negative = the fade out will start BEFORE the starting time of the ON TIME/OFFTIME screen,
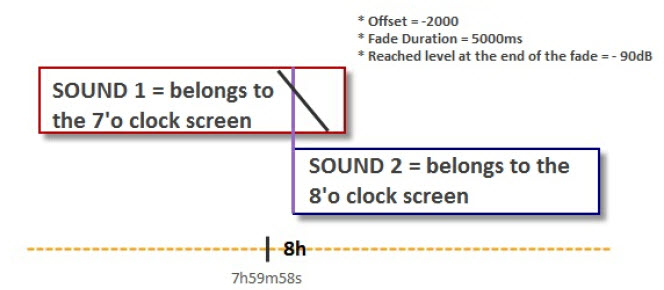
If the offset is positive = the fade out will start AFTER the starting time of the ON TIME/OFFTIME screen,

RECORD TO LIVE
The RECORD TO LIVE output event allows you to make a loop between the audio card Input and the audio card output.
Name : name given to the event
Duration : Duration to give if a RUN of the "event" type is used. (contact the administrator for more information)
Type : ON or OFF (to decide if the action must be triggered or stopped
Start Level (dB) : sound level at the beginning of the fade
Duration : Desired duration for the fade
Db Fade : sound level to reach at the end of the fade
Offset : The Offset defines the position of the beginning of the fade.
MODE AUTO
The AUTO command allows you to switch from manual to automatic mode in AIR-DDO, and conversely.
Name : name given to the event
Duration : N/A
Type : ON (the AUTO mode is triggered) or OFF (the AUTO mode is deactivated)
Start Auto : ON (synchronization on the current hour and automatic broadcast triggering) or OFF (awaiting a trigger to start the broadcast-such as an ON TIME screen or a TIME LIMIT FORCED screen for example, a manual launch...)
In other words, if the START AUTO parameter is set to ON, the screen will start from the position to which the screen should be playing.
SHELL COMMAND
Nom : name given to the event
Duration : N/A
Cmd : name of the command you wish to trigger (command executed by the workstation's OS)
Offset : the offset position defines the position from which the command is executed
- If the offset is set to "0" = command is executed when the screen starts
- If the offset is negative = command is executed before the screen starts
-If the offset is positive = command is executed after the screen starts
VLSU
This type of event is used in correlation with localization players, in order to send a PLAY order to the different PLAYERS in use (Digitrack or LocPlayer)
Name : name given to the event
Duration : N/A
Ident : TIME SLOT EVENT identifier (cf. documentation "LocalisationSchedule_8.00_US.pdf")
Category : TIME SLOT EVENT category (if used)
8.33.Model
8.33.1.Create
It is possible to create a model from a screen contained in the pipe.

Select the screen and right click

A window appears:
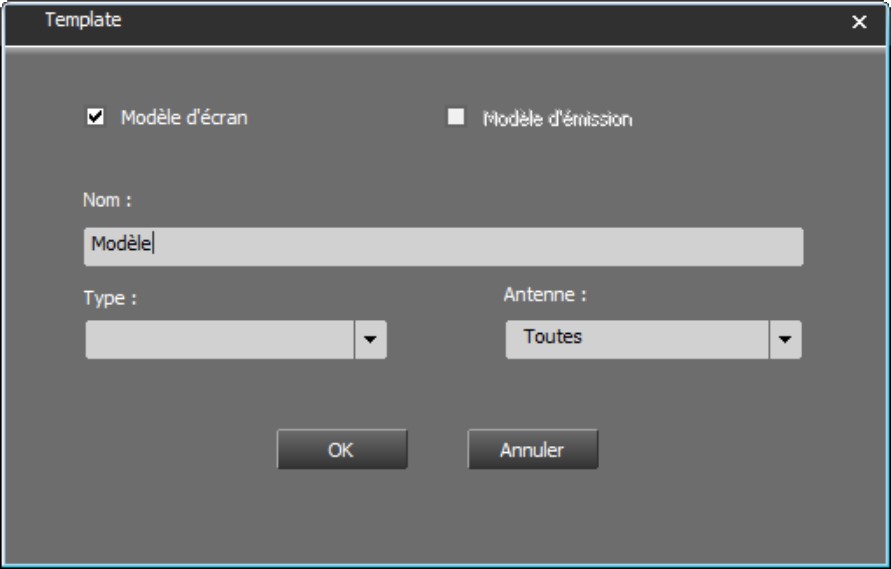
Specify if you want to create a screen or program template.
Enter the name, the type (news, music, etc...)
Specify for which antenna this template will be available.

All created templates are stored in the "Templates" tab of the Browser.
8.33.2.Jokers
It is possible to add wildcards (e.g. $TIME_HH$) in the step naming. When the model is inserted in the pipe, they will be replaced by their value and the date and time of the corresponding step.
DATE_LOCAL | Mar 15:48:10.845 09/12/2020 | Cf Régional settings |
DATE_SQL | Mar 15:48:10.845 09/12/2020 | 2020-12-09 15:48:10.845 |
DATE_DW | Mar 15:48:10.845 09/12/2020 | 03 (Mar) |
DATE_DD | Mar 15:48:10.845 09/12/2020 | 09 |
DATE_MM | Mar 15:48:10.845 09/12/2020 | 12 |
DATE_YYYY | Mar 15:48:10.845 09/12/2020 | 2020 |
DATE_DDMM | Mar 15:48:10.845 09/12/2020 | 0912 |
DATE_DD-MM | Mar 15:48:10.845 09/12/2020 | 09-12 |
DATE_DD/MM | Mar 15:48:10.845 09/12/2020 | 09/12 |
DATE_MMDD | Mar 15:48:10.845 09/12/2020 | 1209 |
DATE_MM-DD | Mar 15:48:10.845 09/12/2020 | 12-09 |
DATE_MM/DD | Mar 15:48:10.845 09/12/2020 | 12/09 |
DATE_DDMMYYYY | Mar 15:48:10.845 09/12/2020 | 09122020 |
DATE_DD-MM-YYYY | Mar 15:48:10.845 09/12/2020 | 09-12-2020 |
DATE_DD/MM/YYYY | Mar 15:48:10.845 09/12/2020 | 09/12/2020 |
DATE_MMDDYYYY | Mar 15:48:10.845 09/12/2020 | 12092020 |
DATE_MM-DD-YYYY | Mar 15:48:10.845 09/12/2020 | 12-09-2020 |
DATE_MM/DD/YYYY | Mar 15:48:10.845 09/12/2020 | 12/09/2020 |
TIME_HH | Mar 15:48:10.845 09/12/2020 | 15 |
TIME_MM | Mar 15:48:10.845 09/12/2020 | 48 |
TIME_SS | Mar 15:48:10.845 09/12/2020 | 10 |
TIME_MS | Mar 15:48:10.845 09/12/2020 | 845 |
TIME_HHMM | Mar 15:48:10.845 09/12/2020 | 1548 |
TIME_HH:MM | Mar 15:48:10.845 09/12/2020 | 15:48 |
TIME_HHMMSS | Mar 15:48:10.845 09/12/2020 | 154810 |
TIME_HH:MM:SS | Mar 15:48:10.845 09/12/2020 | 15:48:10 |
TIME_HHMMSSMS | Mar 15:48:10.845 09/12/2020 | 154810845 |
TIME_HH:MM:SS.MS | Mar 15:48:10.845 09/12/2020 | 15:48:10.845 |
8.33.3.Insert
From the "Templates" tab of the Browser, drag and drop the selected template into the pipe.
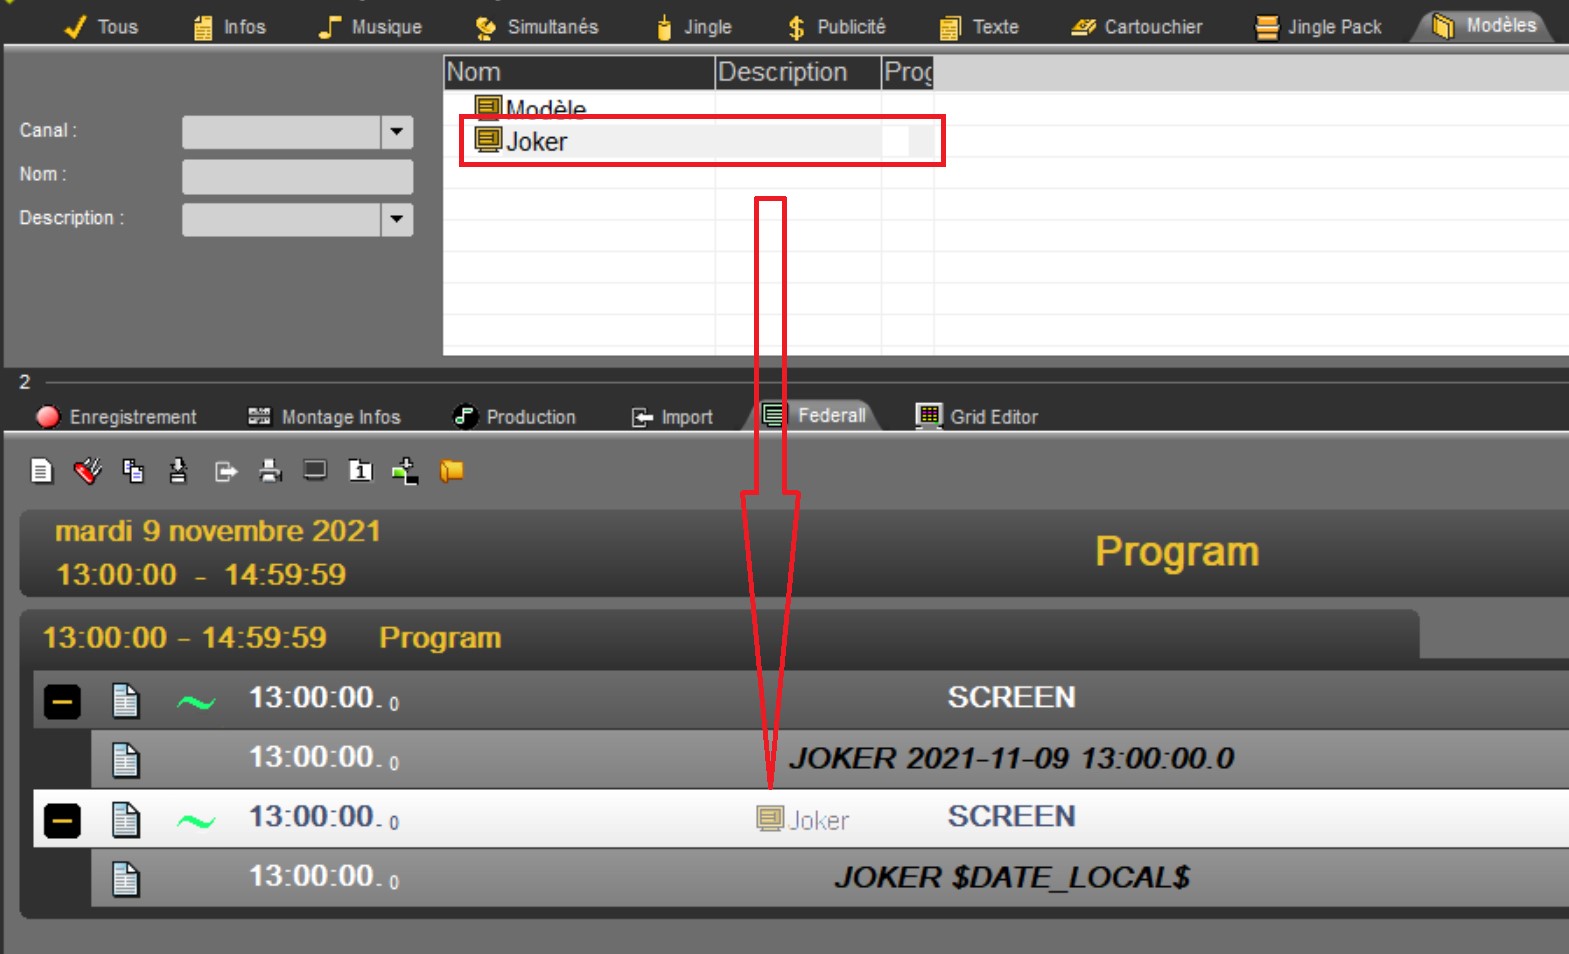
When released, the insertion mode menu appears

After insertion, the new screen from the template is added
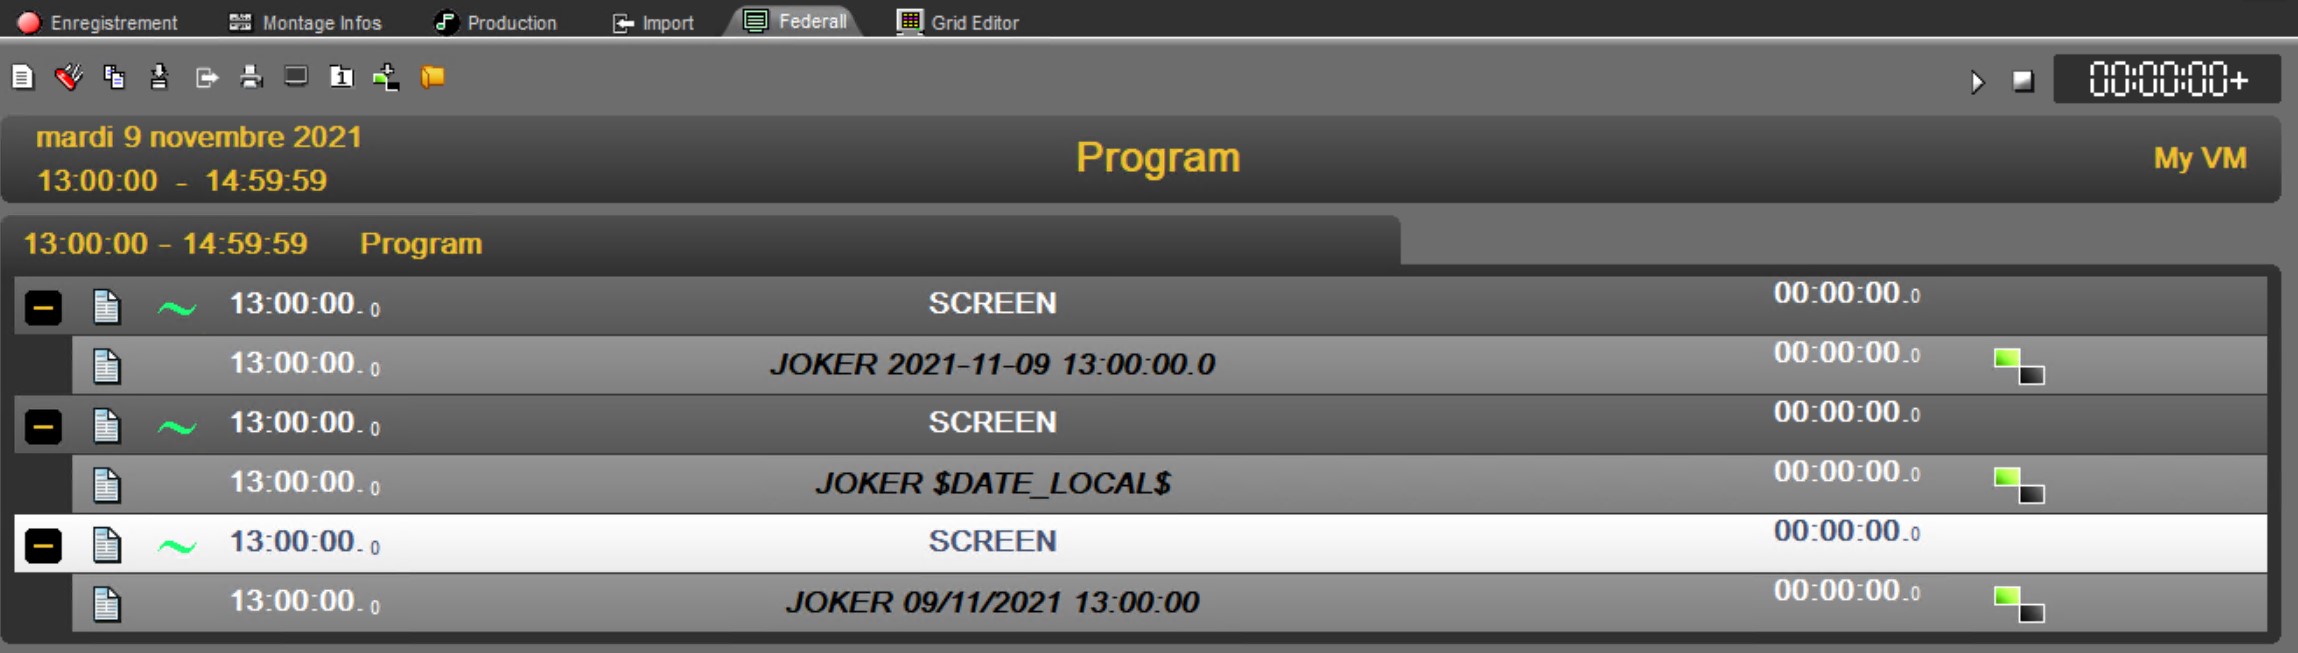
9.FeedIn
The FeedIn tab is used to start, stop and monitor all recordings and to create new recording channels.
9.1.FeedIn definition
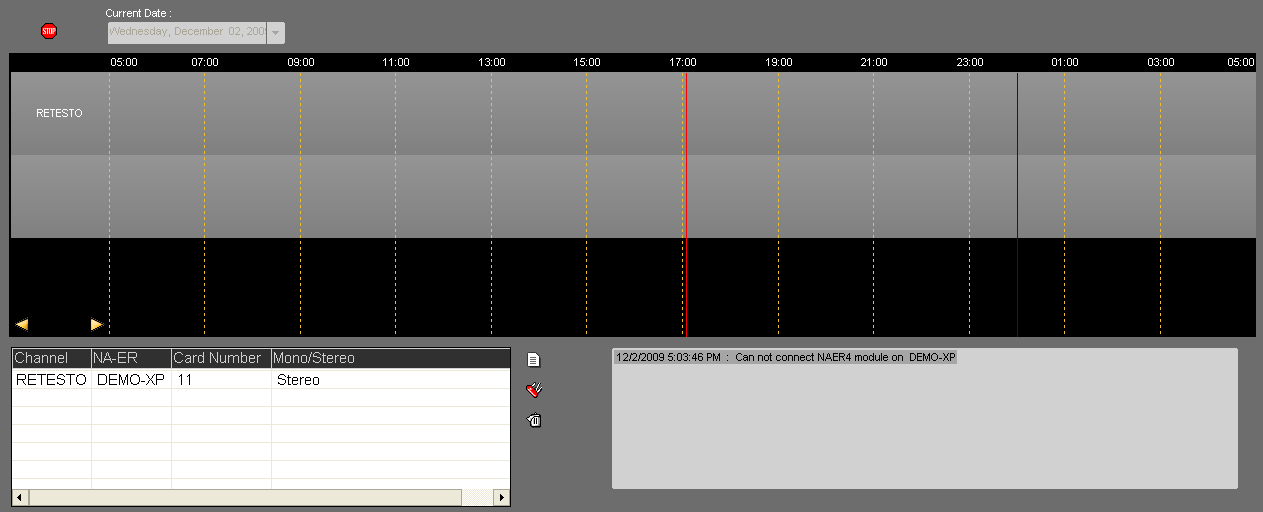
As with Feed-Plan, this tab is divided into two sections:
the top one shows the schedule table (same functions as Feed-Plan) with the day’s recordings.
the bottom one the full list of existing recording channels and error messages.
9.2.Record management
9.2.1.Starting a recording
Even though recordings are scheduled, the “Start” icon in the FeedIn tab must be activated.
To do so, click on 
9.2.2.Stopping a recording
If a scheduled recording needs to be stopped, click on 
9.2.3.Start/Stop a recording via Socket
The feature is active (not deactivatable), and 2 registry keys are associated with this function:
RadioAssist\8.0\NADEC\PortACQ.
RadioAssist\8.0\NADEC\Multicast_Ip_Adress.
This is UDP socket, if the multicast port is not filled, the socket is created in unicast (loopback) on the PortAcq, otherwise it is on the multicast address on the PortAcq.
Each recording managed by FeedIn can be started/stopped upon receipt of a string received on the correct port.
For this it is necessary that in the table T_NAPRO (the one which describes the planned recordings created by FeedPlan) has START_ACQ and/or STOP_ACQ filled with a chain of characters.
The 2 character strings are 24 characters in length max.
FeedPlan allows you to fill them for scheduled recordings (not for instant or continuous recordings).
9.3.Start/Stop a recording via Socket
It is possible to record 2 types of streams:
- an IP stream,
- an audio/video stream from physical sources.
IMPORTANT: It is not possible to run FeedIn in "Hybrid" Audio and IP at the same time.
9.3.1.From an IP stream
Upstream of the creation of IP recording channels, the "IP Stream" box must be checked in the setup of Radio-Assist in the "FeedIn" tab.
The list of existing channels is shown at the bottom of the screen.

To add a new channel, click on 
The following window opens :

Name : New channel name
FeedIn Station : Workstation where the NA-ER recorder is located.
Click on  to create a new recorder; the window below opens :

Machine name : To declare the name of the new workstation hosting the recorder.
Nb card : Number of cards available on the workstation.
IP Stream: Name of the IP stream created upstream in the setup of RadioAssist in the "IP Stream" tab.
The following 4 fields are free input fields:
Type: Type of recorded sound (music, info, etc ...)
Language: Language of the saved stream.
Time Zone: For example, the number of time zones that are different from the time of the recording machine.
Country: For example, country of the audio source.
Metadata:
SID / PID / Genre / Comment: Free alphanumeric type fields. This information is stored in the database.
This metadata can be displayed by checking the "Metadata" box in the "FeedIn" tab of Radio Assist Setup.
The fields "GPI Input" and "Always assign to item" are grayed out.
Database tab : Database tab where the recordings of this channel will be stored.
Specific Path : Path allowing to configure and visualize the specific path in the dialog box allowing to modify/create channels
Ability to use the classic RadioAssist tokens $YEAR $MONTH $DAY in these path.
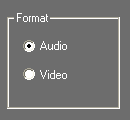 Type of source : Audio or Video
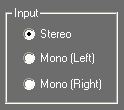 Recording format : mono or stereo. In mono mode, the number of recordable sources is doubled.
Then click on 
The new channel will be displayed in the list of channels along with its parameters.
9.3.2.From a physical source
Upstream of the creation of IP recording channels, the "IP Stream" box must be checked in the setup of Radio-Assist in the "FeedIn" tab.
The list of existing channels is shown at the bottom of the screen.
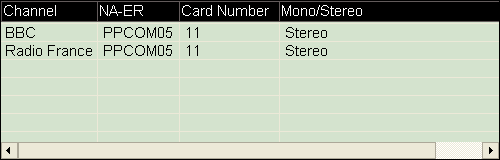
To add a new channel, click on 
The following window opens :

Name : New channel name
NA-ER 4 Station : Workstation where the NA-ER * recorder is located (See Na-Er doc.)
Click on  to create a new recorder; the window below opens :
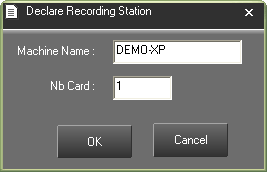
Machine name : To declare the name of the new workstation hosting the recorder.
Nb card : Number of cards available on the workstation.
Card Number : Card number.
Channel : Channel number.
GPI Input : Incoming GPI number.
Always assign to item : Number of the item to be replaced.
At each recording, the item is the database will be replaced by the new recording.
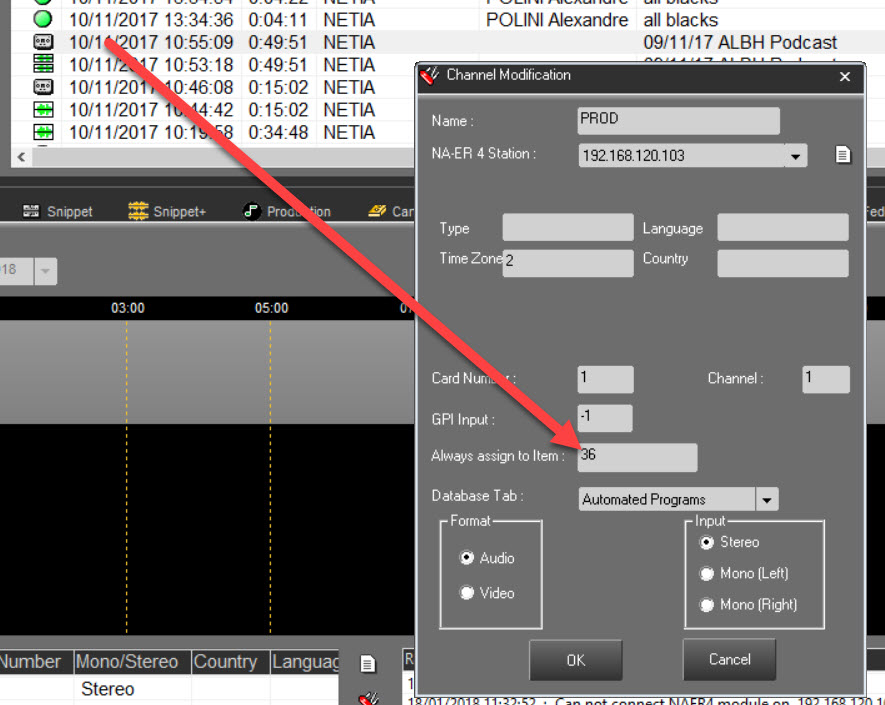
Database tab : Database tab where the recordings of this channel will be stored.
 Type of source : Audio or Video.
 Recording format : mono or stereo. In mono mode, the number of recordable sources is doubled.
Then click on 
The new channel will be displayed in the list of channels along with its parameters.
Multi NAER Setting
In the case of an installation where FeedIn checks multiple NAERs, the following registry key must be modified:
HKEY_LOCAL_MACHINE\SOFTWARE\[WOW6432Node\]NETIA\NA-ER 4\Protocols\IP\ServeurFirstID.
Default value = 5
A unique value must be set for each NAER controlled by FeedIn (eg ID_NAER*1000).
Otherwise, it is not necessary to modify it.
9.4.Modifying a recording channel
To modify the data defined when a channel was created, select the channel to be modified on the list by clicking on it,
click on 
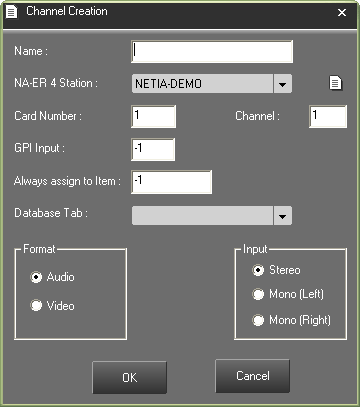
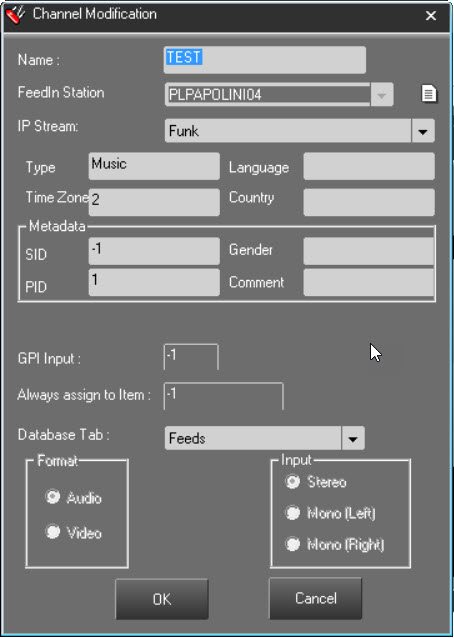 OR
OR
Enter the new parameters and click on  to validate the modifications.
9.5.Deleting a recording channel
To delete a channel, select it in the list of channels with one click (it will be highlighted in blue), then click on  .
.
Note : FeedIn must be stopped in order to delete a channel
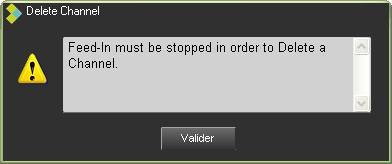
9.6.Error Log
This log indicates any errors which may arise when the Na-Er device is started and any other errors arising when simultaneous schedules are recorded or stopped.

In addition, a warning message is displayed when disk capacity falls below 20Mb, as all recording stops when only 20Mb are left.
10.FeedPlan
10.1.FeedPlan definition
The FeedPlan tool is used to schedule automatic recording programs.
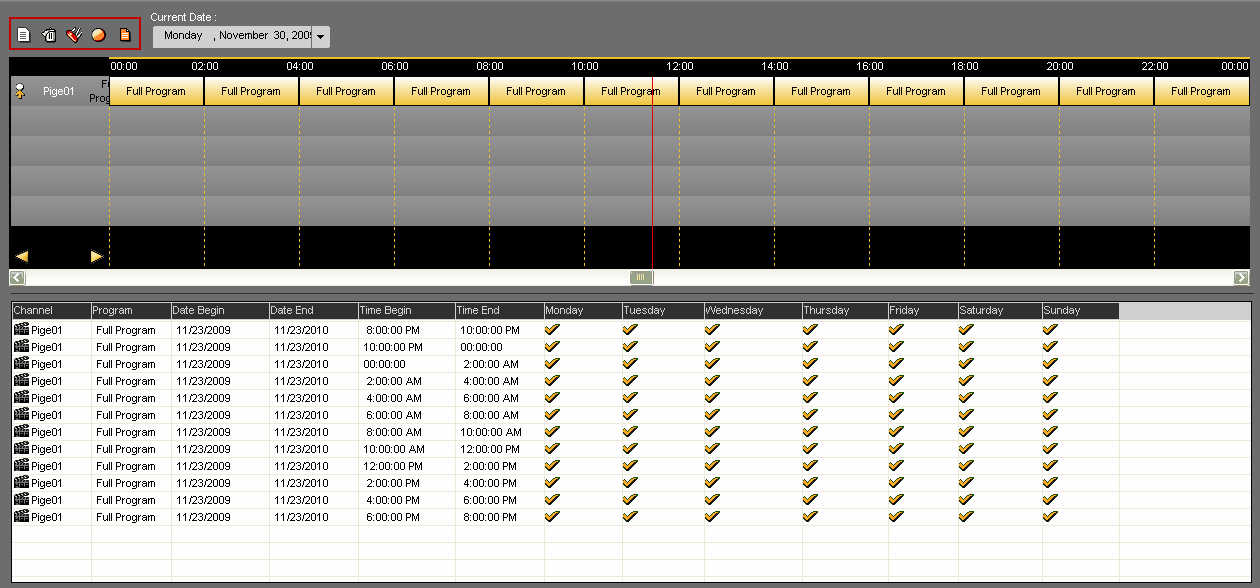
The interface is divided into 2 parts :
The upper part displays the program grid for a specific date (current date which can be modified by selecting another date in the "current date" field). 
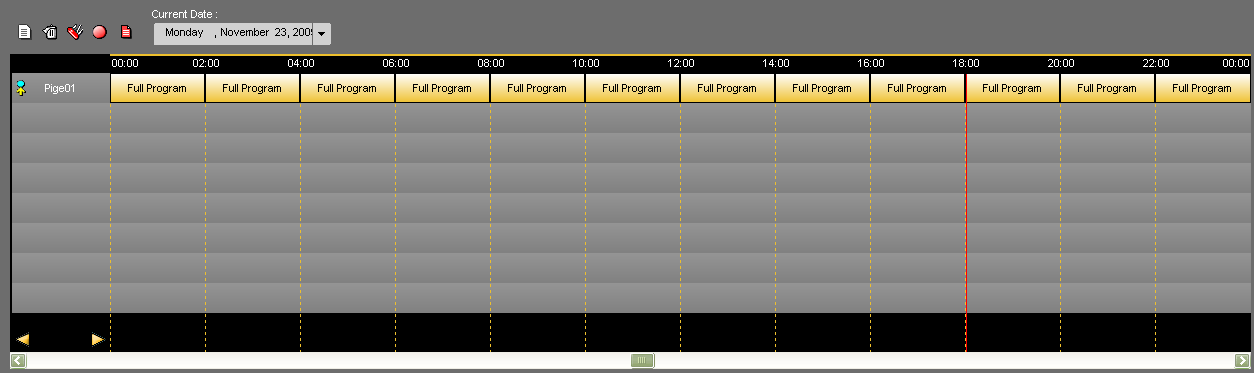
The lower part displays the list of the automatic recordings planned on the different channels available.
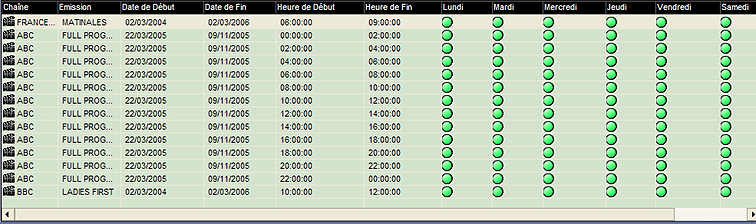
10.2.Feed
A feed is a scheduled recording program.
10.3.Creating a recording schedule
Click on « New »  .
.
The following window is displayed :
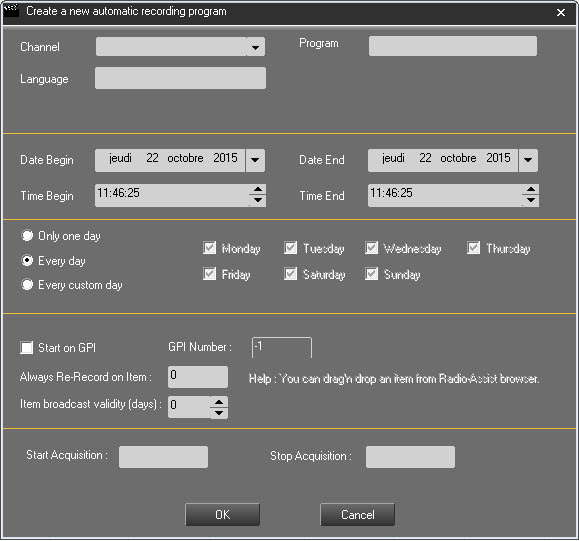
Channel : Select the channel on which you want to record.
Program : Enter the program name.
Language : Enter the code for the program's language.
Date : Enter the date begin and the date end for which the schedule will be valid.
Time : Enter the time begin and time end.
Only one day : The recording is set only for one day. It will use the "Date begin".
Every Day : The recording will be done every day of the week.
Every custom day : You can select which day of the week the recording will be done.
More options are available in the "Misc" window :
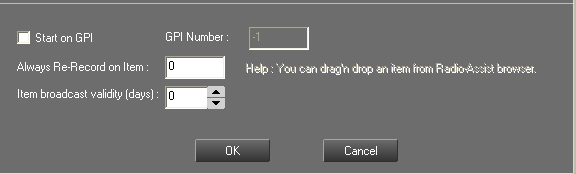
Start on GPI : if checked, the feed will be triggered on a dry contact.
GPI number : if "Start on GPI" is checked, indicates here on which GPI the triggering will be done.
Always Re-Record on item : if you have scheduled a feed and it is now in the database, you can select it and drag it down to this field. Thus, each day the feed will be overwritten by the one of the current day.
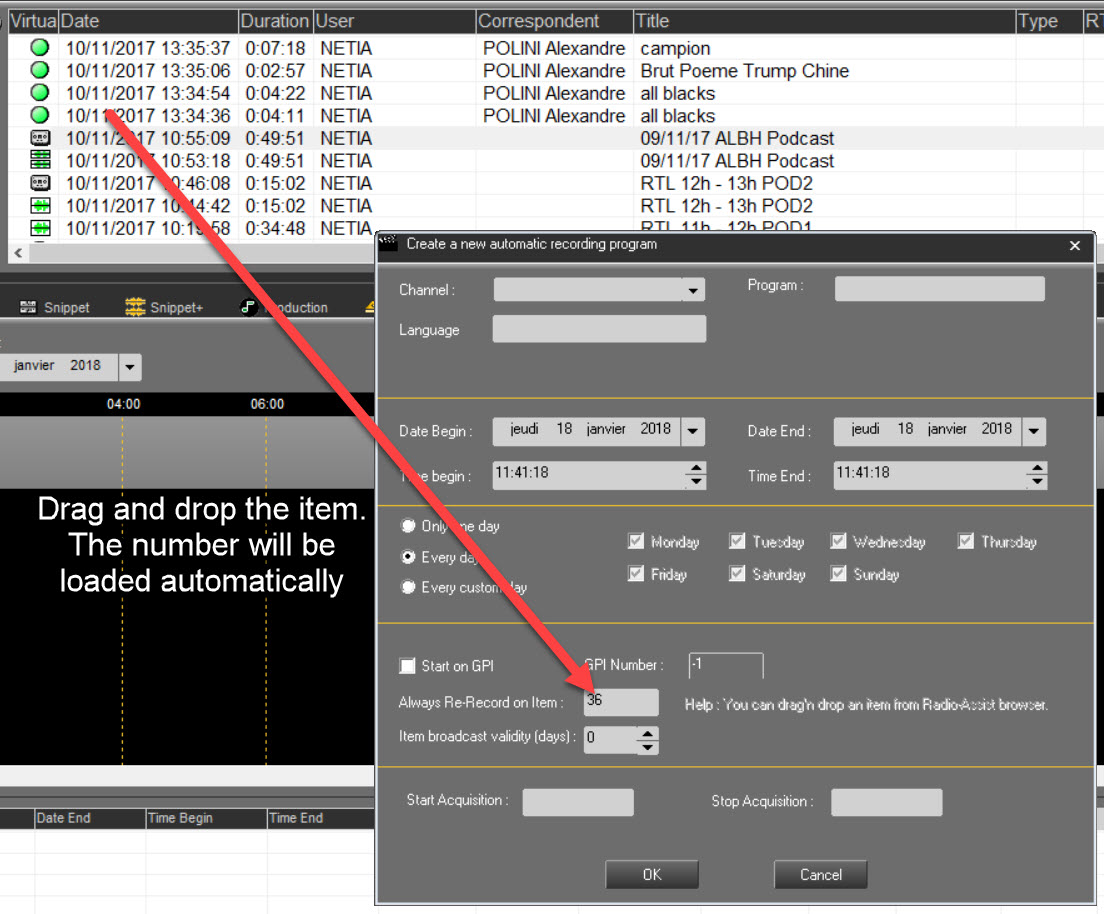
Item broadcast validity (days) : if you use the "Always Re-Record on item" function, indicates here during how long the feed will be overwritten by the recent one.

Fields where you can enter the code for an IP tram to start and stop a recording.
Start acquisition : Enter the code.
Stop acquisition : Enter the code.
Save by clicking on  .
.
10.4.Modifying a recording schedule
Select the schedule by clicking on it and click on "Modify"  or double-click directly on the schedule.
The following window containing the data of the schedule is displayed :

Modify the data.
Save by clicking on  .
.
10.5.Deleting a recording schedule
Select the schedule by clicking on it.
Click on « delete »  . A message confirming the deletion is displayed.
Click on "Yes" to validate.
The schedule is deleted.
10.6."Instant record" function
If you are short of time to fill in all the data when you need to start a recording immediately, click on « Instant record »  .
.
The following window is displayed to enter the basic information.
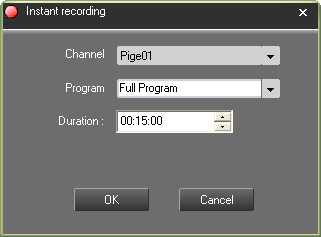
Channel : select the channel on which you want to record.
Program : enter the program name.
Language : enter the code for the program's language.
Duration : enter the recording duration (the default duration is 15 minutes).
Click on  to validate.
The record will start immediately.
10.7."Full Channel Recording" function
The "Full channel Recording" function  is used to create one program for the whole day , but divided in slots.
Example : the following example shows a schedule called "Full program" which has been created for the whole day, but divided in 2 hour slots.

To create a "full channel recording" :
Click on "Full Channel Recording" .
A window is displayed. Enter the following data :
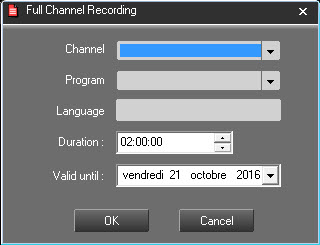
Channel : Select the channel on which you want to record.
Program : Enter the program name.
Language : Enter the code for the program's language.
Duration : Enter the slot duration. Here, the duration is 2 hours. So for one day you will have 12 items of 2 hours.
Valid until : Enter the date until when your "full channel recording" is valid.
Click on  to validate.
10.8.Load Planning Fonction
This function is not active by default.
11.GridEditor
11.1.Workflow
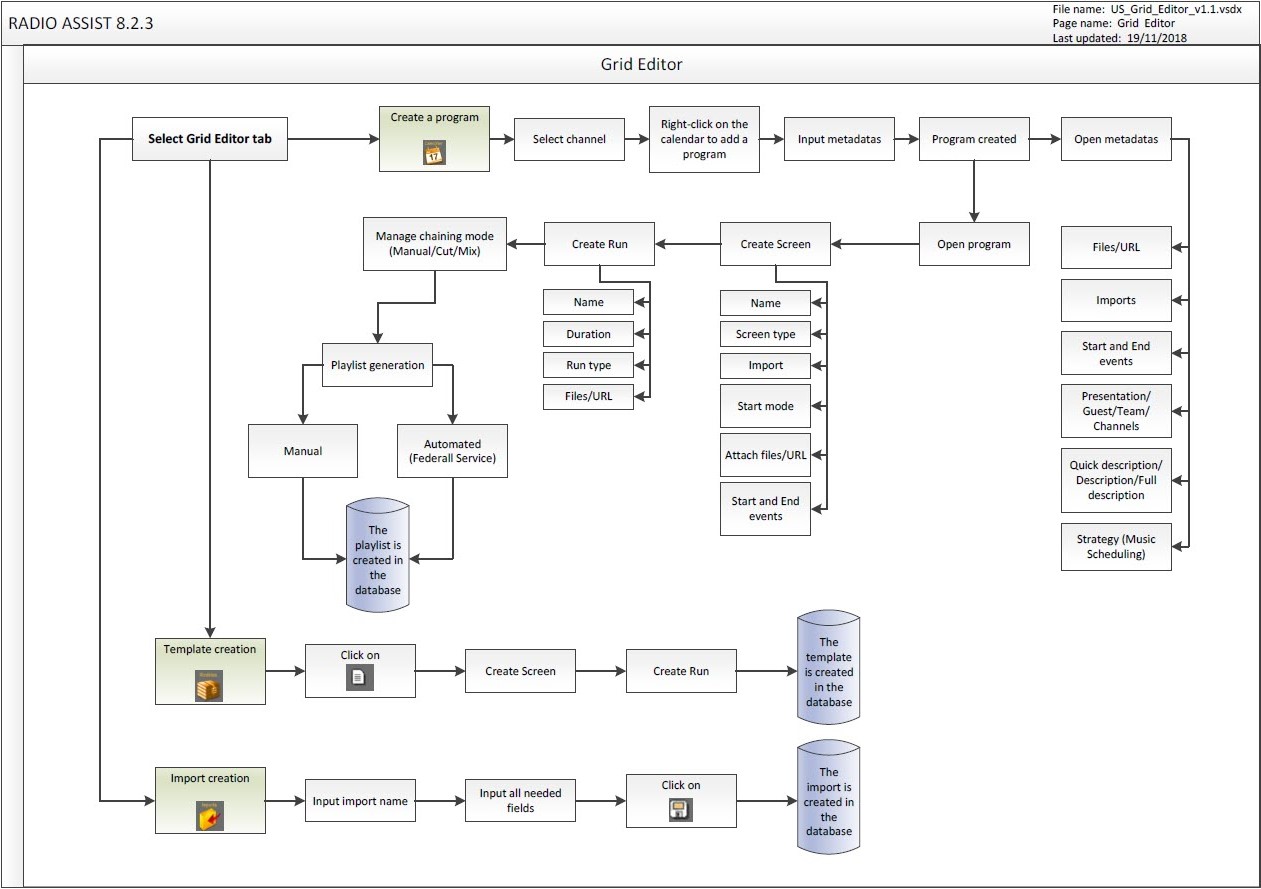
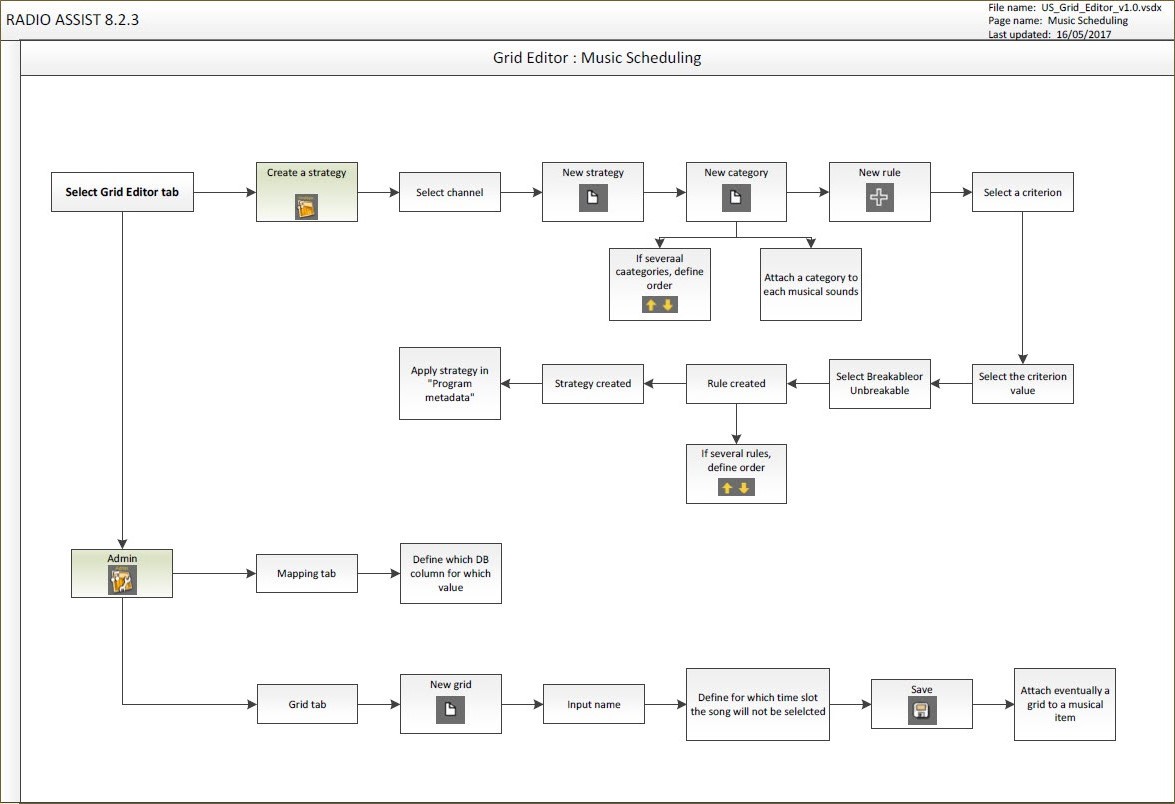
11.2.GridEditor definition
"GridEditor" is a planning tool which is used to create the program grid.
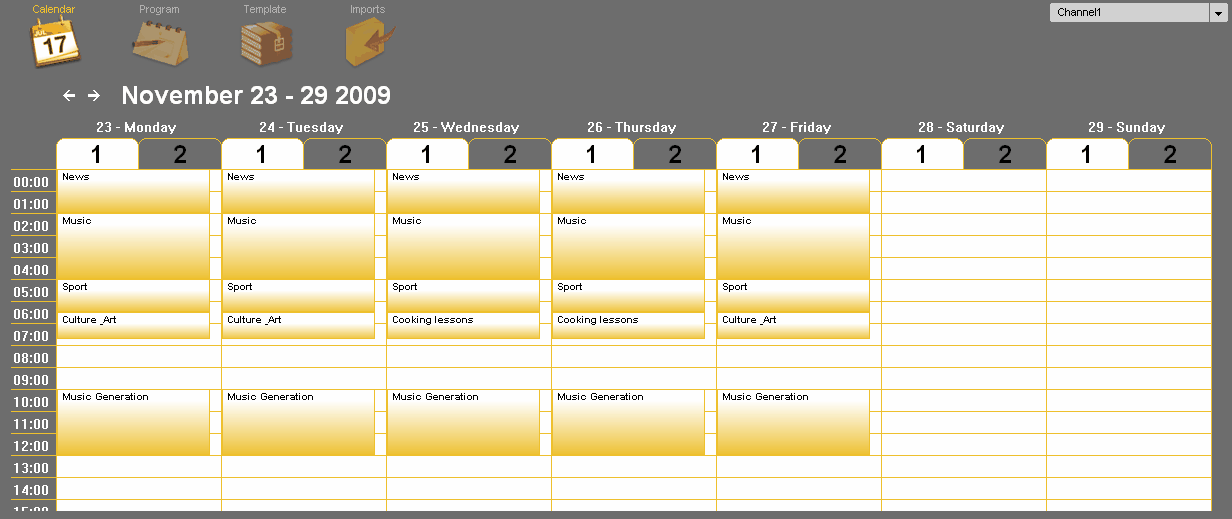
Programme schedules are modelled on different levels and in several steps:
Template creation.
Time slot creation.
Assignment of templates to timeslots.
11.3.Time slot
A time slot is a time span defined by a name, a start and end time and a period of yearly and weekly validity.
E.g.: A time slot called "Morning " is reserved in the program grid from 06h00 to 09h00 and is broadcast every day of the week except weekends from 11/6/05 to 31/8/06.
The slot contains a number of events represented by templates and their program steps which are broadcast one after the other at a set or variable time.
11.4.Creating a time slot
In the grid, click right and select "Add program".
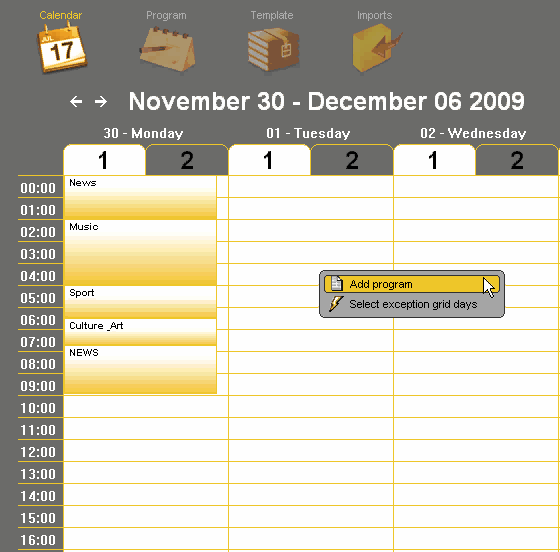
Enter the parameters of the time slot (time slot name, validity period, begin time, end time, valid day(s)).

Click on "OK"  .
.
The time slot is created.
11.5.Modifying a time slot
In the grid, right click on the slot you wish to modify and then select "Modify program parameters".
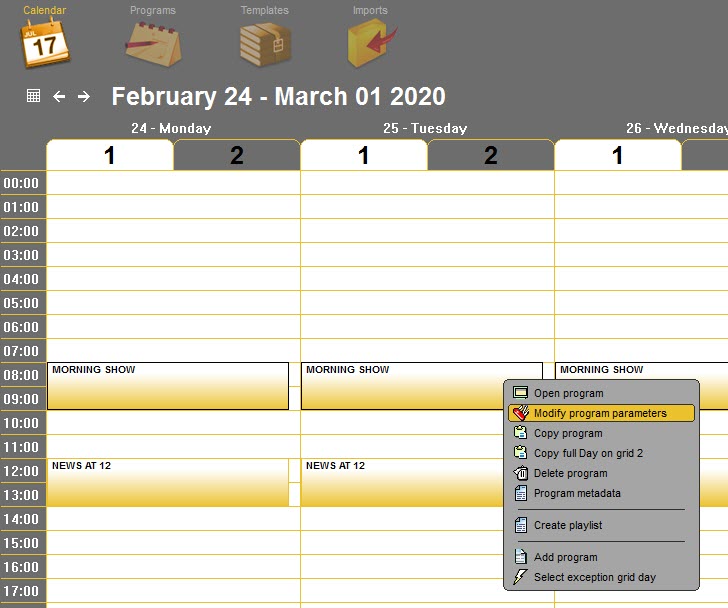
Modify the parameters of the time slot (time slot name, validity period, begin time, end time, valid day(s).
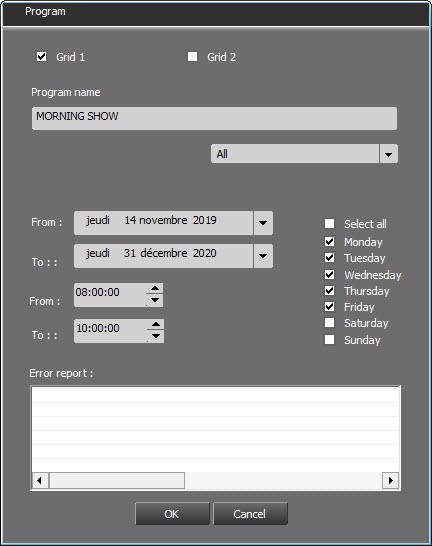
Click on "OK"  .
.
The time slot is modified.
11.6.Program Metadata
It is possible to attach metadata to each program.
For that, right-click on the program in question, then select "Program Metadata" from the menu.
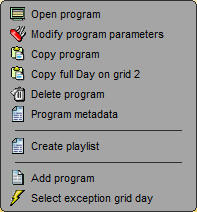
The following window is displayed.
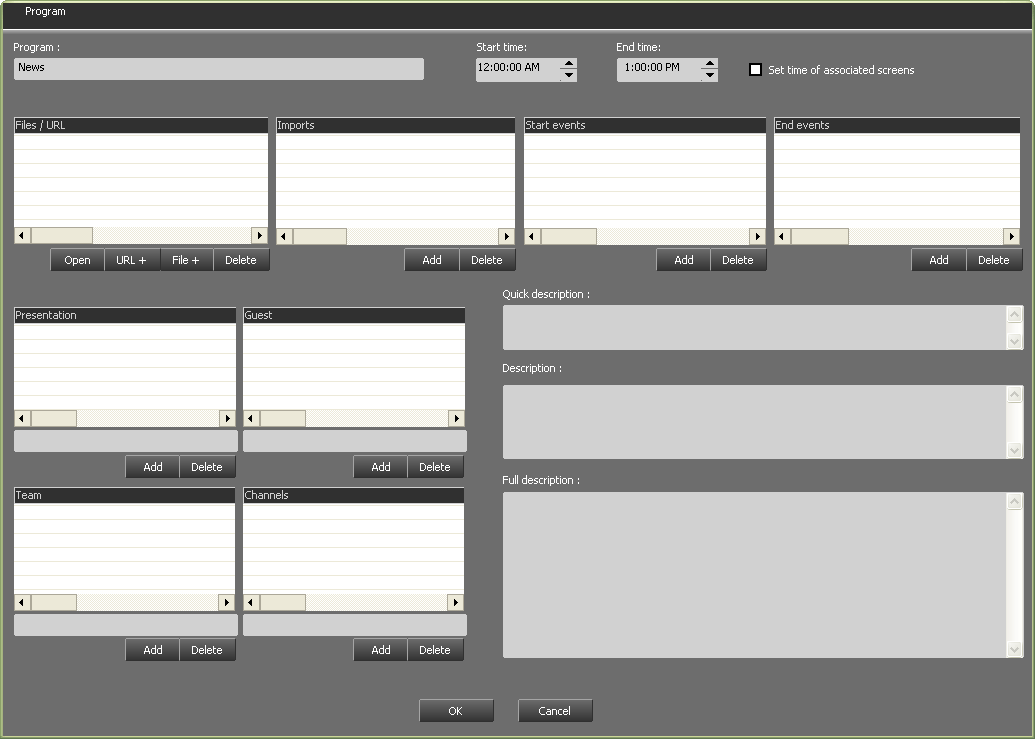
The name as well as the hours for the beginning and the end of the program are automatically displayed.
The box  allows you to change the settings for the start time and the end time of the show, should these settings be changed.
The following elements are detailed here :
11.6.1.URL Files
It is possible to attach files or URL links to a program.
URL files : It is possible to attach URL links or any other kind of file to a program.
As regards URL files, click on 
 , populate the URL field, then click on .
As regards files, click on 
 , WIndows explorer will open. Select teh file you wish to insert, then click on .
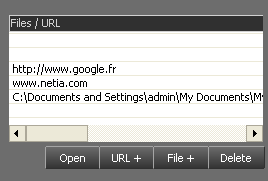
To open the link or the file, select it from the list and then click on  .
.
To delete the link or the file, select it from the list and then click on  .
.
You will be able to reach the file by clicking on the following icon  .
.

11.6.2.Imports
Add the imports related to the specified program.
Click on  then select from the list the import that is related to that program.

Click on 
You have just specified the import for your program.
11.6.3.Start and End events
Start and end events :
It is possible to attach different kinds of events to the beginning or to the end of each program (Gpi, switch to auto mode, recording start, and so on...)
All these elements are set by the administrator and will be added to GridEditor.
11.6.4.Presentation/Guests/Team/Channels
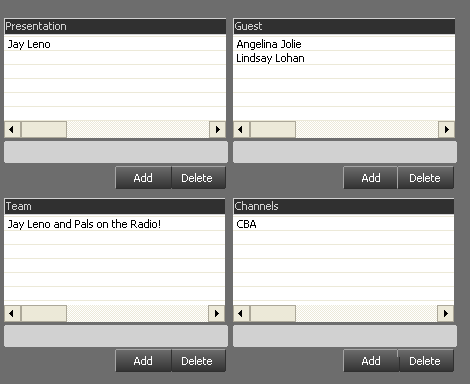
This zone allows you to add text information related to a program:
- Name of the host(s),
- Name of the guest(s),
- Team working on the program,
- Broadcast channels.
It is possible to change the settings for these zones.
To use these fields, populate the grey areas, then click on  .
.
To delete an element, select it by clicking on it once, then click on  .
.
11.6.5.Description
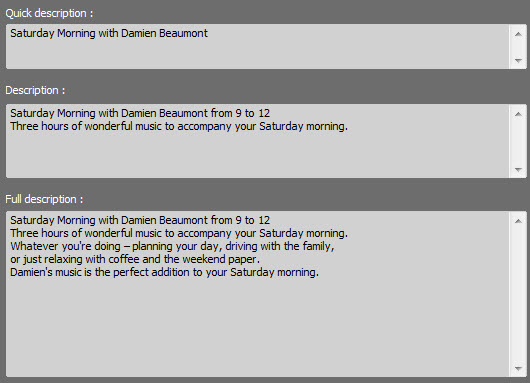
This zone allows you to give three levels of description for the program (quick description, normal and complete)
Write the text in the fields you wish to use.
Valdation will be done once you'll click on  at the bottom of the window.
11.7.Copying a time slot
In the grid, right click on the slot you wish to modify and then select "Copy program".
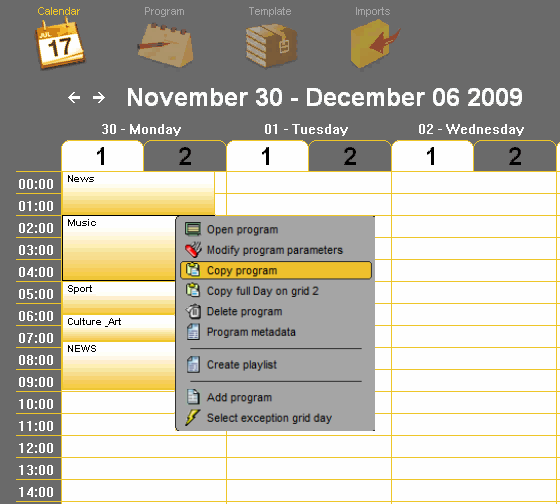
Enter the parameters of the time slot (time slot name, validity period, begin time, end time, valid day(s).
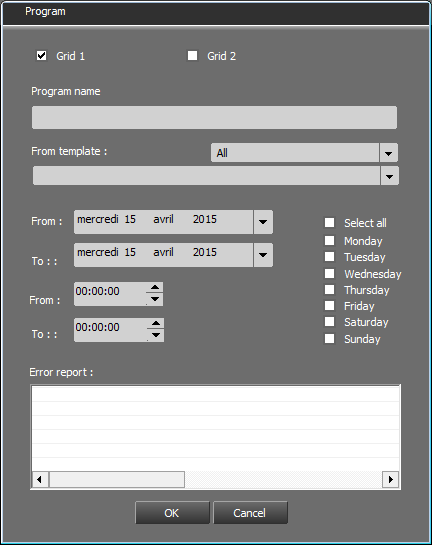
Click on "OK"  .
.
The time slot is Copied.
11.8.Deleting a time slot
Right-click on the time slot to delete.
Click on « Delete program » 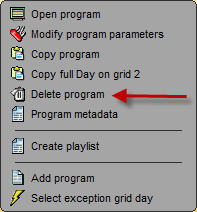 .
.
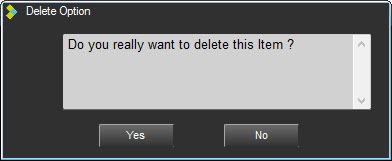
Click on  .
.
Your time slot is deleted for the whole validity period.
11.9.Filling in a time slot
On the scheduler, Click on the time slot to fill in.
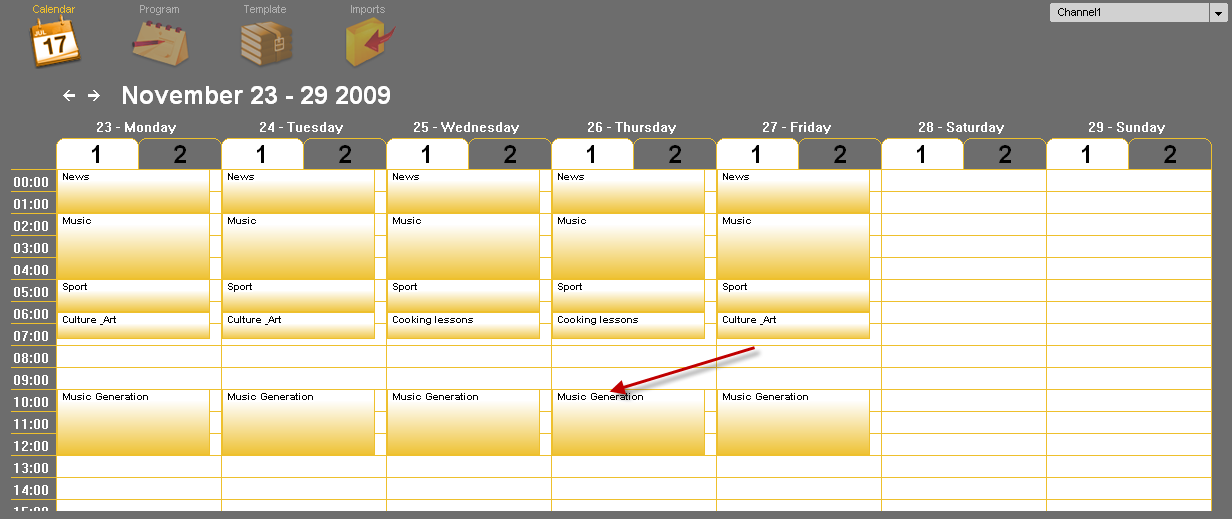
Click on « Open » 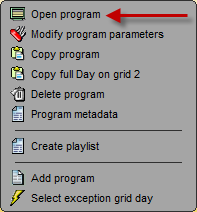 or double-click on it.
In the Browser, select the « Template » category.
Drag and drop from the Browser to the time slot and build the frame of your time slot.
You do not need to save. Indeed, it is saved on the fly.
11.10.Create a screen (Break)
A screen (or break) is a folder which contains one or several steps and which will be broadcast consecutively. A screen is represented by a "folder" icon.
Right-Click on the Screen and then choose "Modify" or "Create empty screen" from the menu.
You can modify or type the screen name (break name), the category and the broadcast mode.
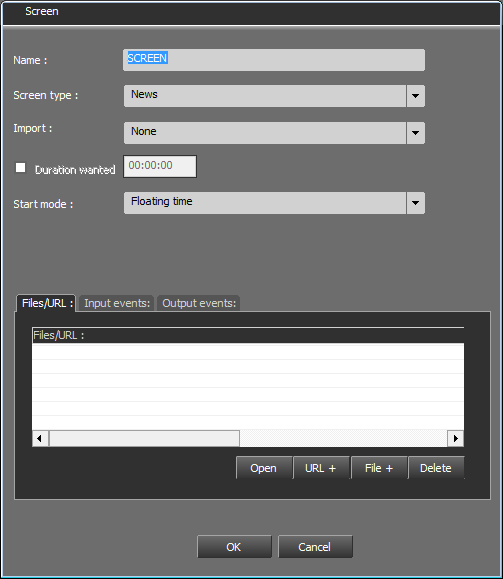
The "Duration wanted" box can be ticked in order to specify a wanted duration for this screen.
Type the durantion wanted (HH:MM:SS)
The duration will be displayed on the screen :
If the reel duration of the screen is superior to the typed duration, the difference will be shown in red.

If the reel duration of the screen is inferior to the typed duration, the difference will be shown in green.

11.11.Broadcast modes
The broadcast modes are the following :
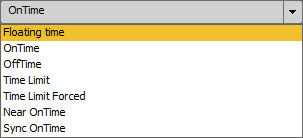
IMPORTANT: The actions of the following broadcast modes are described in the case of an AirDDO in automatic mode. In the case of an AirDDO in manual mode, it is the studio technician who will decide to start the screens by activating the faders.
Floating Time : The screen is broadcasted automatically after the previous screen (broadcast time is adapted) 
On time : The screen is broadcasted automatically at the set time. 
Off time : Screen with an automatic start time which is automatically calculated according to the end of the broadcast time set by the user. End time: time set for screen broadcast to end.
Time limit : Screen with automatic broadcast at a set time + start screen. If broadcast of the previous screen ends during window countdown, this screen will be broadcasted. If it is not over, the Auto window screen will not be broadcasted and the broadcast program will go to the next screen in the playlist.  .
.
Time limit forced : Screen with an automatic broadcast time. Same procedure as "Time Limit" except that the screen is automatically broadcasted at the end of the defined window. 
To define a window, fill in the following parameters :
Begin time : To specify the time screen broadcast starts (HH:MM:SS).
Begin limit : To set a time lapse before the start time (HH:MM:SS).
End limit : To set a time lapse after the start time (HH:MM:SS).
Near on time : The screen is broadcasted at a set time. Nonetheless, Air-DDO will wait for the song (which is on air in the previous screen) to be over before starting the new screen :
Sync OnTime : Same procedure as "Time Limit". The difference is that the screen is strated with GPI. 
IMPORTANT : These broadcast modes are defined in "GridEditor" and "Feder-All" but they are used in Air-DDO (playout system belonging to the RadioAssist range of products).
11.12.Events On Screen
Input Events allow you to trigger an action when the screen starts going On-Air.
A) INPUT EVENTS
Air-DDO awaits an event to start broadcasting the screen. At the beginning of the screen, Air-DDO receives an event. This starting mode can only be used with TIME LIMIT and TIME LIMIT FORCED modes (indeed, ON TIME mode will be triggered based on the exact hour).
To create a new Input Event, complete the popup with the name and the parameters of the events, then click on  . Your event now appears in the drop-down menu and you can use it on any screen.
GPI
This type of event allows you to start the screen on reception of a GPI command.
Name : name given to the event
Duration : N/A
GPI# : number allocated to you GPI command, which will trigger the screen.
Type : ON or OFF or TOGGLE or INVERT ...
COM
This type of event allows you to trigger the broadcasting of a screen on reception of the COM command.
Name : name given to the event
Duration : N/A
The fields "Data", "Parity", "Num Com", "Baud Rate", "WordLenght" and "Stopbits" correspond to the configuration of your COM port.
IP
This type of event allows you to trigger the broadcasting of a screen on reception of the IP command.
Name : name given to the event
Duration : N/A
Address : IP address
Data : IP command sent
Port : IP port number
TTl : Time To live (value fixed at 255 by default)
Type : UDP or TCP
B) OUTPUT EVENTS:
Here, Air-DDO sends a command. The command can be sent at the beginning or at the end of the screen.
To create a new output event, complete the popup with the name and the parameters of the events, then click on  . Your event now appears in the drop-down list and it can be used on any other screen.
GPI
An output GPI event means Air-DDO sends a GPI command when the screen starts (for example, the ON-AIR light is on when broadcasting starts).
Name : name given to the event
Duration : N/A
GPI# : number allowing you to identify the GPI command to launch.
Type : ON or OFF or TOGGLE or INVERT ...
Offset : L’Offset defines the position from which the GPI command is sent.
COM
An output COM event means Air-DDO sends a command which triggers a COM command.
Name : name given to the event
Duration : N/A
The fields "Data", "Parity", "Num Com", "Baud Rate", "Wordlenght", Stopbits" correspond to your port COM settings
Offset : the Offset defines the position from which the COM command is sent.
IP
An output IP event means Air-DDO sends an IP command.
Name : name given to the event
Duration : N/A
Address : IP Adress
Data : IP command sent
Port : IP port
TTl : Time To live (value fixed at 255 by default)
Type : UDP or TCP
Offset : the offset position defines defines the position from which the IP command is sent
RECORD COMMAND
Name : name given to the event
Duration : N/A
Address : listening address
Ident : command identifier
Data : IP command sent
Port : Listening port
TTl : Time To live (value fixed at 255 by default)
Type : UDP or TCP
Action : Start or Pause or Stop
Offset : the offset position defines defines the position from which the command is sent
FADE AUTO
The FADE AUTO event only works with the ON TIME and OFF TIME modes. When the FADE AUTO option is activated, it means the screen will start on time, operating a fade out on the previous item (instead of cutting it abruptly).
Name : name given to the event
Duration : N/A (Leave this value to "0")
Duration (ms) : Duration in milliseconds of the fade out (1000 ms = 1 second)
Level : sound level to reach at the end of the fade out curve
Offset (ms) : The Offset defines the position of the beginning of the fade.
- If the value is fixed to 0 = the fade out will start at the beginning of the ON TIME/OFFTIME screen,
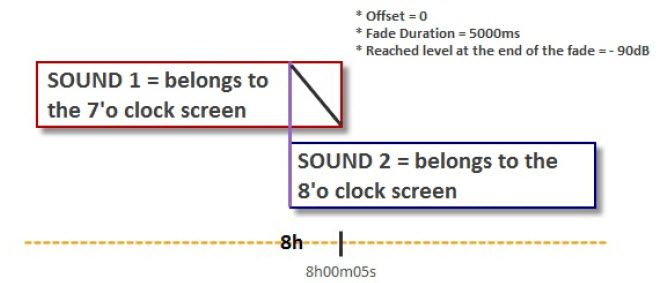
- If the offset is negative = the fade out will start BEFORE the starting time of the ON TIME/OFFTIME screen,

- If the offset is positive = the fade out will start AFTER the starting time of the ON TIME/OFFTIME screen,
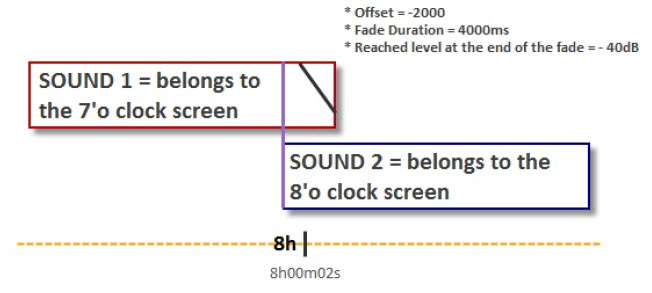
RECORD TO LIVE
The RECORD TO LIVE output event allows you to make a loop between the audio card Input and the audio card output.
Name : name given to the event
Duration : Duration to give if a RUN of the "event" type is used. (contact the administrator for more information)
Type : ON or OFF (to decide if the action must be triggered or stopped
Start Level (dB) : sound level at the beginning of the fade
Duration : Desired duration for the fade
Db Fade : sound level to reach at the end of the fade
Offset : The Offset defines the position of the beginning of the fade.
MODE AUTO
The AUTO command allows you to switch from manual to automatic mode in AIR-DDO, and conversely.
Name : name given to the event
Duration : N/A
Type : ON (the AUTO mode is triggered) or OFF (the AUTO mode is deactivated)
Start Auto : ON (synchronization on the current hour and automatic broadcast triggering) or OFF (awaiting a trigger to start the broadcast-such as an ON TIME screen or a TIME LIMIT FORCED screen for example, a manual launch...)
In other words, if the START AUTO parameter is set to ON, the screen will start from the position to which the screen should be playing.
SHELL COMMAND
Nom : name given to the event
Duration : N/A
Cmd : name of the command you wish to trigger (command executed by the workstation's OS)
Offset : the offset position defines the position from which the command is executed
- If the offset is set to "0" = command is executed when the screen starts
- If the offset is negative = command is executed before the screen starts
-If the offset is positive = command is executed after the screen starts
VLSU
This type of event is used in correlation with localization players, in order to send a PLAY order to the different PLAYERS in use (Digitrack or LocPlayer)
Name : name given to the event
Duration : N/A
Ident : TIME SLOT EVENT identifier (cf. documentation "LocalisationSchedule_8.00_US.pdf")
Category : TIME SLOT EVENT category (if used)
11.13.Copy and paste a screen
It is possible to copy and paste a screen.
Right-click on the screen to copy and select "Copy" in the menu.
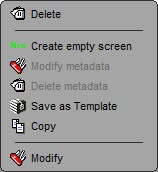
Then place the cursor where you want to paste the screen, right-click and select "Paste" in the meu.
The screen is pasted before the screen selected.
11.14.Metadata items
A "Metadata" item is an item in the database that is present in a tab of the database.
These items make it possible to attach to a screen additional informations that are already present in the database.
That enriches Datacasting.
The configuration will be made upstream to create the tab and all the criteria that can be added to the screen.
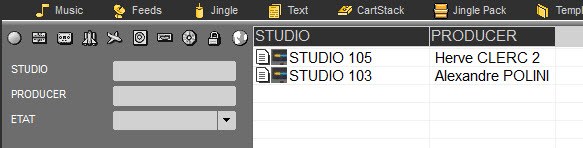
Here, the METADATA tab has been created in order to add items with additional information such as the broadcasting studioand the name of the director.
11.14.1.Create and add a Metadata item
To create a Metadata item, in the Browser click on  on the right of the screen
The following windows opens :

Enter all the informations and click on  .
.
The item is created in the database with the icon  .
.
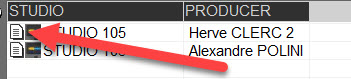
IMPORTANT: These items created in the database will be used as "ORGINAL".
That is, whenever an original item is added in a playlist or a playlist is generated using an original, a copy will be created in the database but without an icon in the browser.
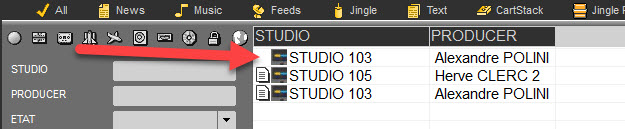
Once the item is created, it can be added to a screen.
To do so, open the show, then drag and drop the item on a screen.
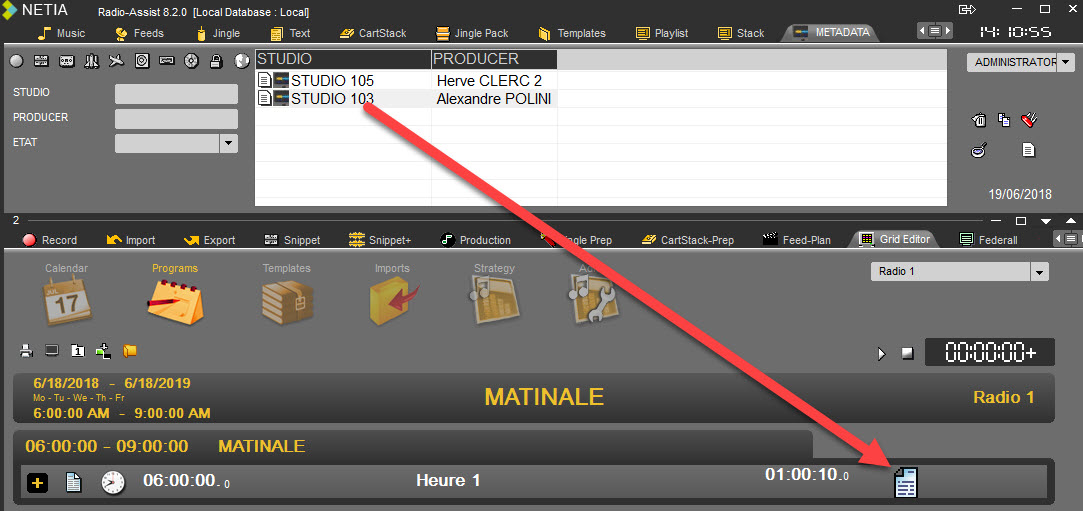
From now on, all palylists generated from this template will have the item linked to this screen.
11.14.2.Modify a Metadata item
To modify a Metadata item, right clic on the icon  and right click.
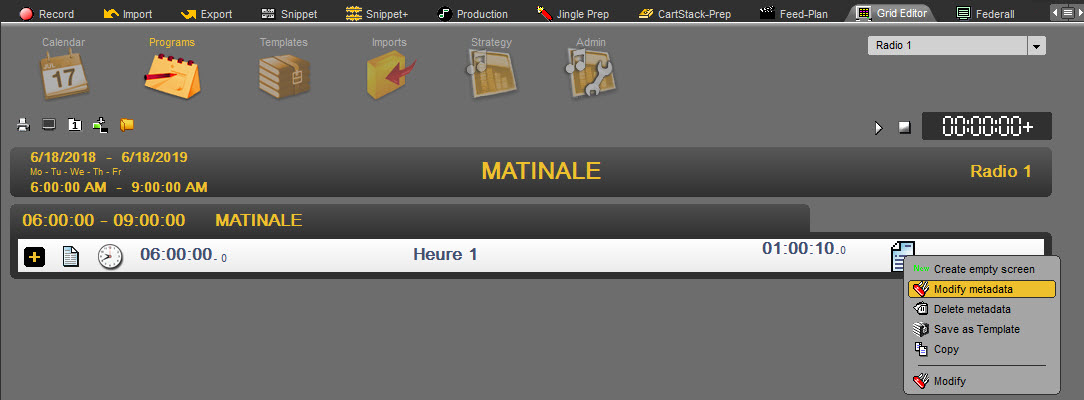
Select "Modify Metadata".
The following window opens :

Make the modifications and click on  .
.

Metadatas are saved.
11.14.3.Delete a Metadata item
To delete a Metadata item, right clic on the icon  and right click.
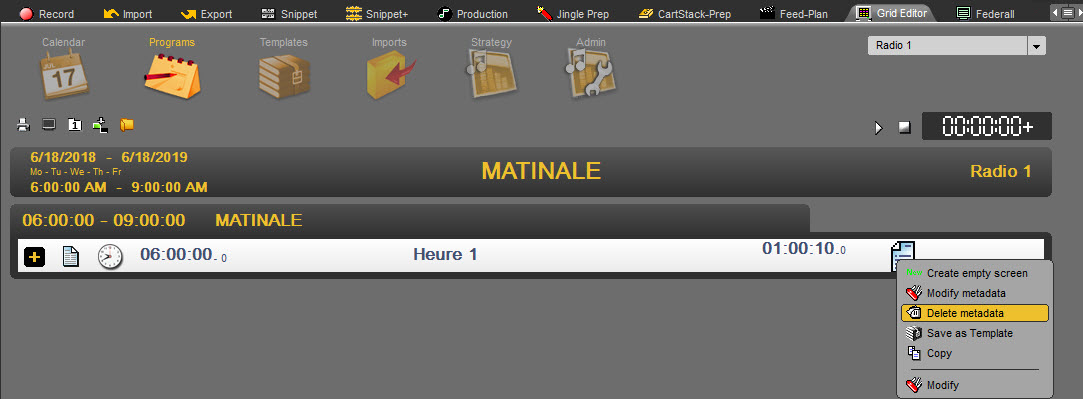
Select "Delete Metadata".
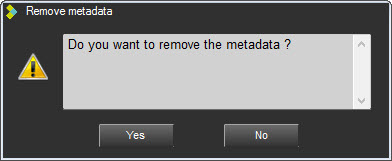
Click on YES.
Metafatas are deleted from the screen.
11.15.Create a run (Step)
A Run (or step) is a sub-folder which is located in a screen.
Example : a template named "News" contains steps for each type of news : "International news", "National news", "Local news" etc.
If you are on a step, right-clicking allows you to modify a step (event) or insert a new step (event) from the menu.
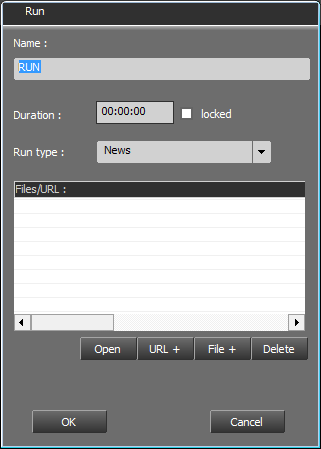
We have 3 different types of runs :
Simple Run : It's the most commun type of run. No setting needed in advance or later
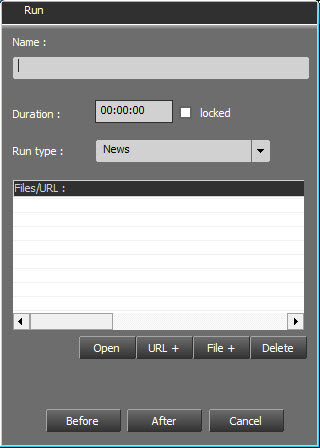
Event Run : Run used to apply events (GPI activation, record command, fade auto, etc...)
These events are crated by system administrators.
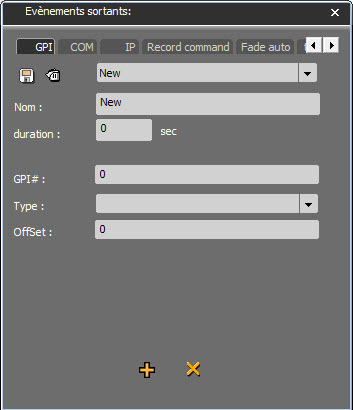
Target Run : Run used when using the RadioAssist music scheduling integrated solution.
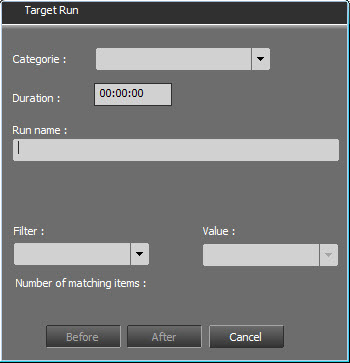
It is possible to add wildcards (e.g. $TIME_HH$) in the step naming. At the generation of the pipe, they will be replaced by their value by the date and time of the corresponding step
DATE_LOCAL | Mar 15:48:10.845 09/12/2020 | Cf Régional settings |
DATE_SQL | Mar 15:48:10.845 09/12/2020 | 2020-12-09 15:48:10.845 |
DATE_DW | Mar 15:48:10.845 09/12/2020 | 03 (Mar) |
DATE_DD | Mar 15:48:10.845 09/12/2020 | 09 |
DATE_MM | Mar 15:48:10.845 09/12/2020 | 12 |
DATE_YYYY | Mar 15:48:10.845 09/12/2020 | 2020 |
DATE_DDMM | Mar 15:48:10.845 09/12/2020 | 0912 |
DATE_DD-MM | Mar 15:48:10.845 09/12/2020 | 09-12 |
DATE_DD/MM | Mar 15:48:10.845 09/12/2020 | 09/12 |
DATE_MMDD | Mar 15:48:10.845 09/12/2020 | 1209 |
DATE_MM-DD | Mar 15:48:10.845 09/12/2020 | 12-09 |
DATE_MM/DD | Mar 15:48:10.845 09/12/2020 | 12/09 |
DATE_DDMMYYYY | Mar 15:48:10.845 09/12/2020 | 09122020 |
DATE_DD-MM-YYYY | Mar 15:48:10.845 09/12/2020 | 09-12-2020 |
DATE_DD/MM/YYYY | Mar 15:48:10.845 09/12/2020 | 09/12/2020 |
DATE_MMDDYYYY | Mar 15:48:10.845 09/12/2020 | 12092020 |
DATE_MM-DD-YYYY | Mar 15:48:10.845 09/12/2020 | 12-09-2020 |
DATE_MM/DD/YYYY | Mar 15:48:10.845 09/12/2020 | 12/09/2020 |
TIME_HH | Mar 15:48:10.845 09/12/2020 | 15 |
TIME_MM | Mar 15:48:10.845 09/12/2020 | 48 |
TIME_SS | Mar 15:48:10.845 09/12/2020 | 10 |
TIME_MS | Mar 15:48:10.845 09/12/2020 | 845 |
TIME_HHMM | Mar 15:48:10.845 09/12/2020 | 1548 |
TIME_HH:MM | Mar 15:48:10.845 09/12/2020 | 15:48 |
TIME_HHMMSS | Mar 15:48:10.845 09/12/2020 | 154810 |
TIME_HH:MM:SS | Mar 15:48:10.845 09/12/2020 | 15:48:10 |
TIME_HHMMSSMS | Mar 15:48:10.845 09/12/2020 | 154810845 |
TIME_HH:MM:SS.MS | Mar 15:48:10.845 09/12/2020 | 15:48:10.845 |
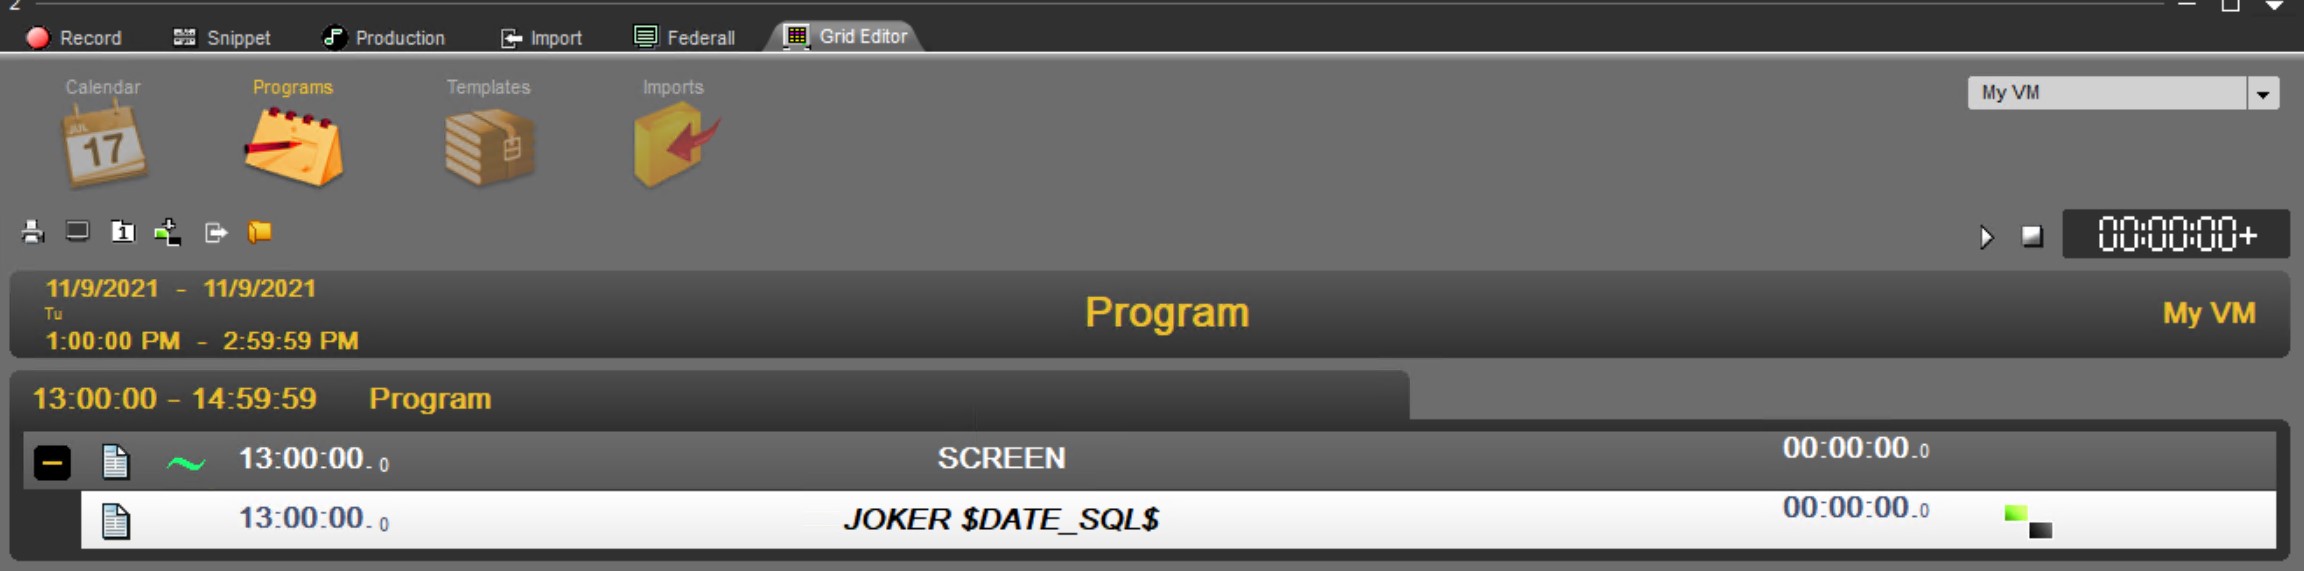

11.16.Locked duration
The "Lock duration" function is designed to lock the step duration (this function is available by a right click on an empty step only).
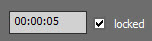
Example : if the step (event) is 5 seconds long, and you insert inside an audio file which is 10 seconds long, it will be possible to play 10 secondes but the duration in the playlist will remain 5 secondes.
11.17.Copy and paste a run
It is possible to copy and paste a run.
Right-click on the run to copy and select "Copy" in the menu.
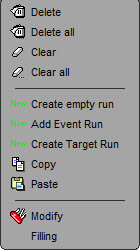
Then place the cursor where you want to paste the run, right-click and select "Paste" in the meu.
The run is pasted before the run selected.
It is possible to copy several runs at the same time.
Select them using the CTRL or SHIFT key, depending on the selection mode wanted (one by one or a group of runs).
Right-click on the run to copy and select "Copy" in the menu.
Then place the cursor where you want to paste these runs, right-click and select "Paste" in the meu.
The runs are pasted before the run selected.
11.18.Template
A template describes the content of a program of part of a program. A template is composed by screen (Break) (example : program name) and steps (events) - (program detail).
11.18.1.Creating a template
Click on the "Template" icon to create and then on the following button (circled in red).
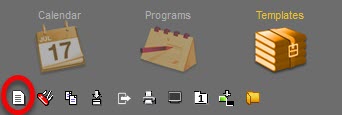
You will be prompted to enter the following information regarding the kind of template you want to create.
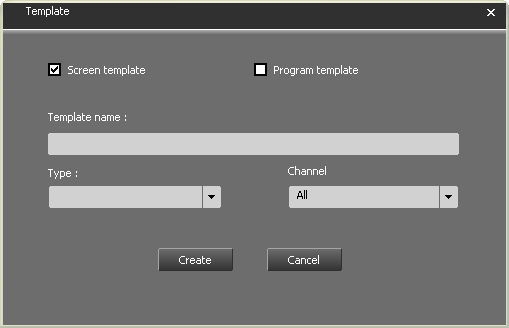
The template is created but it is empty :

Create then the screen(s) and the run(s)
11.18.2.Deleting a template
Go to the Browser, under the "Template" tab.
Select the template to delete.
Either do a right click on it, the« delete » function is displayed, or click on the "trash can" icon  available at the right side of the Browser.
A message to confirm the deletion is displayed. Click on « Yes» to confirm the deletion or « no » to cancel the action.
11.19.Validity period
The validity period represents the period for which the timeslot is valid.
(Example : The « News » time slot from 0h to 2h will be valid during 1 year, from November 1st 2009 to November 2nd 2010, everyday except the week-end).

11.20.Exception Grid Days
The exception grid allows you to create a special program without the need to modify the standard grid.
It is operated the same way as the standard grid.
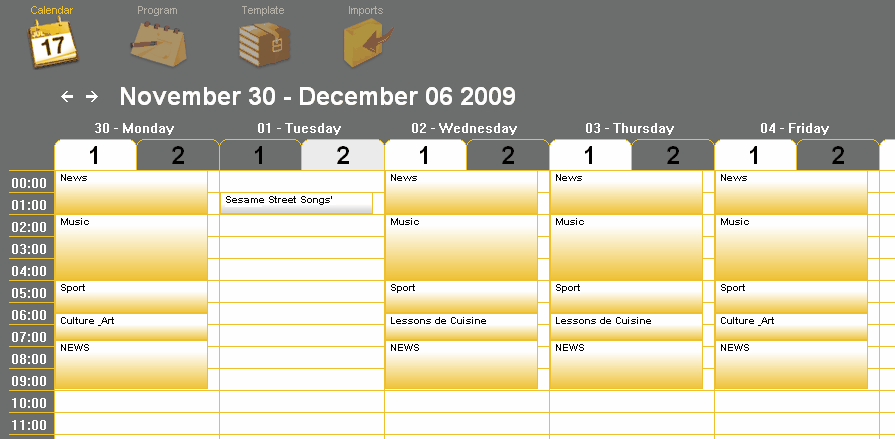
11.20.1.Choosing exception grid days
Choosing exception grid days allows you to define the grid display mode by default.
To specify to Radio Assist the exeption grid days, position your cursor on the grid and then, right click on it.

Choose "Select exception grid days" from the menu.
The following window is displayed :
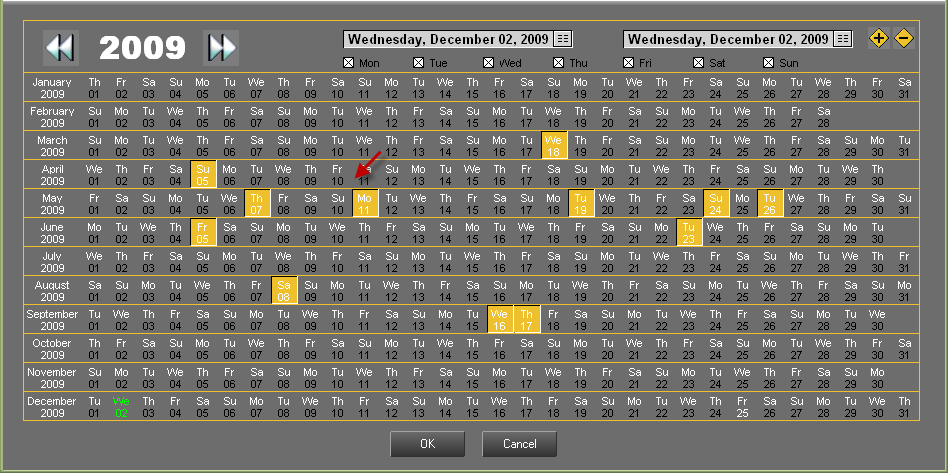
To select one day, just click on it. It becomes yellow.
From now on, the selected days will appear as "exceptional" days in GridEditor.
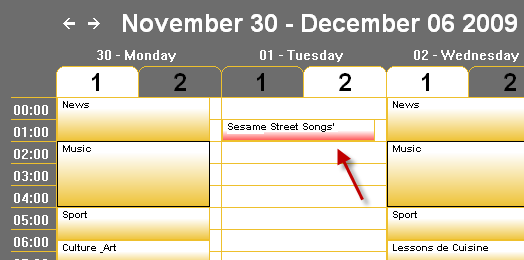
Here, every day of the month of july except the tuesdays will appear as exceptional days.
The following zone:

allows you to mark every given day of the week as an exception grid day.
If you choose a starting date and an ending date and untick some days, you'll have two possibilities:
By clicking on  , Radio Assist will convert all the days between these two dates, except the untick day(s), to exception grid days.
By clicking on  , Radio Assist will convert only the days between these two dates, the untick day(s), to exception grid days.
11.20.2.Multiple Grids
In GridEditor, it is possible to choose to prepare a grid containing all the regular programs as well as an exception grid, as radio stations also carry a wide variety of special event programs (from coverage of festivals, parades, concerts, school plays, political debates, sporting events...)
Therefore, you can choose to modify a full programming schedule or only apply a few changes on your grid.
Depending if the playlists are created automatically ou manually.
Playlists created manually
Playlists created manually :
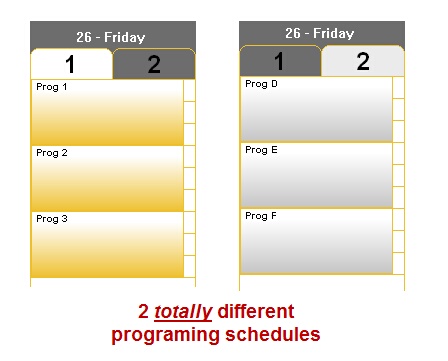
In the example above, we can choose to broadcast the programs from Grid one (regular programs), or those from Grid two (exception grid).
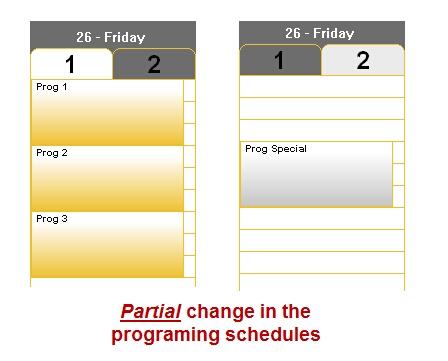
In the example hereabove, it is possible to introduce some changes in the regular programming schedule :
- whether grid one is broadcast (regular programs)
- whether you move from one grid to the next (combination of grids 1 & 2).
In the latter case, it is possible to replace "Prog 2" by "Prog Special".
Generating a multiple-grid-based playlist is done in Federall.
N.B:
It is important to keep in mind that, when replacing a regular program by a special event program, both programs should be of the same duration in order to prevent unbalances between the grids. Indeed, if your special program is too short, then you will go dead air and nothing but silence will be broadcast between the two shows. If it is too long, it will enter into conflict with the next program.
Playlists created automatically
If the playlists are created automatically, a tool called "Federall Service" generates these palylists a few days ahead.
Federall Service will use GridEditor to create those playlists.
It means that Federall Service will use ONLY the Grid#1 or the Grid#2.
If you want to use Grid#2 you must first copy all the time slots from Grid#1 to Grid#2.
To do so, right click on one of the time slots from Grid#1 and select : "Copy full Day on grid 2"
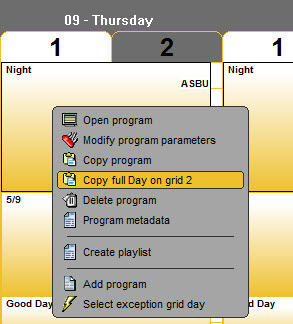
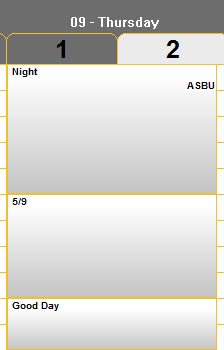
Then select the exception grid day.
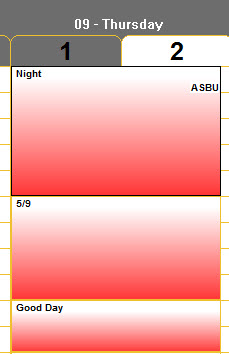
Now modifications can be done on Grid#2 for this special day.
Federall Service will create the playlist using Grid#2 for this specific day.
11.21.Imports
The Imports window will allow to parameter the settings for files coming from third party softwares such as Ads Traffic or Music Scheduling.
This settings are done by administrators.
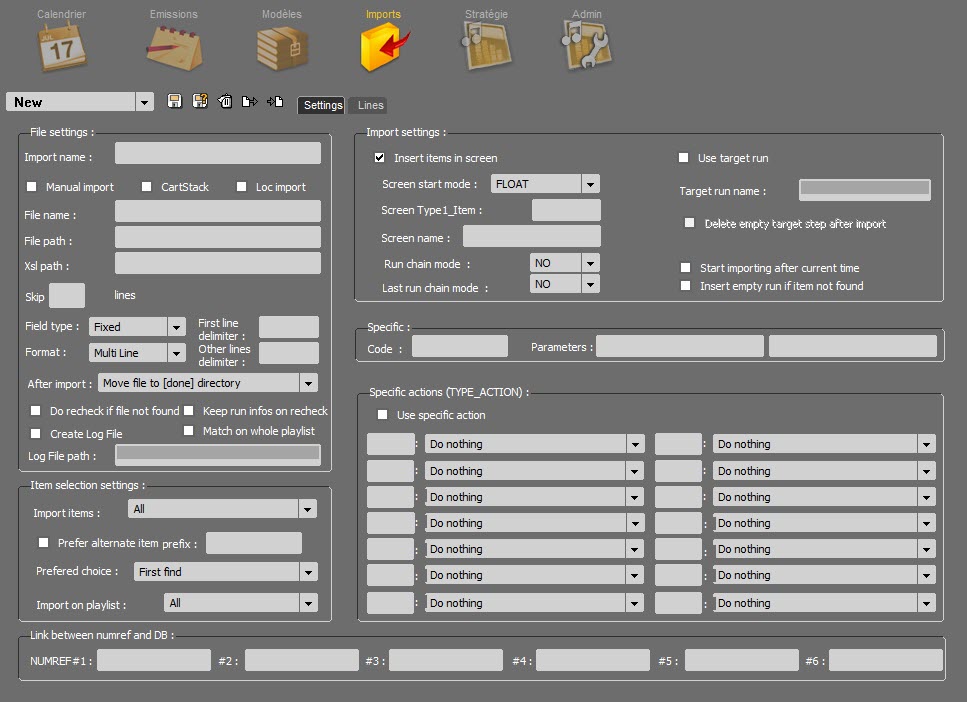
11.21.1.A - SETTINGS

You can choose from the drop-down list the type of configuration you wish to use in order to import the sounds into the playlists. By default, the list is empty.
To create a new configuration profile, you just have to select NEW. Once you're through with the setup, save your profile (via the  icon) and it will appear in the drop-down list.
The settings are saved in an XML file present on the record path of Radio Assist in the FEDERALL directory.
The path must therefore be UNC.
The  icon allows you to delete from the list the profile that has just been selected.
The two other icons  are used to import or export configuration files.
File Settings

Import name : name of the configuration profile.
Manual import : if this box is ticked, the import of sounds into the playlists will only start when RadioAssist users click on the dedicated button  , in the FEDERALL module (in the automatic mode, it is Federall Service which does the import of sounds). The 2 import modes (manual and automatic) can not coexist. 2 simultaneous imports on the same playlist would cause scheduling problems.
Loc Import : This box is used only if the "Localization" option is used. An import file is sent by "LocScheduler" and a cartstack will be created with the items in the import. This option is only available for automated import (via FederallService).
Cartstack : The option allows you to create cartstacks instead of playlists.
This option is only available for auto import (via FederallService).
The values recovered to qualify the cartstack are limited:
PLAYLIST_NAME is used for the title of the cartouchier
TIME_BEGIN_ST for the startdate and boradcastdate
For carts, the RUN_NAME is used to fill the textHead
We update the items durations and NumRef for the recheck cartouches
File name : .txt or .xml file's name format used for the import (for example : %02D%02M%04Y.TXT).
The dates are filled with wild cards % : 04Y% 02D% 02M (Y = year, M = month D = day). % 04Y means one year out of 4 digits.
e.g : ImportFile% 02D% 02M% 04YourChannel1.XML (for example:% 02D% 02M% 04Y.TXT).
File path : UNC Path. Path to the file generated by the scheduling software (MusicMaster, Selector…) used for the import of sounds into RadioAssist.
Xsl path : UNC Path. Complete file's path to the .xsl sheet used to convert the xml file (generated by the third-party application) into the format supported by RadioAssist.
Skip X Lines : possibility not to take into account the first lines of the import file. You can leave this box empty.
Field type : defines the type of formating for the import file. Fields can have a FIXED size or they can be separated by DELIMITERS.
Format : the file can contain 1 (single) or 2 (multiline) types of lines.
First line delimiter: Character or string of characters located in first position of each line of the import file allowing to define the main type of the element to be created (screen for a playlist or cartstack item in Cartstack mode).
Other lines delimiter : Character or string of characters (located in the first position of each line of the import file) to define the secondary type of the element to be created (not for a playlist or cartstack in the T_RTF table in Cartstack mode).
After import : action performed by Federall Service on the file used to import the sounds (Delete file/Do nothing/Move file to [done] directory/Rename file [.done]…)
Do recheck if file not found : here you choose whether Federall Service must rescan the database later in case some sound files were not found the first time (the re-check frequency is defined in the "Playlist Import" section, in the Federall Service Setup window).
Create Log File : Create a log file generated in the folder whose location is noted in "Log File path"
Keep run infos on recheck : Keeps run information when associating a run created by the import with a sound from the database.
The informations kept are:
RUN_NAME
SPECIAL_RUN_DURATION
LIST_FADE
X_INLINK
X_OUTLINK
INTROMS
OUTTROMS
This option makes it possible to keep the work done on a third-party application in terms of mixes, fade points and cutting of the sound during an import (when associating a sound with a run, one normally takes the default information of the sound).
Match on whole playlist : Allow imports with unordered items (screens or not) in the import file.
When importing, we treat each line of the import file one by one. Traditionally, for each new line, one looks for the corresponding element in the associated playlist and this, from the last element found. With this option enabled, we go from the first element of the playlist to each new line of the import file.
Sample file generated by Music Master:
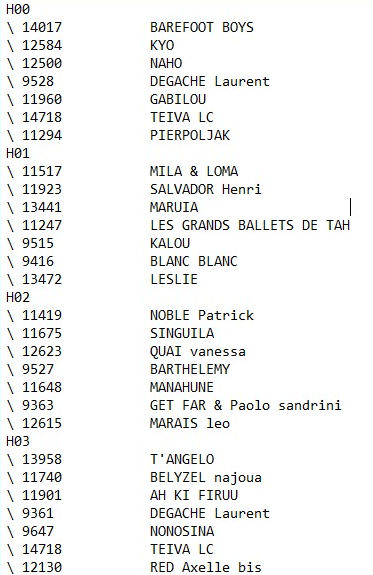
Item Selection Settings
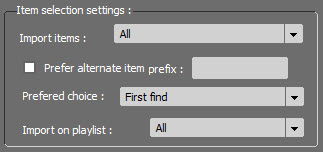
Import items : In this section, you can choose the status of all the items that must be inserted into the playlist.
Does Federall Service have to deal with :
All types of items?
RTB items?
RTB and broadcastable items?
Prefer alternate item prefix : An alternative item import can be set. These items must be stored in the database with the same identifier as in the file but preceded by a prefix.
Example ::
File Ref = 1234
Prefix = ALT
The import will look for priority if there is an identifier ALT1234 in ABC8. Otherwise he will look for the identifier 1234.
Prefered choice : here you choose which item must be used for import :
FIRST FIND
PROD item (virtual file)
MASTER item (physical file)
Import on playlist : Choice if the import is done in all playlists, or only RTB or not RTB.
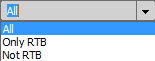
Import Settings
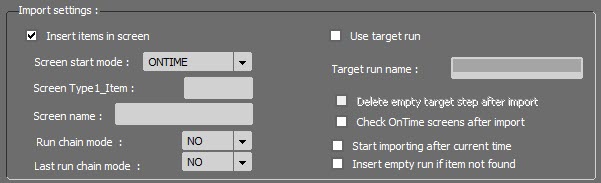
There are 2 types of import :
The first one (INSERT ITEMS IN SCREEN) creates the playlist's structure (the structure must first be defined in the txt or xml files that are ingested by Federall Service)
The second one (USE TARGET RUN) does not imply any structure creation : Federall Service only inserts the sounds in the empty runs with a specific name (ex : $MM)
In the first case, fields are configured by default (ie. screenshot here above) but it is completely possible to change the parameters. Federall Service creates the playlists without using any pre-existing structure. The service will use these parameters if no information is found in the import file.
Screen start mode : here you choose the default start mode of all the screens (Float, On time, Time limit…)
Screen Type1_Item : RadioAssist's reference tab, in which the sounds to be imported are.
Screen name : name given to the screens by default
Run chain mode : chaining mode by default between the runs. (MIX, CUT, MANUAL)
Last run chain mode : chaining mode applied to the last run of the playlist.
In the second case, the setup fields are different :
Use run target : when this box is ticked, the playlist's structure is not created. Federall Service fills the playlists, basing itself on a pre-exisiting structure (which has been defined before by RadioAssist users in GridEditor)
Target Run Name : name of the 'runs' in which the sounds must be inserted (ex : $MM)
Delete empty target step after import : this option allows you to delete runs which remain empty after the import. (For instance, if the scheduling application has prepared 5 sounds in the 4PM-5PM time slot while there are 8 'runs' called $MM in the RadioAssist's playlist, Federall Service will delete the 3 remaining empty runs for which there is no associated sound to import.
Check OnTime screens after import : Verification and possible deletion of overflows due to NoLImit mode.
Start Importing after current time : when this box is ticked, Federall Service starts importing sounds in the playlists that are scheduled for after the current time.
Insert empty run if item not found : when Federall Service scans the ABC8 database in search of a sound to insert into the playlist, if the corresponding sound file is not found, the run that is left empty will be marked as candidate to a re-scan.
Specific Actions
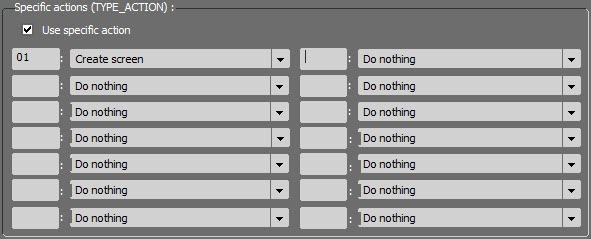
It is possible to trigger a specific action depending on the code that is found in the file used for the import.

The first column is used to enter the code that must be found in the text.
The second column is used to specify the type of action you want to trigger when Federall comes across the above-mentioned code.
Examples of actions : Do nothing, create empty run, create screen, Use screen [NAME] if not Create it, Use screen [TIME] if not create it, Set chain = NO to prev run, Grid Screen…

In rare cases, a customer-specific feature may be required. The setting results in a specific code and 2 parameters.
These codes are used today at RTL and Radio France.
Link Between Numref and DB

In this section, it is possible to enter the references that must be used to find an item in the ABC8 database. Usally, one reference is enough.
Nevertheless, if Federall does not manage to find an item based on the first reference, it can use another reference in order to locate the desired item: you can use up to 6 references.
11.21.2.B - LINES
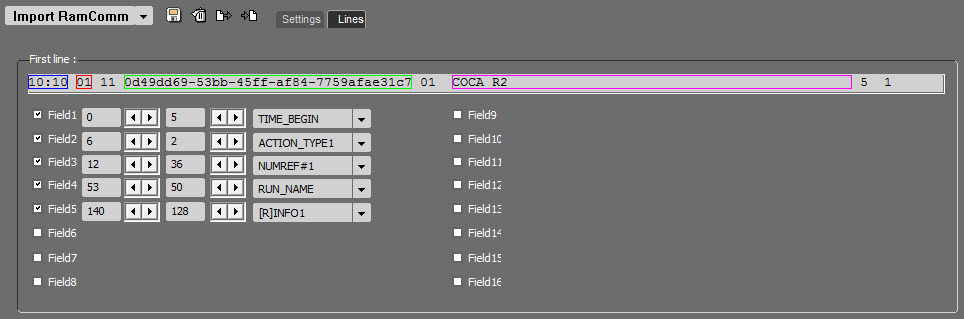
This section is used to describe the structure of the txt or xml file generated by the third-party application:
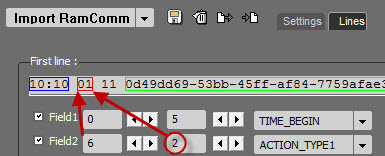
The 'field boxes' correspond to the different columns that appear in the txt or xml file:
- The first section (here in the example : '6' ) means that the field's text starts on the fourth character position
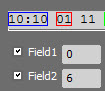
- The second section (here in the example : '2' ) means that the field is made of 8 characters
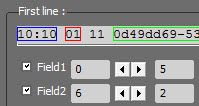
- The third section : 'TYPE_ACTION' means that the action noted in the "Specific action" field will be done. Here, creating a screen.
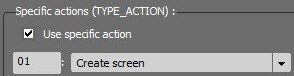
List of possible actions :
ACTION_TYPE1 | Reference of an action (see action). |
ACTION_TYPE2 | Reference of an action (see action). |
ACTION_TYPE3 | Reference of an action (see action). |
BLOCK_HOUR | Time to place the schedule. Used in target mode. |
BREAK_NAME | Break name of the step. |
CHAIN | Desired step mix. |
CHANNEL | Destination channel. |
DURATION | Run duration. This one will be used in the case where the sound matter is not yet present in Radio Assist. An empty step is then created with this duration. Otherwise the duration taken into account is the duration of the Netia item. |
FILE_NO_EXT | File name. |
FILE_SIZE | File size. |
GUID_ITEM | Item's Guid. |
ID_ITEM | Item's ID. |
IGNORE | Field ignored. |
INTROMS | introMS du pas. |
ITEM_NAME | Item's name. |
ITEM_REMARKS | Remarks associated with the item. |
LOCPLAYER | Loc player name as part of a location import. |
NUM_CD | Num_CD ref. |
NUM_SELECTOR | Num_Selector ref. |
NUMREF#1 | Dynamic reference number (see NUMREF) Make the link between the external identifier and a Netia DBD field for matching. |
NUMREF#2 | Dynamic reference number (see NUMREF) Make the link between the external identifier and a Netia DBD field for matching. |
NUMREF#3 | Dynamic reference number (see NUMREF) Make the link between the external identifier and a Netia DBD field for matching. |
NUMREF#4 | Dynamic reference number (see NUMREF) Make the link between the external identifier and a Netia DBD field for matching. |
NUMREF#5 | Dynamic reference number (see NUMREF) Make the link between the external identifier and a Netia DBD field for matching. |
NUMREF#6 | Dynamic reference number (see NUMREF) Make the link between the external identifier and a Netia DBD field for matching. |
PATH | Item's path. |
PLAYLIST DATE | Playlist date. Used in playlist creation mode. |
PLAYLIST NAME | Playlist name. Used in playlist creation mode. |
PLAYLIST START | Playlist start time. Used in playlist creation mode. |
PLAYLIST END | Playlist finish time. Used in playlist creation mode. |
POSITION | RTL specific. Sets the position of the add step in the screen (informative) |
REGIE | RTL Specific. Define the add agency (informative) |
RUN_NAME | Run name. This one will be used in case the sound matter is not yet present in Radio Assist. An empty step is then created with this name. Otherwise the filled name is the Netia item name. |
SCREEN_DURATION | Screen duration |
SCREEN_NAME | Screen name |
SCREEN_REMARKS | Remarks linked to the screen |
SPOT_ID | Spot ID |
STRING_1 | Not Used |
STRING_2 | Not Used |
STRING_3 | Not Used |
STRING_4 | Not Used |
STRING_5 | Not Used |
TIME_BEGIN | Screen begin time |
TIME_END | Screen end time |
TIME_LIMIT_AFTER | Duration of "Time Limit" after screen |
TIME_LIMIT_BEFORE | Duration of "Time Limit" before screen |
TIMESLOT | Used for Localisation import |
TYPE | Screen type |
UNIK | UNIK field value |
UV END | RTL specific. (UV end time) |
UV START | RTL specific. (UV begin time) |
[I]DATE_FIRST_BROADCAST | Set the T_Item field to the value given in the file |
[I]DATE_KILL | Set the T_Item field to the value given in the file |
[I]INTROMS | Set the T_Item field to the value given in the file |
[I]ITEM_REMARKS | Set the T_Item field to the value given in the file |
[R]INFO1 | Set the T_Item field to the value given in the file |
[R]INFO2 | Set the T_Item field to the value given in the file |
[R]INLINK | Set the T_Item field to the value given in the file |
[R]INTRO_BEG_LEVEL | Set the T_Item field to the value given in the file |
[R]INTRO_BEG_POS | Set the T_Item field to the value given in the file |
[R]INTRO_END_LEVEL | Set the T_Item field to the value given in the file |
[R]INTRO_END_POS | Set the T_Item field to the value given in the file |
[R]OUTLINK | Set the T_Item field to the value given in the file |
[R]OUTRO_BEG_LEVEL | Set the T_Item field to the value given in the file |
[R]OUTRO_BEG_POS | Set the T_Item field to the value given in the file |
[R] OUTRO_END_LEVEL | Set the T_Item field to the value given in the file |
[R] OUTRO_END_POS | Set the T_Item field to the value given in the file |
[R]RUN_NAME | Set the T_Item field to the value given in the file |
11.22.Music scheduling
The music scheduling tool integrated in RadioAssist allows you to perform the following operations:
Create a musical scheduling.
Edit a music scheduling.
Simply perform a musical fill in.
Manage multiple channels.
Take into account elements actually broadcasted (reconciliation).
Music scheduling is an integral part of the RadioAssist GridEditor tab.
Only administrators have the option to display the setting icons.
The setting of the music scheduling is explained in the "Music Scheduling" documentation.
11.23.Create a playlist
Generating a playlist for a show can be done from the grid (standard ou exception)
Right-click on the show for which we want a playlist.

Select "Create Playlist"
The following window opens :
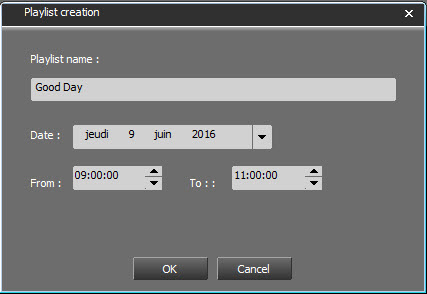
Select the date and click on  .
.
The playlist is generated and can be found in the "Playlist" tab.
12.Import
12.1.Workflow
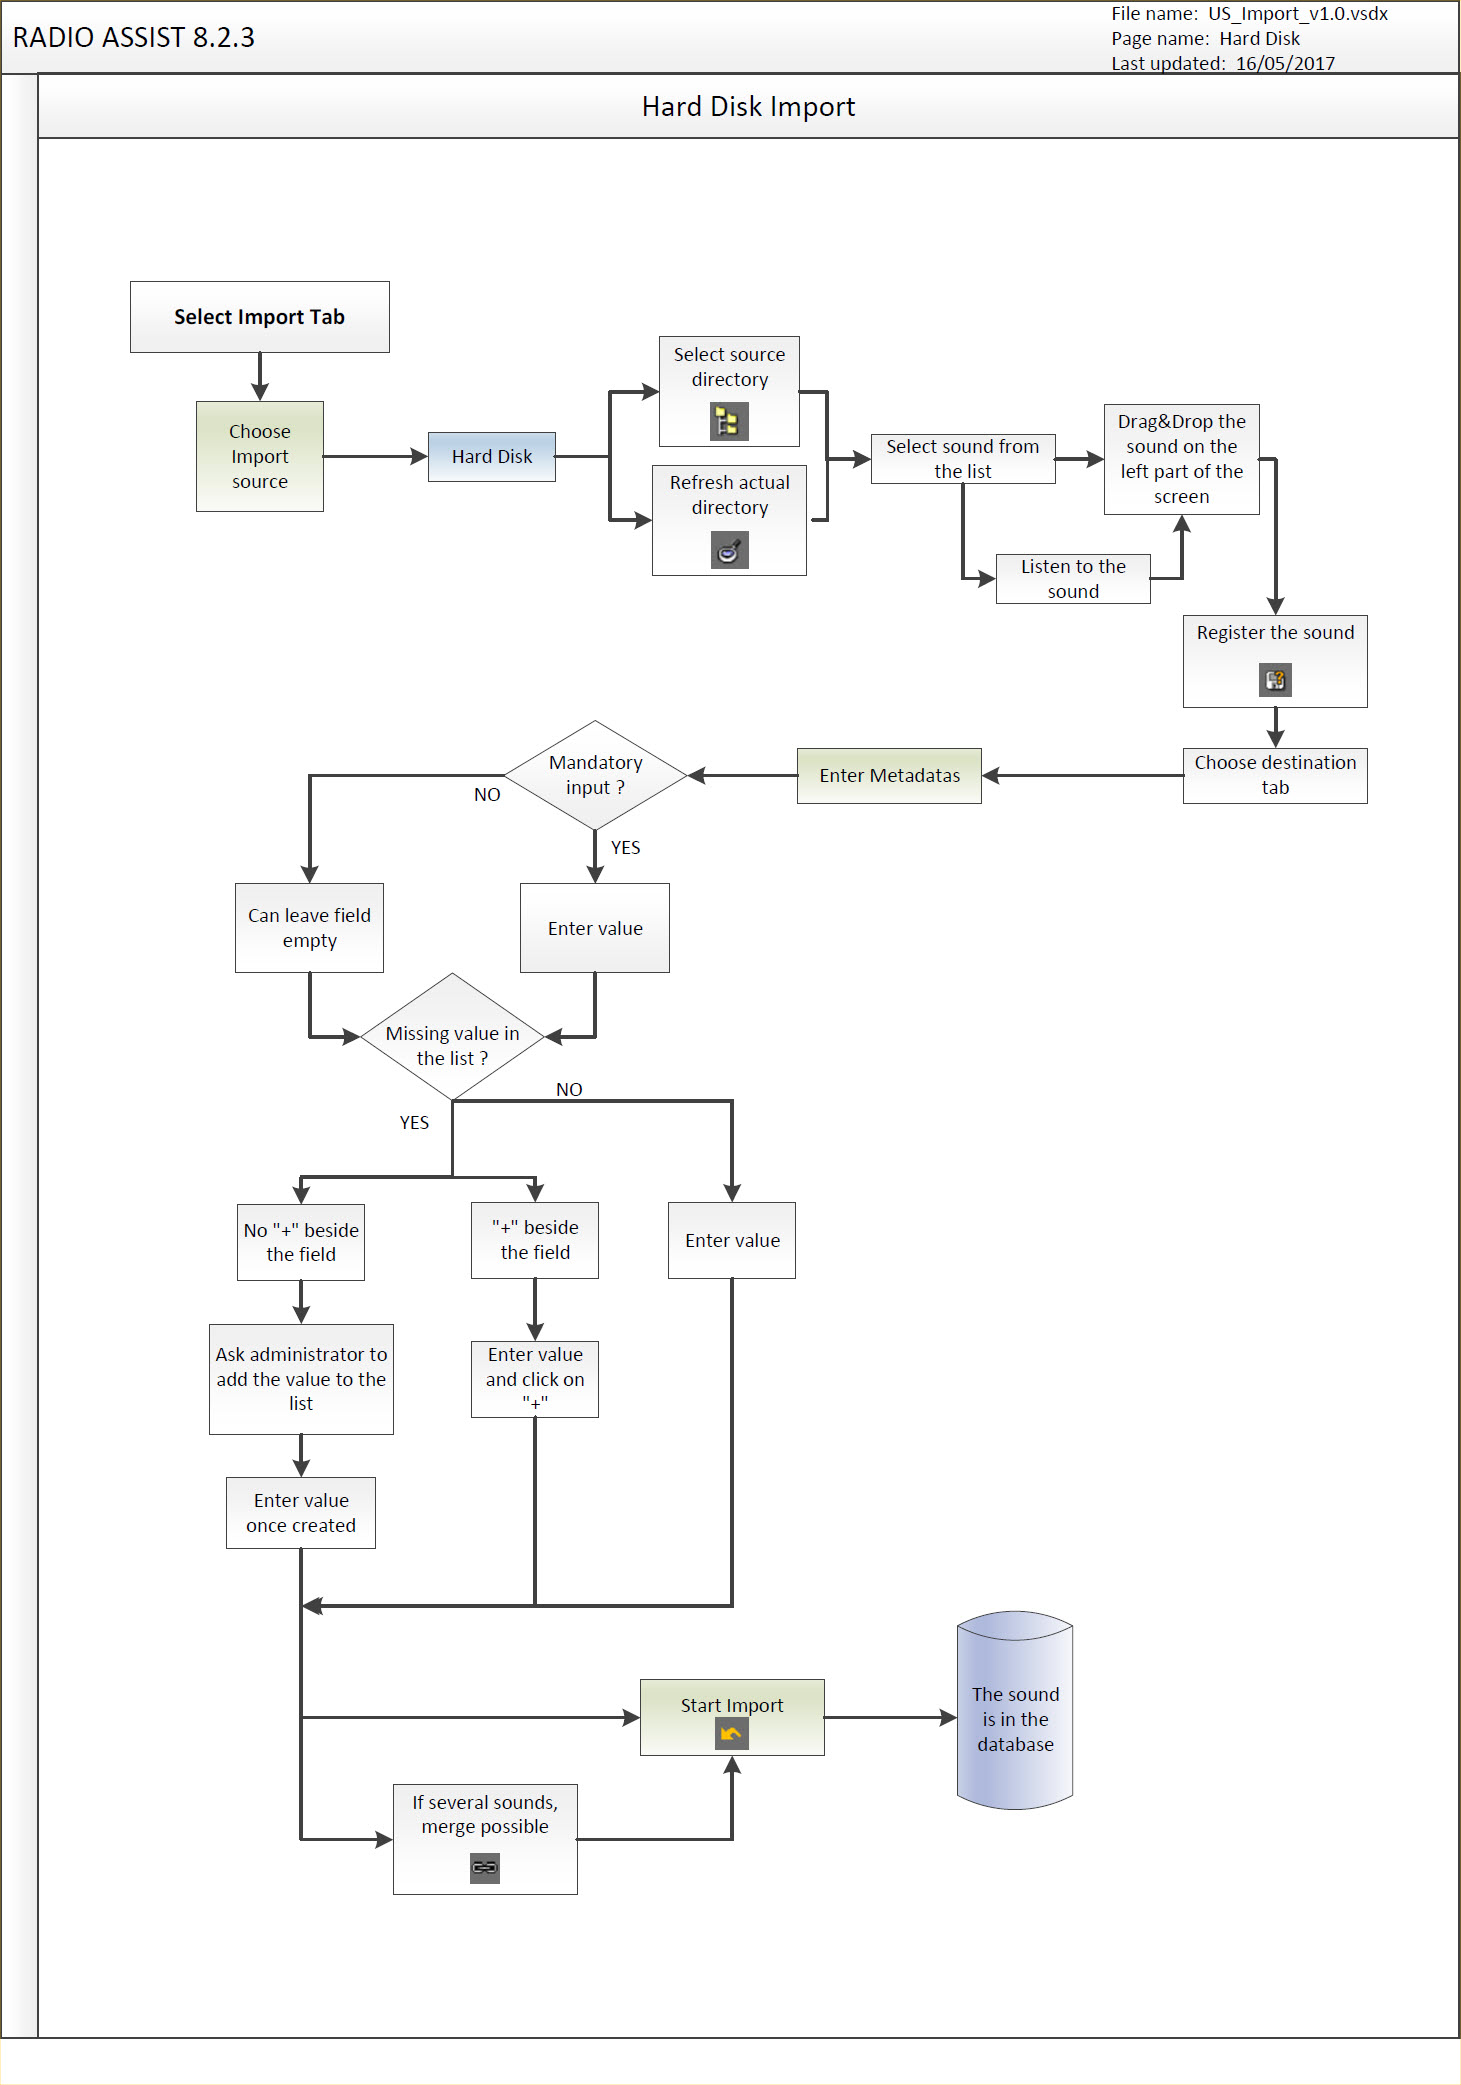
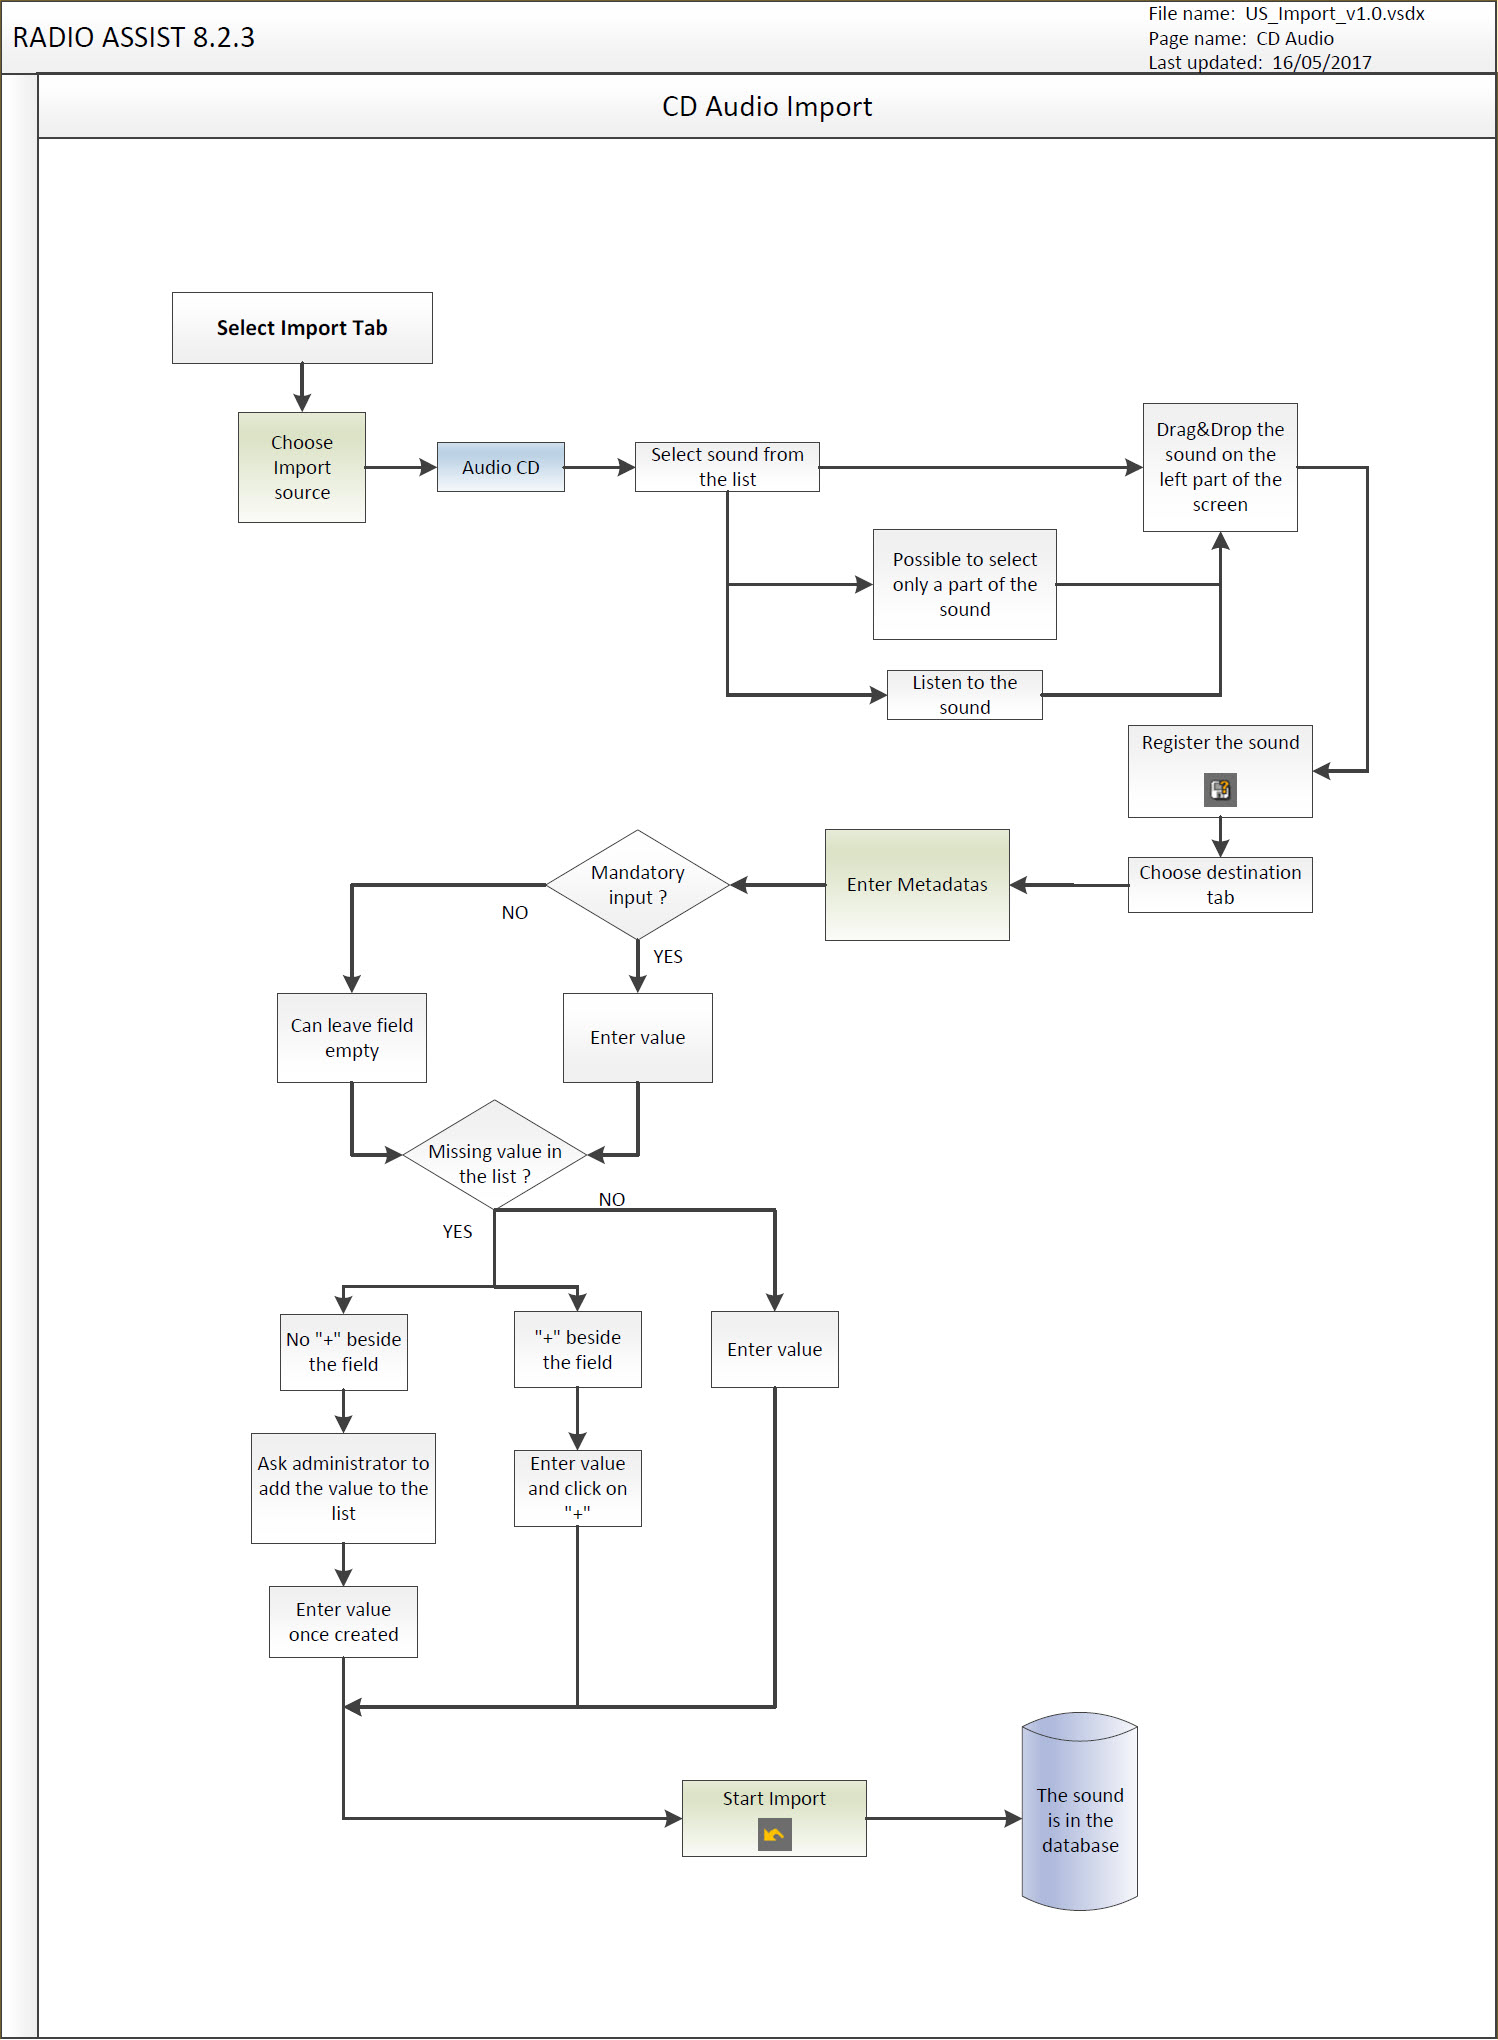
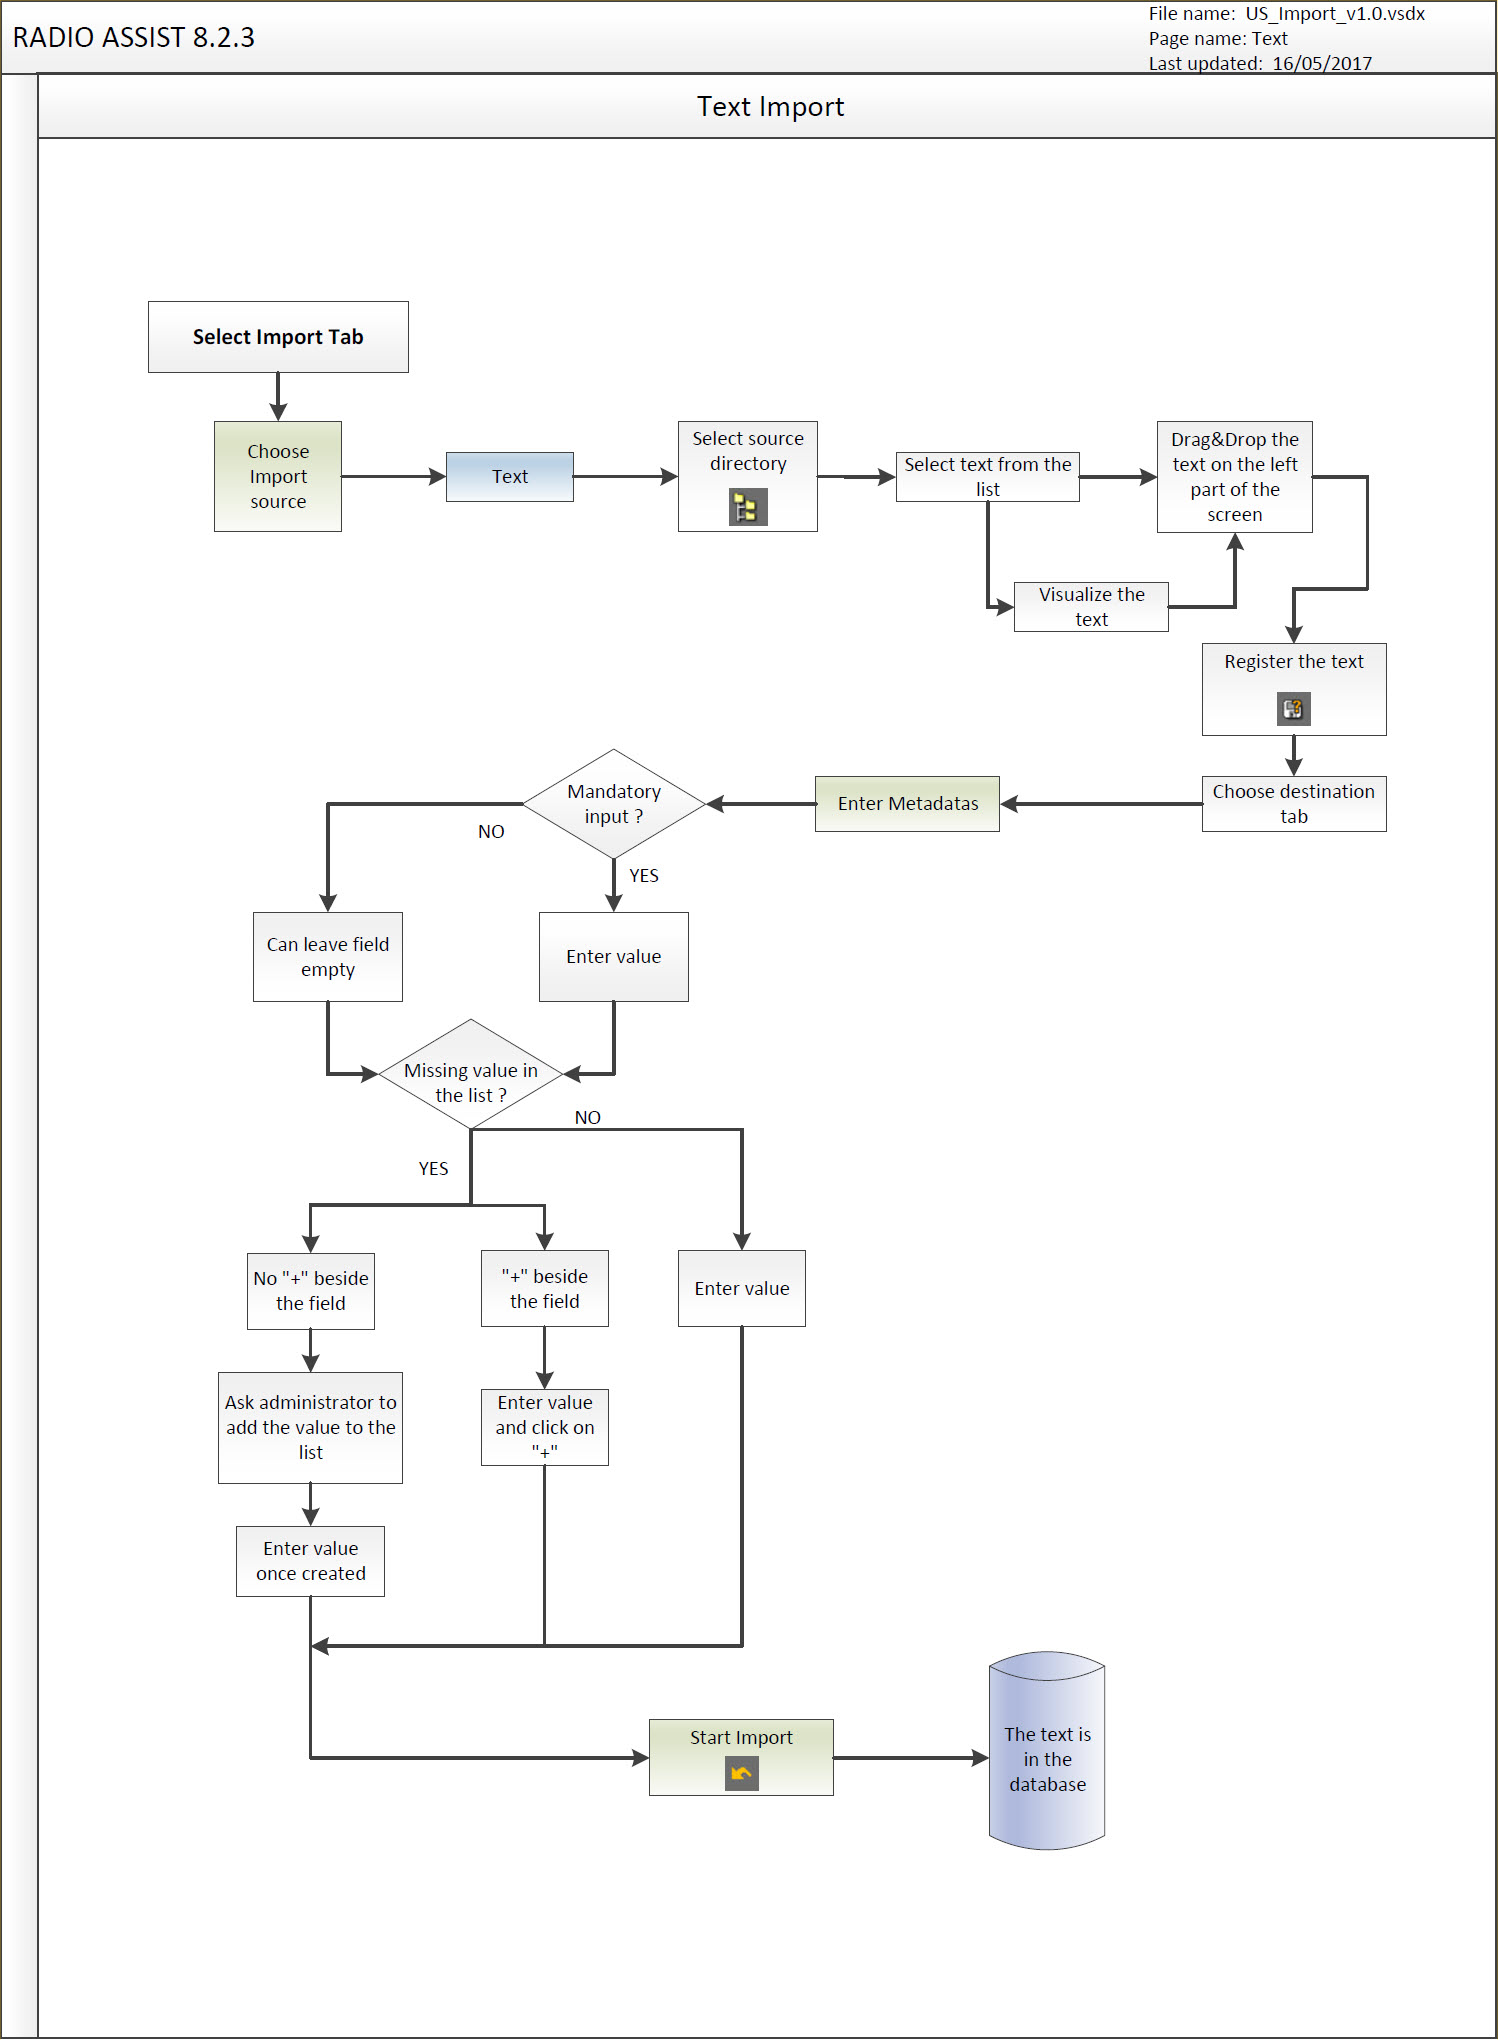
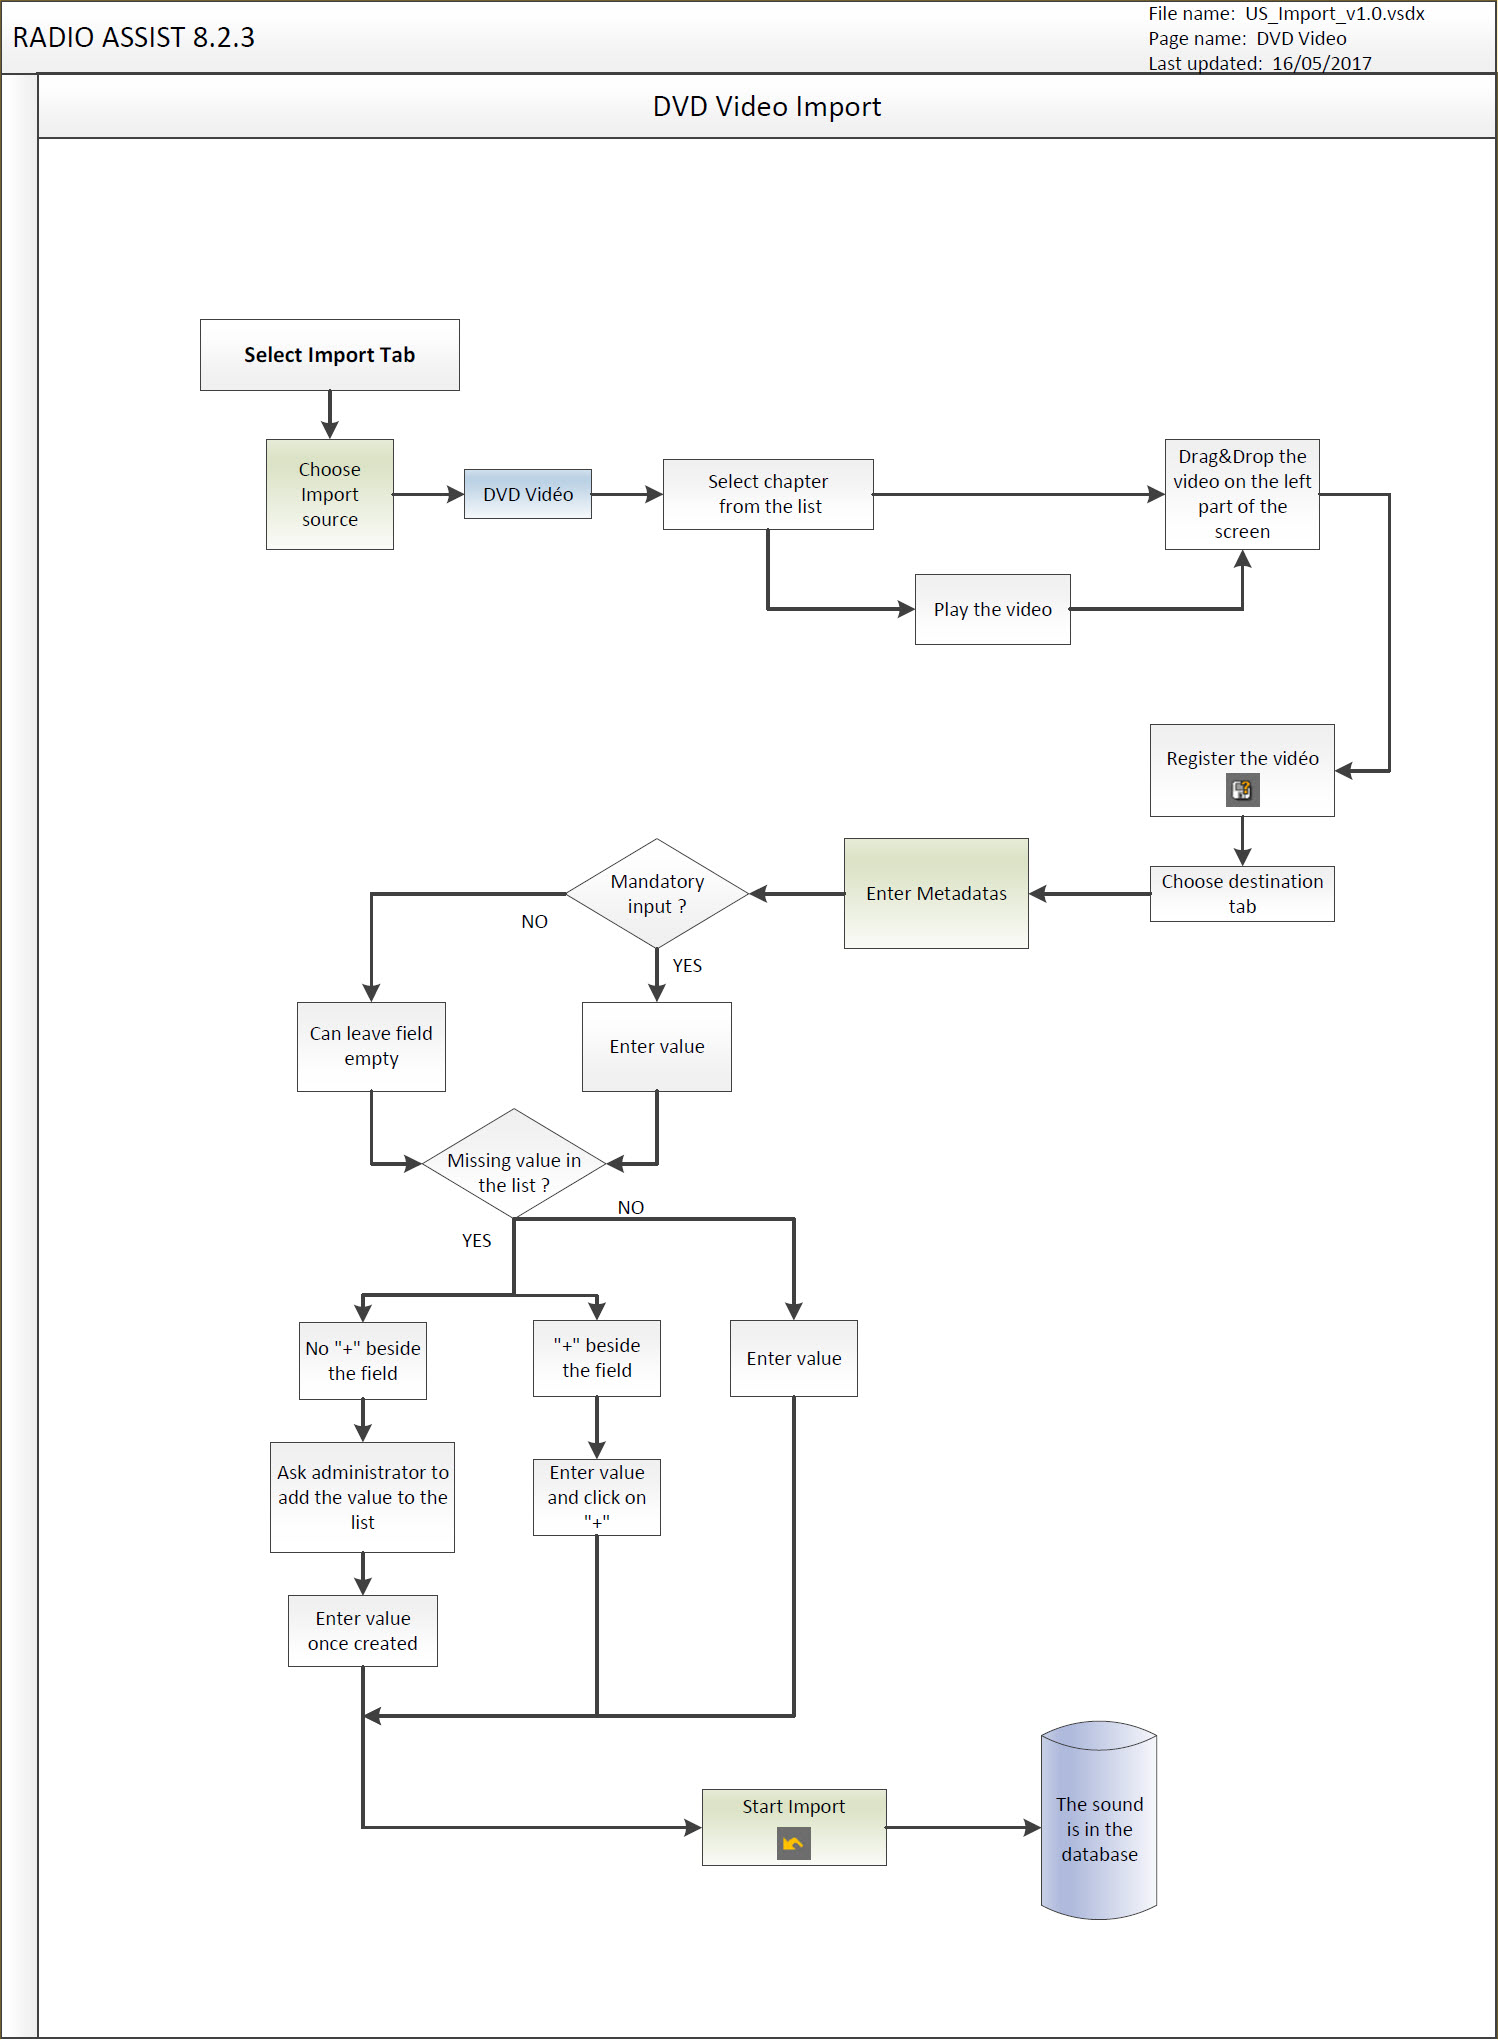
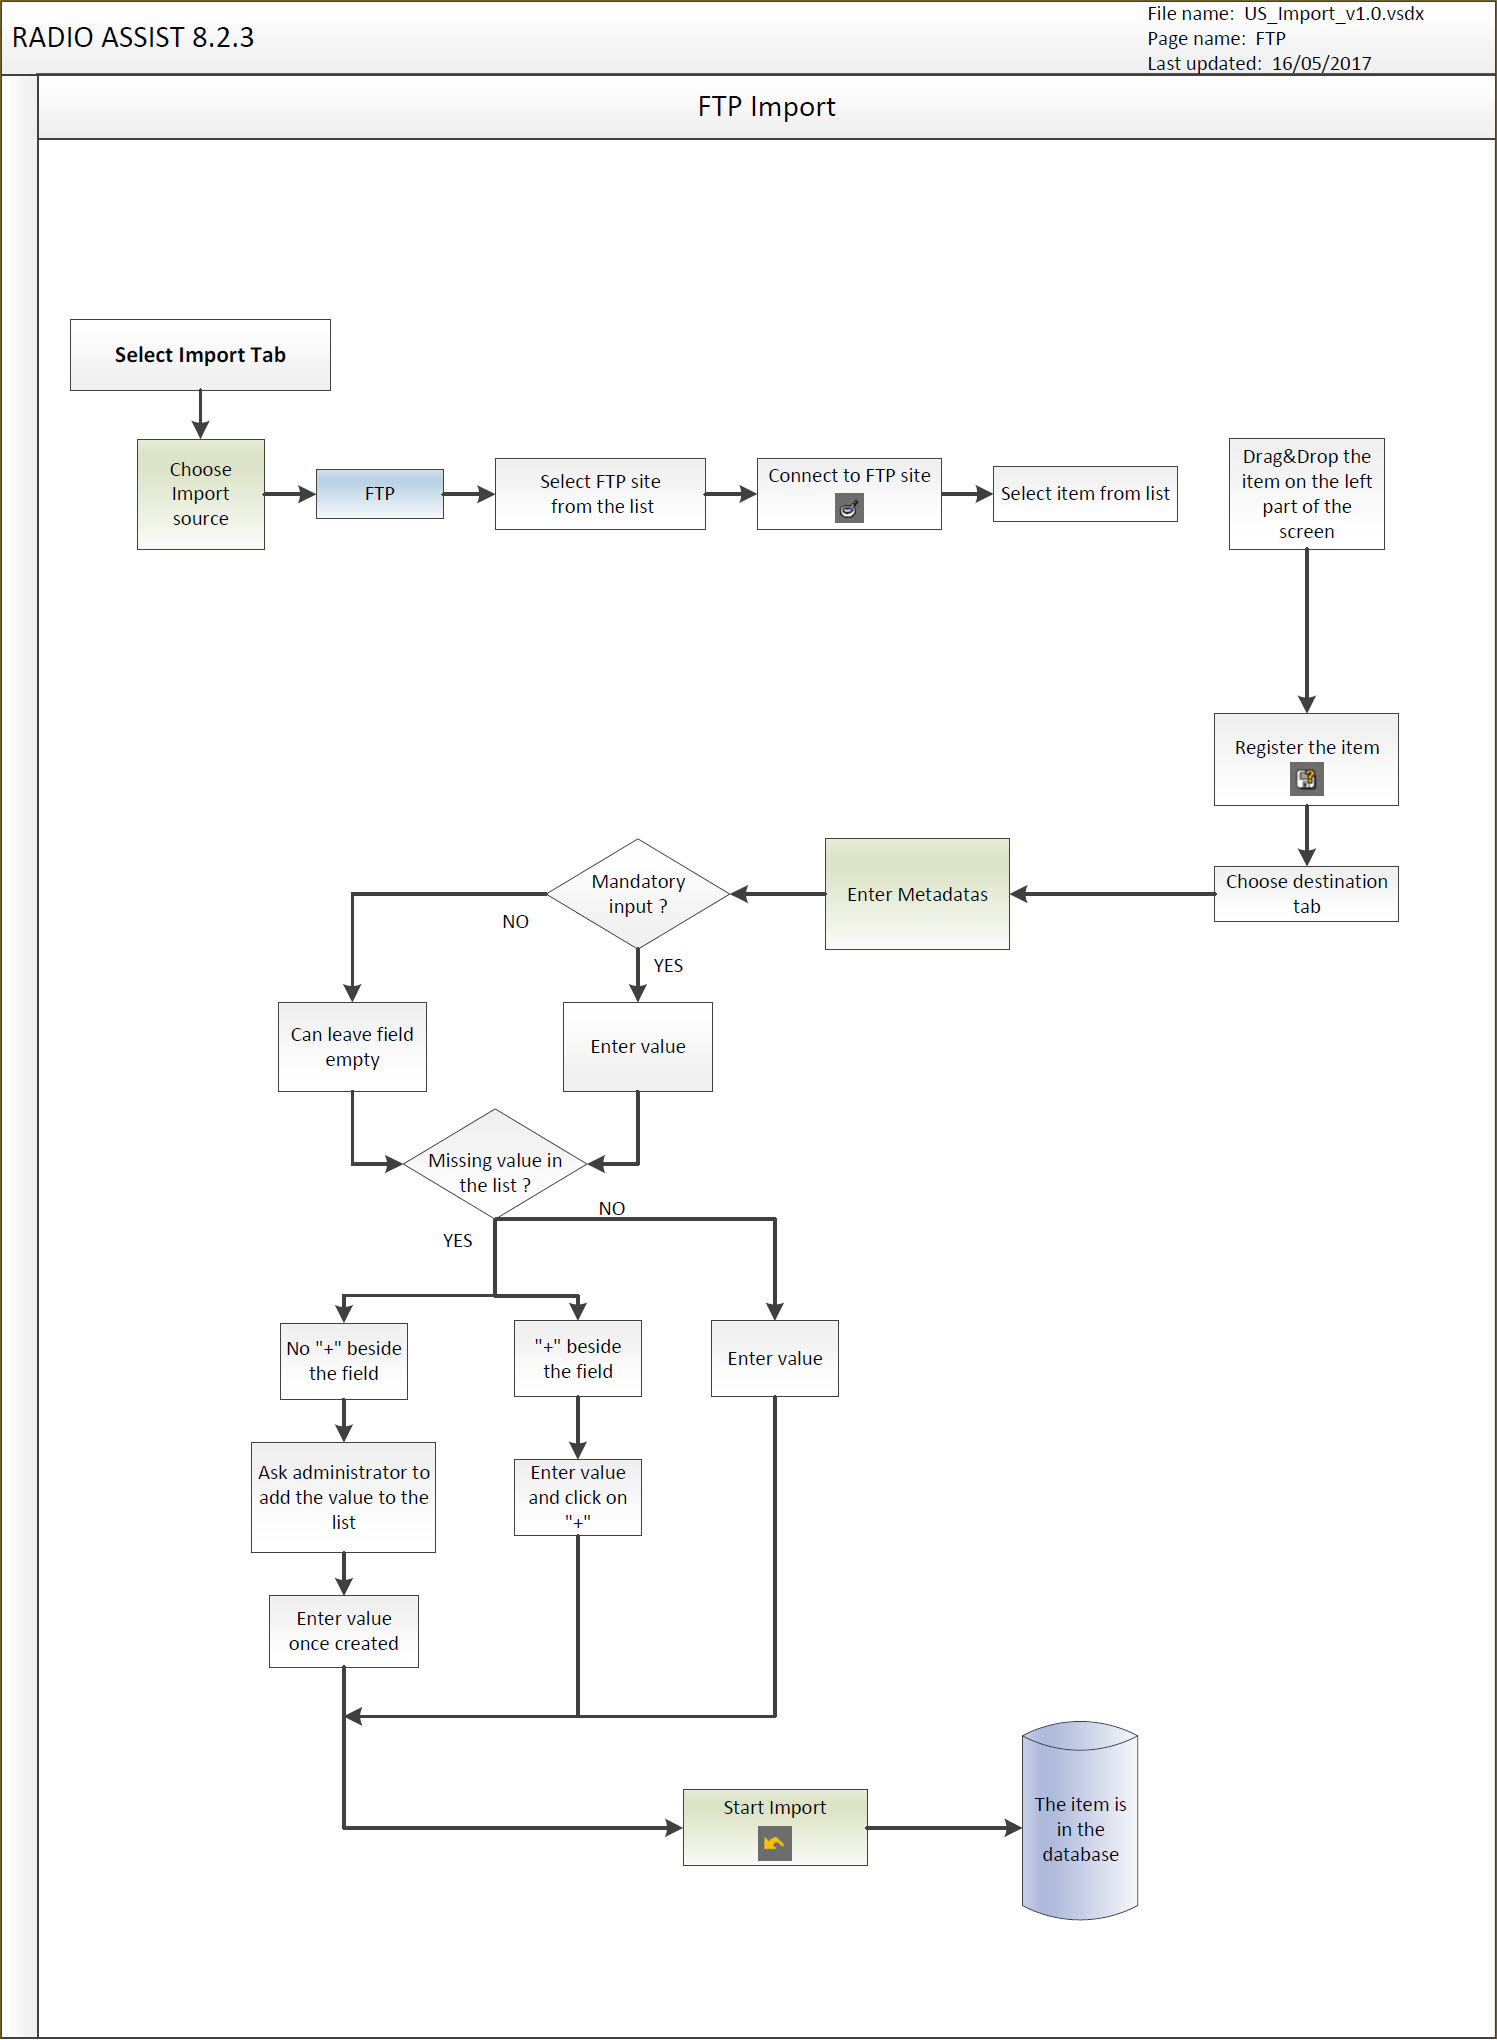
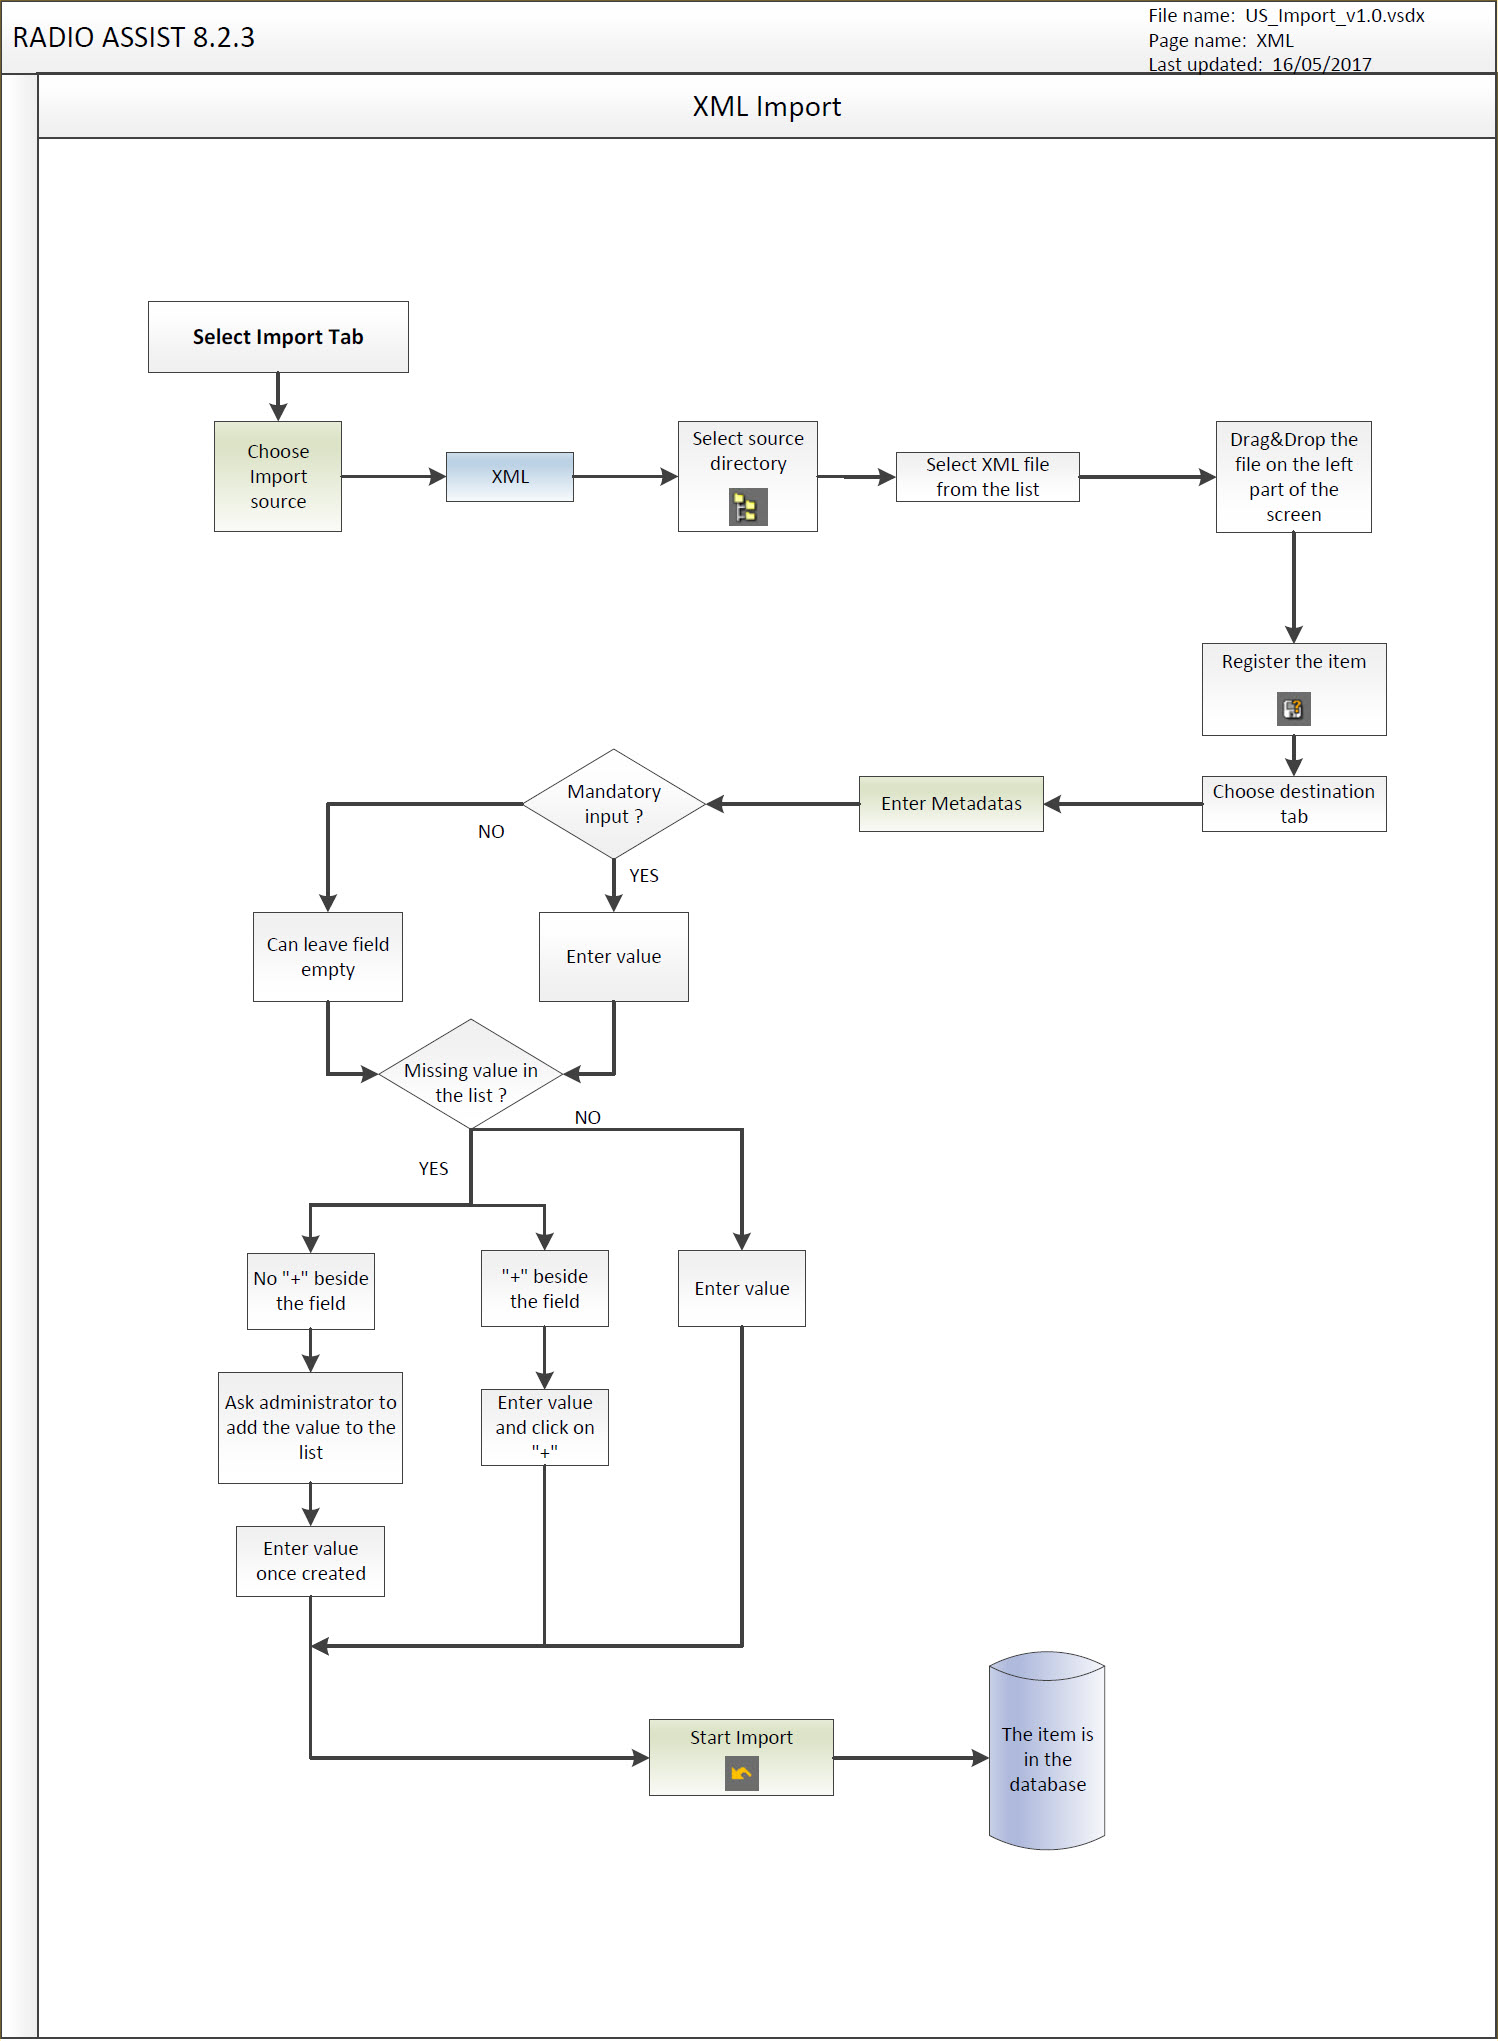
12.2.Import definition
The "Import" tool is used to import items (audio or text) from an external support : hard disk, network source, CD-audio, CD-ROM, DVD-ROM, MiniDisc, FTP site et PCMCIA card (NAGRA) to the database.
The "Import" is divided into 3 sections :
1. Zone where the import source is selected via tabs: Hard Disk, CD, mini-disc, PCMCIA card (Nagra), etc.
2. Import preparation list.
3. The list of items to be imported.
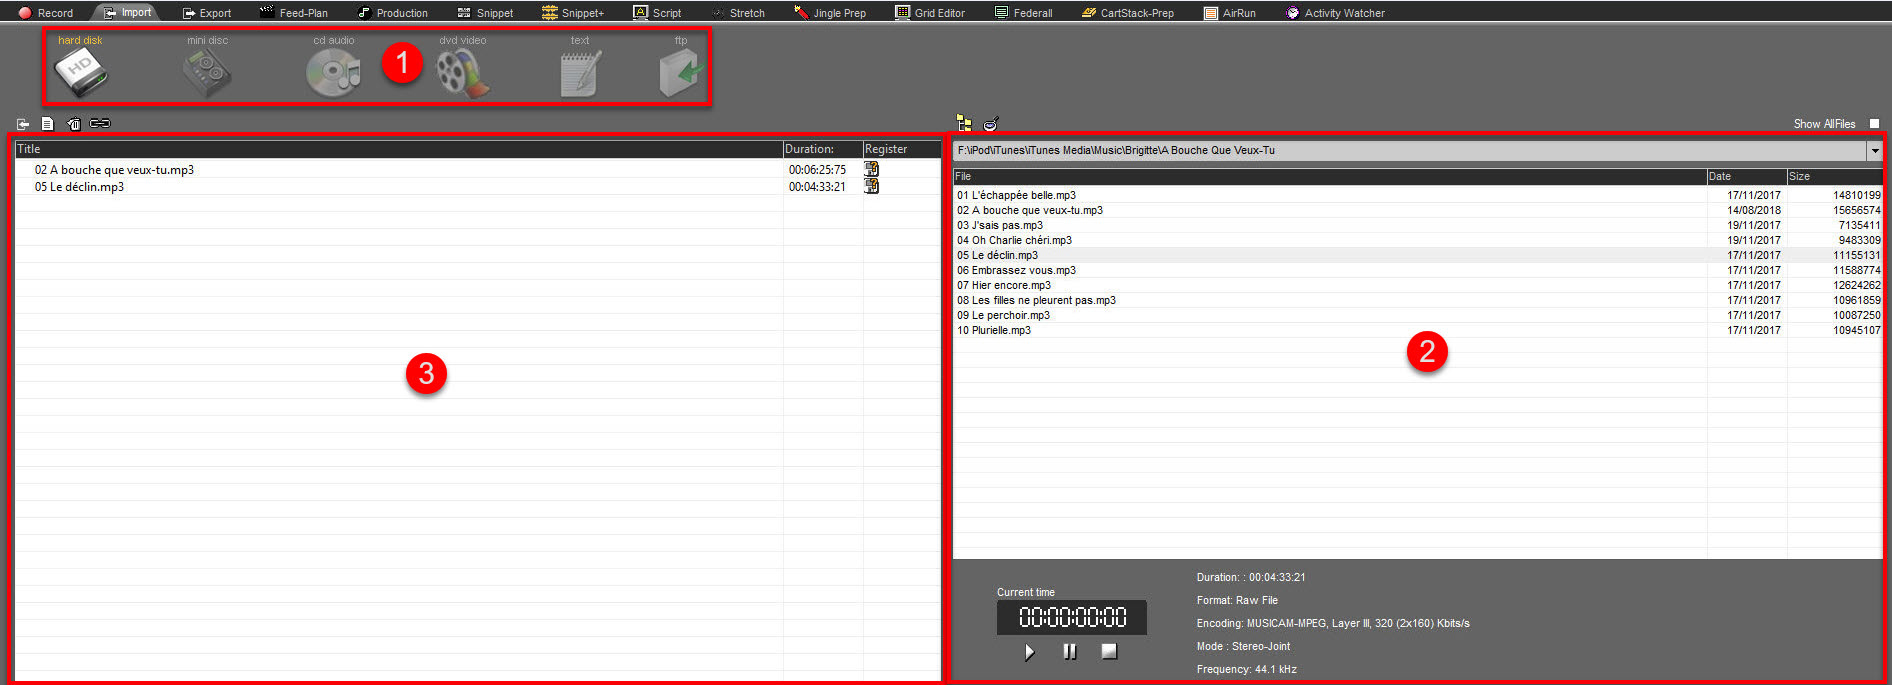
12.3.The different import sources
The different import sources available are :
Hard Disk (click on the "directory" icon and select the directory where the items to import are stored).
CD-ROM or DVD-ROM (via the Hard disk)
DVD (via the Hard disk)
DVD video
DAT Player
Flash NGRA card- Arec-C – (carte PCMCIA)
12.4.How to import an item ?
Click on the "Import" tab.
Select the source (depending on where the sound is coming from) by clicking on Hard disk, CD, MD, etc.

The support content is displayed.
To play an item, select it first, and then click on "Play"  .
.
To import an item, select it, then, without releasing the mouse button, draw it to the left-hand side of the screen.
Release the button.
Then click on "Register" (the "floppy disk" icon with the question mark :  ). A window is displayed.
Select the category where you want to save (News, Music, Jingle, etc.) and enter the details (title, etc.).

Click on "Save"  .
.
A yellow check mark 
 is displayed in the « Register » column, instead of the "floppy disk" icon . It means the item is ready to be imported.
You can import as many items as you want.
Once items are ready, click on « Import »  .
.
Import takes place and, when it is over, a message will inform you of the number of items imported.
The imported items are now in the Browser.
Alternately, you can validate several items all at once (click on control and select several items. Then, click on the Save icon.
All the information found in the metadata sheet that is displayed on the screen will be copied to the other metadata sheets
Exception Nagra : only the information in the Savedlg field is duplicated on all the metadata sheets.
12.5.File formats
You can import the following formats :
Raw and Wave files (with BWF or not) : in MPEG & PCM
Pro-tools Sd2 : in PCM (44,1 Khz 16 bits stereo raw file)
AIFF : in PCM
SND/AU (Sun/Next/Unix) : in PCM & G711-muLaw
Musifile : in MPEG
MPEG Layer 3, PCM 24 bits Compressed
Raw : in WB48sbc
Eela Audio non BWF (with an automatic transfer of the exact informations to BWF) : in MPEG
12.6.Importing from the Hard Disk or the Network
Select the "Hard-Disk" source by clicking on it.

At the right side of the screen, click on the "directory" icon  .
.
The windows explorer is displayed. Select the directory where the items to import are.
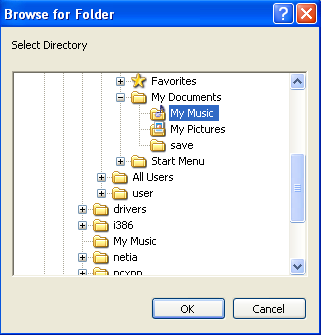
The list of items available in the directory is displayed in the following window :
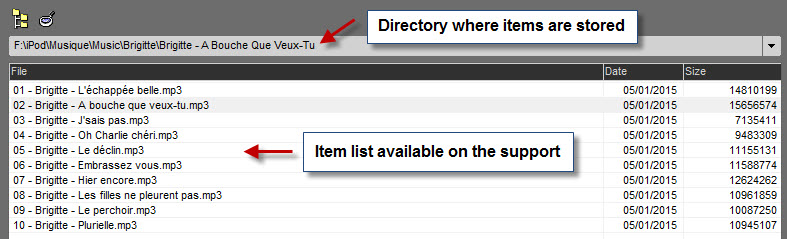
To play an item, select it, then click on "Play" : 
To import an item, select it, then, without releasing the mouse button, draw it to the left-hand side of the screen.
Release the button.
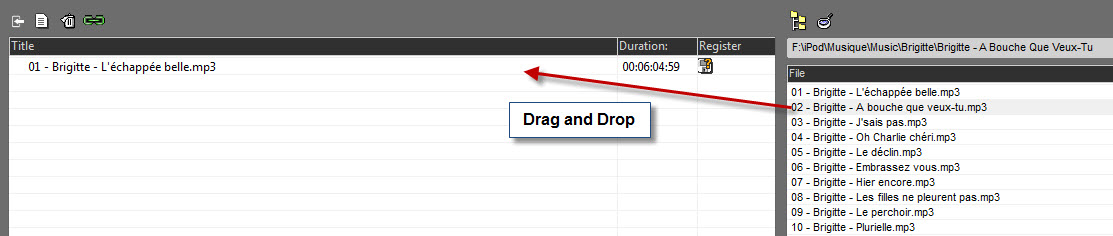
Then click on "Register" (the "floppy disk" icon with the question mark :  ). A window is displayed.
Select the category where you want to save (News, Music, Jingle, etc.) and enter the details (title, etc.).

Click on "Save"  .
.
A yellow check mark 
 is displayed in the « Register » column, instead of the "floppy disk" icon . It means the item is ready to be imported.
You can import as many items as you want.
Once items are ready, click on « Import »  .
.
Import starts and, when it is over, a message will inform you with the number of items imported.
The imported items are now in the Browser.
12.7.Importing from an XML file ?
It is possible to import a sound as an XML file.
This XML file will include all metadata and the physical path to the sound element.

Select the "XML" icon from the menu.
To the right, click on the "directory" icon. 
Windows Explorer appears. Select the directory where the XML files to be imported are located.
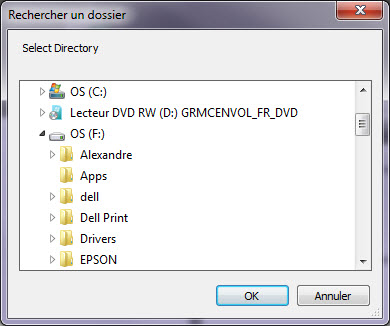
The directory where the XML is stored as well as the list of elements contained in this directory appears.
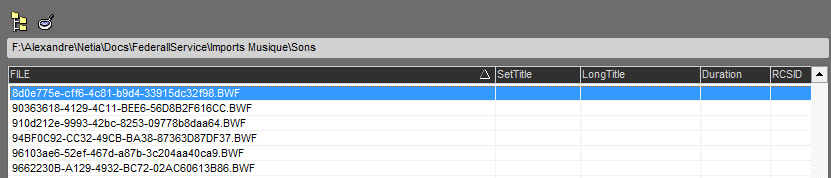
The list of sounds declared in the XML files appear in the list
Take the sound to be imported and drag it to the left side of the screen.

This is the name of the XML file corresponding to the sound that is displayed.
If we open the XML file, we note the different metadata of the sound and its GUID.
This is an example of an XML file. The format is different for each user.
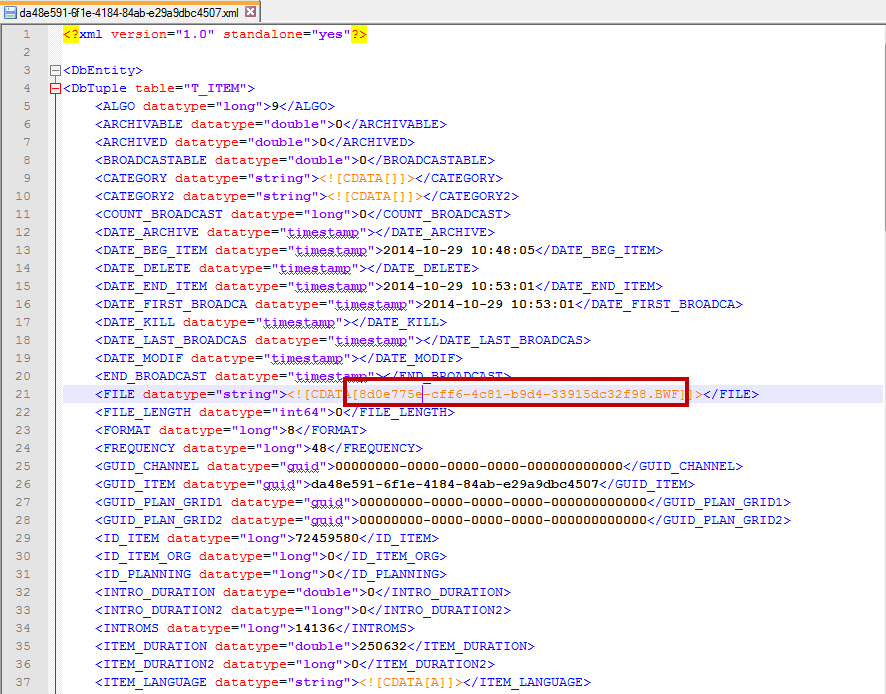
Then click on the diskette on the right. A window opens.
Enter the metadata for the item.
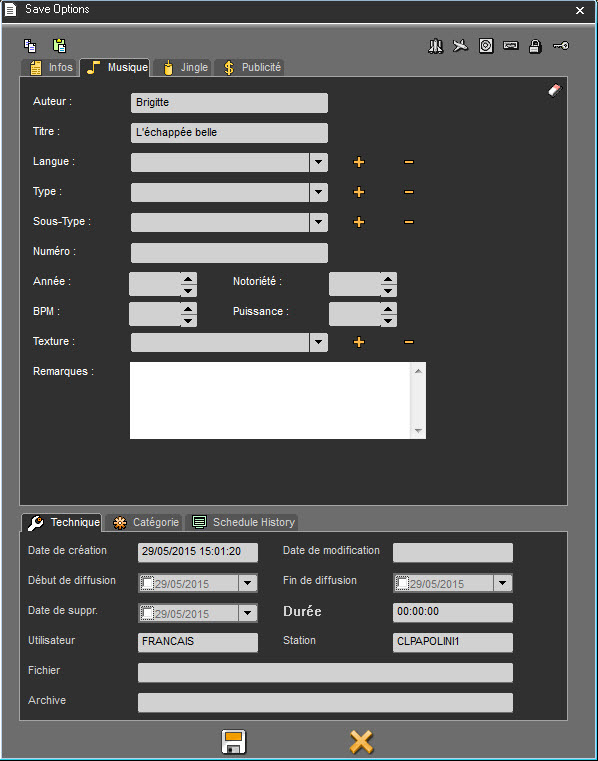
Then click on the diskette to save the parameters.
A yellow tick  will appear in the "Register" column instead of the diskette. This means that the item is ready to be imported.
You can import as many elements as you wish at the same time.
Once the elements are ready, click on " Import "  .
.
The import will start and when it is complete, a message will appear informing you of the number of elements imported.
The imported element(s) are available in the Browser.
12.8.Fusion
When importing several items, you have the option to ingest them into the database in only one single file. To do so:
1) Drag-and-drop several elements you want to import from right
2) Click on the Fusion button : 
3) The button turns green :  .
.
4) Register only the first item from the list. After the import, the file will be named as the 1st one and will be composed of all the other items from the list.

Here, the file will be named "Barry Jones Interview" but will be composed of all 3 files.
4) Click on 
12.9.Importing from XML file
12.10.Importing from a CD Audio
Select the "CD Audio" source by clicking on it.

Insert your empty CD in your CD-Player.
The item list contained on a CD is displayed at the right side :

To play an item, select it, then click on "Play" : 
To import an item, select it, then, without releasing the mouse button, draw it to the left-hand side of the screen.
Release the button.

Then click on "Register" (the "floppy disk" icon with the question mark :  ). A window is displayed.
Select the category where you want to save (News, Music, Jingle, etc.) and enter the details (title, etc.).
Click on "Save"  .
.
A yellow check mark 
 is displayed in the « Register » column, instead of the "floppy disk" icon . It means the item is ready to be imported.
You can import as many items as you want.
Once items are ready, click on « Import »  .
.
Import starts and, when it is over, a message will inform you with the number of items imported.
The imported items are now in the Browser.
12.10.1.Importing a part of a track
To import a part of the track :
In the "start position" column, enter from where you want to import.
For instance, if you want to start at 5 minutes in, enter : 05:00.
In the "Track Time" column, enter the duration you want to import.
For instance, if you want to import 3 minutes, enter : 03:00.
Then, do the import (as explained in the following topic : Importing from an audio CD).
12.11.Importing from a CD ROM or a DVD-ROM
Select the "Hard-Disk" source by clicking on it.

At the right side of the screen, click on the "directory" icon  .
.
The windows explorer is displayed. Select the directory where the CD-ROM/DVD-ROM driver is.
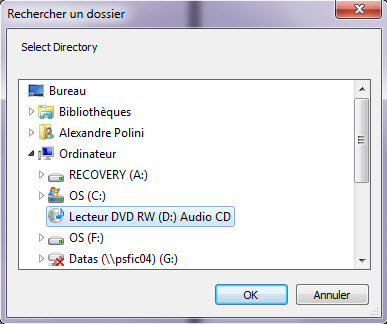
The item list contained on a CD-ROM/DVD-ROM is displayed at the right side
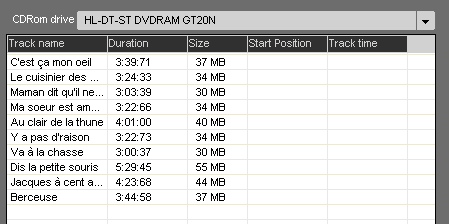
To play an item, select it, then click on "Play" : 
To import an item, select it, then, without releasing the mouse button, draw it to the left-hand side of the screen.
Release the button.

Then click on "Register" (the "floppy disk" icon with the question mark  ). A window is displayed.
Select the category where you want to save (News, Music, Jingle, etc.) and enter the details (title, etc.).
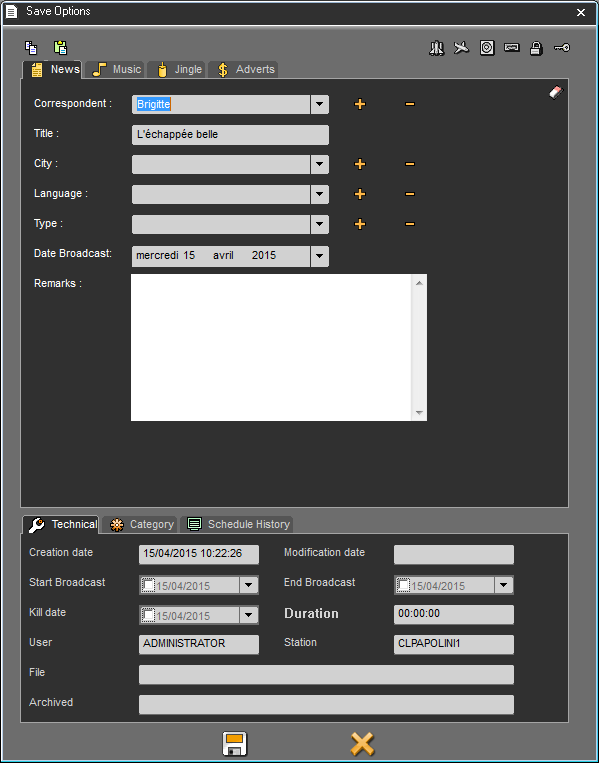
Click on "Save"  .
.
A yellow check mark 
 is displayed in the « Register » column, instead of the "floppy disk" icon . It means the item is ready to be imported.
You can import as many items as you want.
Once items are ready, click on « Import »  .
.
Import starts and, when it is over, a message will inform you with the number of items imported.
The imported items are now in the Browser.
12.12.Importing from a DVD Video
You can rip the audio from a DVD Video
Select the source by clicking on "DVD Video".

Load the DVD into the workstation.
The list of the DVD chapters will appear :
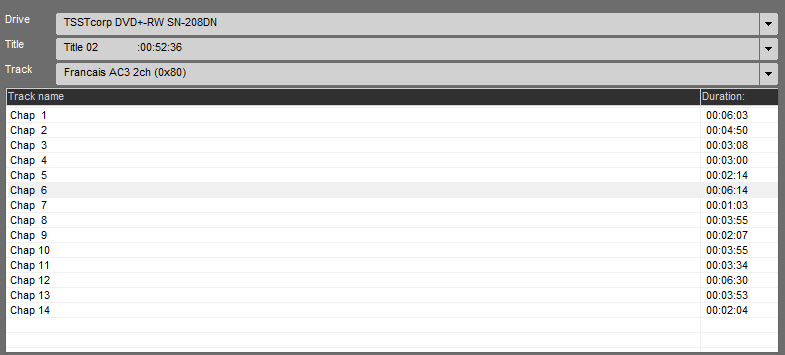
You can preview the DVD chapter you want to rip :
Click on "Play", the video plays in the player :
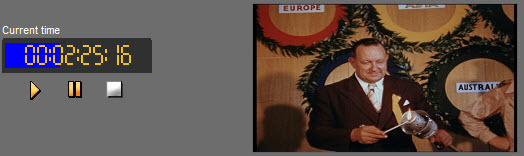
To import a chapter, select it and drag and drop it on the left part of the screen.
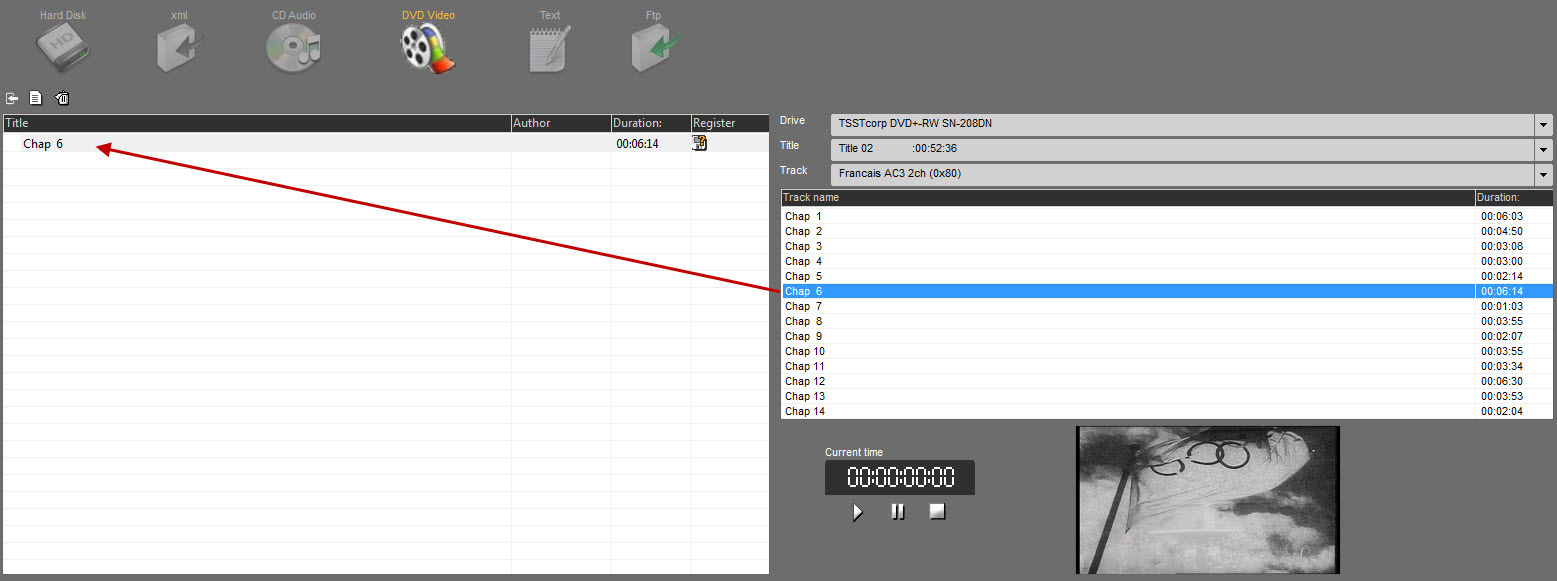
Click on the tape in order to register the item.
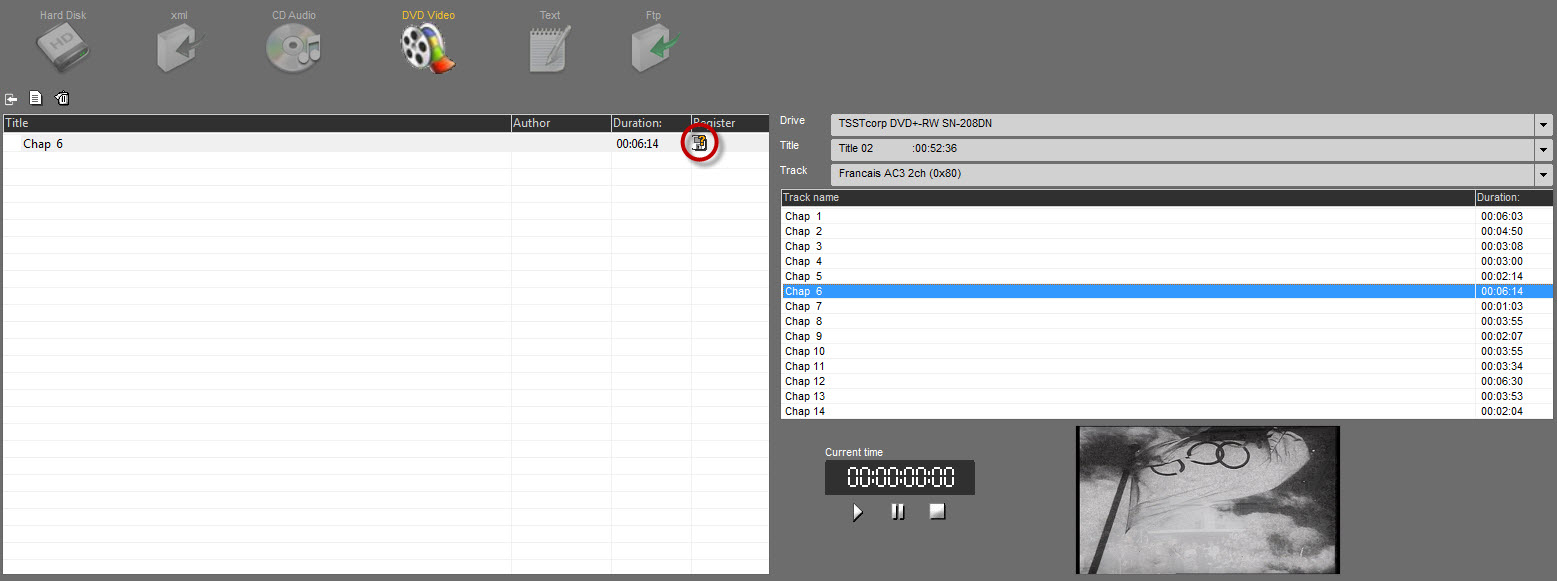
Fill with metadatas.
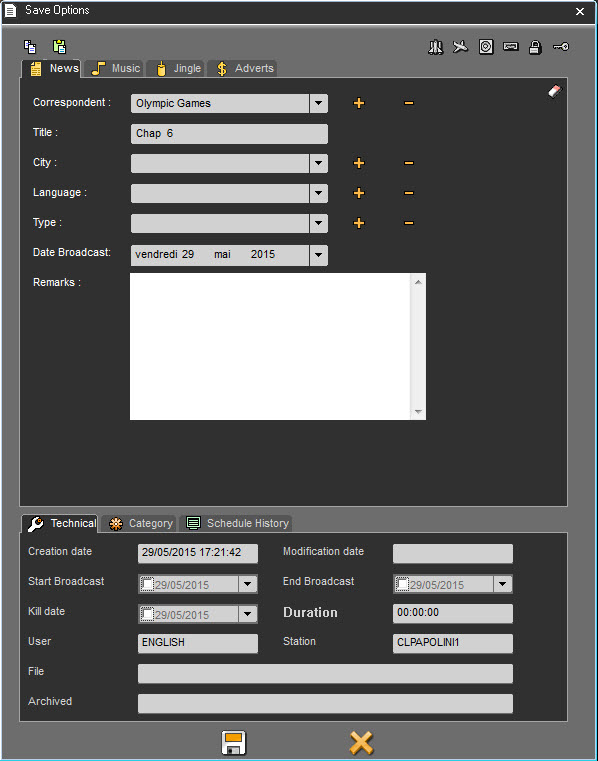
Click on "Save"  .
.
A yellow check mark 
 is displayed in the "Register" column, instead of the "floppy disk" icon . It means the item is ready to be imported.
You can import as many items as you want.
Once items are ready, click on  .
.
Import starts and, when it is over, a message will inform you with the number of items imported.
The imported items are now in the Browser.
12.13.FTP (File Transfert Protocol)
FTP stands for File Transfert Protocol.
It is a protocol for file transfer.
FTP can work in active or passive mode.in the first case, the client contacts the server on the port 21, and this one calls back on the port 20.
In the passive mode, it is the client which initiates all the connections and only the port 21 is used.
12.14.Configuring an FTP site
Before importing from an FTP site or exporting to an FTP site, you have to configure the FTP settings, by filling it out the following information :
To do this, click on the button  in the FTP tab.
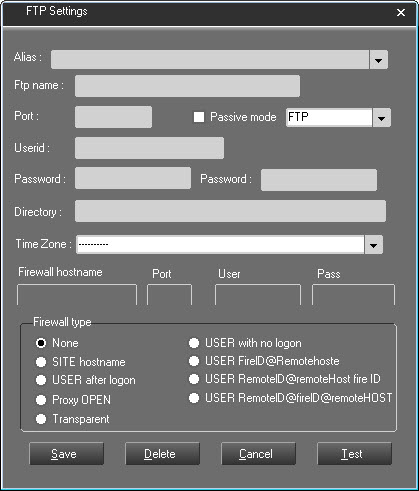
Alias : Server name.
FTP name : Name fo the FTP site to reach.
Port : Port defined for uploading FTP.
Passive mode : Functioning mode of the FTP server. If the server works in a passive mode, the client (FTP import) must be configured in a passive mode.
FTP Type : Select from the list the FTP protocol wanted.
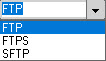
Userid : User name with rights to be connected to the FTP site.
Password : Password giving the right to access to the FTP site.
Directory : Directory where files are stored.
Time Zone : Select the time zone of the remote FTP server.
Firewall Hostname : Filter avoiding to access to the FTP site.
Port : Defined port.
User : User name.
Pass : Password.
Firewall type : List of the available firewalls.
The button  is used to test the created connection.
Once all the information has been filled in, click on  .
.
To delete an FTP site, select it from the list and click on  .
.
12.15.Importing from an FTP site
Select the "FTP" source by clicking on it.

Click on "Configure FTP site"  . The configuration window is displayed :
Enter the FTP site settings.

Then, click on "Save".
To display the item list to import, click on "refresh"  .
.
To play an item, select it first, and then click on "Play"  .
.
To import an item, select it, then, without releasing the mouse button, draw it to the left-hand side of the screen.
Release the button.
Then click on "Register" (the "floppy disk" icon with the question mark :  ). A window is displayed.
Select the category where you want to save (News, Music, Jingle, etc.) and enter the details (title, etc.).

Click on "Save"  .
.
A yellow check mark 
 is displayed in the « Register » column, instead of the "floppy disk" icon . It means the item is ready to be imported.
You can import as many items as you want.
Once items are ready, click on « Import »  .
.
Import starts and, when it is over, a message will inform you with the number of items imported.
The imported items are now in the Browser.
12.16.Importing text
12.17.Playing an item before importing
Before importing an item, you can play it first. To do so :
In the list, select the item to play :

Then, click on "Play" (the player is under the list) :
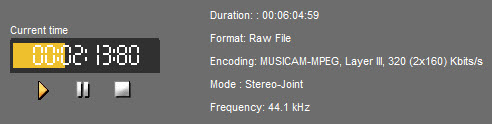
12.18.Deleting the import list
To delete the import list :
Click on  .
.
12.19.Deleting an item from the import list
To delete an item from the import list :
Select the item to delete.
Click on  .
.
The item disappears from the list.
13.LevelMonitor
13.1.Definition of LevelMonitor
LevelMonitor is an application for the NETIA RadioAssist suite. It operates in its dedicated window, providing real-time measurements of audio signals flowing in and out of the application. These measurements include peaks, true peaks, loudness, and phase correlation.
LevelMonitor is utilized for the following purposes:
Ensuring that audio recording levels do not result in distortion caused by excessive loudness or excessive noise-to-signal ratio due to recording at low levels.
Verifying that audio content is recorded or mixed within the desired loudness range.
Determining the overall loudness (integrated) of an audio file.
Identifying problematic opposed phase stereo files.
Monitoring individual track levels in multitrack sessions or recordings.
While LevelMonitor is primarily intended to be used with RadioAssist it can also display other Netia application I/O measurement using Open Sound Control (OSC) protocol locally or over IP networks.
13.2.Launching LevelMonitor
LevelMonitor is an optional feature of the RadioAssist suite. To use it, the option must be enabled by the administrator.
To launch LevelMonitor, users can click on the icon positioned between the faders of Browser, Record, Snippet, Snippet+, and Production tabs. Alternatively, they can right-click on the browser play button located in the top-right transport control panel area of the browser.
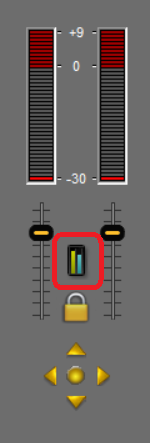
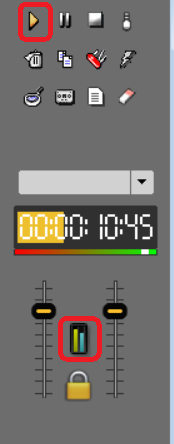
13.3.LevelMonitor Window
Once launched you will have access to the LevelMonitor main window. It is a separate window from the rest of the application which will float on the top of RadioAssist.
The level monitor window is divided into two areas: the metering modules dynamic area (1) and the action bar (2).
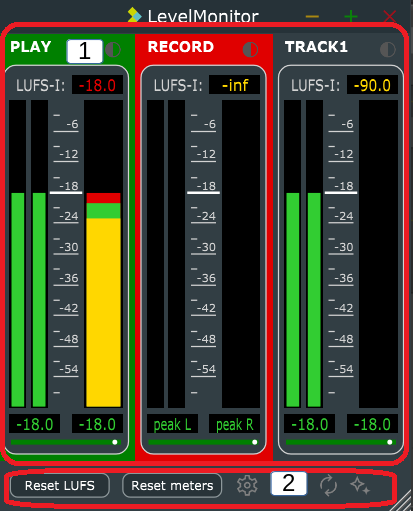
13.4.Metering modules
The number of modules displayed in the modules area will vary either based on the I/Os in use when in automatic mode (default mode) or the configured value in manual mode. Each module represents either an input of an audio device, an output of audio device, or the sub channel of a montage.
In a module you can have access to different measurements on the I/O
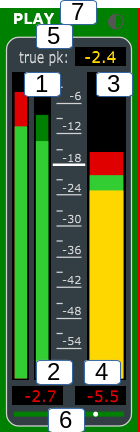
Peak Meter (1): This meter displays the amplitude of the digital signal in decibel Decibel Full Scale (dBFS). For ease of reading a darker “peak and hold” value section is added to display the recent highest peak value recorded. A maximum peak alert can be to colour in red the section of the meter where a previous measurement passed the alert threshold.
Maximum Peak (2), (4): The digital counter records the highest peak since starting measurement (start of application or meter value reset). Here again the peak can be coloured if over the defined threshold so that you can at a glance know if and the threshold was reached during the session and at which value.
Loudness Meter (3): This meter displays the loudness value of the signal in LUFS. Based on configuration the gauge can be divided in three segments: below target loudness (here in yellow), within target range (here in green), above target (red).
Configurable digital display (5): Can be configured to display different measurement between true peak, Loudness range (LRA), integrated loudness, momentary loudness or short-term loudness.
Phase correlation meter (6): Displays the correlation between left and right of a stereo signal. When the signals on left and right are identical the dot in the middle of the meter is at the far right. When they are in phase opposition, the dot is at the far left and the background is red to indicate a potential cancellation issue (silence) or very degraded stereo image. During normal operation the dot should oscillate around the center of the meter.
Label and colour (7): Allow users to give their own label to input and outputs modules as well as setting a colour for the module.
13.5.Action bar
Reset LUFS: Clicking on this button reset internal loudness calculation, dbTP, LRA, integrated, momentary, and short-term loudness and restart measurement. Typically, users would click the Reset LUFS before playing a an audio file to measure its integrated loudness in real time.
Reset meters: Reset all metering values, including the max peak values. Users would for instance reset the counter values before doing a retake of a recording that clipped/distorted.
Detected address: Used in manual mode to assign a detected OSC address to a module. Note you must be in address mode (see configuration panel below).
Gear icon: Displays the configuration panel (see below).
Magic button: Auto detects I/O currently in use and allocates metering modules accordingly.
13.6.Configuration panel
To access the configuration panel, click on the gear icon. If enable by your administrator, you will be presented with all the following settings.

Auto settings: When ticked the application will automatically add/remove metering modules based on detected I/O in use. If unticked the modules will remain as defined until manually changed by the user.
Display TITLE/address: Toggles between displaying label and OSC address of the module. Note to manually assign OSC tracks you need to be in address move, select a track address and assign it with the “detected address” drop down.
LUFS value displays: Allow users to set which measurement is displayed in the loudness digital display. Possible values are: True peak, Loudness Range (LRA), Integrated loudness, Momentary loudness, Short-term loudness.
LUFS sliders displays: Allow to select which value is displayed in the loudness gauge of the meter module between integrated, momentary or short-term loudness.
Segmented slider: When unticked gauges are displayed in one solid colour matching the current measurement threshold, when ticked gauges are separated in segments each coloured with the value matching the threshold. The segmented view helps users viewing at a glance if they are below, within or above acceptable loudness target range specified by the threshold values.
High/Low threshold: Low value indicates the loudness value in LUFS below which the signal is considered not loud enough. High threshold the value above which it is considered too loud. Typically, users will aim to be within both thresholds displayed in green with default colour scheme.
Colours: Allow users to select between different colour schemes to represent thresholds. Some provided schemes may more be suitable for certain vision impairement.
Number of tracks: This allows the user to define a static number of tracks when using the application in manual address assignment mode.
Ignore subtracks: When ticked multitrack and montage subtracks are not displayed as individual metering modules.
Ignore record: When ticked inputs are not displayed.
13.7.Glossary
Decibel Full Scale (dBFS): dBFS represents the maximum level that a signal can reach within the available dynamic range, where 0 dBFS represents the maximum possible digital level without distortion.
Loudness: The loudness is a measurement that takes into account psychoactive attributes of the signal that are more meaningful than the amplitude to gauge how loud a sound is perceived by humans. The loudness is measured Loudness Units relative to Full Scale (LUFS) where 0 is the maximum the signal can reach. Further information on loudness can be found in EBU report R128 and ITU report V2054.
True peak: the highest peak levels in dB (or dbTP) of an audio signal, accounting for potential inter-sample peaks during digital-to-analog conversion. This measurement is used to prevent distortion during this process, since this value can be higher than maximum sample peak.
Loudness Range (LRA): metric used to quantify the dynamic range of the audio signal. It measures the difference between the softest and loudest parts of an audio track, providing an indication of the audio's perceived loudness variation. A higher LRA value indicates a wider dynamic range, while a lower value suggests a more consistent loudness throughout the track.
Momentary loudness: Loudness measured over 400 milliseconds. It provides a real-time and highly responsive representation of loudness changes, ideal for capturing rapid and transient loudness fluctuations.
Short-term loudness: Loudness measurement over a time window of 3 seconds. Short-term loudness provides a more smoothed-out loudness measurement compared to momentary loudness, giving a better representation of the overall loudness variations in a short time span.
Integrated loudness: Measures the average loudness level of the audio signal since measurement start (or reset LUFS button click). It is calculated by integrating the loudness measurements over time. Integrated loudness is used to assess the loudness compliance of the audio file with various broadcast standards or streaming platforms.
14.META OCX
14.1.Introduction to ENPS

Radio-Assist / ENPS Integration
14.1.1.Opening ENPS
To open ENPS, you can :
Click on the "ENPS" icon available on your desk, and press "Enter" on the keyboard.

OR
Double-click on the "ENPS" icon available on your desk.

Once ENPS is launched, you are ready to use the program.
14.1.2.Creating a story / rundown
Once ENPS is launched, the user interface is made of several empty windows :
On the bottom folders, choose the adequate folder and create a story or a rundown via the contextual menu.
Once it is done, the RA8 extension will appear in the bottom part of the screen, on the right.
14.1.3.Closing ENPS
To close ENPS, click on the small cross available in the right hand corner :
14.2.Browser
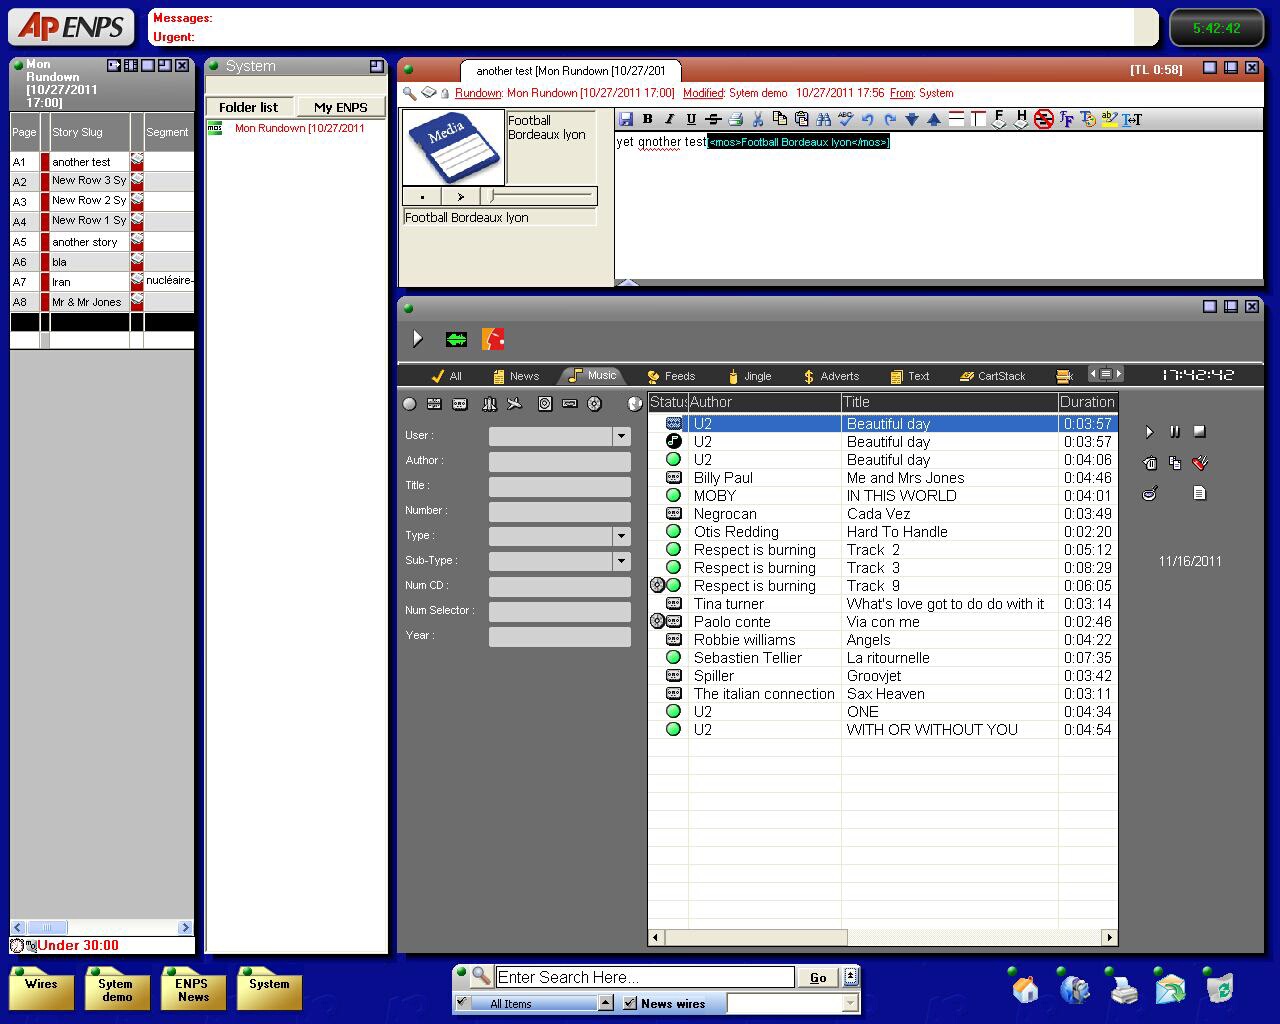
14.2.1.Browser definition
The Browser represents the database which gives the access to any stocked items (audio or text).
The items are ordered by categories, and some search filters are available to retrieve an item quickly.
Moreover, some action buttons are available at the right side of the Browser (Play, delete, restore a deleted item, copy, modify, set as urgent, generate a master, create an empty file…).

14.2.2.Sound status
RAW :
 A raw item is an original file.
EDITED ITEMS :
 An edit session is a virtual file.
Several types of edited item exist (depending on the tool you use for editing).
The different edited icons :
 : edit session coming from the "Snippet" tab.
 : edit session coming from the "Multitrack" or "Snippet+" tabs.
 : edit session (called "produced item") coming from the "Production" tab.
Attention : Do not transform a "produced" item into a Master, otherwise you will loose the information that you have put on the sound.
MASTER :
 A master is the transformation of a edit session into a physical sound.
14.2.3.Available items in the Browser
The items available in the Browser are :
Audio items
Video items
Text items
Playlists
Stacks
Templates (created in the « Grid Editor » tab)
Cartstacks (created in the « Cartstack-prep» tab)
Jingle-Packs (created in the « Jingle-Prep» tab)
Dynamic tabs : additional tabs created on request to add more categories).
14.2.4.Sorting out the database
To sort out the items of the Browser by chronological order or alphabetical order, click on the column header.
If you click on the "Date" column header, your sort out the database by chronological order, increasing or decreasing.

Example: If you click on the column header having some data like the "title" column, then you sort out the database by alphabetical order.
14.2.5.Move a tab
It is possible to move a tab of the Browser and thus change the display order.

Here, we will move the "Jingle Pack" tab and position it between the "Advertisement" and "Text" tabs.
To do this, open the list of tabs by clicking on the list button on the right  ]:
]:
The list of tabs is displayed. Click on "Jingle Pack" and move it between "Advertisement" and "Text":

The "Jingle Pack" tab is now moved.

14.2.6.Hide a tab
It is possible to hide one or more tabs in Browser.
To do this, open the list of tabs by clicking on  .
.
The list opens:
Here we want to hide the tab "Automated Programs"

Move the mouse on the desired tab. It is highlighted in yellow with the icon  .
.

Click on  .
.

The tab is grayed out in the list and is no longer displayed in the Browser.

14.2.7.The search methods
Several ways for searching an item in the Browser are available.
Use the different filters in the left part of the screen. You can combine them to refine your search.

- see the Original items
- see the Edited items (coming from : Snippet / Snippet+ / Production)
- see the Master items
- see the RTB items (Ready-To-Broadcast)
- see the Broadcastable items
- see the RTA items (Ready-To-Archive)
- see the Archivable items
- see the Archived items
- see the locked items
- see the RTW items (Ready-To-Web) which will be retrieved by the Dispatcher* application.
(*Dispatcher retrieves the sounds and convert them into multiple formats for multiple destinations delivery).
NB: when the filter is green, it means that it is activated and that all the elements corresponding to the selected criteria are displayed in the Browser. On the opposite, when the filter is red, it means that you can see only the items which are not corresponding to the selected status.
 = the filter is not active (all the items are displayed, whether they are RTB or not)
 = the filter is active (only the RTB items are displayed)
 = the filter is negative (only the items which are not RTB are displayed)
You can use the different indexing fields (the search is not case sensitive but accents are taken into account).

Attention : when you make a new search, do not forget to delete the previous one by taking the filters off. To do so, you can do a right click on the "refresh" icon  . All filters are cleaned out.
OR
Drag and drop from the item list to a chosen search field.
Example : in the Browser, select Mariah, and drop it to the "author" field. The Browser displays the item list containing "mariah" in the "author" field.
NB : you can use this search method on any fields.
OR
You can search two items or more simultaneously by using the "OR".
Example : if you type "Volta" OR "Silversun" in the « author » field, the Browser displays the item list containing "Volta" and/or "Silversun".

Attention : if you use this search method, the « OR » must be in CAPITAL LETTERS.
NB : if you do not know in which category your item is stored, go to the "All" category, and enter a keyword in the "global" field. The search is done on the whole database.
14.2.8.Initializing a search
To reinitialize a search (it means taking all filters out), click on the "Refresh" button.  .
.
14.2.9.Saving a search
Once you have made a search, you have the possibility to save it.
To do so, place your mouse on the category. the cursor turns blue.

Double-click on the category. A window is displayed.
Enter the search title. Then, click on the "floppy disk" icon to save it.
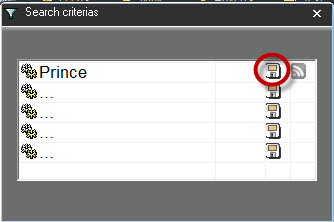
Your search is saved. Then you can edit it anytime.
14.2.10.Editing a search
To edit a search which has been saved :
Place your mouse on the category where you have saved your search. The cursor turns blue.

Click on the category. A window is displayed.
Select the search you want to edit and click on the "folder" icon to edit it.

Your search is edited.
14.2.11.Playing an item (Ctrl+P)
You can play an item from the Browser and define the speed (from very slow to very fast). To do so :
Select an item in the Browser.
Click on "Play" 
A progress bar is displayed. And a volume button to set the sound level as well.
By clicking on the Lock icon, it is possible to modify separately the level for the left and/or the right channel.
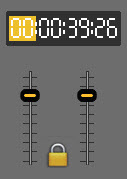
While playing a sound, or even when it is paused, if you click a second time on the button  , it will place the cursor 5 seconds before the end.
Do a right click on the progress bar. a window is shown as follows :

Choose the speed of your item.
For information :
50% : Plays very slowly
75% : Plays slowly
100% : Plays normally
150% : Plays quickly
200% : Plays very quickly
14.2.12.Adding a new item
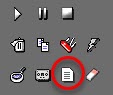
A new item can be added by clicking on the button on the right side of the Browser window.
It is used to create :
- an empty item witout physical item for the SOUND, VIDEO, TEXT or IMAGE items
- a contact
- a basket
- a cartstack
- a Jingle Pack
For the following type :
- Project
- Edit from Snippet/Snippet+ or Multitrack
- Playlist/Stack/Template
- Asset
- Event
...the dedicated tool should be used
An item linked to a project can not be deleted (first delete the project, the window allowing to delete the linked items is not implemented in this case)
An item linked to a asset can not be deleted (first delete the asset, the window allowing to delete the linked items is not implemented in this case)
When deleting an item (whatever the type of deletion is : final or sent to the bin), the item is deleted from the baskets including this item. If restauring an item, this item will not be replaced in the baskets where it was before the deletion.
Palylists/Stack/Templates
LocSchedule/LocTemplate
Cartstacks
Jingle Packs
...cannot be sent to the bin.
14.2.13.Deleting an item (Ctrl+D)
To delete an item from the Browser , select the item and do a left click on the "Trash" icon at the right side of the Browser or do a right click on the selected item. the "Delete" function is displayed in a menu.
Attention : It is not possible to delete :
A item belonging to another user (except if the right is given)
An item with the RTB and/or Broadcastable validation(s).
A
An item in use
An item in a playlist, cartstack or jingle pack.
14.2.14.Restoring a deleted item
To restore a deleted item, do a right click on the "Trash can" icon  .
.
The following window is displayed with the list of the deleted items in the chosen category.
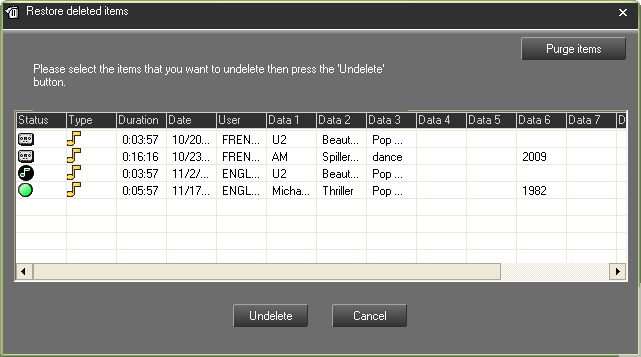
Select the item to restore and click on "Undelete".
A message is displayed to confirm the restoration. Click on "Yes".

To retrieve the restored item in the Browser, either use the search filters at the left side of the Browser, or refresh the Browser with the "Refresh" icon .
Attention : To restore a deleted item, you must get the right to do it (right given by the administrator).
IMPORTANT :
An EDL can be deleted even if a RAW or other associated EDLs exist. Only the EDL will be deleted (and will go into the bin).
You can delete a RAW even if an EDL is already in the bin.
When deleting a RAW, the existing associated EDLs will also be deleted but an information box that lists the associated EDLs allows you to cancel the deletion of the RAW and the associated EDLs.
When restoring one of the EDLs put in the bin, the RAW is also automatically restored without any information. Unless the RAW has been purged.
When restoring the RAW from the bin, the RAW is the only one restored and the EDLs remain in the bin.
14.2.15.Deleting a playlist
In the Browser, go to the "Playlist" category.
Select the playlist to delete.
Either do a right click on it, the "Delete" function is displayed, or click on the "Trash can" icon available at the right side of the Browser.
A message to confirm the deletion is displayed. Click on "Yes" to confirm the deletion or "No" to cancel the action.
Attention : it is not possible to delete a playlist with the RTB validation (you must remove the validation first).
14.2.16.Deleting a stack
In the Browser, go to the "Stack" category.
Select the stack to delete.
Either do a right click on it, the "Delete" function is displayed, or click on the "Trash can" icon available at the right side of the Browser.
A message to confirm the deletion is displayed. Click on "Yes" to confirm the deletion or "No" to cancel the action.
Attention : it is not possible to delete a stack with the RTB validation (you must remove the validation first).
14.2.17.Deleting a template
In the Browser, go to the "Template" category.
Select the template to delete.
Either do a right click on it, the "Delete" function is displayed, or click on the "Trash can" icon available at the right side of the Browser.
A message to confirm the deletion is displayed. Click on "Yes" to confirm the deletion or "No" to cancel the action.
14.2.18.Copying an item (Ctrl+L)
The « Copy » function  is used to copy an item which will have the name of the user doing this copy.
In the Browser, select the item to copy.
Click on "Copy".
The information card is displayed. Modify the data if needed.
Click on the "Floppy disk" icon to copy the file.
NB : This function is available by doing a right click on the item you want to copy.
14.2.19.Modifying an audio item (Ctrl+M)
The "Modify"  function is used to modify the data of a selected item (name of the correspondant, title, category…).
In the Browser, select the item to modify.
Click on "Modify".
A window is displayed to modify the data.
Click on the "Floppy disk" icon to save the modifications.
NB : This function is available by doing a right click on the item you want to modify.
14.2.20.Indexing Sheets
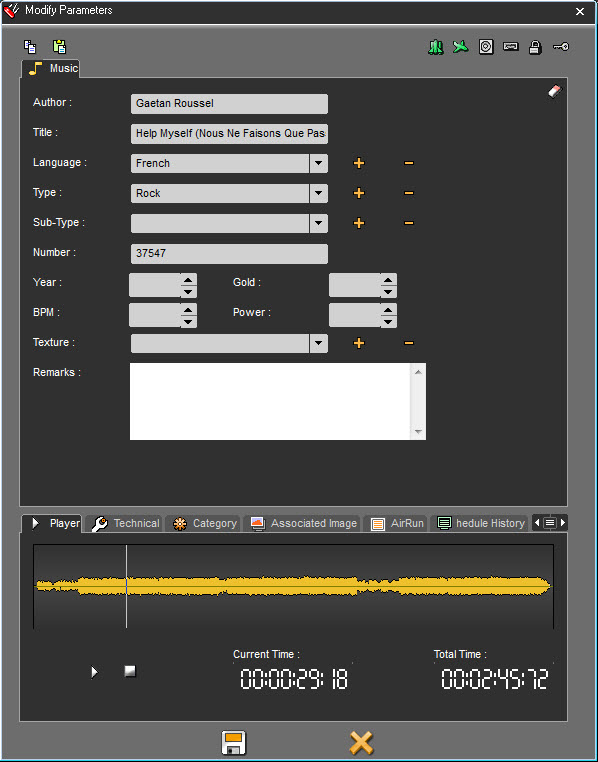
In the upper part of this popup, users can enter or edit the metadata relative to the selected item.
In the lower part, you will find :

Player Tab : pre-listen your audio item.
Technical Tab : check the set of information relative to the creation of the item.
Category Tab : link your item with a music category (Hot 20, Top 100, Gold 80…)
Associated Image Tab : display the image associated to your item, usually the album cover.
AirRun tab : display the informations about when the item was broadcasted.
Schedule History : Display when the item was ou will be broadcasted.
History : Displays all the action done on the item (modified, flagged RTB, unflagged, etc...)
When you access the database in Remote mode, the display of the indexing sheet is the same.
Audio Player
Sound Items:

This Player allows you to play all sound items.
It is made of :
A spectrum,
A "Play/Pause" button,
A "Stop" button,
A "Total Time" timer indicating the total length of a track,
A "Current Time" timer indicating the current position of the playhead on the track.
The spectrum is displayed only if you open a Raw, Master or a Production item. The whole track’s spectrum is displayed
Play button 
 , turns to Pause button when pressed.
Pause button 
 , turns to Play button when pressed again.
Stop button  , puts the playhead to the beginning of the track when pressed.
Clicking on any part of the spectrum allows you to navigate into the track. Changes are reflected in the "Current Time" counter.
While playing the sound, a click in the "Current Time" timer will place the playhead accordingly.
Image Player
Image:
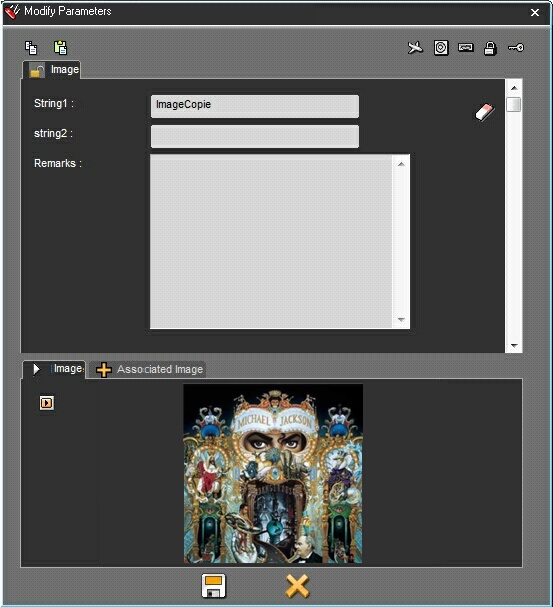
This player allows you to open Image items.
It is made up of :
The item’s image
An "External Player"  button.
If there is no image to display, a default image is used.
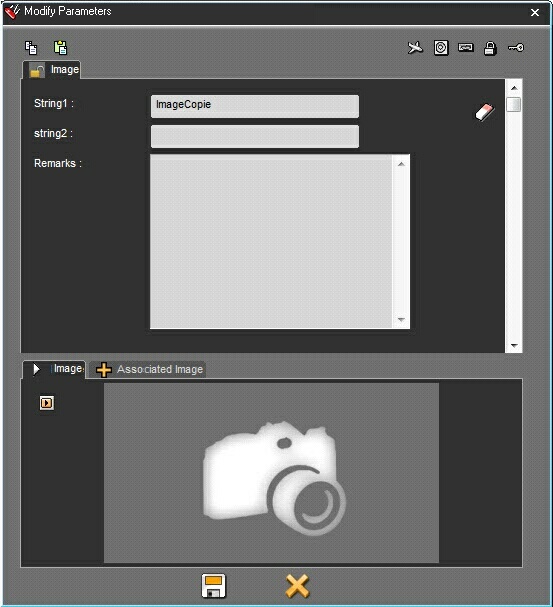
Associated Image:
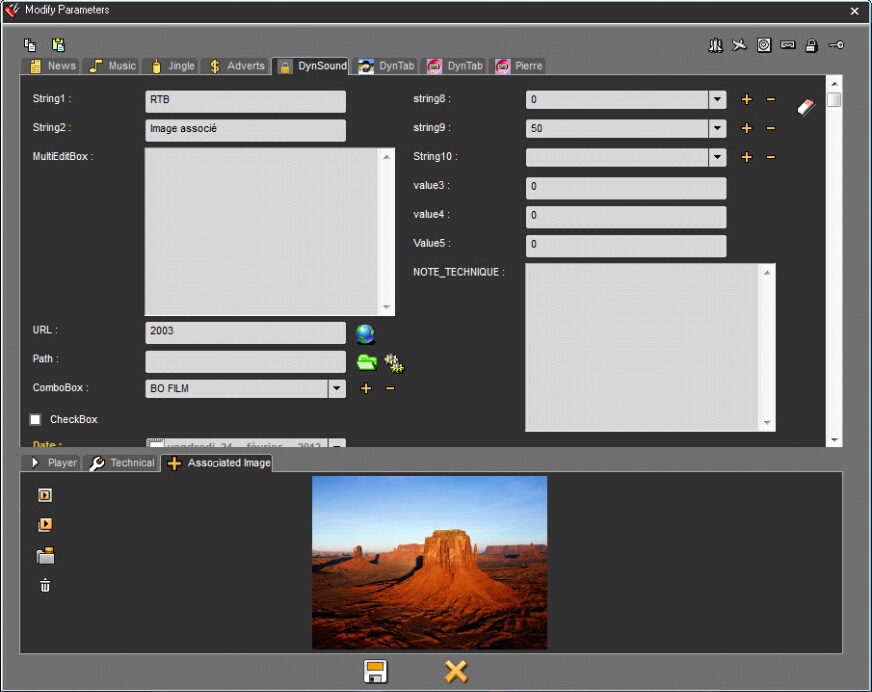
This tab allows you to display the image that is associated to your item.
The "INTERNAL PLAYER"  button (or double-click on the image), opens the image in RadioAssist’s Internal Player.
The "External player"  button opens the image in an external player such as Windows Photo Viewer.
The "IMPORT"  button allows you to import an image, so that you can associate it with an item, via the Windows browser.
The "DELETE"  button allows you to get rid of the current associated image.
If no image is associated with the item, a default image is used.
Associated Images Player:
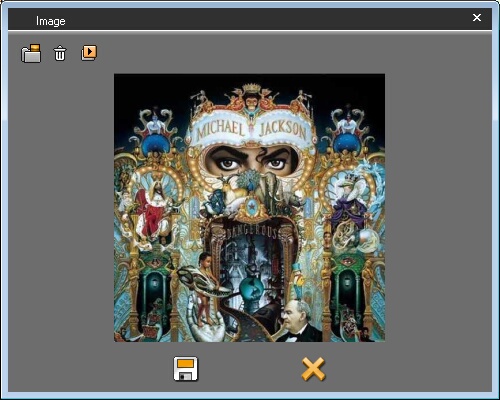
This window allows you to display the image that is associated with the selected item.
It is made up of :
The item’s associated image,
The "External Player"  button, opens the image in an external player such as Windows Photo Viewer.
The "IMPORT"  button allows you to import an image, so that you can associate it with an item, via the Windows browser.
The "DELETE"  button allows you to get rid of the current associated image.
The "INTERNAL PLAYER"  button (or double-click on the image), opens the image in RadioAssist’s Internal Player.
The window is dynamically resizable and the last resized dimensions are stored in the system for each user session.
If no image is associated with the selected item, a default image is used.
Image Item Player:
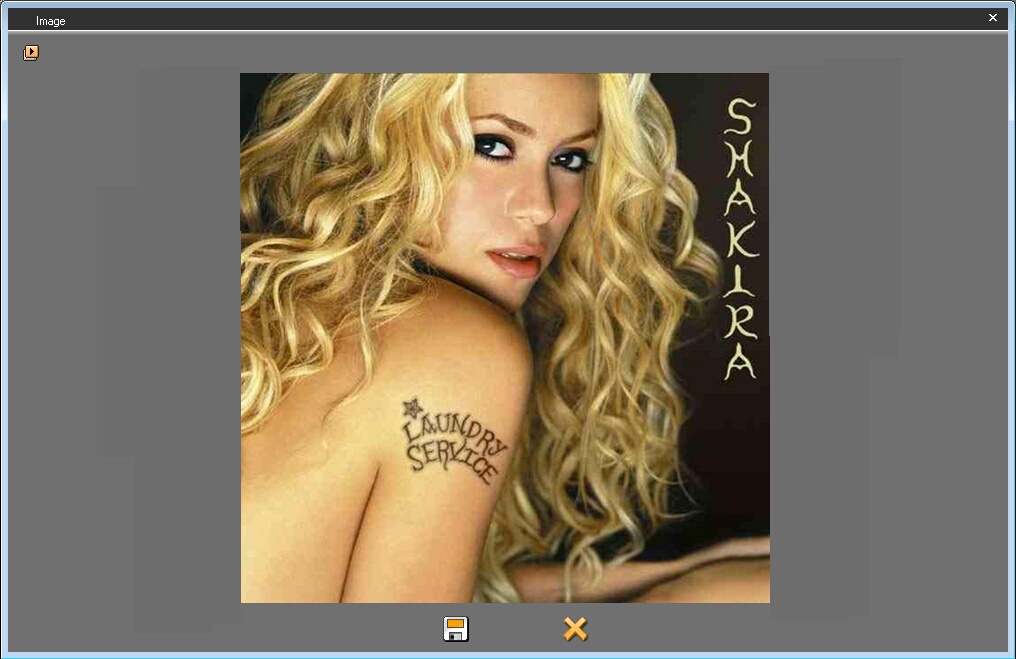
This popup allows you to display the image items.
The "External Player"  button (or double-click on the image), opens the image in an external player such as Windows Photo Viewer.
The window is dynamically resizable and the last resized dimensions are stored in the system for each user session.
Importing images
To import images, drag-and-drop the image file from the source folder to the "Image" tab of your RadioAssist Browser (virtual tab you need to create via the TabEditor application - please see TabEditor documentation for further information)
A popup allows you to complete the metadata associated to the Image file.
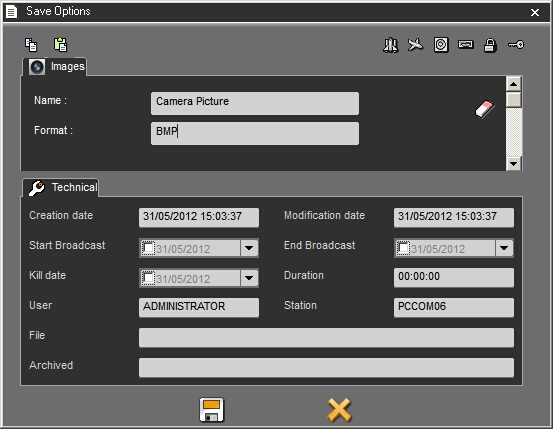
Technical Tab
The Technical tab allows you to get all the information related to the file (location on the archives server, name of the physical file...)
Start Broadcast + End Broadcast : authorized dates of broadcast for the item
Kill Date : date of purge of the item.
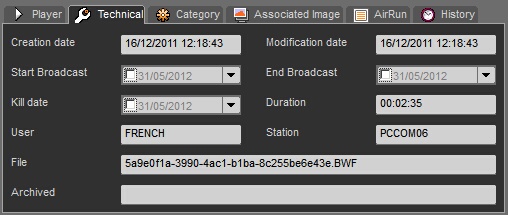
Category Tab
The Category tab allows you to associate a category to a sound and to define its broadcast time restrictions. This helps you create music programming through NETIA's scheduling technology (tool integrated to GridEditor, see. Music Scheduling documentation)
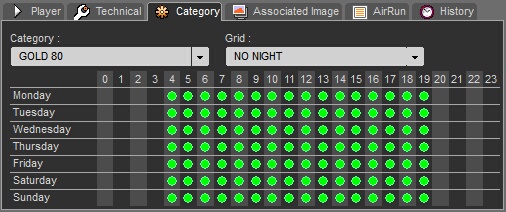
AirRun Tab
The AirRun tab allows you to know more about the broadcast history of a track.
- Start time of Broadcast
- End time of Broadcast
- Channel used
- Playlist's name (if the item was inserted in a playlist)
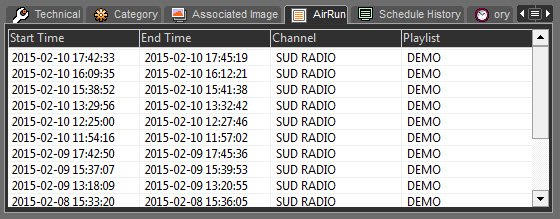
History Tab
The History tab allows you to know which modifications were performed on the item since its date of insertion into the database:
- Date of modification
- Type of modification
- Name of the tool used to do the modification
- Name of the user who did the update
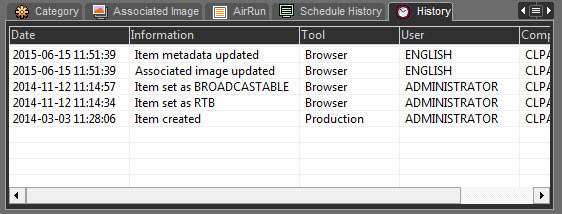
Schedule History Tab
The "Schedule History" tab allows you to view the scheduling history of a sound.
Both in the past and in the future.
It shows :
- broadcast start date,
- Playlist,
- Name of the screen in which the sound has been/will be played,
- Channel
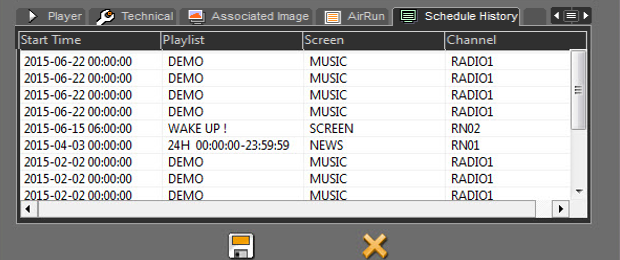
14.2.21."Set as urgent" function
The "Set as urgent" function  is designed to send an audio item to the Hot-Box of Air–DDO (playout system) to notify the technician that the item must be broadcasted urgently (because it is not planned in the playlist).
To send an item as urgent, select it first and click on the "Set as urgent" function  . In multi-channel mode, all channels will be notified.
If you work in multi-channel mode, do a right click on the item to send. In this case, the list of the available channels is displayed. You can choose on which channel you want to send the item then.

14.2.22.Generating a master (Ctrl+G)
To generate a master, select the edit session coming from Snippet, Snippet+ or Multitrack and click on the "Generate a master" function located at the right side of the Browser.
You can also do a right click on the selected item. The "Generate a Master" function is displayed as well.

Attention : Do not masterize items coming from the "Production" tool, otherwise you will loose all information that you have put on the sound. Moreover, it is not possible to transform an original item directly into a master.
14.2.23.Creating an empty file
The "New element" function  on the right-hand side of the Browser is used to create a record without associated sound, in the case of SOUND, VIDEO, IMAGE and TEXT elements. An empty raw card element is created.
This fonction is designed to prepare files which will be associated with an audio file later on (coming from an automaton or associated with the "Masterize as" function for instance).
It is not possible to create empty sheets in a tab where the “Type” is not defined (example: ALL).
An empty record is indicated by the "sheet" icon.

14.2.24."Masterize As" function
The "Masterize as" function (function available by a right click on an item of the Browser or by a right click on the "Generate a Master " function) is used to associate a sound to a empty file.
14.2.25.Using the "Masterize As" function
To use this function you must create empty files first.
Select the audio file on which you want to associate an empty file.
Do a right click on it and choose the "Masterize as" function (or right click on the "Generate a master" icon). A window is displayed proposing a list of empty files (without audio files associated) available in the Browser.
Choose the empty file on which you want to associate the sound file.
Click on "OK".
The sound is associated to the file and the status of this audio file will be master.
14.2.26.Remote Database
A remote database is designed to access a database available on another site for instance.
To access to a remote database, select it in the dropdownlist at the right side of the Browser :
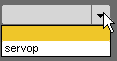
An identification window is displayed asking your login.
Then, click on "connect to the remote database" :

The Browser displays items from the remote database.

To transfer an item from the remote database to the local database, select the item to transfer and click on "Transfer to the local database"  .
.
To go back to the local database, click on "Connect to the local database"  .
.
To transfer an item from a local database to a remote database, choose a remote database in the dropdownlist.
Click on "Transfer"  .
.
14.2.27.Automatic archiving of Browser's items
To archive automatically the items of the Browser, you must use the required validations which are RTA. (Ready To Archive) and/or Archivable.
Thus, once the items have the RTA and/or Archivable validation(s), Na-Arch (the automatic archiving software from the RadioAssist range of products) can archive them automatically.
According the different radios' methods, 1 validation or 2 validations can be used.
14.2.28.Archived items
Once an item is archived manually or automatically, a CD icon is displayed near the status of the archived item.

(item archived but still available in the database )

(item archived and deleted from the database - see "Consulting the archived items").
If you do a right click on the archived item, the archive location (whether a path, whether a number) is shown.

14.2.29.Consulting the archived items
As long as an archived item is not purged, it is still possible to consult it or use it. The archived items which are still on line are recognizable thanks to a grey CD-ROM icon near the status.

However, if the archived item is purged, the data remain in the database but the audio file is no longer available.The items which are archived AND purged are recognizable thanks to an orange CD-ROM icon near the status.

If you double-click on it, a message asks you to insert the CD or to enter the path where the item has been archived.

To put the audio file back in the database, insert the CD or choose the path on which the archived item is and click on "Validate".
The audio file is now available in the Browser.
14.2.30.Changing user
The right-hand window lists all existing users. To change user, click on the down arrow. A drop-down menu appears, listing all available users in the database.
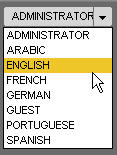
Choose your name. The login window appears.
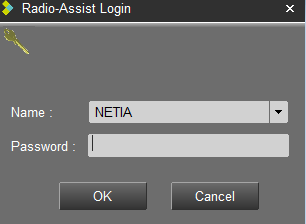
- Enter your password.
- Click "OK" or press "Enter" on your keyboard.
14.2.31.Locked items (lock icon)
Locking an item will have the following results :
- the item won't be eligible for purge
- depending on the settings made by the administrator it could be locked for user users to be used and/or modified and/or deleted

14.2.32.Locking an item
To lock an item, you have two ways :
Click on "Modify" . The lock icon is displayed on the sound data. .
Click on it. The icon turns green  .
.
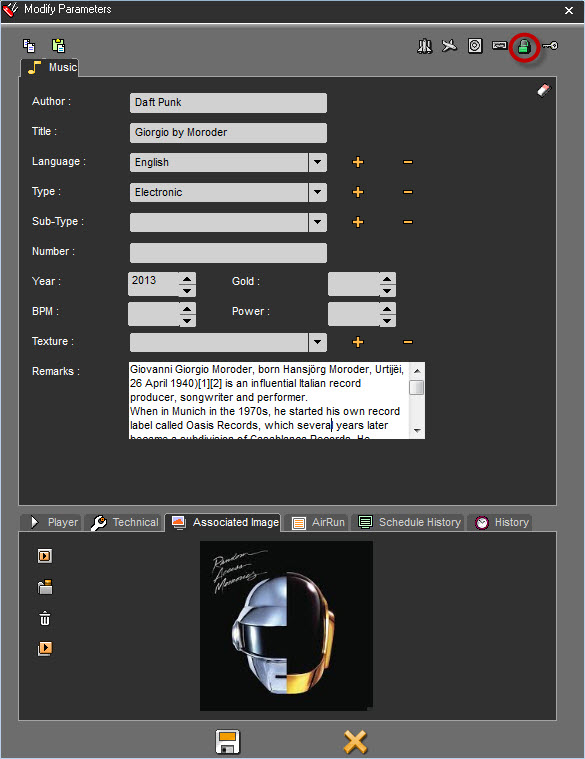
In the Browser, in the "Lock" column , on the sound.

However, this item is accessible by anybody.
14.2.33.Printing the Browser
To print out the list of the items available in the Browser, click on the NETIA icon on the top left hand corner, or do a right click on the title bar et choose "Print Browser".
14.2.34.Private mode
The yellow key means that the item is "Private". Thus, only the connected user who has put the key will be able to see the item (see "Putting an item in "private").
14.2.35.Putting an item in "private"
To put an item in "Private", you have 2 ways :
Click on "Modify" . the key icon is displayed on the window data of the item. Click on it. The icon turns green.

Or, in the Browser, in the « Personnal » column, on the item.

14.2.36.The validations RTB/Broadcastable
The RTB 
 and/or broadcastable validations are used to validate an item in order to broadcast it.
According the different radios' methods, 1 validation or 2 validations can be used.
On the sound file when you transform it into a Master. The 2 validation icons appear at the top right of the file.
Click on them. The icon(s) will turn green.
In the Browser, in the R.T.B. and/or Broadcastable column, click on the sound. Double-click on it, and the validation icon appears.
14.2.37.Putting the RTB and/or Broadcastable validations
To put the RTB and/or Broadcastable validations, you have 3 ways :
1) When you generate a master, a window with the item data is displayed. The RTB 
 and the Broadcastable icons are available. Click on them. The icons turn red.
2) In the Browser, in the RTB and/or Broadcastable column, on the sound. Click on it (or double-click, according to the configuration), the icon(s) is/are displayed.
3) In the Browser, select the item to validate and press Ctrl + R to put the RTB validation and/or CTRL + B to put the Broadcastable validation .
14.2.38.Putting a playlist RTB
To put the RTB (Ready-To-Broadcast) validation on a playlist :
In the Browser, go to the "Playlist" category.
Select the playlist.
Go to the "RTB" column and double-click on it.
The "Space shuttle" icon  is displayed which means that the playlist has the RTB validation and then it is visible in the playout system.
NB : if a playlist does not have the RTB validation, it will not be visible in the playout system.
14.2.39.Putting a stack RTB
To put the RTB (Ready-To-Broadcast) validation on a stack :
In the Browser, go to the "Stack" category.
Select the stack.
Go to the "RTB" column and double-click on it.
The "space shuttle" icon  is displayed which means that the stack has the RTB validation and then it is visible in the playout system.
NB : if a stack does not have the RTB validation, it will not be visible in the playout system.
14.2.40.Locking Radio-Assist
You can log out from RadioAssist without closing the application.
To do so, click on the "Lock button" available at the right hand corner of the screen  .
.
Thus, the next user who wants to use RadioAssist, has to log in with his name and his password.
This function prevents one user from being connected under another name.

The right window contains the user list. To change the login, click on the down arrow. A dropdown list containing the user list available in the database is displayed.

Choose your name. Then, the connexion window is displayed.

Enter your password.
Click on « OK » or press « Enter » on your keyboard.
14.2.41.Browser Shortcuts
Ctrl + D : Deletes the selected item
Ctrl + l : Copies the selected item
Ctrl + M : Modifies the sound data
Ctrl + T : Launches a search
Ctrl + G : Generates a master
Ctrl + P : Play/Stop the selected item
Ctrl + R : Puts the RTB validation on the selected item
Ctrl + B : Puts the Broadcastable validation on the selected item
CTRL + / : Puts the RTA validation on the selected item
Ctrl + Master (button or dedicated line in the popup menu - when item is selected) : Masterization of selected item without opening its metadata sheet
Alt + T : displays the whole items of the database
Alt + N : Go to the "News" category
Alt + M : Go to the "Music" category
Alt + F : Go to the "Feed" category
Alt + J : Go to the "Jingle" category
Alt + A : Go to the "Ads" category
NB : "Ctrl" and "Alt" are keys.
14.3.Snippet
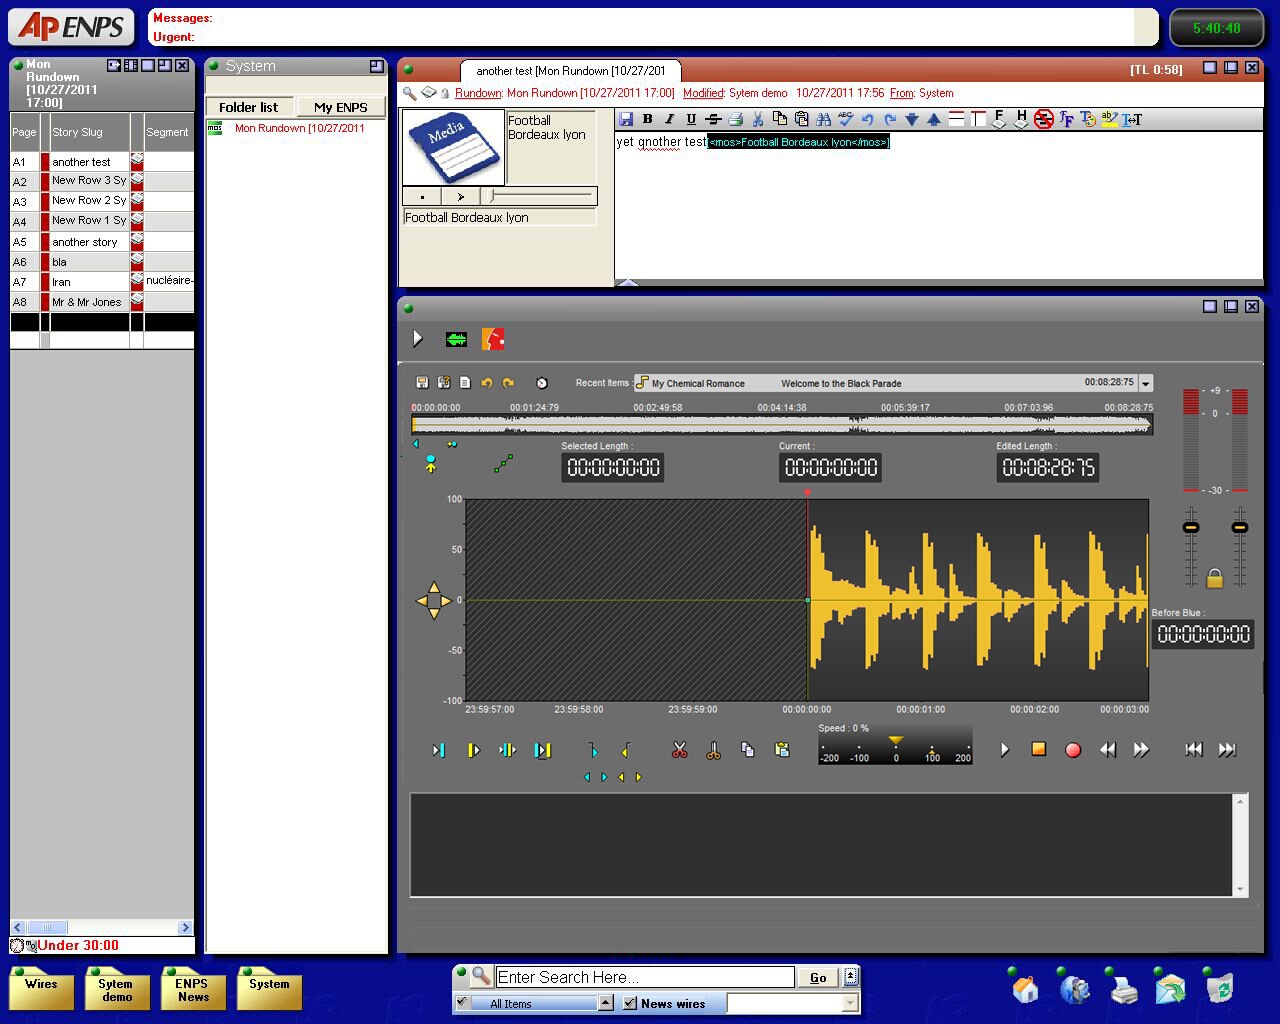
14.3.1.Workflow
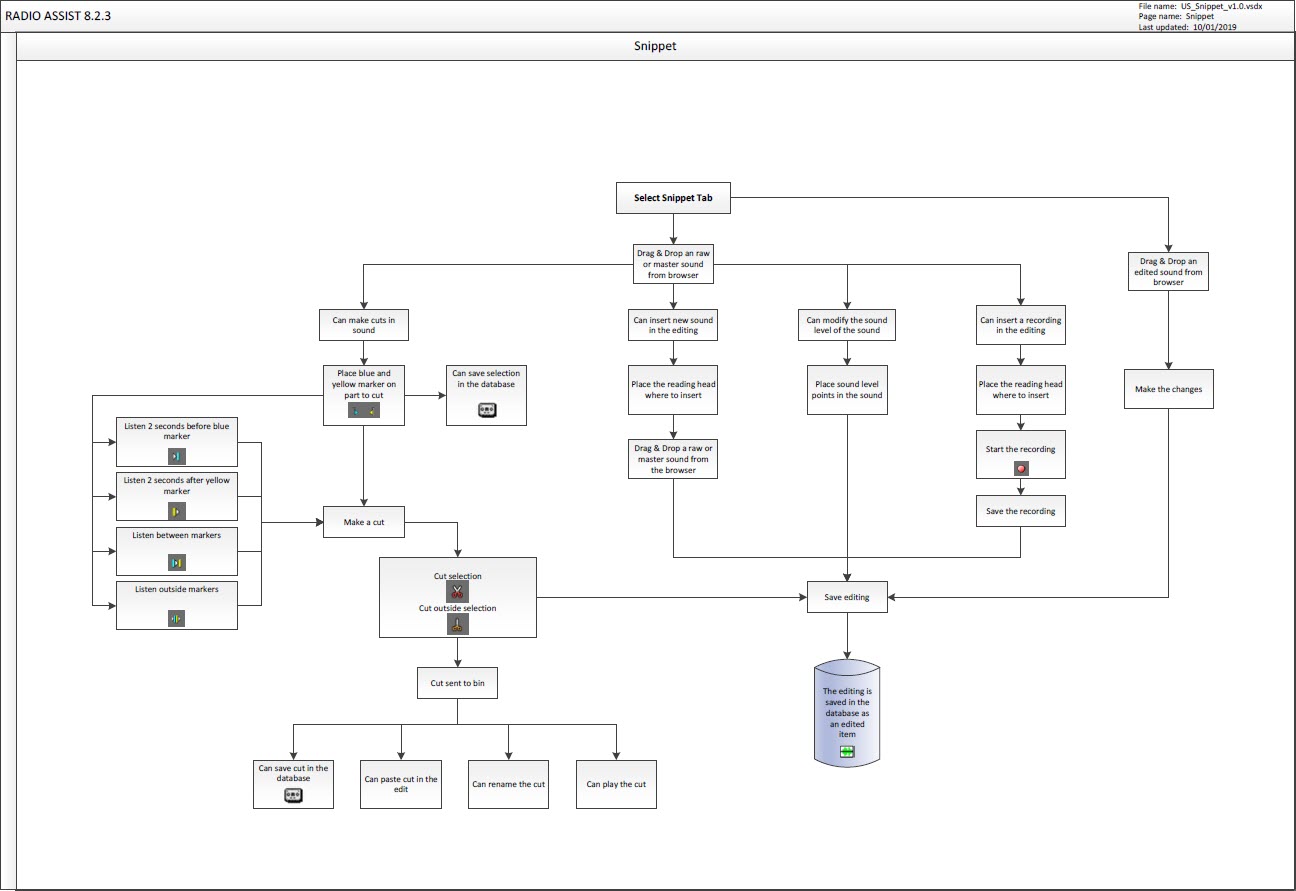
14.3.2.Snippet definition
In the « Snippet » tool, 2 cut modes are available :
Removing mode (you select the part to delete).
To do so, use the "opened scissors" icon which is used to cut what you have selected between the blue and the yellow lines.
Adding mode (you select the part to keep).
To do so, use the "closed scissors" icon which is used to keep what you have selected between the blue and the yellow lines.

14.3.3.Editing in Snippet
Click on the « Snippet » tab.
In the Browser, select the item you want to edit.
- To edit a new item you can use original 
 or master items .
- To modify an edit session, you can select an edit session coming from the "snippet" tool or the "Production" tool .
Place the item on the track. To do so, 3 possibilities are available :
Drag and drop from the database to the track.
Double-click on the item.
Select the item and press "Enter" on you keyboard.
Place the blue and the yellow lines. Then, you have the possibility to keep the selection or to delete it.
Once your blue and your yellow lines are placed approximately, you can readjust them. To do so, go to the blue or to the yellow line and replace them.
You can also do this operation by using the following buttons :


To know the result before cutting, you can use the following play buttons :
 Plays 2 seconds before the start of a cut (before the blue line).
 Plays 2 seconds after the end of a cut (after the yellow line).
 Plays outside the cut (2 seconds after the blue and 2 seconds before the yellow) - (F6)
 Plays the content of a cut (2 seconds after the blue line and 2 seconds before the yellow line) - (F7).
NB : A right click on one of these buttons will play the sequence in loop until the stop button is activated, so cuts can be modified as you go along.
Once you are satisfied, click on :
 : To delete the selection
 : To keep the selection
Your cut goes to the bin.

To do other cuts, start the operation all over again (place the blue line, the yellow line...).
14.3.4.Setting the mark in (blue) - (F3)
To set the mark in, represented by the blue and marking the begin of your cut you have to :
Place the playhead where you want to place the blue line.
Click on the following icon :  .
.
NB : you can also set the blue line by using the right click of your mouse (function available in "Snippet" only ) or use F3 (shortcut) (see Snippet shortcuts).
In addition, note that by right-clicking on the blue or the yellow icons, the marks on the track will disappear.
14.3.5.Setting the mark out (yellow) - (F4)
To set the mark out, represented by the yellow and marking the end of your cut you have to :
Place the playhead where you want to place the yellow line.
Click on the following icon : .
.
NB : you can also set the yellow line by using the right click of your mouse (function available in "Snippet" only ) or use F4 (shortcut) (see Snippet shortcuts).
In addition, note that by right-clicking on the blue or on the yellow icons, the marks on the track will disappear.
14.3.6.Playing 2 seconds before the current cut
To play 2 seconds before the blue, to know if the blue is at the right position, click on the following icon : .
NB : if you do a right click on the icon, you play 2 seconds before the blue line in loop.
14.3.7.Playing 2 seconds after the current cut
To play 2 seconds after the yellow line, to know if the yellow is at the right position, click on the following icon : .
NB : if you do a right click on the icon, you play 2 after the yellow line in loop.
14.3.8.Simulating a cut (F6)
To simulate a cut, meaning to play the result before cutting what you have selected between the blue and the yellow lines, click on the following icon : .
NB : if you do a right click on the icon, you play 2 seconds before the blue line and 2 seconds after the yellow line in loop.
14.3.9.Playing the content of the cut (F7)
To play the content of the cut (between the blue and the yellow), click on the following icon:
If the cut duration is more than 4 seconds, only 2 seconds after the blue and 2 seconds before the yellow will be played.
NB : if you do a right click on the icon, you play between the blue and the yellow in loop.
14.3.10.Cutting a selection (F5 or Del)
Several ways are available to cut a selection.
Once you have placed the blue and the yellow lines :
Click on the « cut » icon  .
.
OR
Do a right-click on the wave form and choose the « Cut » function.

OR
Press "F5" or "Del" on you keyboard.
The cut is displayed in the bin.
14.3.11.Cutting a selection without putting it in the bin
You can cut a selection without putting it in the bin.
Once you have placed the blue and the yellow lines :
Do a right click on the « cut » icon  .
.
OR
Hold the "Shift" key down and click on the « cut » icon  .
.
14.3.12.Cutting outside the selection
"Cutting outside the selection" means that you keep what you have selected between the blue and the yellow lines.
Once you have placed the blue and the yellow lines :
Click on the « Cut outside selection » icon  .
.
14.3.13.Playhead
The playhead is the red vertical line in the middle of the track. The playhead is fixed.
When you want to insert the blue line, the yellow one, insert a blank or do any action, you HAVE TO place the playhead at the chosen place.
14.3.14.The bin
The bin is the cut list. Indeed, each time that you make a cut, this cut disappears from the sound and goes to the bin.

By doing a right click on a cut, the following menu is displayed :

Play : plays the selected cut.
Rename : renames the selected cut
Paste : pastes the selected cut on the sound, where your playhead is.
Save as a new item : saves the selected cut as a master in the Browser.
Delete : deletes the cut from the bin.
Playing a cut
Go to the bin :

Select the cut to play and click on the following button :  .
.
You can also do a right click on the cut. The following menu is displayed :

Click on « Play ».
Renaming a cut
Go to the bin :

Select the cut to rename.
Do a right click on it. The following menu is displayed :

Choose « rename ». A window is shown to rename the cut.
Enter the cut name.

Click on « OK » or press « Enter » on your keyboard.
Your cut is renamed.
Restoring a cut
On the track, click on the cut mark (brown line).
The bin selects the cut belonging to the selected cut mark.
In the bin, do a right click on the highlighted cut.The following menu is displayed :

Choose « Paste ».
The cut is restored.
NB : you can also put the cut back by doing a drag and drop.
Deleting a cut (Del)
In the bin, select the cut to delete.
Do a right click on it. The following menu is displayed.

Choose « Delete ».
The cut is deleted.
14.3.15.Generating a master from Snippet (Ctrl + W)
To generate a master from "Snippet" :
Select the sound-bite to masterize thanks to the blue and the yellow lines (press Ctrl + A to select the entire sound file).
Do a right-click on it. The following menu is displayed.

Click on « Special » and then « Save as a new item ».
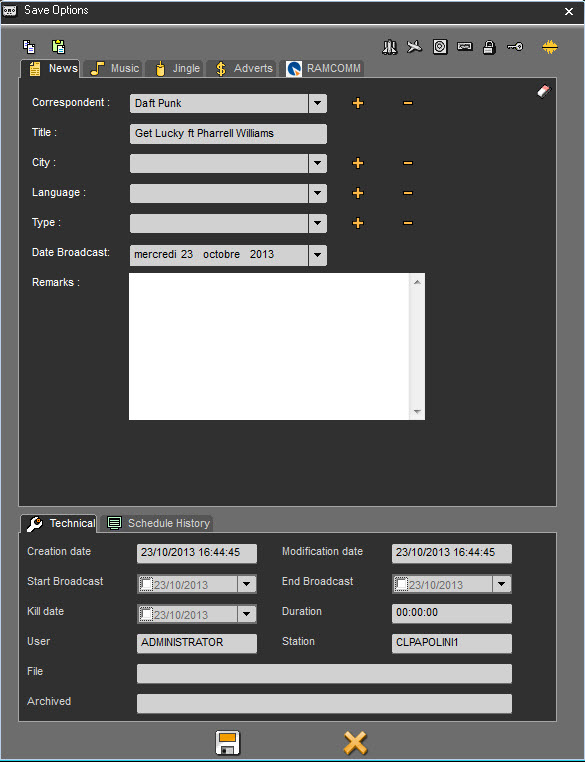
Modify the data if needed.
Save.

The item is saved in the database
NB : this feature is available in the bin as well.
14.3.16.Straightening a cut
If a cut is not good (the end of a word is missing for instance), you can straighten it to retrieve just the part of the word that you have cut by mistake.
To straighten a cut, click on the cut mark (arrow pointing downward). This one turns to orange.
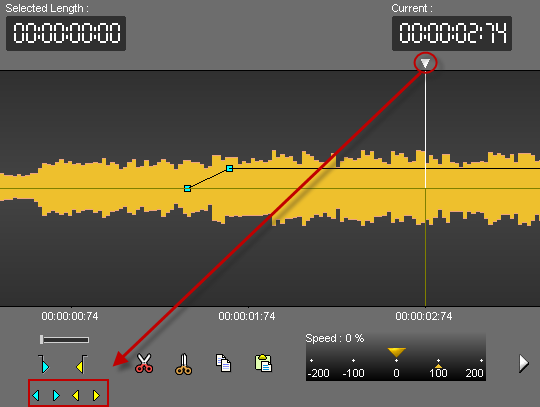
Straighten your cut thanks to the following buttons :
to straighten the beginning of the cut (blue).
to straighten the end of the cut (yellow).
14.3.17.The trimming "function"
The "Finalize" function is used to delete blanks at the beginning and at the end of the recording.
To do so, do a right click on the closed scissors icon  .
.
14.3.18.Undo (Ctrl + Z)
To undo an action, Click on the following icon : 
NB : you can undo up to 256 actions before saving.
14.3.19.Redo (Ctrl + Y)
When you undo and you change your mind, you can redo the action by clicking on the following icon : .
14.3.20.Juxtaposing several audio items
In snippet, you can juxtapose several audio items on the same track.
Once you have inserted the first item, replace the playhead where you want to insert the second audio item.
Then, select the item from the database and drag it down on the track (or double-click on it, or press "Enter" ).
The second audio item is inserted. The color is different.
You can insert as many items as you want.

Attention : you can juxtapose original items 

 , master items but not edit sessions together.
14.3.21.Go to beginning (F8)
To go to the begin of an item, click on the following icon :

14.3.22.Go to end (F9)
To go to the end of an item, click on the following icon :

14.3.23.Adding a fade point in Snippet (Ctrl + right click)
To add a fade point :
Do a right click on the wave form, where you want to add a new fade point.
The following menu is displayed.

Click on « Add fade point ». The fade point is displayed.
NB : Ctrl + right click on the wave form allows you to create a new fade point without using the contextual menu.
14.3.24.Deleting a fade point in snippet (Ctrl + right click)
To delete a fade point :
Do a right click on the fade point you want to delete.
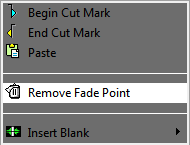
Click on "Remove fade point" (this function is only available if you are on a fade point. Otherwise, it is the "add a fade point" which is displayed).
The fade point disappears.
Attention : you can not delete the default points (set by Radio-Assist).
NB : Ctrl + right-click on the wave form allows you to delete a new fade point without using the contextual menu.
14.3.25.Hiding the fade points
To hide fade points, click on the following icon : 
a red cross is displayed on the icon  .
.
NB : The fade points are not visible but you can still listen to them.
14.3.26.Visualizing the fade points
If you have hidden your fade points and you want them back, click on the following icon :  .
.
The red cross on the icon disappears  , and your fade points are visible again.
14.3.27.Modifying the global level of the sound
To modify the global level of your sound :
Click on the red horizontal line (separating your track in 2), a double arrow is displayed.
Increase or decrease the sound level by moving the black line which appears.
Release the mouse button.
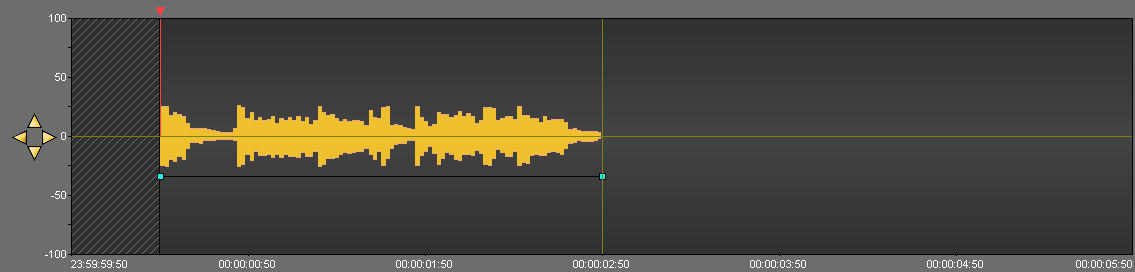
14.3.28.Modifying the sound level
To modify a fade point :
Click on the fade point to move (four arrows are displayed) and drag it to the chosen place.
Release the mouse button.

14.3.29.Display AirRun markers
It is possible to display on the sounds that comes from the Feed, the markers that delimit each element played (beginning of songs, beginning of ads, beginning of jingles, etc ...)
To make these markers appear, you must :
Select a sound from the Feed tab in the Browser.
Drag and Drop it into Snippet
Right click on the button  to display the list of channels.

Select the channel for this sound.
Click on  .
.
The button turns green  and the markers are displayed in the sound.

To make the markers disappear, click on 
 . It turns grey and the markers are not shown anymore.
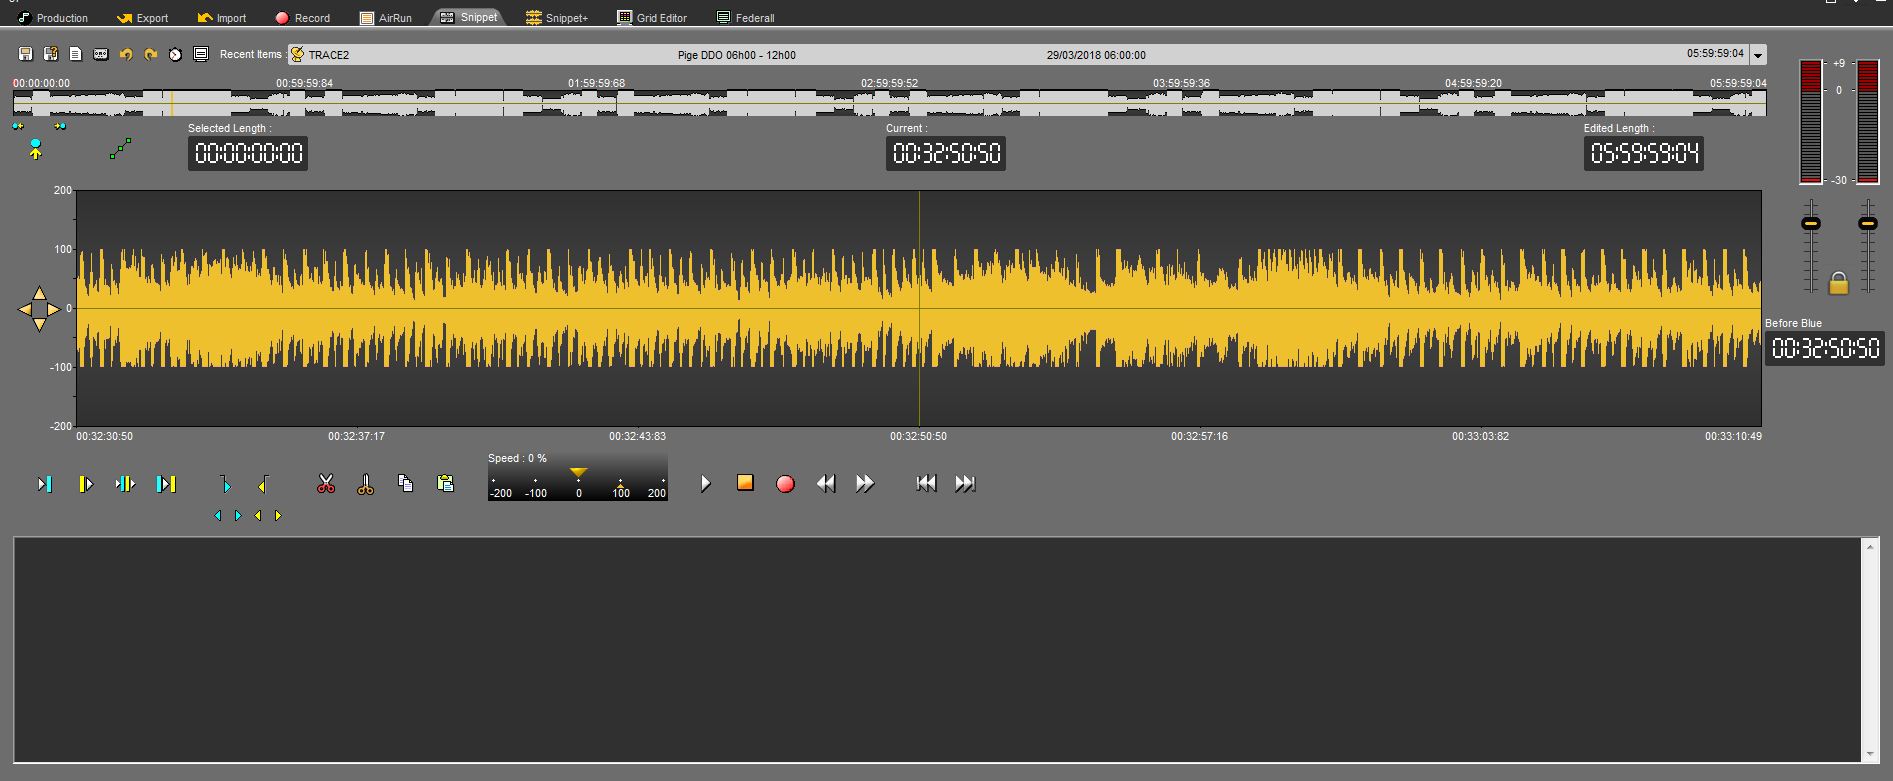
14.3.30.Set a marker in Snippet (F1)
To set a marker on your item :
Place the playhead where you want to insert the marker.
Click on « Set a marker »  .
.
14.3.31.Renaming a marker in Snippet
To rename a marker :
Do a right-click on the marker number you want to rename. A menu is displayed.

Choose « Rename locator ».
Enter the marker name.

Click on « OK » or press "Enter" with you keyboard.
14.3.32.Moving from marker to marker (1...9)
To move from marker to marker, you can go straight to specified marker using the number pad, from 1 to 9.
Or, use the arrows below the "set locator" icon to go from one marker to the other with no number limitation.

14.3.33.Deleting a marker
To delete a marker :
Do a right-click on the marker number you want to delete. A menu is displayed.
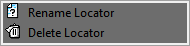
Choose « delete the locator ».
14.3.34.Copying and pasting a soundbyte in snippet (Ctrl + C/Ctrl + V)
To copy and paste a sound bite :
Select between the blue and the yellow lines the part to copy.
Click on « Copy » (or Ctrl + C)  .
.
Place the playhead where you want to paste the sound bite.
Click on « Paste » (or Ctrl + V)  .
.
14.3.35.Stretching a selection
The "Stretch" function enables you to increase or decrease the duration of the sound bite you have selected, without altering the pitch.
To stretch a selection :
Select the part you want to stretch thanks to the blue and the yellow lines.
Do a right-click. A menu is shown.

Click on Special then, click on Stretch.
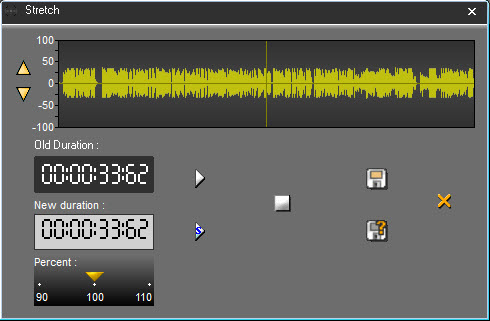
In the stretch window, enter the new duration or modify the percentage (up to 10%).
You can listen to the result by clicking on  .
.
Click on "Save"  .
.
The sound bite you have stretched is displayed on the track, with another color.
If you click on  , the following window is shown :

Click on  .
.
The sound bite you have stretched is displayed on the track, with another color and is also saved in the database.
NB : The original sound bite is available in the bin. Therefore, you can retrieve it at any moment.
14.3.36.Inserting a blank
The "insert blank" function enables you to insert a blank of a predefined length.
To insert a blank :
Place the playhead where you want to insert the blank.
Do a right click. A menu is shown. Click on "Insert blank" and choose the length of your blank.

The blank is inserted :
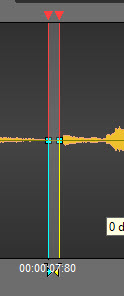
14.3.37.Crossfade
A crossfade is used to fade out a part of a sound and to fade in another part simultaneously.
The "crossfade" function is used on a cut mark only.
To do a crossfade :
Click on the cut mark. It turns to orange and the "crossfade" function is displayed :

Drag the cursor according to the kind of crossfade you want (light or strong). The more you drag the cursor to the right side, the stronger the crossfade is.
14.3.38.Recording in "Snippet"
To record in "Snippet":
Click on « record »  .
.
Click on « Pause »  to stop momentarily the recording.
You can resume the pause where the playhead is or somewhere else. To do so, replace the playhead.
Once the recording is finished, click on « stop »  .
.
A window is displayed to save you recording in the Browser.
Fill in the data and save by clicking on the floppy disk icon  (or press "Cancel" to start over).
NB : Your recording has the raw status  .
.
It is possible to monitor the incoming signal through the output of the sound card. Monitoring is controlled by the green "speaker" button.
 Monitoring enabled
 Monitoring disabled
Note: If the audio card used supports standard monitoring mode, RadioAssist will use the it to try to achieve a low latency output. If the driver does not support this mode then RadioAssist will attempt to emulate it in software playthrough mode, which adds some latency. It is therefore recommended to use a card supporting monitoring at driver level for voiceover or voicetracking scenarios.
It is possible to configure the monitoring status by at startup via the following registry key.
[HKEY_LOCAL_MACHINE\SOFTWARE\WOW6432Node\NETIA\Radio-Assist\8.0\Supedit]
"DefaultIsMute"="No"
14.3.39.Absolute time
When the "Absolute time" icon is pressed, the piece does not start at 0, but at the time of the original recording starts. This function is especially useful for simultaneous recordings.
Example : I have a feed which has been recorded at 20h02 until 21h34.
It means that when I play my feed, my counter will go from 00h00h00 to 01h34h00.
However, I would like to go at 20h15 because there was something interesting at that time.
Thus, when I click on the "absolute time" icon, the counter will start at 20h02 and will end at 21h34.
Moreover, by a double-click on the "current" counter, I can enter the time where I want to go.
14.3.40."Selected length" counter
The "Selected length" counter gives the duration of a selected sequence (between the blue and the yellow lines).

14.3.41."Current" counter
The "Current" counter gives the position of the playhead (red line). The playhead can be moved to another position on the spectrum by double-clicking on the counter and entering the exact position required. To validate, press Enter or press "Esc" to cancel.

14.3.42."Edited length" counter
The "edited length" counter gives the total duration of an edit session. Each time you cut a selection, the duration is refreshed.

14.3.43."Before blue" counter
The "Before blue" counter gives you the duration between the reading head and the blue marker.
If numbers are white, the reading head is after the blue marker.

If numbers are orange, the reading head is before the blue marker.
14.3.44.Recent items list
To get the list of items you have used :
Go to « Recent items ».
Click on the down arrow. A drop-down list is displayed containing the last items used.

If you click on one item of the list, you insert the item on the track, where the playhead is.
14.3.45.Resizing the spectrum
Several possibilities are available to resize the spectrum.
Thanks to your keyboard by using the Ctrl + arrow keys.
OR
Use the 4 arrows available at the left side of your spectrum (2 horizontal arrows and 2 vertical arrows).

OR
Use the mouse wheel.
14.3.46.Saving an edit session (Ctrl + S)
To save an edit session, use the following functions :
 Save : to save an edit session. This edit session is inserted in the database under the chosen category.
If modifications are done from an existing edit session, this one is updated and the previous version is replaced by the new one.
 Save as : To save an edit session under a new name.
If modifications are done from an existing edit session, you will have two versions of it.
 New : to create a new edit session.
14.3.47.Snapshot
A right click on the "Save" icon  displays the "Snapshot" function.
The "Snapshot" function is designed to save different versions of the edit session each "x" minutes automatically.
Thus, it is possible to reload an edited version.
To reload a previous version of an edit session :
Do a right-click on the "save" icon  .
.
A "Load Snapshot save" window will appear with all the different versions.
Select the version to reload.
Double-click on it or click on "OK".
14.3.48.Snippet Shortcuts
F1 : Set locators
F3 : Set the blue line
F4 : Set the yellow line
F5 or Del : Cut the selection
F6 : Play 2 seconds before the blue, 2 seconds after the yellow
F7 : Play the contents of a cut (2 seconds after the blue line and 2 seconds before the yellow line)
F8 : Go to the beginning
F9 : Go to the end
F10 : Fast forward
F11 : Fast rewind
Space bar : Play/Stop
Ctrl + A : Select the track
Ctrl + N : New document
Ctrl + Z : Undo
Ctrl + Y : Redo
Ctrl + C : Copy
Ctrl + X : Cut
Ctrl + V : Paste
Ctrl + O : Retrieve the audio file used in the track from the Browser
Ctrl + S : Save
Ctrl + W : Generate a master
Ctrl + left arrow* : Zoom backward
Ctrl + right arrow* : Zoom forward
Page up : Go to the blue line
Page down : Go to the yellow line
Mouse wheel : horizontal zoom in/zoom out
Shift + Mouse wheel : vertical zoom in/zoom out
Ctrl + Mouse wheel : scroll right/left one page
NB : "Left arrow" and "right arrow" are keys board.
14.4.Snippet+
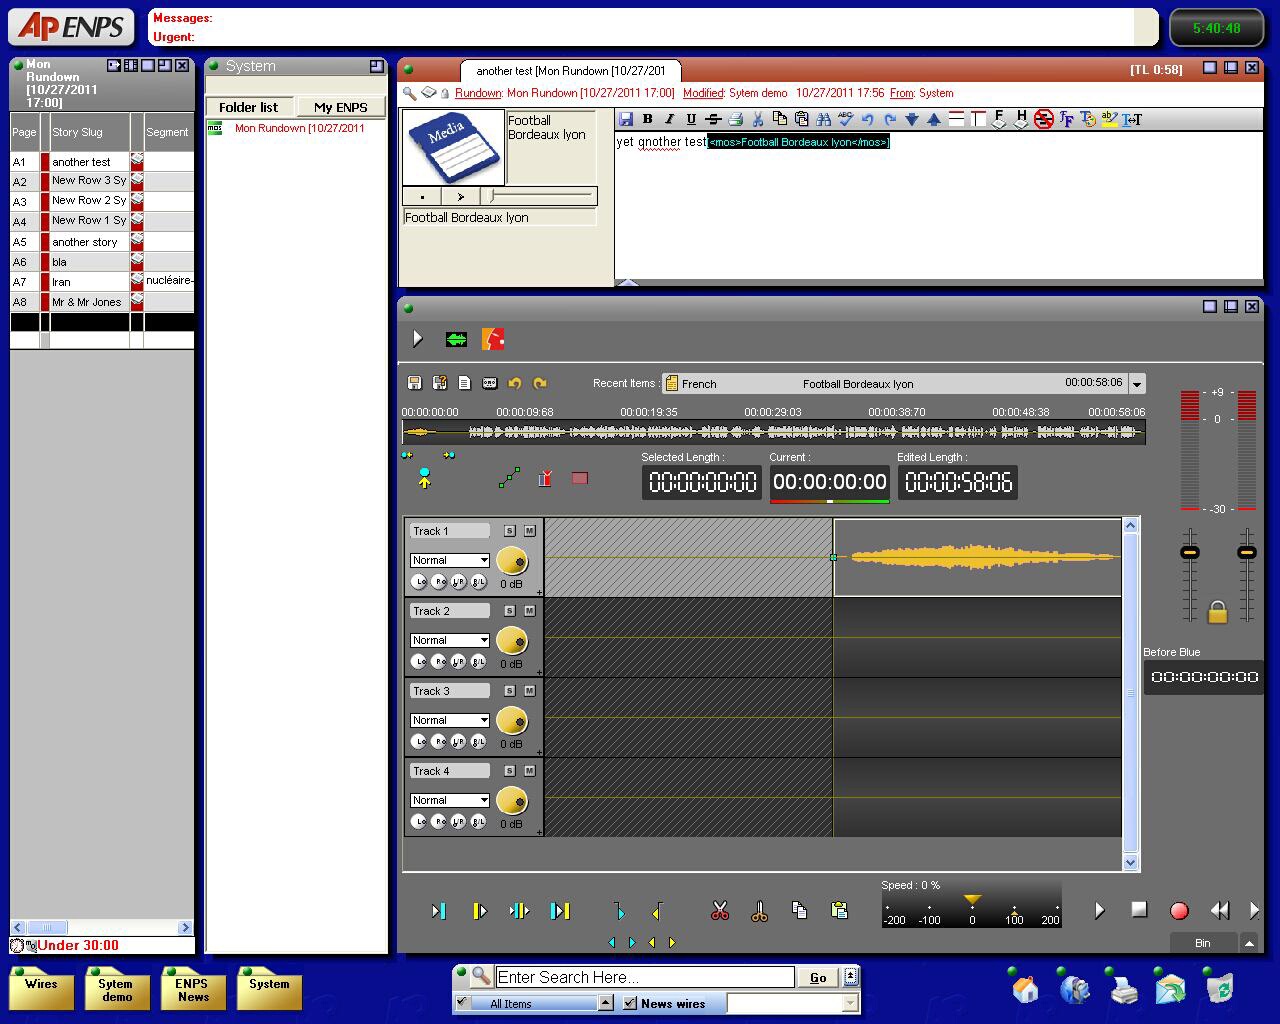
"Snippet+" tool of Radio-Assist
14.4.1.Workflow

14.4.2.Snippet+ definition_2
Snippet+ is a multi-track tool allowing users to edit their work based on several sound files.
14.4.3.Clip and Selection modes
In Snippet+, you can choose between two modes :
Clip mode  : it allows you to move the clips on the tracks.
Selection mode  : it allows you to create a selection area (with the possibility to include several tracks, simply by extending your selection to the next tracks)
14.4.4.Zoom buttons
Buttons on the right of the screen are used to zoom or center the tracks on the screen.
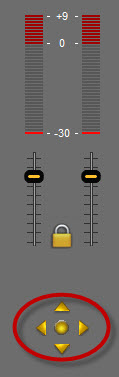
Left arrow button : backward zoom.
Right arrow button : forward zoom.
Up button : Vertical zoom on tracks.
Down button : Vertical un-zoom on tracks.
Middle button : Center all the tracks on the screen.
14.4.5.Cutting options
In the « Snippet+ » tool, 3 cutting options are available :
IN SELECTION MODE
Ø Removing mode (you select the part to delete).
To do so, use the "opened scissors" icon which is used to cut what you have selected between the blue and the yellow lines.
Ø Adding mode (you select the part to keep).
To do so, use the "closed scissors" icon which is used to keep what you have selected between the blue and the yellow lines.
IN CLIP MODE
Whatever the pair of scissor you choose, the function is the same: the track is divided into two parts and the separation is done where your playhead is.
In this mode, the blue and yellow lines are here to pre-listen to the sound. It has nothing to do with the cutting action.

14.4.6.Insertion / Replacement mode
It is important to clearly dissociate the "Insertion mode" from the "Remplacement mode" according to what you want to do in Snippet+.
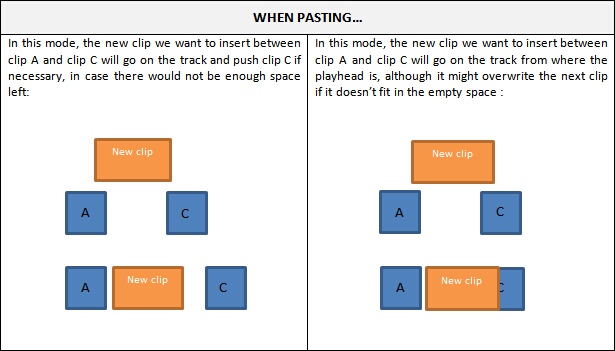

14.4.7.Editing in Snippet+_2
Click on the "Snippet+" tab.
In the Browser, select the item you want to edit.
To edit a new item you can use original 
 or master items .
To modify an edit session, you can select an edit session coming from the "Snippet+" tool 
 or the "Production" tool .
Place the item on the track. To do so, 3 possibilities are available :
Drag and drop from the database to the track.
Double-click on the item.
Select the item and press "Enter" on you keyboard.
Place the blue and the yellow lines. Then, you have the possibility to keep the selection or to delete it.
Once your blue and your yellow lines are placed approximately, you can readjust them. To do so, go to the blue or to the yellow line and replace them.
You can also do this operation by using the following buttons :


To know the result before cutting, you can use the following play buttons :
 Plays 2 seconds before the start of a cut (before the blue line).
 Plays 2 seconds after the end of a cut (after the yellow line).
 Plays outside the cut (2 seconds before the after and 2 seconds before the yellow line) - (F6)
 Plays the content of a cut (2 seconds after the blue and 2 before the yellow line) - (F7).
NB : A right-click on one of these buttons will play the sequence in a loop until the stop button is activated, so cuts can be modified as you go along.
Once you are satisfied, click on :
 : To delete the selection
 : To keep the selection
Your cut goes to the bin.

To do other cuts, start the operation all over again (place the blue line, the yellow line...).
14.4.8.Add a track
You can add one or more tracks to "Snippet+"
By default, 4 tracks are available for editing when you open "Snippet+"
If you want to add a new track, right click on any of the track's header.
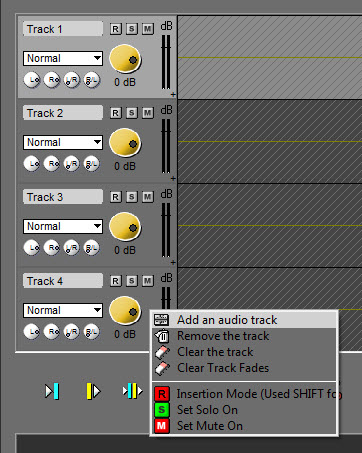
Select "Add an audio track"
The new track is added :
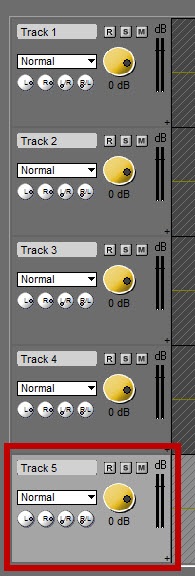
14.4.9.Remove a track
To remove a track from "Snippet+", right-click on the track to remove :
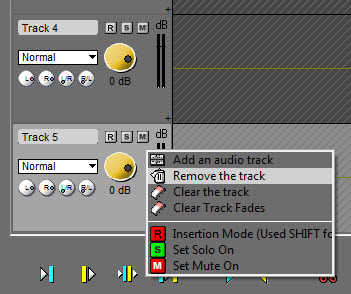
Then select "Remove the track".
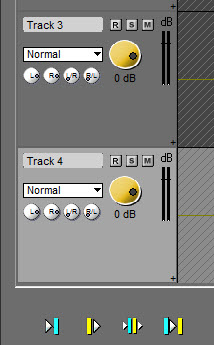
The track is removed.
14.4.10.Setting the mark in (blue) - (F3)_2
To set the mark in, represented by the blue line and marking the begin of your cut, you have to :
Place the playhead where you want to place the blue line.
Click on the following icon :  .
.
NB : you can also set the blue line via the contextual menu, by using the right click of your mouse (function also available in "Snippet") or use F3 (shortcut) (see Snippet+ shortcuts).
14.4.11.Setting the mark out (yellow) - (F4)_2
To set the mark out, represented by the yellow line and marking the end of your cut, you have to :
Place the playhead where you want to place the yellow line.
Click on the following icon : .
.
NB : you can also set the yellow line via the contextual menu, by using the right click of your mouse (function also available in "Snippet") or use F4 (shortcut) (see Snippet+ shortcuts).
14.4.12.Playing 2 seconds before the current cut_2
To play 2 seconds before the blue line, to know if the blue line is at the right position, click on the following icon : .
NB : if you do a right click on the icon, you play 2 seconds before the blue line in a loop.
14.4.13.Playing 2 seconds after the current cut_2
To play 2 seconds after the yellow line, to know if the yellow line is at the right position, click on the following icon : .
NB : if you do a right click on the icon, you play 2 after the yellow line in a loop.
14.4.14.Simulating a cut_2
To simulate a cut, meaning to play the result before cutting what you have selected between the blue and the yellow lines, click on the following icon : .
NB : if you do a right-click on the icon, you play 2 seconds before the blue line and 2 seconds after the yellow line in a loop.
14.4.15.Playing the content of the cut (F8)_2
To play the content of the cut (between the blue and the yellow lines), click on the following icon:
If the cut duration lasts for more than 4 seconds, only 2 seconds after the blue line and 2 seconds before the yellow line will be played.
NB : if you do a right-click on the icon, you play between the blue and the yellow lines in a loop.
14.4.16.Cutting a selection (F5 or Del)_2
There are several ways to cut a selection.
Once you have placed the blue and the yellow lines :
Click on the « cut » icon  .
.
OR
Do a right click on the spectrum and choose the « Cut » function.

OR
Press "F5" or "Del" on your keyboard.
The cut is displayed in the bin.
14.4.17.Cutting a selection without putting it to the bin_2
You can cut a selection without putting it to the bin.
Once you have placed the blue and the yellow lines:
Do a right click on the « cut » icon  .
.
OR
Hold the "Shift" key down and click on the « cut » icon  .
.
14.4.18.Cutting outside the selection_2
"Cutting outside the selection" means that you keep what you have selected between the blue and the yellow lines.
Once you have placed the blue and the yellow lines:
Click on the « Cut outside selection » icon  .
.
14.4.19.Playhead_2
The playhead is the red vertical line in the middle of the track. The playhead is fixed.
When you want to insert the blue, the yellow lines, inset a blank or do any other type of action, you HAVE TO place the playhead at the chosen place.
14.4.20.The bin_2
The bin includes the list of all your cuts. Indeed, each time you make a cut or delete an item/block, this cut/delete disappears from the sound and goes to the bin.

By using the combination "Ctrl" + "Sup" or "F5", the element or block is deleted but not moved to the bin.
By doing a right click on a cut, the following menu is displayed :

Play : plays the selected cut.
Rename : renames the selected cut
Paste : pastes the selected cut on the sound, where your playhead is.
Save as a new item : saves the selected cut as a master in the Browser.
Delete : deletes the cut from the bin.
14.4.21.Generating a master from Snippet+ (Ctrl + M)_2
To generate a master from "Snippet+" :
Click on the tape cassette symbol  to masterize your mix.
A window appears to identify your master in the database before saving it.

The master generation appears.
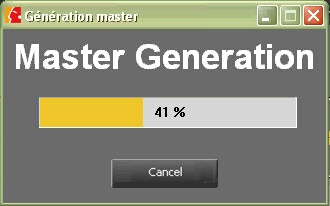
Once the process is over, you can use the master file.
14.4.22.Masterization on the track
As it is possible to masterize your whole work, Snippet+ also allows users to masterize only one part of their selection.
To do so, you only have to define a selection, do a right-click to display the contextual menu and select the option "Generate a master":
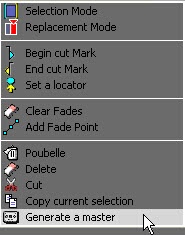
A window appears to identify your master in the database before saving it.

The master generation appears.

Once the process is over, you can use the master file.
14.4.23.Show / Hide Bin
In Snippet+, it is possible to show or hide the bin to gain more space on the screen.
To do so, use the tab on the top right corner of the bin:

14.4.24.Straightening a cut_2
If a selection is not good (the end of a word is missing for instance), you can straighten it to retrieve just the part of the word that you have excluded from the selection by mistake.
Straighten your selection thanks to the following buttons :
to straighten the beginning of the selection (blue).
to straighten the end of the selection (yellow).
Similarly, when you cut too much of a track by mistake, you can restore the missing part by placing your cursor over the extremity of the clip. The cursor will turn to a double-arrow. Click over the edge, maintaining the button pressed, and slide your mouse to resize the clip that has been left on the track.

14.4.25.The trimming "function"_2
The "Finalize" function is used to delete blanks at the beginning and at the end of the recording.
To do so, do a right-click on the closed pair of scissors icon  .
.
14.4.26.Undo (Ctrl + Z)_2
To undo an action, Click on the following icon : 
NB : you can undo up to 256 actions before saving.
14.4.27.Redo (Ctrl + Y)_2
When you undo and you change your mind, you can redo the action by clicking on the following icon : .
NB : you can redo up to 256 actions before saving.
14.4.28.Go to the beginning_2
To go to the beginning of an item, click on the following icon : 
14.4.29.Go to the end_2
To go to the end of an item, click on the following icon : 
14.4.30.Adding a fade point in Snippet+_2
To add a fade point :
Do a right-click on the spectrum, where you want to add a new fade point.
The following menu is displayed.

Click on « Add fade point ». The fade point is displayed.
14.4.31.Deleting a fade point in Snippet+_2
To delete a fade point :
Do a right click on the fade point you want to delete.

Click on "Remove fade point" (this function is only available if you are on a fade point. Otherwise, it is the "add a fade point" that is displayed).
The fade point disappears.
Attention : you can not delete the default points (set by Radio-Assist).
14.4.32.Gradual Fade
When you wish to add new fade point, at the beginning or at the end of the track, you have the possibility to create a gradual fade curve by performing the following action :
Ctrl + click (at the beginning / end of the clip)
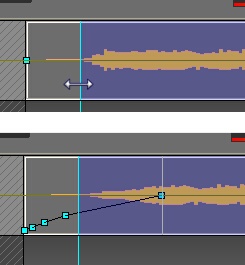
14.4.33.Hiding the fade points_2
To hide the fade points, click on the following icon : 
A red cross is displayed on the icon  .
.
NB : The fade points are not visible but you can still hear them.
14.4.34.Visualizing the fade points_2
If you have hidden your fade points and want them back, click on the following icon : .
The red cross on the icon disappears  , and your fade points are visible again.
14.4.35.Modifying the global level of the sound_2
To modify the global level of your sound :
Click on the red horizontal line (separating your track in 2), a double-arrow is displayed.
Increase or decrease the sound level by moving the black line appearing in the middle of the track.
Release the mouse button.

14.4.36.Mono / Stereo settings
Snippet+ allows you to balance and pan your sound.
This function is available for each track on the left bottom part.

Normal : what is supposed to be played on the right is actually played on the right channel and what is supposed to be on the left is logically played on the left channel.
Left Only : on both sides is played what is supposed to be played on the left channel.
Right Only : on both sides is played what is supposed to be played on the right channel.
Custom : 4 level settings buttons :
"L" : To set the level of the left channel.
"R" : To set the level of the right channel.
"L/R" : To set the level of the left channel when it is played on the right channel.
"R/L" : To set the level of the right channel when it is played on the left channel.
14.4.37.Mute a track
The "Mute" function (which allows you to de-activate a track when you play your mix) is represented by the following symbol  .
.
Click on the  button which appears on the track you want to mute.
The button turns to red  .
.
To be able to listen to it again, click on the red button  .
.
14.4.38.Isolate a track
Click on the solo button  .
.
The sound on the other tracks is muted. The Mute button turns to red.
To listen to all the tracks again, click once more on the button which has turned to green  .
.
14.4.39.Group / Ungroup functions
In Snippet+, it is possible to "group" or "ungroup" the clips.
To do so, you just have to select while in clip mode the different clips you want to group together (these can be located on the same track or on different tracks) and click on the right button of your mouse, so as to display the contextual menu. The "group" function will appear:

1) You can group individual clips : clip A + clip B + clip C = ABC
2) You can group "clip groups" or "sub-groups" altogether: (clip A + clip B) + clip C = AB+C = ABC (AB is a sub-group of ABC)
Afterwards, it is possible to ungroup completely or partially your selection by displaying the contextual menu again:
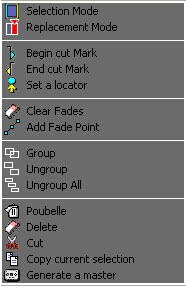
The "Ungroup" function : it separates the different units that have been grouped together. Therefore, one may find after the process individual clips or, possibly, clip groups.
The "Ungroup all" function" : it separates all clips from one another.
14.4.40.Modifying the sound level_2
To modify a fade point :
Click on the fade point to move (four arrows are displayed) and drag it to the chosen place.
Release the mouse button.
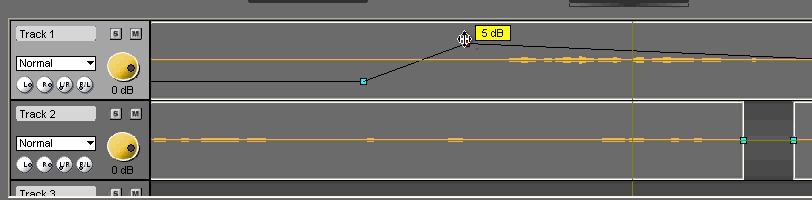
14.4.41.Set a locator in Snippet+ (F2)_2
To set a mark on your item :
Place the playhead where you want to insert the locator.
Click on « Set a locator »  . Your locator appears on the track, and it comes with a number.

When your locator is positioned on the track, you can rename it by right-clicking on its number to see the popup menu. From that point, you can choose between two options : "Rename Locator" / "Delete Locator".


Once you have renamed your locator, a label will appear inside the clip.

14.4.42.Moving from one locator to the other_2
To move from one locator to the other, you can use the arrows below the "set locator" : you will go from one locator to the other, regardless of the tracks where the locators are.

If you want to go from one locator to the other in the same track, use the arrows and click on "Shift" at the same time.
14.4.43.Deleting a locator_2
To delete a locator :
Do a right-click on the locator number you want to delete. A menu is displayed.

14.4.44.Copying and pasting a soundbyte in Snippet+ (Ctrl + C/Ctrl + V)_2
To copy and paste a sound bite : (in selection mode only)
Select between the blue and the yellow lines the part to copy.
Click on « Copy » (or Ctrl + C)  .
.
Place the playhead where you want to paste the sound bite.
Click on « Paste » (or Ctrl + V)  .
.
NB: in clip mode, copy-paste will copy and paste the whole clips that are selected in red, regardless of the blue and the yellow lines.
14.4.45.Recording_2
To record in "Snippet+":
Select on which track you want to record, then place the playhead where you want to start the recording.
REMARK :
If "Snippet+" is in Insertion mode, the block(s) on the same track after the recording will be moved to the right during the recording.
If "Snippet+" is in Replacement mode, the block(s) on the same track after the recording will be erased while the recoring is going on.
Click on  . The recording starts.
Click on  to pause momentarily the recording.
You can resume the recording where the playhead is by clicking again on
Once the recording is finished, click on  .
.
A window is displayed to save you recording in the Browser.
Fill in the data and save by clicking on the floppy disk icon  (or press "Cancel" to start over).
NB : Your recording has the raw status  .
.
It is possible to monitor the incoming signal through the output of the sound card. Monitoring is controlled by the green "speaker" button.
 Monitoring enabled
 Monitoring disabled
Note: If the audio card used supports standard monitoring mode, RadioAssist will use the it to try to achieve a low latency output. If the driver does not support this mode then RadioAssist will attempt to emulate it in software playthrough mode, which adds some latency. It is therefore recommended to use a card supporting monitoring at driver level for voiceover or voicetracking scenarios.
It is possible to configure the monitoring status by at startup via the following registry key.
[HKEY_LOCAL_MACHINE\SOFTWARE\WOW6432Node\NETIA\Radio-Assist\8.0\Multisupedit]
"DefaultIsMute"="No"
14.4.46.Multi-channel recording
Depending on the audioboard installed on the workstation and on the settings done, it is possible to create a multi-channel recording.
For example, you will record on Track 1, the singer of a band, then a Track 2 the bassist and on Track 3 the drums.
To do so, click on the "R" button of the track's header.


Select the audio channel for each track.
Then start the recording.

The recording will start on all the selected tracks;
Then stop and save your recording in the database.
If you recorded more than one track, you will have only one window to save all tracks.
Ths sounds will be separated in the database. You will have for each sound, the name + the name of the track.

 +
+
Note : The recording will be saved as a raw file  .
.
14.4.47."Selected length" counter_2
The "Selected length" counter gives the duration of a selected sequence (between the blue and the yellow lines).
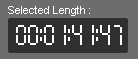
14.4.48."Current" counter_2
The "Current" counter gives the position of the playhead (red line). The playhead can be moved to another position on the wave form by double-clicking on the counter and entering the exact position required. To validate, press Enter or press "Esc" to cancel.
 (active phasemetre)
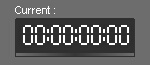 (inactive phasemetre)
Just below this counter, one can see a phasemeter it is possible to activate (the phasemeter appears in colours) or deactivate (the phasemeter turns to grey) by simply clicking on the phasemeter bar. This tool allows you to measure the difference of phases between two alternating currents with the same frequency.
The phase meter gives a simple indication to non-technical people regarding phase opposition, which can prove extremely useful for mono (AM) transmissions produced in stereo.
When the white dot is in the green side, both left and right channels are in phase: indicates no stereo effect.
When the dot is on the red side left and right channel phase are opposed: indicates problems in case of mono mixdown (summing opposed signal to mono mixdown will result in silence or muffled sound).
14.4.49."Edited length" counter_2
The "edited length" counter gives the total duration of an edit session. Each time you cut a selection, the duration is refreshed.

14.4.50.End Extension
The "End extension" fonction allows you to add seconds and/or millisecondes at the end of an editing.
To create a blank for example.
Right click on any track of Snippet+.

Select "End extension"
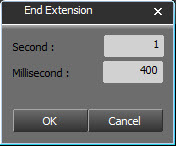
Type the wanted duration, here 1 second and 4 tenths of a second.
And click on 
The sound will now stop after 1.4s after the end of the last block of the editing.
14.4.51.Recent items list_2
To get the list of the items you have used :
Go to « Recent items ».
Click on the down arrow. A drop-down list is displayed, containing the last items used.

If you click on one item of the list, you insert the item on the track, where the playhead is.
14.4.52.Saving an edit session (Ctrl + S)_2
To save an edit session, use the following functions :
 Save : to save an edit session. This edit session is inserted in the database under the chosen category.
If modifications are done from an existing edit session, this one is updated and the previous version is replaced by the new one.
 Save as : To save an edit session under a new name.
If modifications are done from an existing edit session, you will have two versions of it.
 New : to create a new edit session.
14.4.53.Snapshot_2
A right click on the "Save" icon  displays the "Snapshot" function.
The "Snapshot" function is designed to save different versions of the edit session each "x" minutes automatically.
Thus, it is possible to reload an edited version.
To reload a previous version of an edit session :
Do a right-click on the "save" icon  .
.
A "Load Snapshot save" window will appear with all the different versions.
Select the version to reload.
Double-click on it or click on "OK".
14.4.54.Effects
Principle
In Snippet+, users have at their disposal :
- 4 effects rack (corresponding to the 4 tracks of the module)
- 4 effects by rack
When using the effects, each track is dealt with in real time : effects are not directly applied onto the track and at any time you can listen to the initial track, without any effect addition.
No effect can be added to the general output channel.
Each effect works with a VST plugin. By default, some basic effects are offered with Radio-Assist but it is completely up to you to add further effects, according to what you want to do.
Note: In RA8, the use of effects is taken into account in the different Snapshots.
Add / Cancel an effect
To add an effect, click on the dedicated tab, in the bottom right corner of Snippet+.

This grants you access to the 4 racks corresponding to the 4 tracks of the tool. Under each line showing "Effect n" ('n' ranges from 1 to 4), you have the possibility to use a scrolling menu to select the effect you want to add to the track.
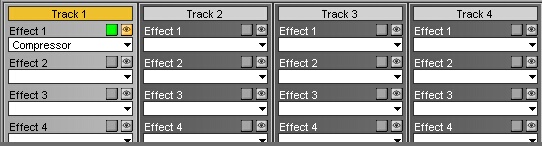
By default, when the user selects an effect, this one is active 
 and visible . At any time, you can deactivate those options by simply clicking on the button that is concerned.
Last but not least, to get rid of all the effects of a same rack, choose the "No effect" option in the scrolling menu.
14.4.55.Snippet+ Shortcuts
Drag and Drop from the Browser (Original, master, production and mono mix) on a track :
Adds the item in replacement mode on the track at the location the playhead is.
Drag and Drop + SHIFT from the Browser (Original, master, production and mono mix) on a track :
Adds the item with inversion of the insertion or replacement mode on the track at the location the playhead is.
F1 : Set locator.
F2 : Go to next locator.
F3 : Set the blue line.
F4 : Set the yellow line.
F5 or Del : Cut the selection (cut is binned in Selection mode) / F5 Splits the clip (in Clip mode).
Ctrl + F5 : Cut the selection (cut isn't binned).
Ctrl + Del : Idem (cut isn't binned).
F6 : Play outside the selection area (2 seconds before the blue and 2 seconds after the yellow).
F7 : Play inside the selection area (2 seconds after the blue and 2 seconds before the yellow).
F8 : Slow rewind.
F9 : Slow forward.
F10 : Fast rewind.
F11 : Fast forward.
Space bar : Play/Stop.
Ctrl + A : Selects all clips from selected tracks.
Ctrl + N : New project.
Ctrl + Z : Undo.
Ctrl + Y : Redo.
Ctrl + C : Copy.
Ctrl + X : Cut (cut is binned).
Ctrl + Shift + X : Copy all selected clips or what is inside the selection area without generating a copy inside the bin.
Ctrl + V : Paste.
Ctrl + O : Retrieve in the Browser the audio file used in the track.
Ctrl + S : Save.
Ctrl + M : Generate a master.
Ctrl + I : Import a sound.
Ctrl + G : Group all selected clips.
M : Switch from Selection to Clip mode.
Page up : Go to the blue line.
Page down : Go to the yellow line.
With the mouse wheel :
Mouse wheel : Horizontal zoom in/zoom out.
Shift + Mouse wheel : Vertical zoom in/zoom out.
Ctrl + Mouse wheel : Scroll right/left one page.
Ctrl +  : Automatic positioning of the playhead at the beginning of the previous sequence of the selected track.
Ctrl +  :Automatic positioning of the playhead at the beginning of the following sequence of the selected track.
Ctrl +  : Moves to the top the selected track(s).
Ctrl +  : Moves to the bottom the selected track(s).
Ctrl + Clip selection: Clip selection (one by one).
Ctrl +  (beginning) : In Clip mode : Selection of all the clips of selected tracks from the reading head to the beginning of the track.
Ctrl + (end) : In Clip mode : Selection of all the clips of selected tracks from the reading to the end of the track.
Shift +  : Horizontal zoom-in.
Shift +  : Horizontal zoom-out.
Shift + : From a selected clip, selection of the next clip(s).
Shift +  : From a selected clip, selection of the previous clip(s).
Ctrl + Shift + A : Select all clips from all tracks.
Double-click on the track header: Enlarges/shrinks the selected track.
 : Place the playhead at the beginning of the mix.
Fn : Place the playhead at the end of the mix.
 : Selection of the upper track.
 : Selection of the lower track.
 : Move the playhead forward or accelerate the speed of playing.
 : Move the playhead backward or slow down the speed of playing.
Alt + “*” : Centering tracks
Alt + click : Move the playhead without selecting or unselecting the track (Clip Mode).
Page up : In Selection mode, go to blue marker.
Page down : In Selection mode, go to yellow marker.
14.5.Player
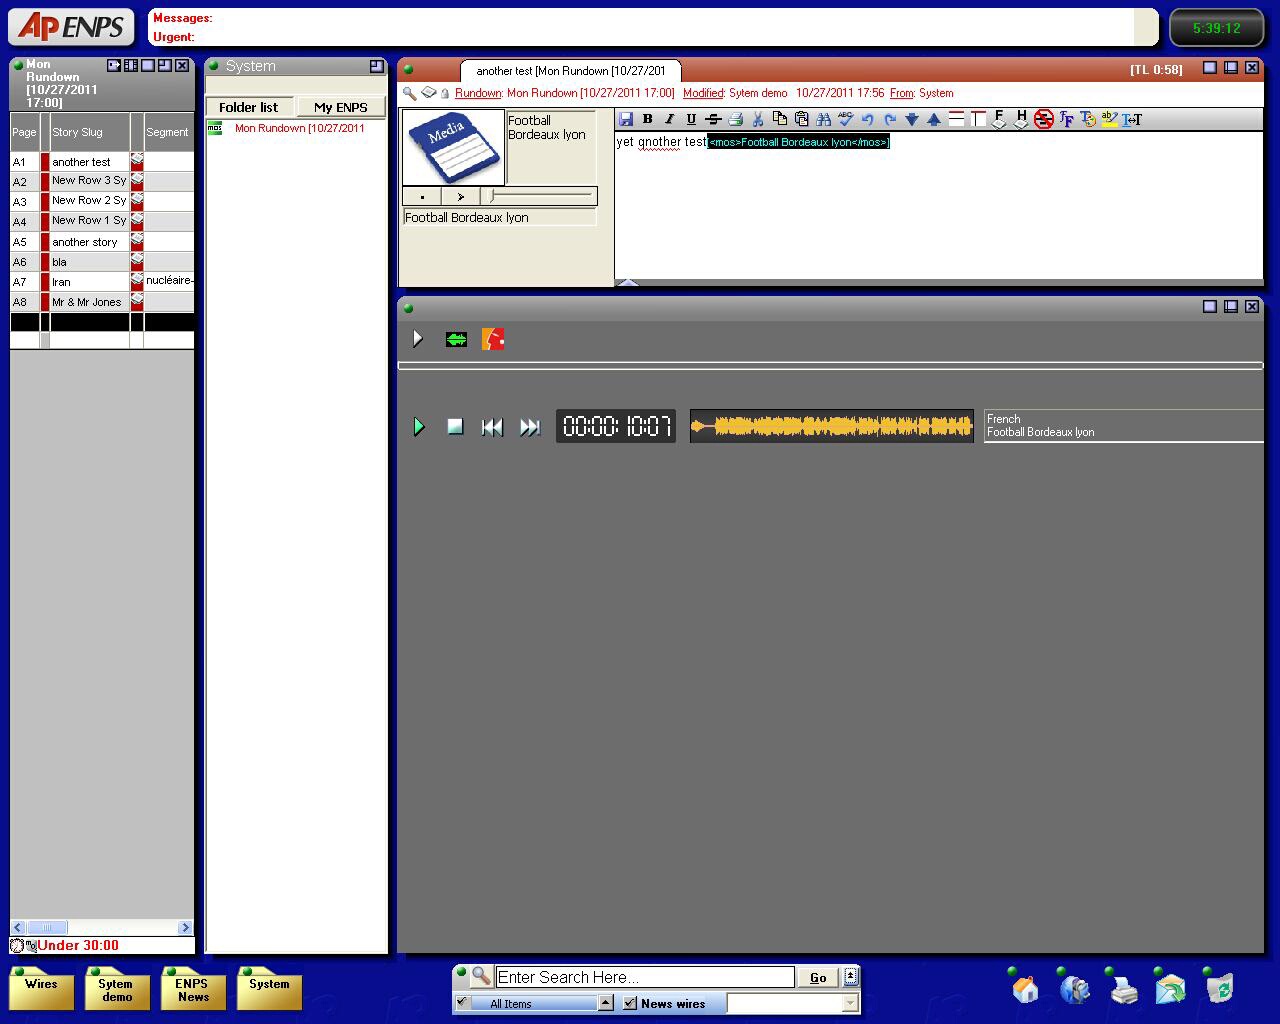
Radio-Assist Player (integrated into Mos ENPS)
14.5.1.Player's functions
The player functions are the following:

14.6.Story Creation (with embedded audio)
To create a new story in ENPS:
click on Ctrl+N
drag and drop the item you want to embed from the browser into the story.
(A MOS reference will appear in red in the text and on the left of the story)
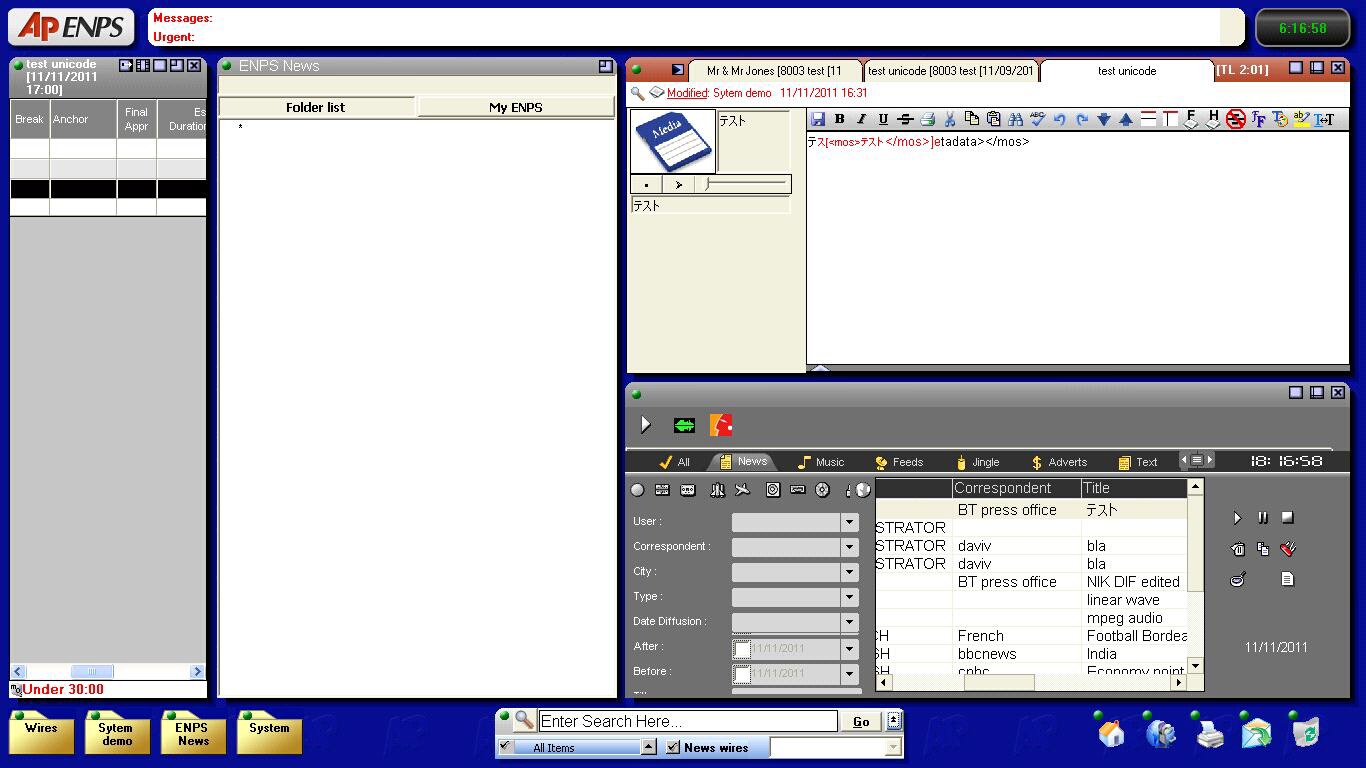
Composite text with audio reference story in ENPS
14.7.Rundown and Cartstack Creation
To create a rundown, follow the ENPS procedure to create a rundown (New/Rundown menu of the 3rd rover).
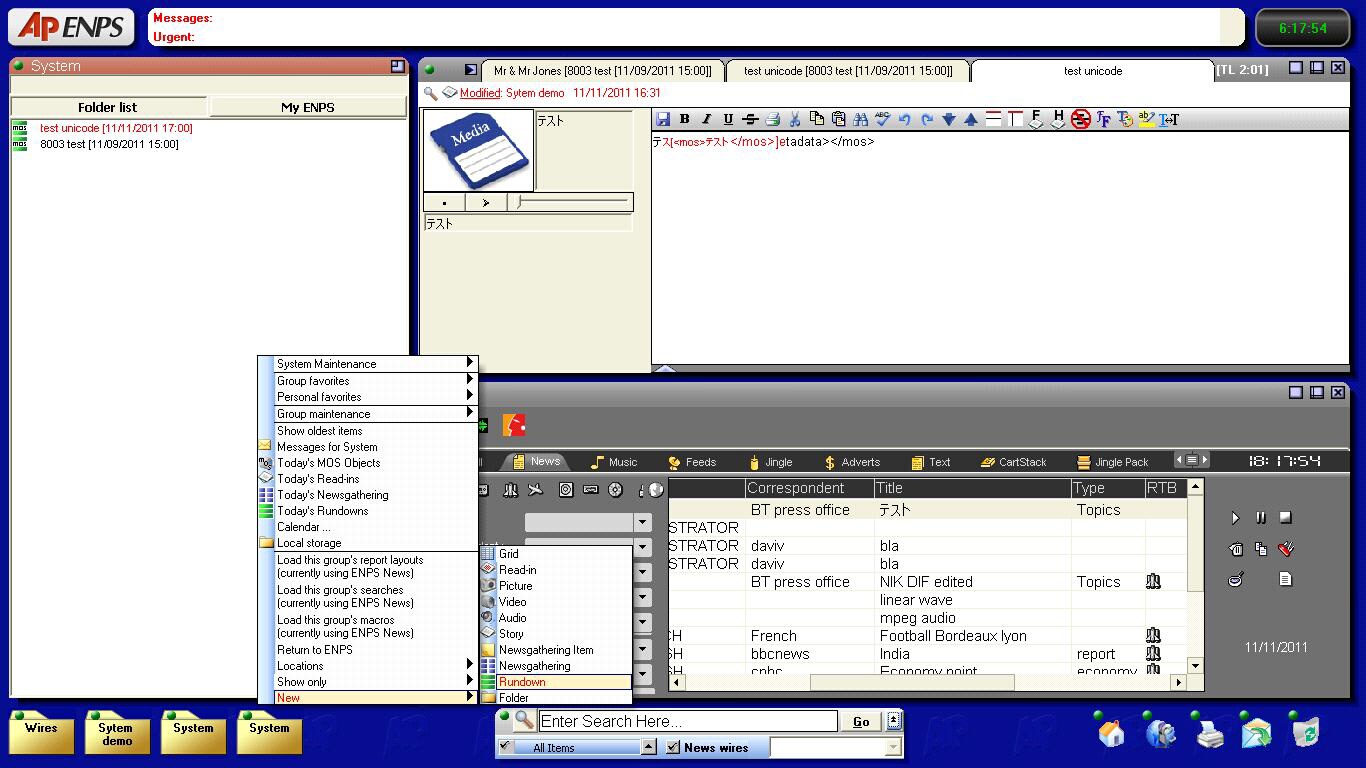
Creation of a rundown in ENPS
Add some composite story containing NETIA audio items in it, by drag and dropping them into the rundown.
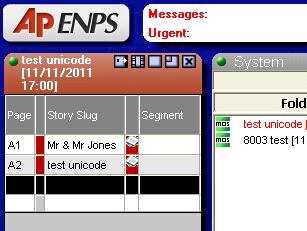
Rundown in ENPS :
Then go to the properties of the rundown and enable “MOS Control active”.

Rundown properties :
At this stage, there should be some message going through Newslink and a Cart-stack with the same name as the run down should have been created in the Cart-stack tab of the Browser (hit refresh to view the effect as the browser is not notified of any cartstack creation/destruction).
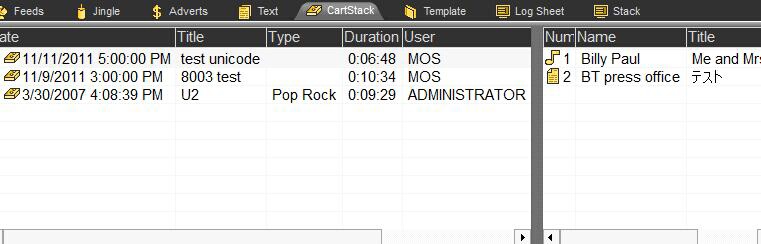
NETIA browser Cart-stack tab
15.Multitrack
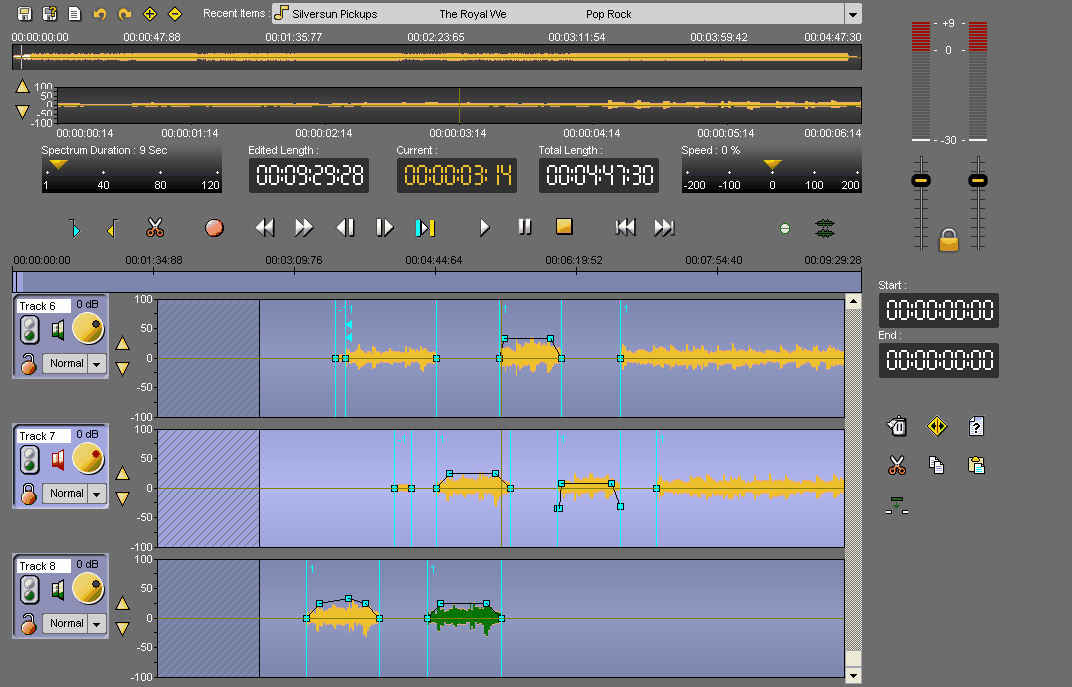
15.1.Multitrack definition
The « Multitrack» tool is designed to mix items together. The cut mode is by adding only, which means that you select the part to keep.
The « Multitrack» tool is divided into 2 parts :
The upper part displays the original track : the track where you insert the item you want to cut.
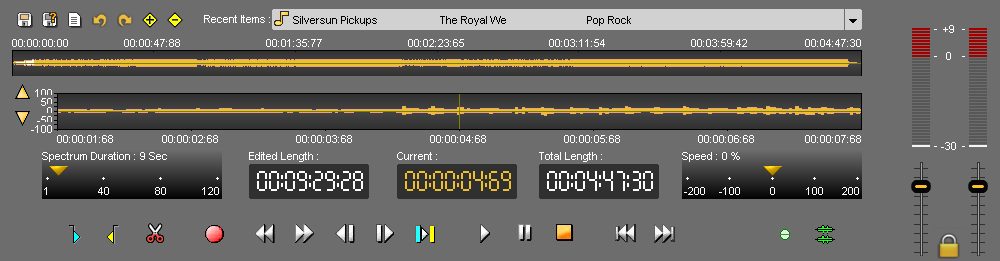
The lower part displays the edited items : your different cuts (which will be your mix).
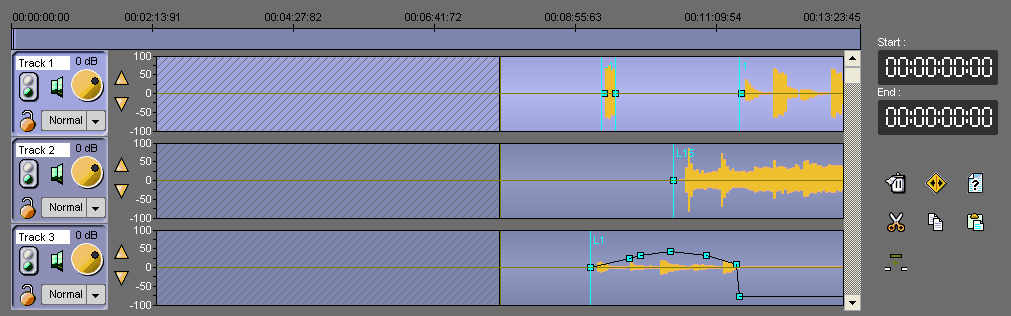
15.2.Displaying more tracks (+)
To display more tracks in the lower part of the multitrack, click on the "plus" icon : 
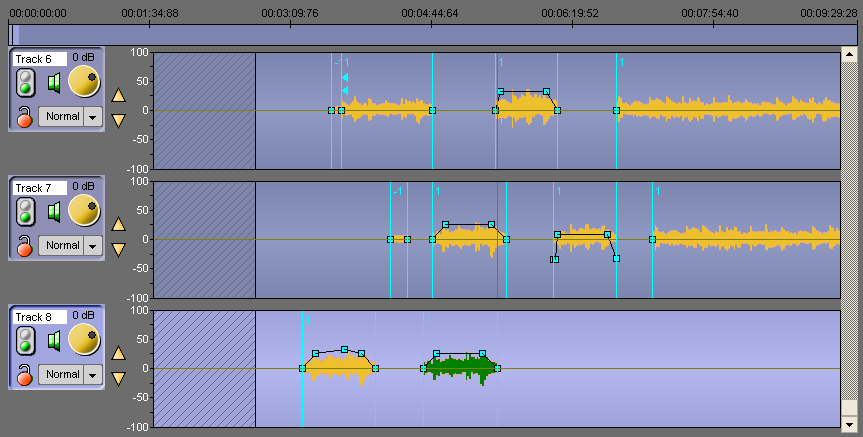
15.3.Displaying less tracks (-)
To display less tracks in the lower part of the multitrack, click on the "minus" icon : 
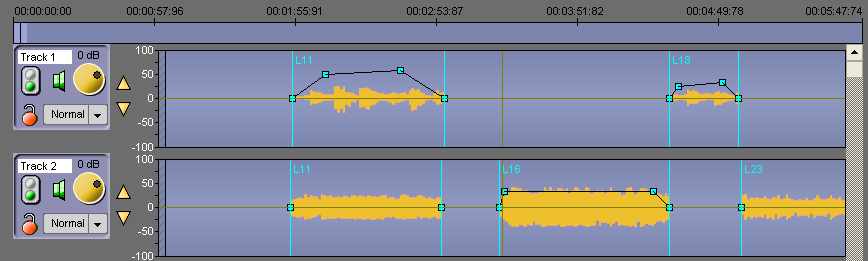
15.4.The playing functions
The following playing functions are available :
 Play the item* (space bar)
* you can choose if you want to listen to the original track or the edited tracks :
To play the original track (upper part of the « Multitrack »), click on the following icon : .
Or select the original track with one mouse click on it.

To play the edited tracks (lower part of the « Multitrack »), click on the following icon : .
Or select one of the edited tracks with one mouse click on it.
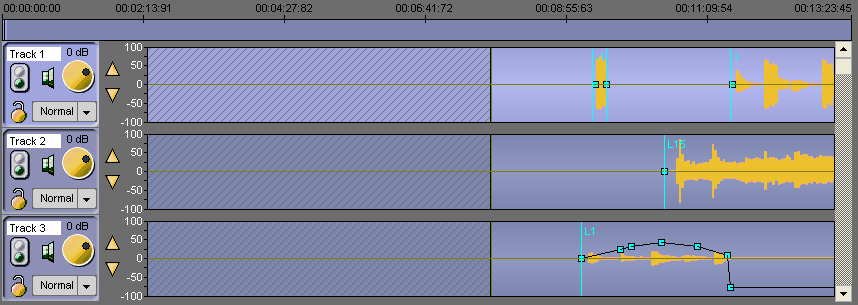
 Item on pause.
 Stop the item (space bar).
 Go to the beginning of the track (F8).
NB : if you play the edited tracks and you have a sequence selected (in black), you go to the beginning of the sequence and not the track.

 Go to the end of the track (F9)
NB : if you play the edited tracks and you have a sequence selected (in black), you go to the end of the sequence and not the track.

 play backward or forward slowly, while pressed.
 play backward or forward at normal speed, while pressed.
play the content of the cut (between the blue and the yellow).
NB : if the cut duration is more than 4 seconds, only 2 seconds after the blue and 2 seconds before the yellow will be played.
15.4.1.The different counters
The "Current" counter gives the position of the playhead (red line). The playhead can be moved to another position on the wave form by double-clicking on the counter and entering the exact position required. To validate, press Enter and to cancel, press Esc.

The "Total length" counter gives the duration of the original track.
The "Edited length" counter gives the duration of the edited tracks.
The "Start" counter gives the begin time of the selected sequence.
The "End" counter gives the end time of the selected sequence.

15.5.The playhead
The playhead is the vertical line in the middle of the track. The playhead is fixed.
When you want to insert the blue, the yellow, insert a blank or do any action, you HAVE TO place the playhead at the chosen place.
15.6.Setting the mark in (blue) - (F3)
To set the mark in, represented by the blue and marking the begin of your cut you have to :
Place the playhead where you want to place the blue.
Click on the following icon :  .
.
NB : you can also set the blue by using the right click of your mouse (function available in "Snippet" only ) or use F3 (shortcut) (see Multitrack shortcuts).
15.7.Setting the mark out (yellow) - (F4)
To set the mark out, represented by the yellow and marking the end of your cut you have to :
Place the playhead where you want to place the yellow.
Click on the following icon : .
.
NB : you can also set the yellow by using the right click of your mouse (function available in "Snippet" only ) or use F4 (shortcut) (see Multitrack shortcuts).
15.8.Editing in Multitrack
Click on the « Multitrack » tab.
In the Browser, select the item to edit.
Drag the item down, on the original track (upper part).
Play your item  .
.
Select the part that you want to keep thanks to the blue (represented the mark in) and the yellow (represented the mark out).
Once the blue and yellow are approximately positioned, you can readjust them.
To do so, go to the blue or the yellow, a double-arrow is displayed, then click and drag.
Then, play between the blue and the yellow to ensure that the cuts are right. Use the following button: .
In the lower part of the Multitrack, select on which edited track you want to insert your cut, and place the playhead.
Once you are sure that you cut is right, click on « cut »  .
.
You cut is inserted on the chosen edited track, where your playhead is.
To do other cuts, redo the different steps, as explained above.
To select another item to insert into the current job, go back to the Browser and Drag & Drop the new item to the original track. The previous item will be automatically replaced without affecting the edit job. (be careful, you need to use raw or master products).
15.9.Modifying the track level
To modify the track level, use the "jog" button available at the left side of the edited track  .
.
NB : do a right click on the jog to go back to "0" dB.
15.10.Adding fade points
By default, each sequence has 4 fade points (2 at the beginning of the sequence and 2 at the end).
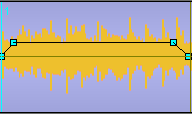
To add a new fade point :
Do a right click where you want to add a new fade point.
The fade point is displayed.
15.11.Deleting a fade point in Multitrack
To delete a fade point :
Place your mouse on the fade point you want to delete.
Do a right click on it. The fade point disappears.
NB : you can not delete the default fade points (set by Radio-Assist).
15.12.Deleting a sequence (Del)
To delete a sequence :
Select the sequence to delete by clicking on it (it becomes black).

Click on « delete »  .
.
The sequence is deleted.
NB : if you want to delete several sequences at the same time, hold the "Ctrl" key down, select your sequences and press delete.
15.13.Splitting a sequence
To split a sequence :
Place the playhead where you want to split.
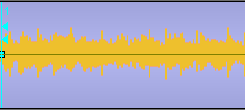
Click on the « split » function  . The sequence is splitted.
Click on the second part of the splitted sequence. it turns black.
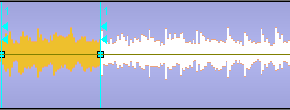
- Click on it again and drag it to move the second part of the splitted sequence.
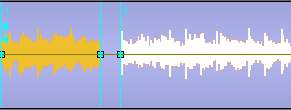
15.14.Inserting a blank in Multitrack
See the "Splitting a sequence" topic.
15.15.Renaming a sequence in multitrack
To rename a sequence :
Select the sequence to rename (it becomes black).

Click on « Name selected clip »  .
.
Type the name.
Click on « OK » or press « Enter » on you keyboard. The sequence is renamed.
15.16.Cutting/Pasting a sequence in Multitrack (Ctrl +X/Ctrl+V)
To cut and paste a sequence :
Select the sequence to cut (it becomes black) :

Click on « Cut »  .
.
Place the playhead where to want to paste.
Click on « Paste »  .
.
Your sequence is moved.
15.17.Copying/Pasting a sequence in Multitrack (Ctrl +C/Ctrl+V)
To copy and paste a sequence :
Select the sequence to copy (it becomes black) :

Click on « Copy»  .
.
Place the playhead where to want to paste.
Click on « Paste »  .
.
Your sequence is pasted.
15.18.Replace mode / Insertion mode
Two modes are available to insert a sequence from the original track to an edited track.
 Replace mode : "simple" insertion without moving a sequence. It means that the insertion will be done only if the space is enough.
 Insertion mode : when you click on "replace mode", you go to the "insertion mode" function.
This function enables you to insert a sequence by moving the other ones if you do not have space enough.
Moreover, this function enables you to stick down all sequences in case of splitting a sequence (to keep the same space between the different sequences for instance).
15.19.Moving a sequence on a same track
To move a sequence on a same track :
Select the sequence to move (it becomes black).

Click again and drag it to the chosen place.
The sequence is moved.
15.20.Moving several sequences on a same track
To move several sequences on the same track :
Hold the « ctrl » key down.
Select the sequences to move by clicking on it (they become blacks).


Click again and drag them to the chosen place.
The sequences are moved.
NB : you can use the « ctrl » + « A » keys to select all sequences of the selected track.
15.21.Recording on a track (Multitrack)
To record on a track :
Click on the "red lock" icon  , on the track where you want to record.
Once the lock is closed 
 (meaning track locked), the "Record" button appears, near the "cut" icon.
Place the playhead where you want to start recording.
Click on « Record »  .
.
Once you are done, click on « stop »  .
.
A window is shown to save your recording in the Browser.
Fill in the data and save by clicking on the floppy disk icon  (or press "Cancel" to start over).
NB : Your recording has the raw status  .
.
15.22.Playing a track in solo
On each track, a "traffic light" icon is displayed  . This icon represents the "Solo" function.
To play a track in solo :
Click on the "traffic light" icon  available on the track you want to play in solo.
The other tracks are muted. All other traffic light icons turn red :
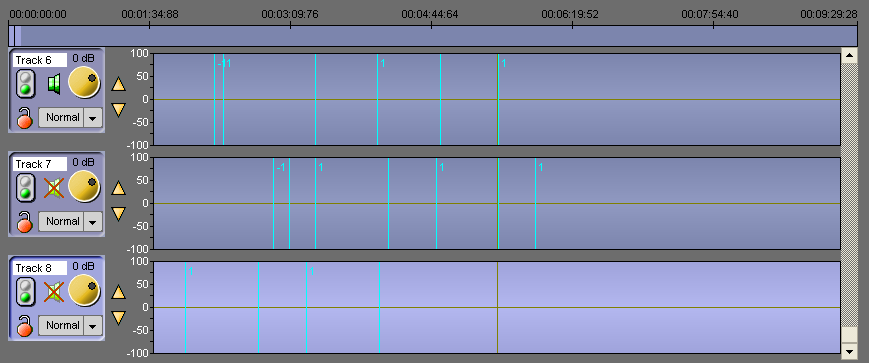
To play all tracks again, click on the green traffic light available on the track you have played in solo.
15.23.Muting a track
On each track, a "Loudspeaker" icon is displayed  . This icon represents the "Mute" function.
To mute a track :
Click on the "loudspeaker" icon  available on the track you want to mute.
A red cross is shown on the loudspeaker. The track is muted.
To unmute it, click again on the "Louspeaker" icon 
 . The track is unmute (the red cross disappears).
15.24.The "panning"/"balance" function
In the "Multitrack" tool, a panning/balance function is available :
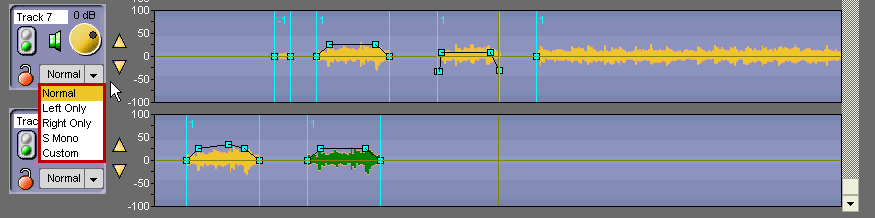
Normal : you play what you have on each channel (left + right) separetely.
Left Only : you play what you have on the left channel.
Right Only : you play what you have on the right channel.
Custom : 4 settings buttons are available to configure le level :
- "L" : you configure the level of the left channel.
- "R" : you configure the level of the right channel.
- "L/R" : you configure the level of the left channel when it is played on the right channel.
- "R/L" : you configure the level of the right channel when it is played on the left channel.
15.25.Undo (Ctrl + Z)
To undo an action, Click on the following icon : 
NB : you can undo up to 256 actions before saving.
15.26.Redo (Ctrl + Y)
When you undo and you change your mind, you can redo the action by clicking on the following icon : .
15.27.Recent items list
To get the list of the items you have used :
Go to « Recent items ».
Click on the down arrow. A dropdownlist is displayed containing the last items used.

If you click on one item of the list, you insert the item on the track, where the playhead is.
15.28.Saving an edited item (Ctrl + S)
To save an edit session, use the following functions :
 Save : to save an edit session. This edit session is inserted in the database under the chosen category.
If modifications are done from an existing edit session, this one is updated and the previous version is replaced by the new one.
 Save as : To save an edit session under a new name.
If modifications are done from an existing edit session, you will have two versions.
 New : to create a new edit session.
15.29.Multitrack shortcuts
F3 : Set the blue
F4 : Set the yellow
F5 or Del : Cut the selection
F7 : Play the contents of cut (2 seconds after the blue and 2 seconds before the yellow).
F8 : Go to begin
F9 : Go to end
F10 : Play fast forward
F11 : Play fast backward
F12 : Change the play mode (original mode – edited mode)
Space bar : Play/Stop
Inser : Insert
Ctrl + A : Select the entire track
Ctrl + N : New document
Ctrl + Z : Undo
Ctrl + Y : Redo
Ctrl + C : Copy
Ctrl + X : Cut
Ctrl + V : Paste
Ctrl + S : Save
Ctrl + left arrow : increase zoom
Ctrl + right arrow : decrease zoom
Page up : Go to blue
Page down : Go to yellow
+ : Display more tracks
- : Display less tracks
Click + left arrow : Un/Select all clips before the current point.
Click + right arrow : Un/Select all clips after the current point.
With the mouse wheel :
Mouse wheel : horizontal zoom in/zoom out
Shift + Mouse wheel : vertical zoom in/zoom out
Ctrl + Mouse wheel : scroll right/left one page
16.Music Scheduling
16.1.Presentation of Music Scheduling
The Radio Assist integrated Music Scheduling program allows you to realize the following :
- Create a music scheduling
- Modify a music scheduling
- Simply do a musical filling in a playlist
- Manage several channels
- Take into account broadcasted elements (reconciliation).
Music scheduling is integrated into the Radio Assist's Grid Editor tab.
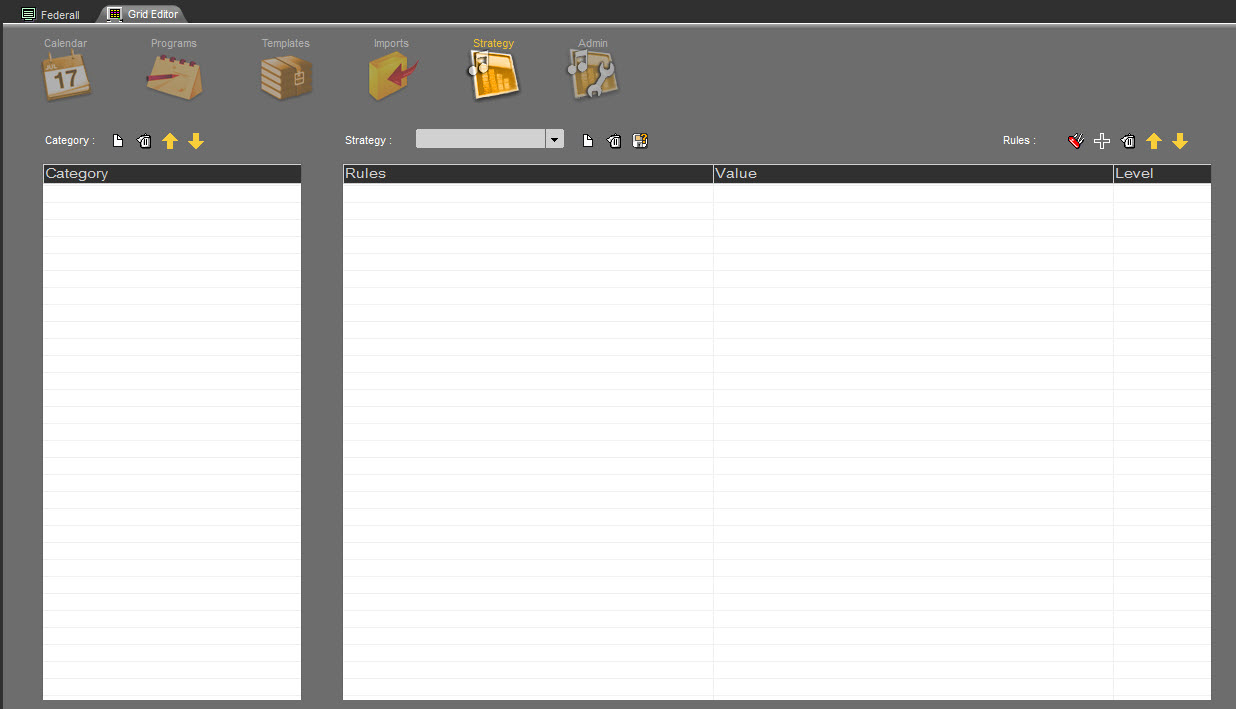
Music Scheduling in Grid Editor
16.2.Display icones
Only administrators can have these icons displayed.

You must set the value "29" onto the "ExtraDisplay" key in the registry:
HKLM\SOFTWARE\(WOW6432Node)\NETIA\Radio-Assist\8.0\LogView8\Ctrls
In Administrator, you must also allow the right "Can see Music Scheduler" for Grid-Editor and Feder-All
16.3.Glossary
Library
The library contains all the audio files that are up for consideration.
Each item is described by a set of properties, some fields being mandatory while others are optional.
Categories
This is the main piece of information associated to an item in the library. This piece of information is required.
A category can be seen as a set of tracks that must have the same rate of exposure, on-Air.
Users can create as many categories as they want (on-the-fly creation/edition)
A common use of categories is to gather tracks by date of release.
Rules
The scheduling software allows you to apply a certain number of rules to the different items, in order to better control the flow, balance and mix of the scheduled playlists.
A rule is an option allowing you to define the way a category should be exposed, depending on its genre, tempo, type, hour restrictions…
Rule options are customizable and can be applied differently depending on the category or time slot users are considering (cf. Strategies)
Rules can be grouped together, depending on their settings (rotation rate, protection to make sure certain categories don’t play next to each other, weight associated with each category…)
Example: the « Titles Minimum Separation » rule has a « duration » criterion allowing you to keep the same category from playing too close to itself. This duration can vary depending on the category you are considering. On balance, a title from the « Top 40 » category will be schedulable every 3 hours, while you may want the system to give you more time of rest for a song from the Gold category.
Similarly, the minimum separation time can be set differently depending on the hour of the day (song rotation can be less important during the night than during the day).
Strategies
A strategy is a set of rules and parameters that need to be applied, taking into account the importance relative to each rule.
Rule selection, as well as Rule priorities, can vary inside one same strategy depending on the categories you’re dealing with. Consequently, there is a sub-association that is made between the rules and the categories when defining a strategy.
Calendar of Strategies
Different strategies can be used throughout the day or week.
Therefore, there is a calendar allowing you to choose which strategy must be applied for each hour of the day.
Scheduling
To generate a musical scheduling, the software will choose, for each target run in a clock, an item belonging to the category that has been called for.
The Music scheduling software performs searches, going from one category to the other, over the lapse of time the application has to cover.
A stack is created for each category.
For one specific run, the software goes through the category from top to bottom until it reaches a song that meets all the rules previously defined by users.
If no matching song has been found, the software will once again go through the list, ignoring the less important breakable rule. This operation will be repeated as often as needed. Nevertheless, if in the end, there is still no matching item, the position will remain unscheduled.
An item that has already been scheduled is sent back to a lesser position in the list, based on a refusal percentage (100% meaning the song is sent back to the bottom of the stack).
Once automatic scheduling is over, a report will provide users with information regarding the number of items that have been scheduled for each category, along with the number of positions that remain unscheduled for each category.
Pass order
This indicates the pass order for the category. The category listed as “1” will schedule first and so on. Furthermore, with a similar set of rules, the first categories suffer less restrictions and their rotation is naturally richer and really well-balanced.
Therefore, categories with fewer items are usually scheduled first. Categories not appearing in this list will never be scheduled, even if some target runs in the clocks call for these latter.
Turnover analysis
To improve scheduling schemes, it is important that the rules be coherent with the library content (if a rule applied to one category is too restrictive, this can prevent songs belonging to this category from being scheduled).
For this purpose, users have at their disposal an array of analysis tools to better deal with the composition of their library.
Scheduling log editing
One scheduling logs have been generated, users can browse through the playlists in order to edit them. Titles can be moved by simple drag-&-drop, or they can be deleted, and so on…
By hovering their mouse over the runs users wish to edit, the software will display the stack of items corresponding to the category that is called for (other option: the software can display the list of lesser-scheduled songs belonging to the category).
For each item in the stack, users can see how well the rules do apply or not, for the run that is being considered. What is more, a second list allows you to see in one glance which rules have been broken. Users can also select a title from another category. The same type information regarding the rules will be displayed.
16.4.Prepare a music scheduling
In order to prepare a music scheduling, we need to go through several steps :
- Create categories and grids
- Apply a category and a grid to a sound
- Define rules
- Define strategies
- Define clocks
Once all these steps done we can start the music scheduling process.
We will be able to control the result and modify this music scheduling.
This documentation shows how to create a music scheduling by using the notion of "New", "Recurrent", "Gold" and "Hit" and the geographical repartition with "International" and "National".
We will also use the "Jingle" category.
16.4.1.Create a category
Creating a category is done in the Grid Editor tab, then click on 
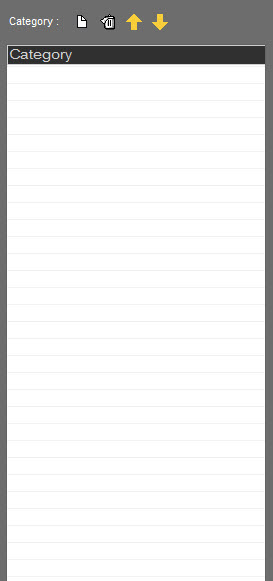
On the left part of the screen click on 
A field is open :

Type the name of the new category, then validate by using "Enter" on your keyboard.
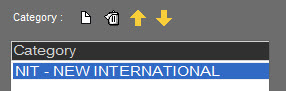
IMPORTANT : It is impossible to modify the name of the category once it is created.
Once all the categories have been created, you can modify their order by using these 2 buttons : 
 and to move a category up or down.
IMPORTANT : The order is very important.
This order will be used by the scheduling process.
It will fill the playlist using the 1st category, then the 2nd category, etc...
Because rules will be set on the scheduling process, as it fills the playlist it will be more and more difficult to find sounds passing all the rules.
The 1st category will have less constraint for the filling. The 2nd one, a little more, and so on...
So the category including the most sounds needs to be placed last in the category order. It will leave more choice of sounds as the scheduling process is working.
16.4.2.Create/Modify/Delete a grid
A grid is a tool allowing you to define if a sound will or won't be scheduled in the different 24 time slots of a day and for each day of the week.
Create a grid
You can create as many grids as you want.
A grid is a way to specify for a sound if it could be played between 00:00 and 24:00, from monday to sunday.
It is specified by time slots of 1 hour each.
To create a grid, click on 
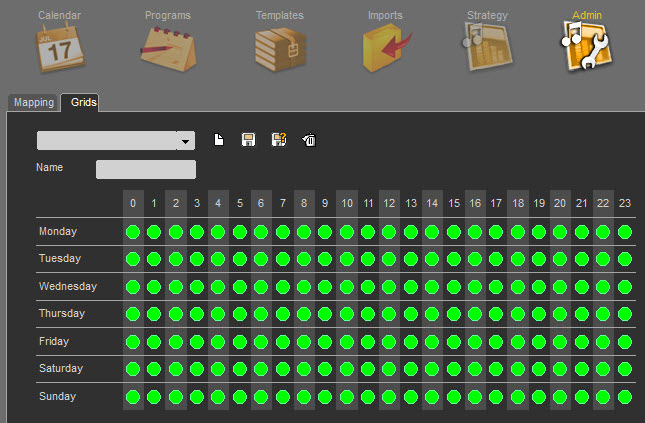
Type the grid name in the "Name" field.
A green dot means that the sound can be played.
The absence of a green dot means it won't be played.
By clicking on a green dot, it makes it disappear.
Once the selection is done, click on 
It is possible to copy one line on another by right-clicking on the line yu want to copy : Here, Friday is the same as Thursday
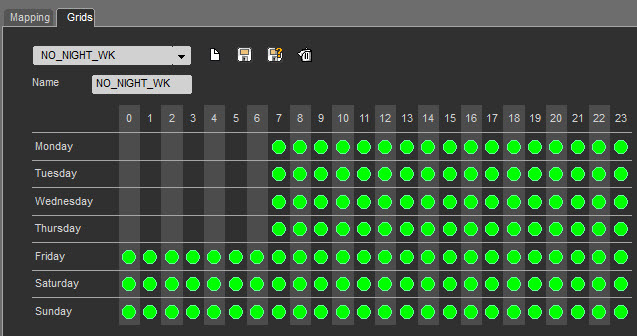
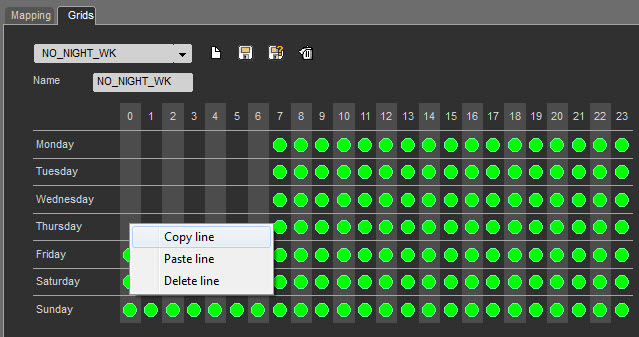
Right-click on the line we want to copy
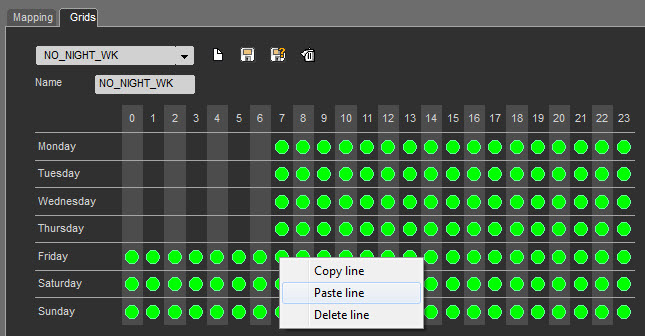
Then paste the line on the line you want to modify
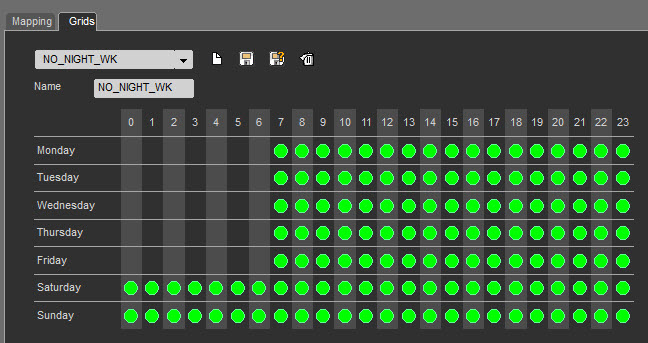
Friday is the same as Thursday
You can also delete all the green dots on a line by right-clicking on the line and select "Delete line" :
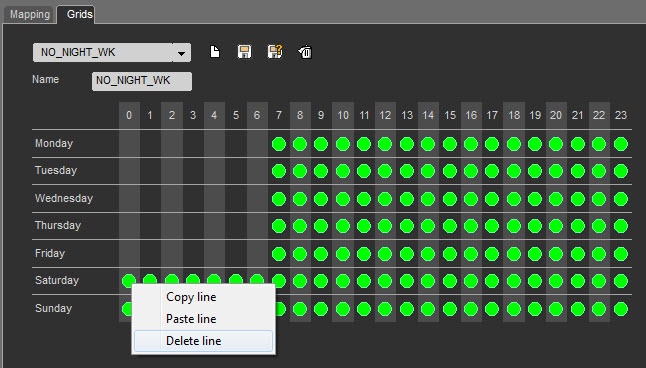
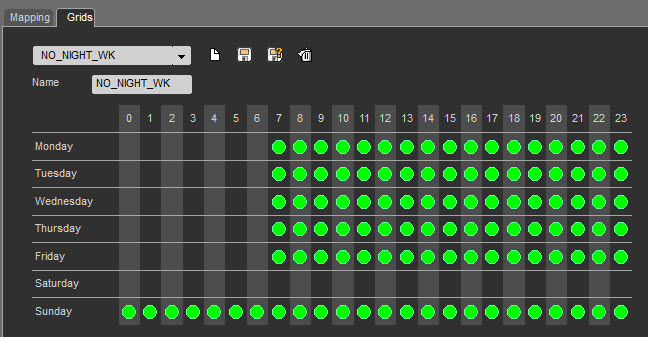
Click on  to save modifications.
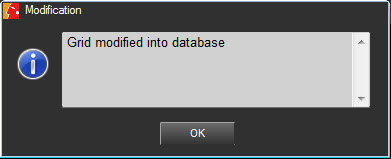
The grid is modified.
Modify a grid
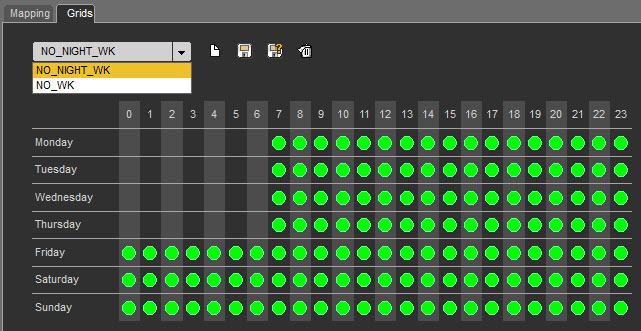
Select the grid you want to modify, make the modifications, then click on 

The grid is modified.
Delete a grid

Select the grid you want to delete, then click on 
16.4.3.Apply category and grid to a sound
Once you have created categories and sound, you need to apply a category to a sound. It's mandatory in order for the scheduling process to work.
Adding a grid to a sound is optional.
Select your sound in the database, then open the modification window :
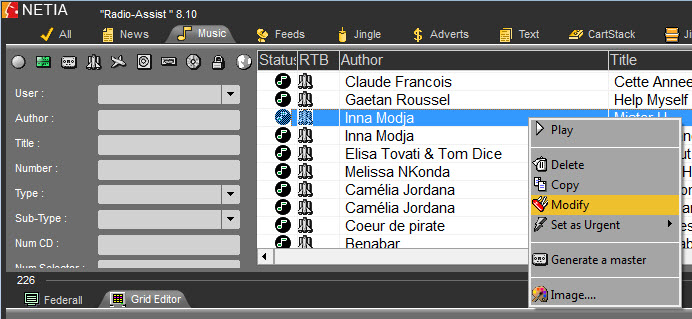
The following window is displayed :
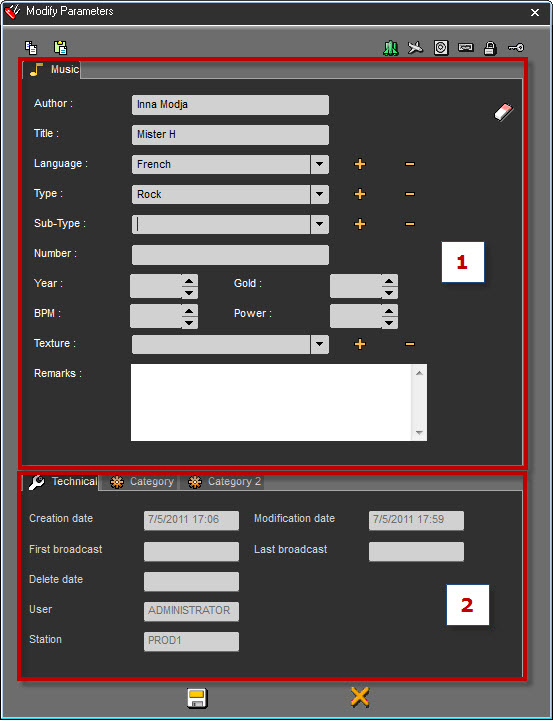
The upper part (1) is where you find all the sound's properties.
These pieces of information need to perfectly filled in order to use them as filters for the clock's runs.
On the lower part (2) you have all the information related to the scheduling process
"Technical" Tab :
All these pieces of information are given by the system.
"Category" Tab :
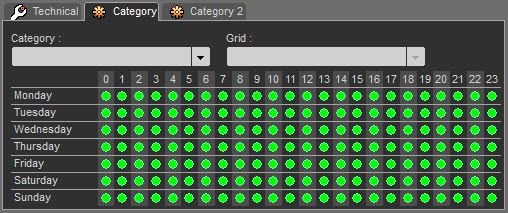
In this tab, you will select the category for this sound and eventually, the grid you want to apply.
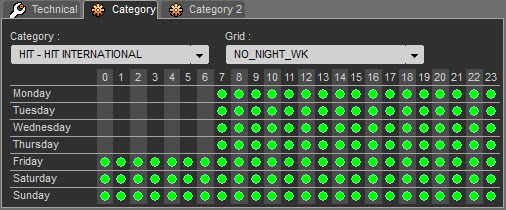
"Category 2" Tab :
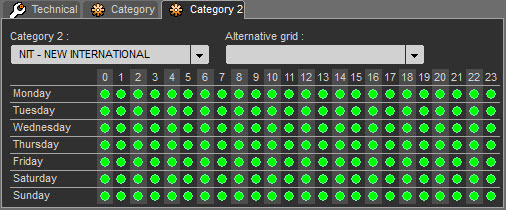
You can also add a second category to the sound and also a grid.
Adding a second category to a sound allows you not to limit the use of a sound.
Here we said that this song is an International Hit but also a New song.
Click on  .
.
The item is saved.
NB: Information on items behavior when the items have been associated with a category or a grid
When you copy an item which is candidate to the music scheduling, the metadata related to category+ grid are not copied
When you edit an item in the Production tab, the metadata related to category+ grid are not copied
When you edit an item in the Snippet/Snippet+ tab, the metadata related to category+ grid are not copied
The general rule is: new items created from a scheduling candidate item will not inherit from the sceduling metadata (in order to protect the way the Music Scheduling)
16.4.4.Create a strategy
Creating a strategy will allow you to define the rules to apply to your categories.
Once created, you will apply one and only one strategy to a time slot.
Click on 
Then click on  on the right of "Strategy"
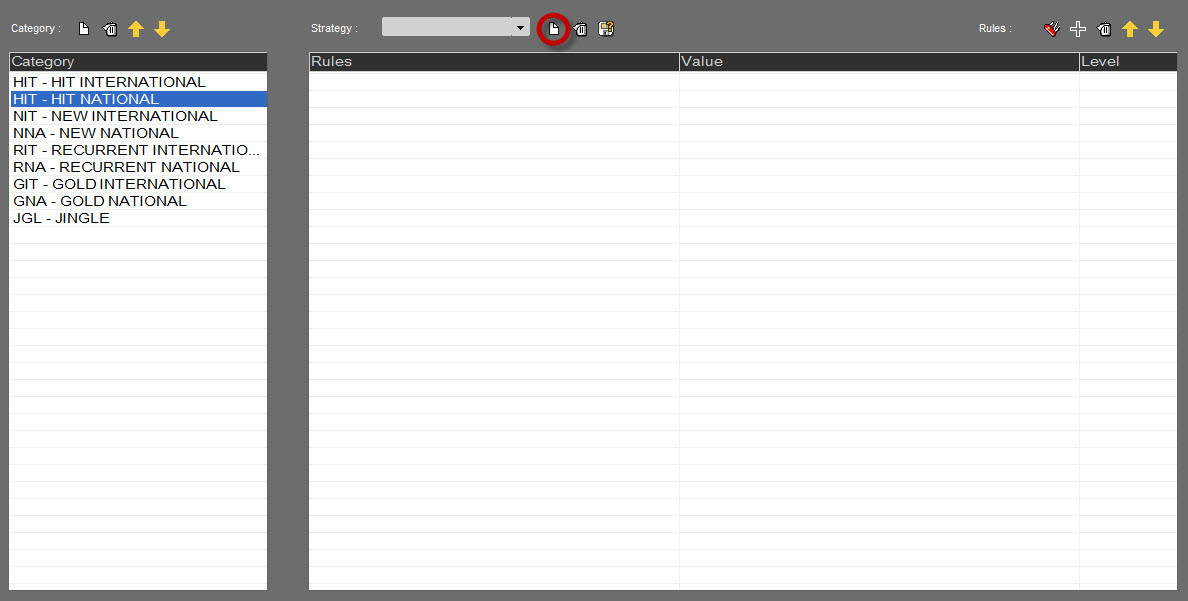
Give a name to your strategy, then click on 
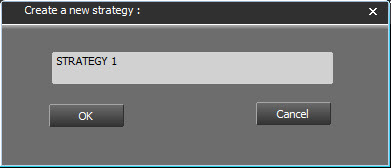
Then, select the rules you want to apply to each categories.
On the left, select a category and click on  to add a rule.
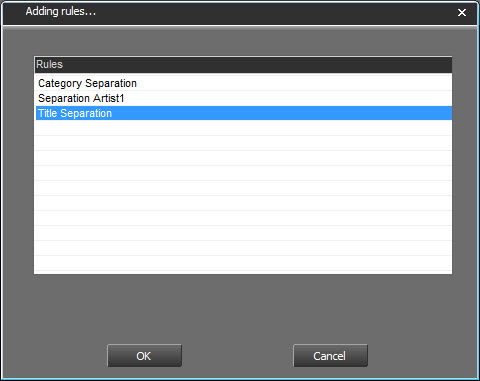
Here, we are going to use the "Title Separation" rule.
Double click on the rule :

The rule is selected for this category. We need to set the duration between the same title and if the rule must be "Breakable" or "Unbreakable"
By default, the rule is always "Unbreakable"
To set the duration, follow the instruction on the screen : Double Click
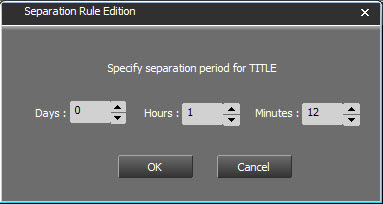
Then, click on 

To modify the rule's level, double click on "Breakable". It will turn to "Unbreakable". Double click again, it will turn to "Breakable", etc...
When a rule is "Unbreakable" the line is highlighted in orange.

You can add as many rules as available.
IMPORTANT : If no rules are defined for a category, the scheduling process will use a random selection in the category.
The order of the rules is important. They need to be sorted by order of importance.
To modify the order, use the arrow buttons : 
 and .
and .
To delete a rule, select it, and click on  .
.
Then save your strategy.
16.4.5.Create a clock
Clocks are created in the programs created in Grid Editor.
Target runs will be inserted in a screen of a program.
To insert a target run in a program, open an existing program or create a new one.
Then right click on a run to add a new target run :
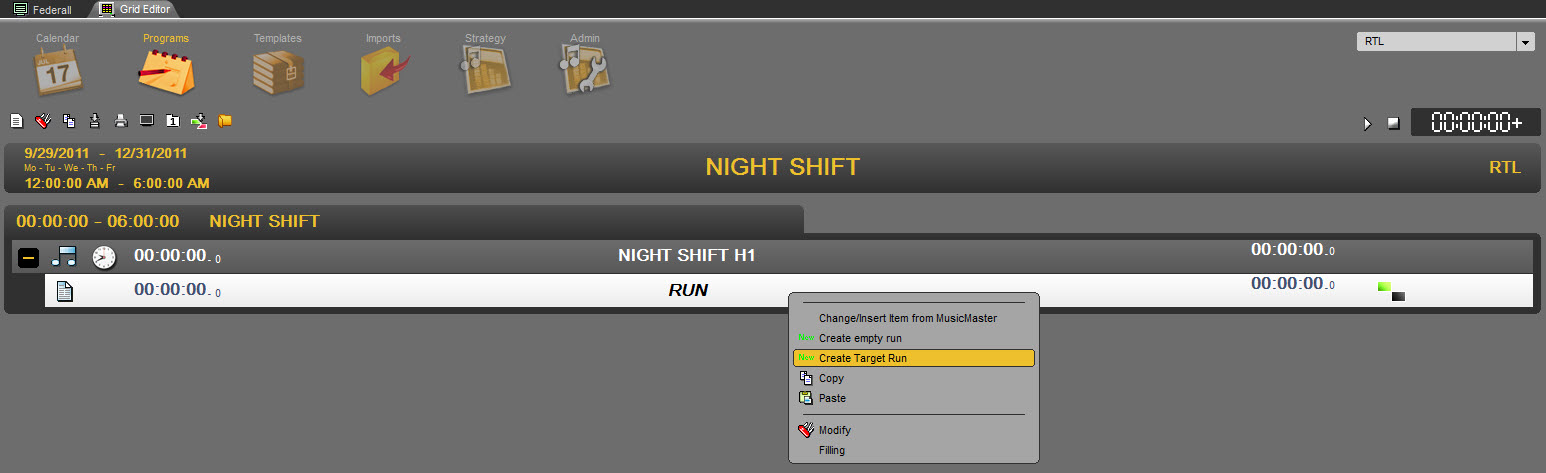
Select in the list the category you want to play and optionally, apply a filter on the run.
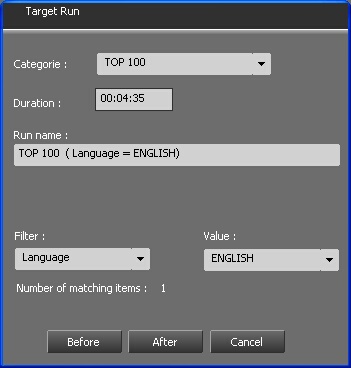
The indicated duration corresponds to the average duration of all the sounds from the category.
Then click on 
 or in order to save the run after or before the run you right clicked on.
Each target run will have this icon : 
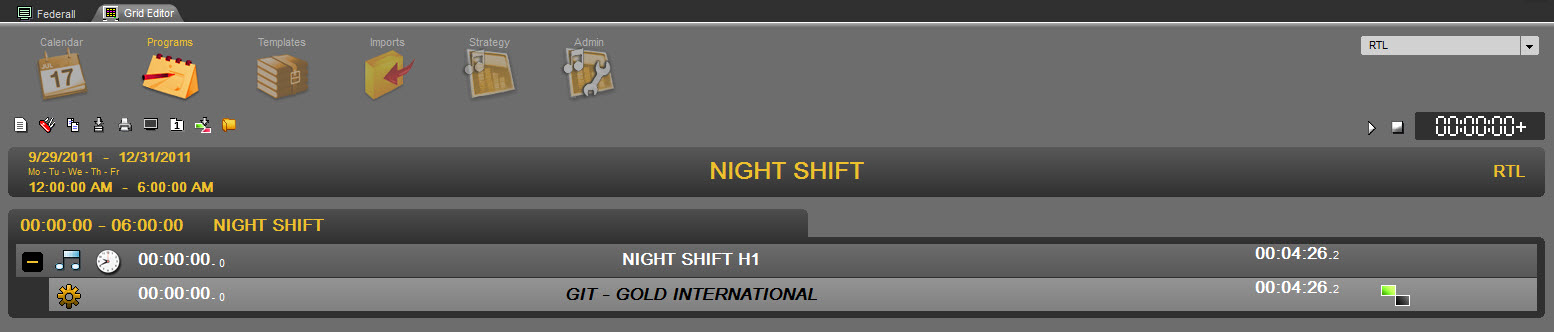
Once created all you steps, the playlist is ready.
You can mix target runs and "normal" runs.
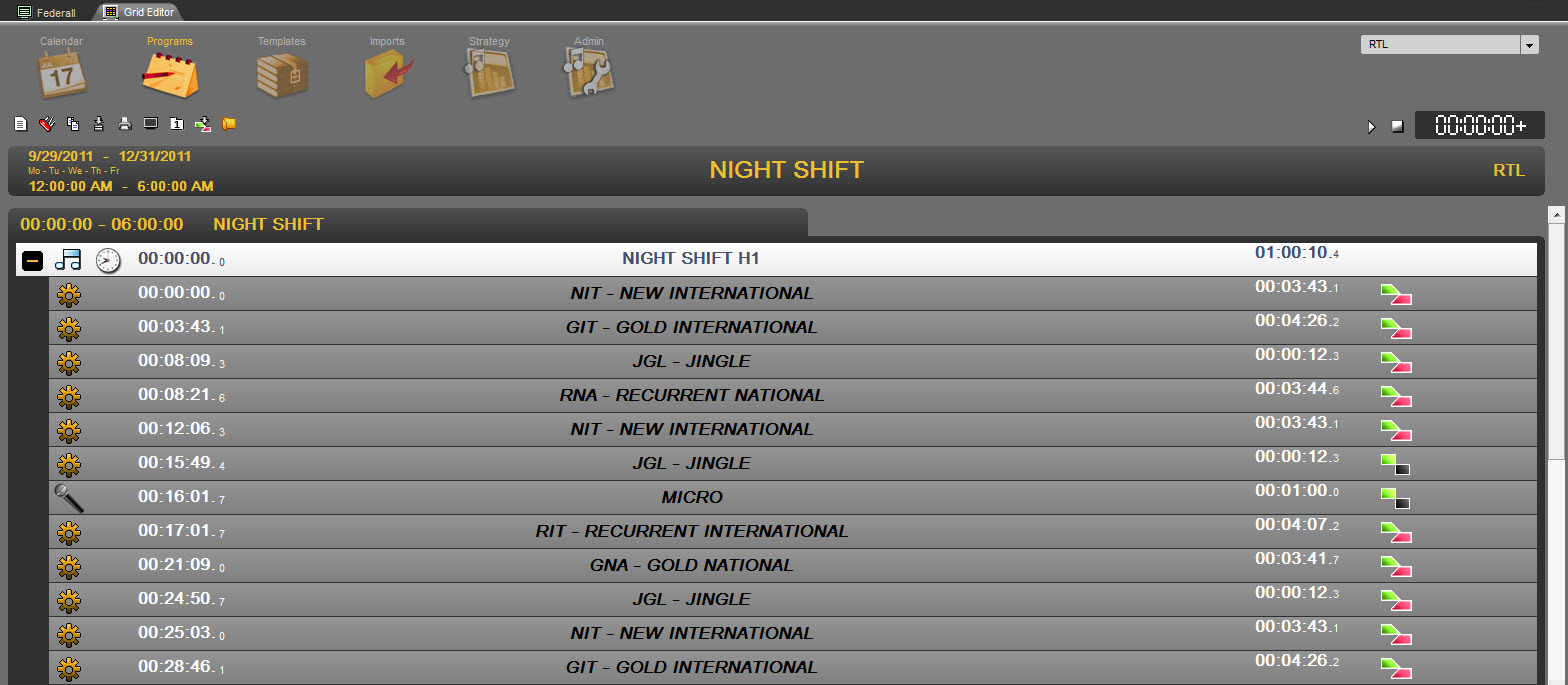
16.4.6.Apply a strategy
The playlist is now created, you need to apply a strategy to this program.
You need to access the Program.
There are two ways to apply a strategy to a program :
Apply a strategy through a program
Right click on the program, then select "Modify"
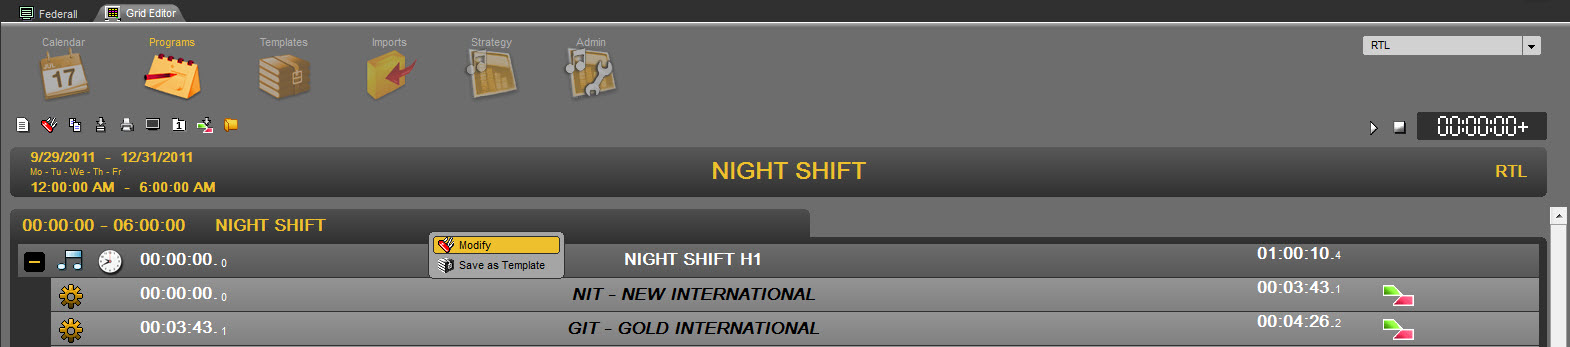
Then, select on the upper right of the screen, the strategy you want to apply on this program :

Then, click on 
The selected strategy will be used by the scheduling process.
Apply a strategy through Grid Editor
Right click on the program you want to modify and select "Program Metadata"
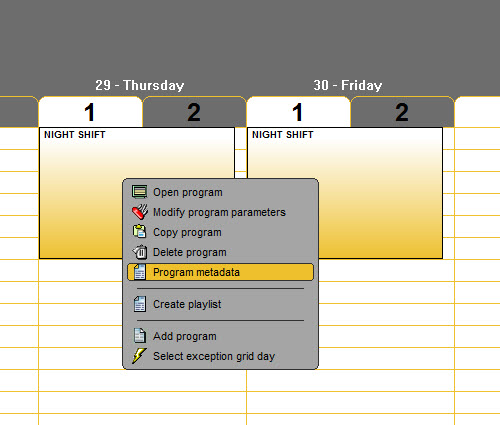
Then, select on the upper right of the screen, the strategy you want to apply to this program :

The click on 
The strategy selected will be used by the scheduling process.
The strategy also appear on the grid for each day of the program :
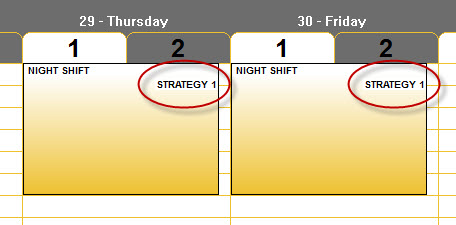
16.5.Create a music scheduling
Once everything is set, empty playlist will be generated manually or automatically.
Select the playlist you want to use for the automated music scheduling process in the "Log Sheet" Radio Assist tab and drop it into the "Federall" tab.
The playlist is loaded :
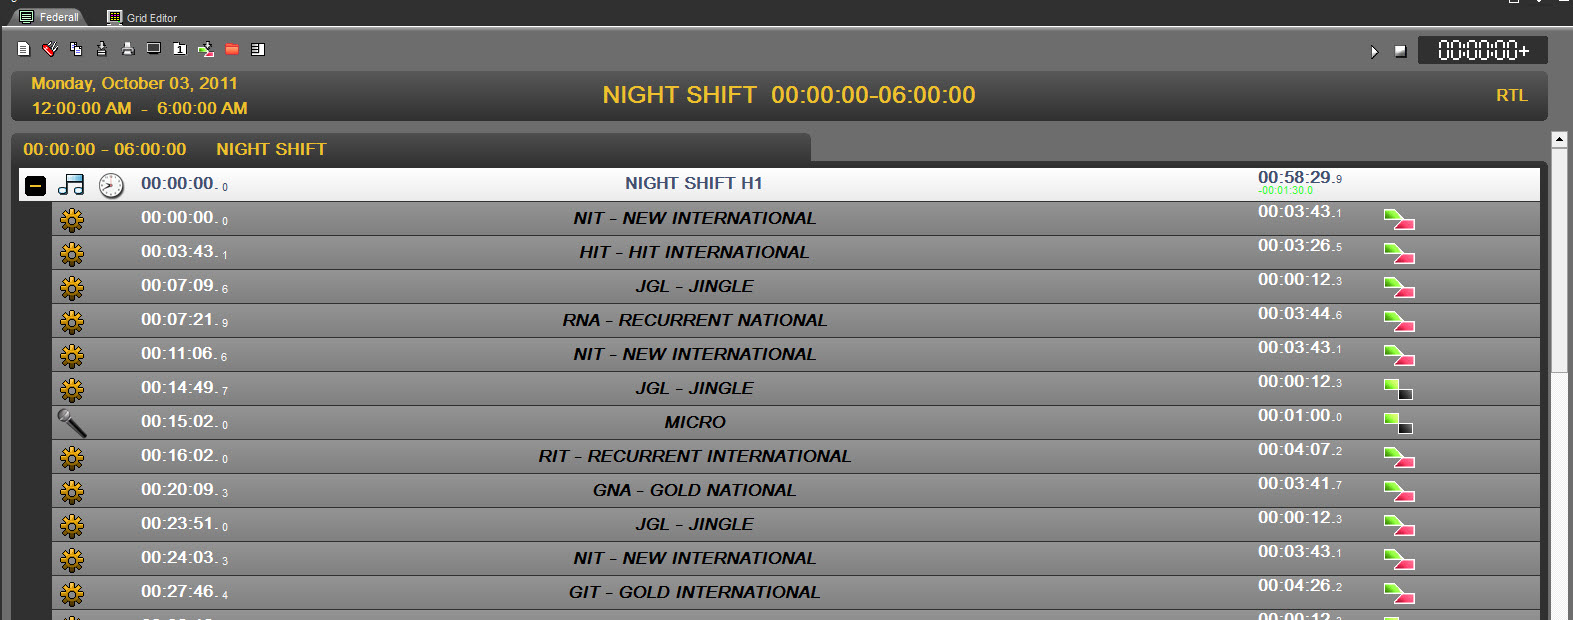
To start the music scheduling process, click on  to open the tools used for it.
The screen displays new windows.
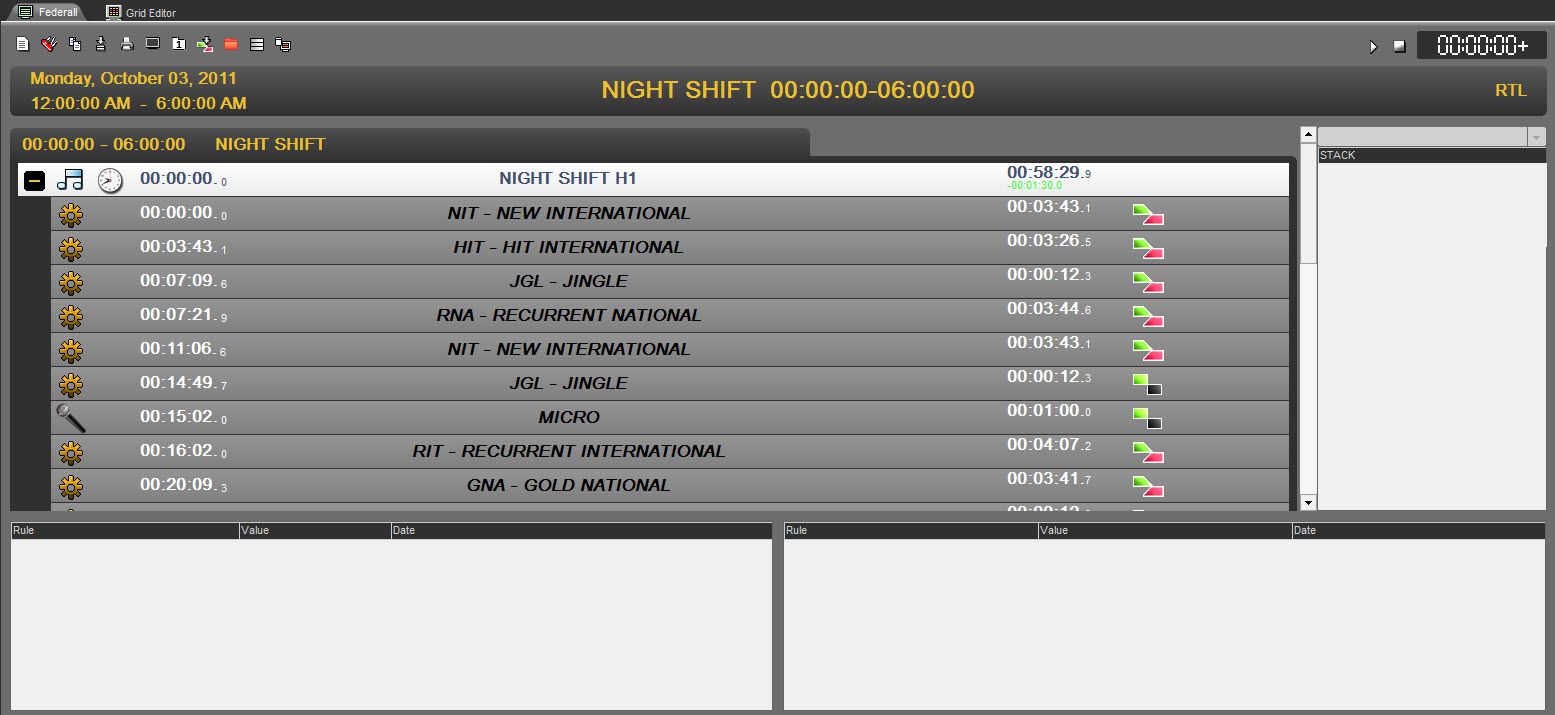
The button changes into :  To have theses windows disappear, click again on this button.
Then click on  to load the data (sounds) used for the scheduling.
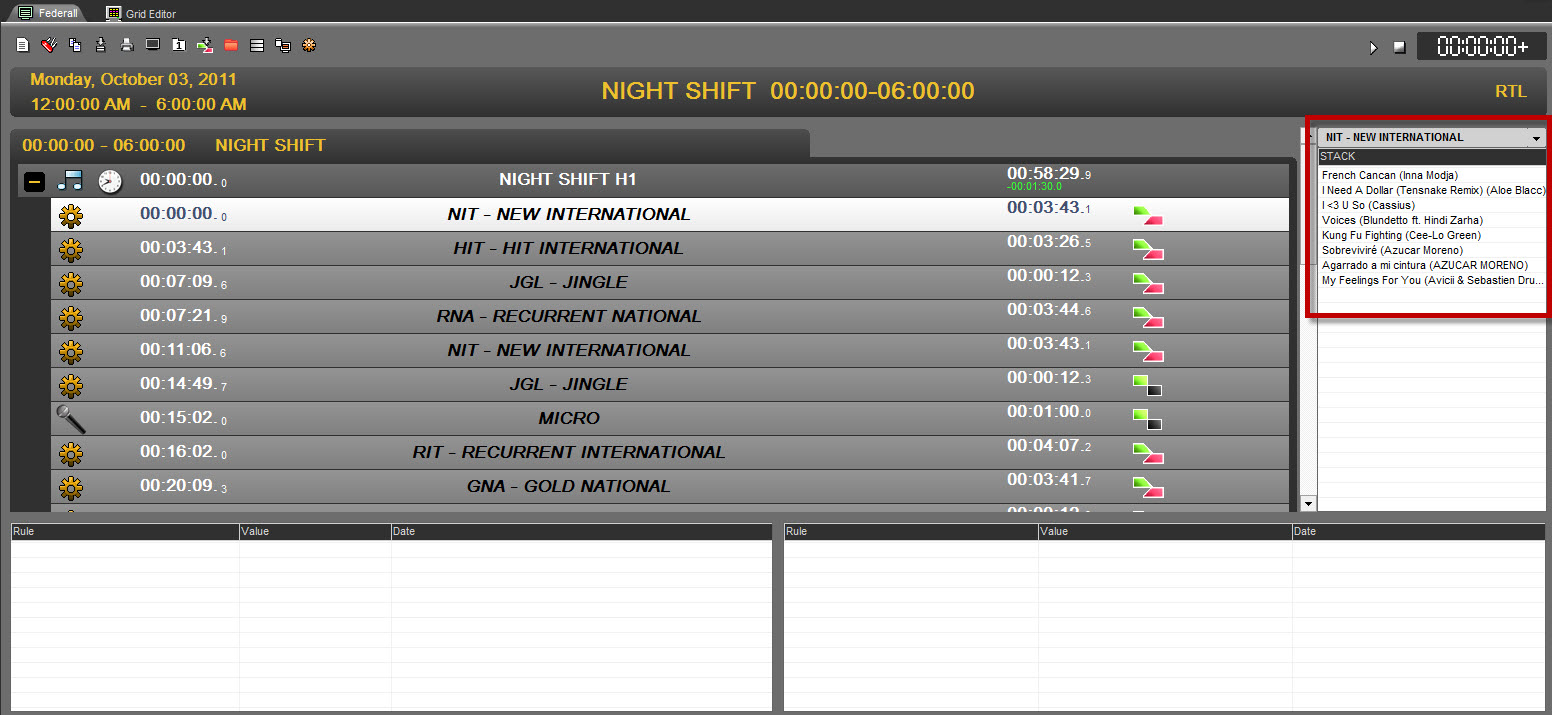
Now when you click on each target run (category), you will see, on the right, in the "Stack", all the sounds from the category.
You can launch the automated music scheduling by clicking on 
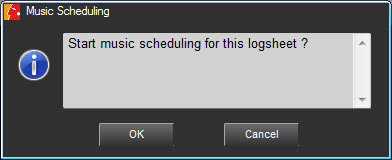
By clicking on  , it wall start the process.
As a result you will have your log sheet filled with sounds selected automatically.

Your scheduling is done for this playlist.
16.6.Edit a music scheduling
Once the scheduling is done, you can manually modify your scheduling
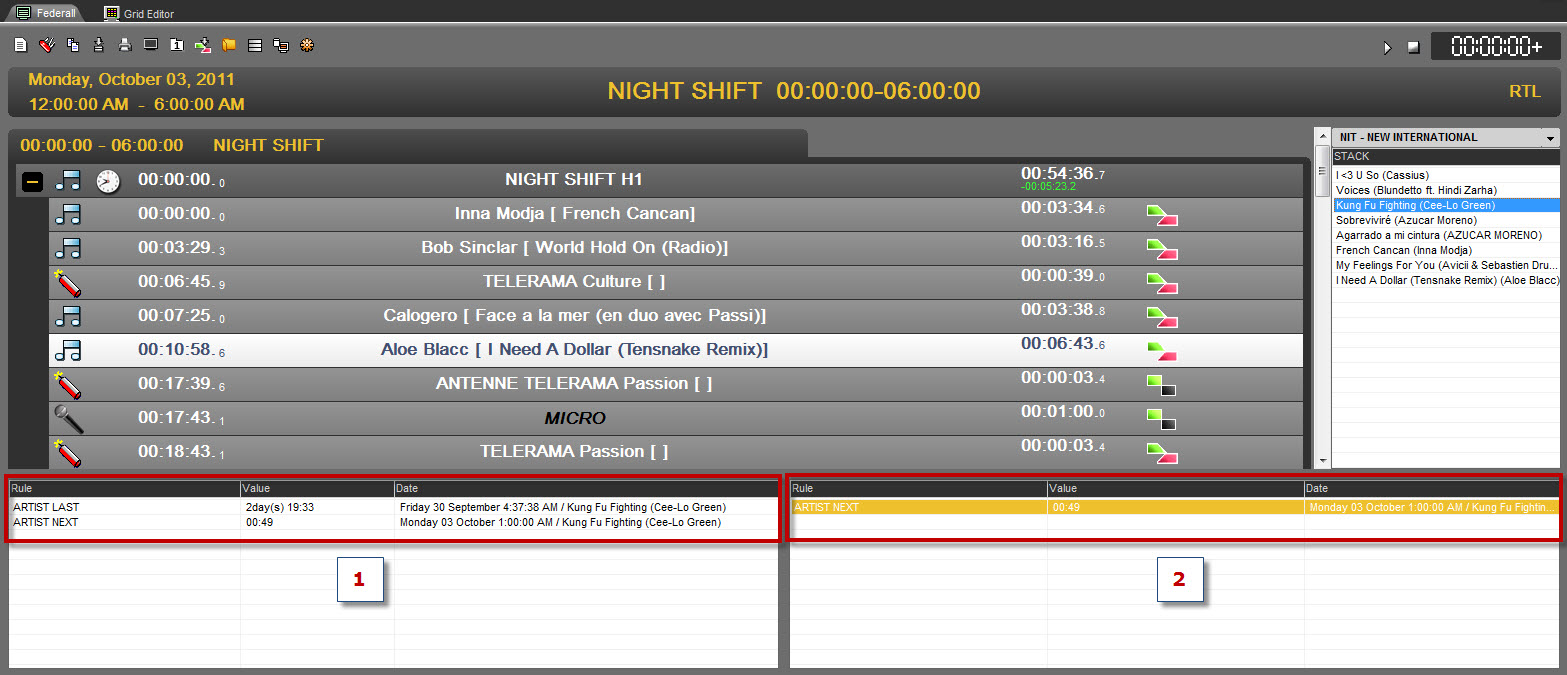
If you want to replace Aloe Blacc at 00:10:58 with another song, click on Aloe Blacc in the playlist and you will see all the songs that are available in the same category.
By clicking on a song from the same category, several pieces of information will be displayed.
Here, you want to schedule "Kung Fu Fighting" by Cee-Lo Green. When you click on the song,you will see 2 pieces of information :
1 - It will give you :
Column Rule :
- Artist Last : Last time the artist was scheduled
- Artist Next : Next time the artist will be scheduled
Column Value :
The value of the previous criterion in Days HH:MM.
Column Date :
The dates calculated with the previous criterion
2 - It will give you the list of the broken rules (breakable in orange and unbreakable in red)
Column Rule :
The name of the broken rule
Column Value :
The value of the previous criterion in Days HH:MM.
Column Date :
The dates calculated with the previous criterion
You call select a song of another category by opening the combo box and select a new category.
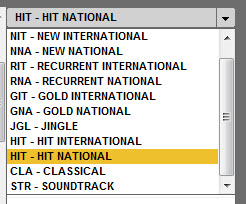
You can listen to any song from this list by double-clicking on it. It will be played on the player above the combo box.
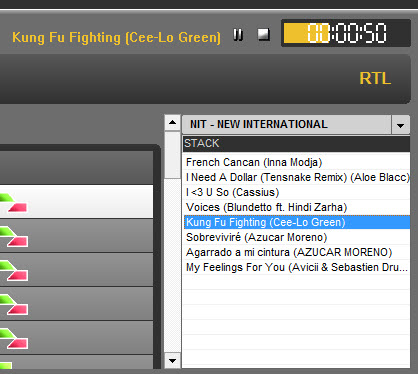
Once you've selected a new song, just Drag and Drop it in the playlist and select the option :
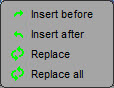
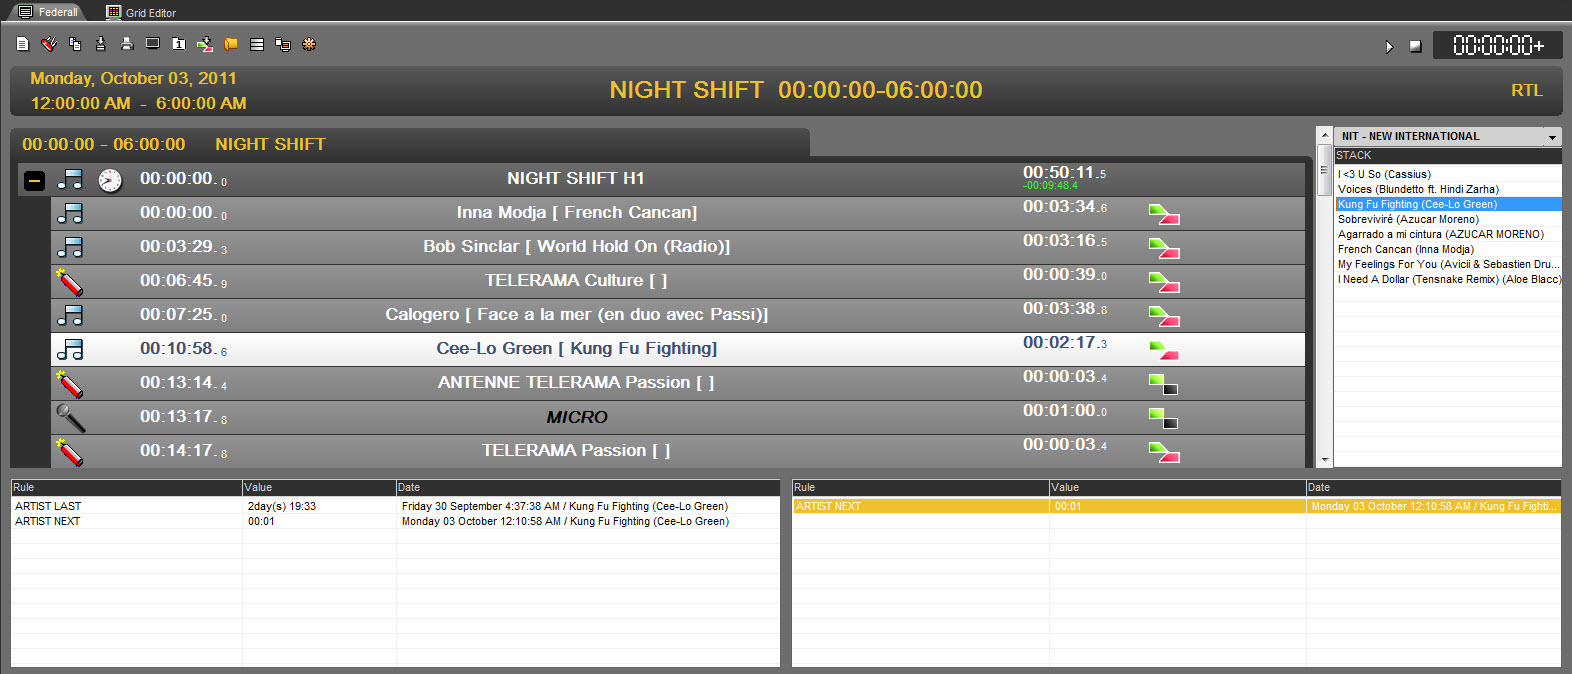
The song is replaced and the playlist ready to be broadcasted.
16.7.Reconciliation
Playlist planification is fed with planified playlist before and after it.
For non broadcasted playlists, music scheduling is based on planified elements. For playlists already broadcasted, modifications done on air will be automatically saved in the playlist.
Therefore, reconciliation is done automatically.
For an optimum reconciliation, the broadcasting process should prioritize modifications to be done in the playlist and that an unaired item be deleted from the playlist.
17.Production
17.1.Workflow
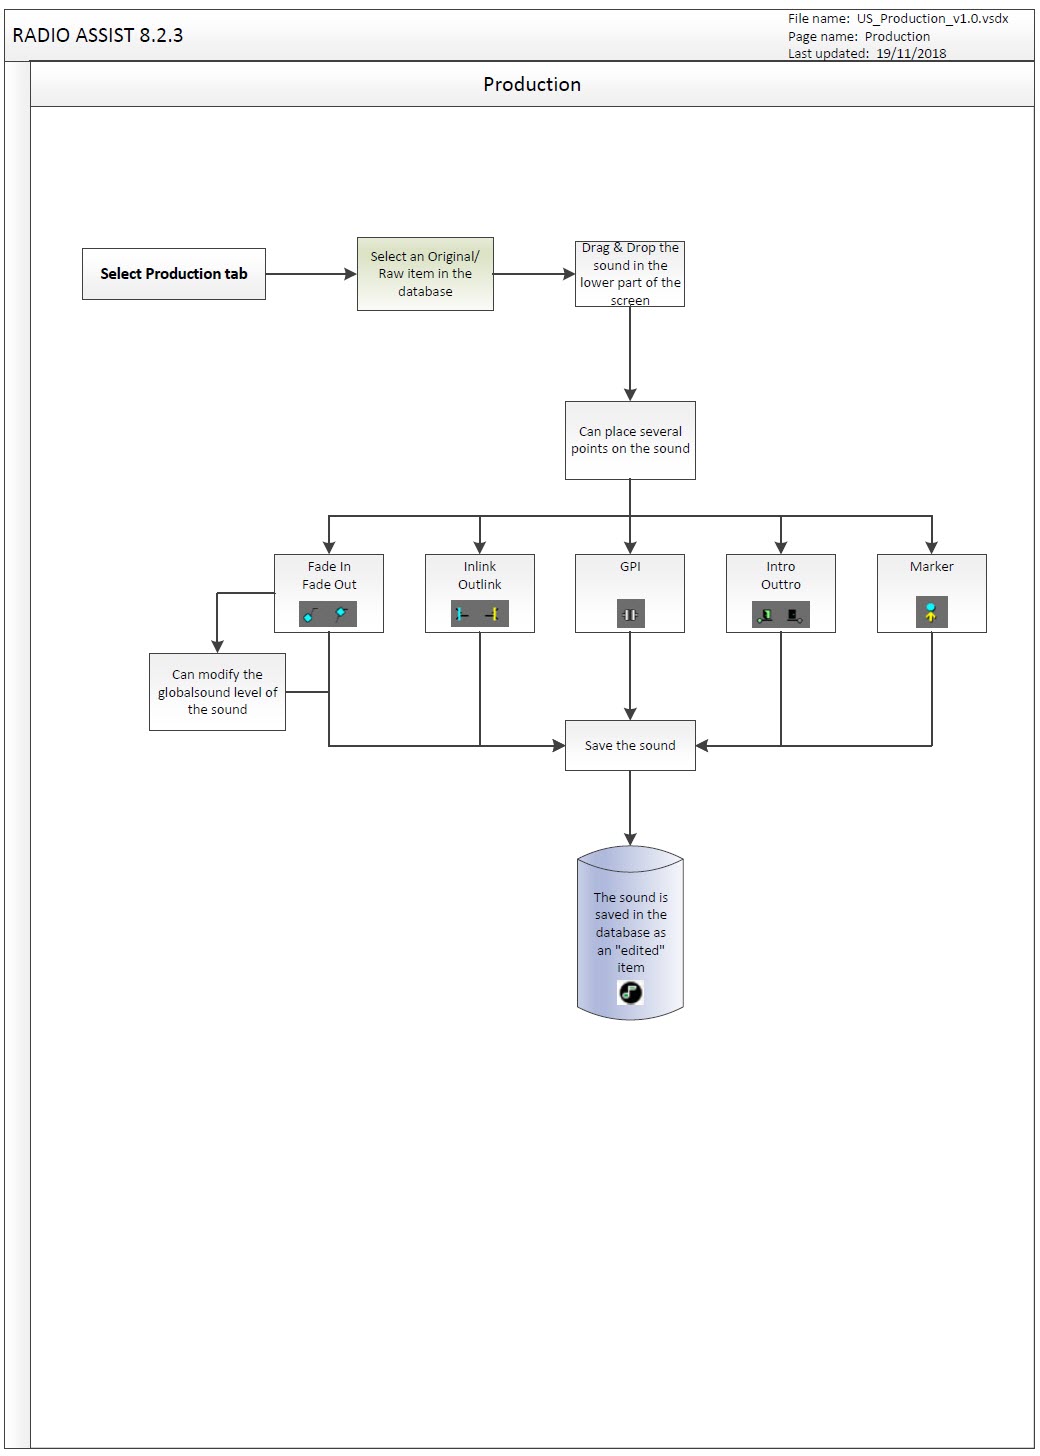
17.2.Production definition
The "Production" tool is designed to:
Modify sound level "Music" and "jingle" items.
work on fade in and fade out points
Specify input and output points and relays (GPI).
Position Intro and Outro points.
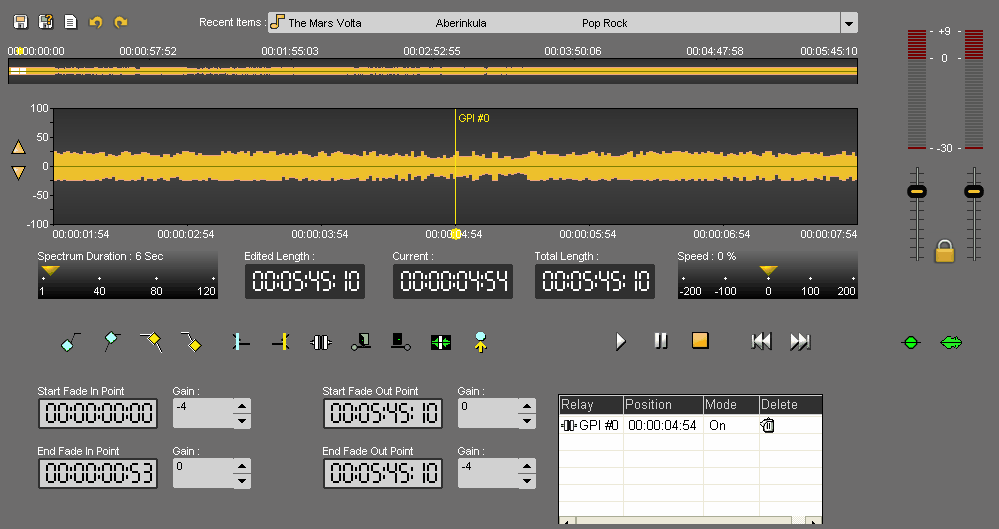
17.3.Using Production
To use Production, select a music-type item in the Browser, then drag and drop it into the player.
The elements that can be used are :
- raw elements.
- master elements.
- Production-type assembled elements.
The playhead is the vertical line in the middle of the track. The playhead is fixed.
When you want to insert the blue, the yellow, insert a blank or do any action, you HAVE TO place the playhead at the chosen place.
17.4.Zoom
You can zoom in or out on the track by using the scrolling button of the mouse :
Mouse wheel : Horizontal zoom in/zoom out.
Shift + Mouse wheel : Vertical zoom in/zoom out.
For the vertical zoom the button  can also be used.
It changes the display, but not the volume.
17.5.Counters
The "edited length" counter gives the total duration of an edit session. Each time you cut a selection, the duration is refreshed.

The "Current" counter gives the position of the playhead (red line). The playhead can be moved to another position on the spectrum by double-clicking on the counter and entering the exact position required. To validate, press Enter or press "Esc" to cancel.

The "Total Lenght" counter gives the total duration of the element regardless of the edit points.
17.6.Speed modification
You can change the playback speed or move through the sound by speeding up or slowing down the playback speed.
To do this, move the yellow cursor to the right or to the left.
The variation is from -200% to + 200%.
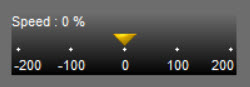
17.7.Fade In
A fade in is an upward slope at the beginning of the sound.


17.7.1.Setting a fade In
To set a fade in :
Place the where you want to start the fade in.
Click on the "Start fade in point" icon :

Then, place where you want to end the fade in.
Click on the "End fade in point" icon :

To adjust the 2 points of the fade in, click and drag them.

You can also use the counters below to enter the position of the start and end points of the initial fade, as well as their respective sound levels.
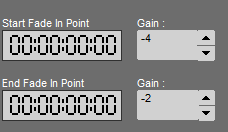
17.8.Fade Out
A fade out is an downward slope at the end of the sound.


17.8.1.Setting a fade out
To set a fade out :
Place the playhead where you want to start the fade out.
Click on the "Start fade out point" icon :

Then, place playhead where you want to end the fade out.
Click on the "End fade out point" icon :

To adjust the 2 points of the fade out, click and drag them.
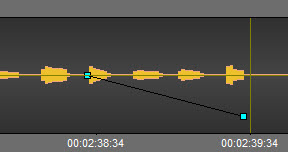
You can also use the counters below to enter the position of the fade-in and fade-out points and their respective sound levels.
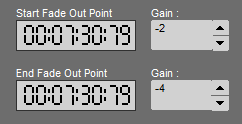
17.9.Lead-in points
The lead-in points are used to link two sound items to be played one after the other. On air, the end of lead-in point of the first item 
 will be lined up with the start of lead-in point of the second item .
So the end of the first item will be played at the same time as the start of the second.
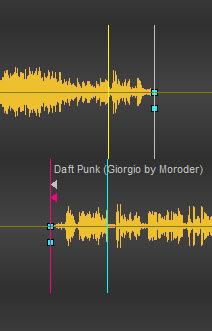
17.10.Relay (GPI - General Purpose Interface)
A relay (or GPI : General Purpose Interface) is a dry contact to trigger a command.
17.11.Setting a relay (GPI)
To set a relay (GPI) :
Place the where you want to set the relay (GPI).
Click on «GPI»  .
.
The GPI is set and is visible in the GPI window.
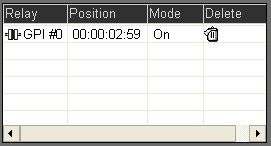
If you click on the GPI number, a dropdown list is shown and you can choose your GPI.
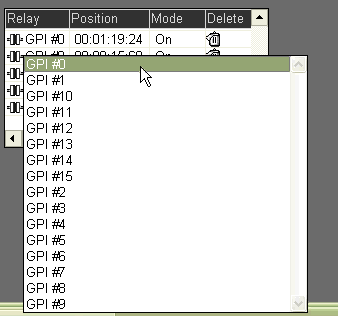
You can also define the mode. Indeed, 3 modes are available : ON/OFF/TOGGLE.
To choose your mode click on it. A dropdown list is shown. You can modify your mode.

17.12.Intro
The intro represents the beginning of the song, without the singer's voice (no lyrics).
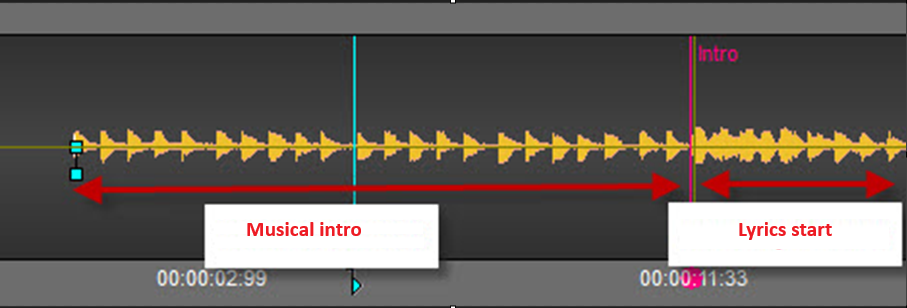
To place the intro time :
Place the at the end of the intro.
Click on "Set intro time"  .
.
The intro time is set. It means that on air, the presenter will have a counter couting down. Thus, he will know how many seconds he has to speak on the beginning of the song.
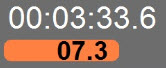
17.13.Outro
The outtro represents the end of the song, without the singer's voice (no lyrics).
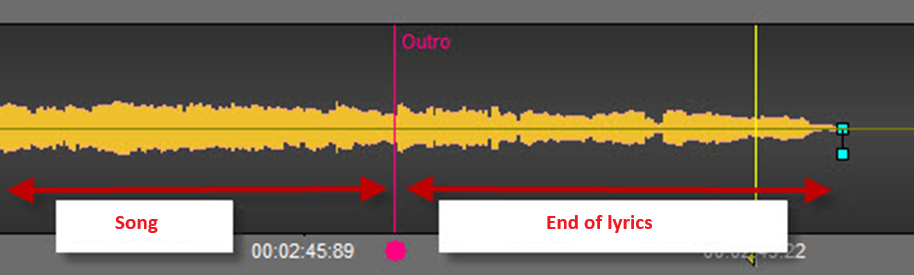
To place the outtro time :
Place the at the beginning of the outtro.
Click on "Set outtro time"  .
.
The outtro time is set. It means that on air, the presenter will know from where he can start speaking again on the song.
17.14.Blank Detection
In the "Production" tab, it is possible to detect the blanks present in the audio track.
A left click on the  button will position the playhead at the beginning of the first blank.
A right click on the same button allows you to display a Blank Detection Properties window divided up into 2 sections.
Sound Quality : allows you to define the blank detection level.
* Bad : -30 db
* Normal : -40 db
* Excellent : -50 db
Blank Length : allows you to define how long must a blank be before it is considered as undesirable.
* Short : 300 ms
* Normal : 500 ms
* Long : 800 ms
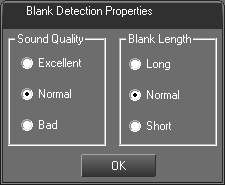
Click on OK to validate your choice.
17.15.Setting a locator
One or more locators can be placed on a sound.

To position these locators, position the playback head where you wish, then click on:

To navigate from one locator to another, use the 
These locators can be renamed.
To do this, position yourself on the locator number, then right-click.
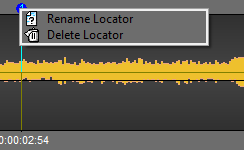
Select "Rename locator" then enter the text.
Click on 
The locator is renamed.
To delete a locator, right-click on the locator number or name.
Select "Delete locator".
The locator is deleted.
17.16.Playing the original item in Production (F12)
To play the original item, click on the following icon :  .
.
17.17.Playing the "produced" item (F12)
To play the "produced" item, click on the following icon :  .
.
17.18.Go to begin (F8)
To go to the begin of an item, click on the following icon : 
17.19.Go to end (F9)
To go to the end of an item, click on the following icon : 
17.20.Undo (Ctrl + Z)
To undo an action, Click on the following icon : 
NB : you can undo up to 256 actions before saving.
17.21.Redo (Ctrl + Y)
When you undo and you change your mind, you can redo the action by clicking on the following icon : .
17.22.Recent items
To get the list of the items you have used :
Go to « Recent items ».
Click on the down arrow. A dropdownlist is displayed containing the last items used.

If you click on one item of the list, you insert the item on the track, where the is.
17.23.Saving a "produced" item (Ctrl + S)
To save an edit session, use the following functions :
 Save : to save an edit session. This edit session is inserted in the database under the chosen category.
If modifications are done from an existing edit session, this one is updated and the previous version is replaced by the new one.
 Save as : To save an edit session under a new name.
If modifications are done from an existing edit session, you will have two versions.
 New : to create a new edit session.
17.24.Production shortcuts
F1 : Set 1st fade-in point
F3 : Set 1st fade-out point
F8 : Go to start
F9 : Go to end
F10 : Play fast backward
F11 : Play fast forward
F12 : Change play mode (original mode - edited mode)
Space bar : Play - Stop
Ctrl + N : New file
Ctrl + Z : Undo
Ctrl + Y : Redo
Ctrl + S : Save
18.Script
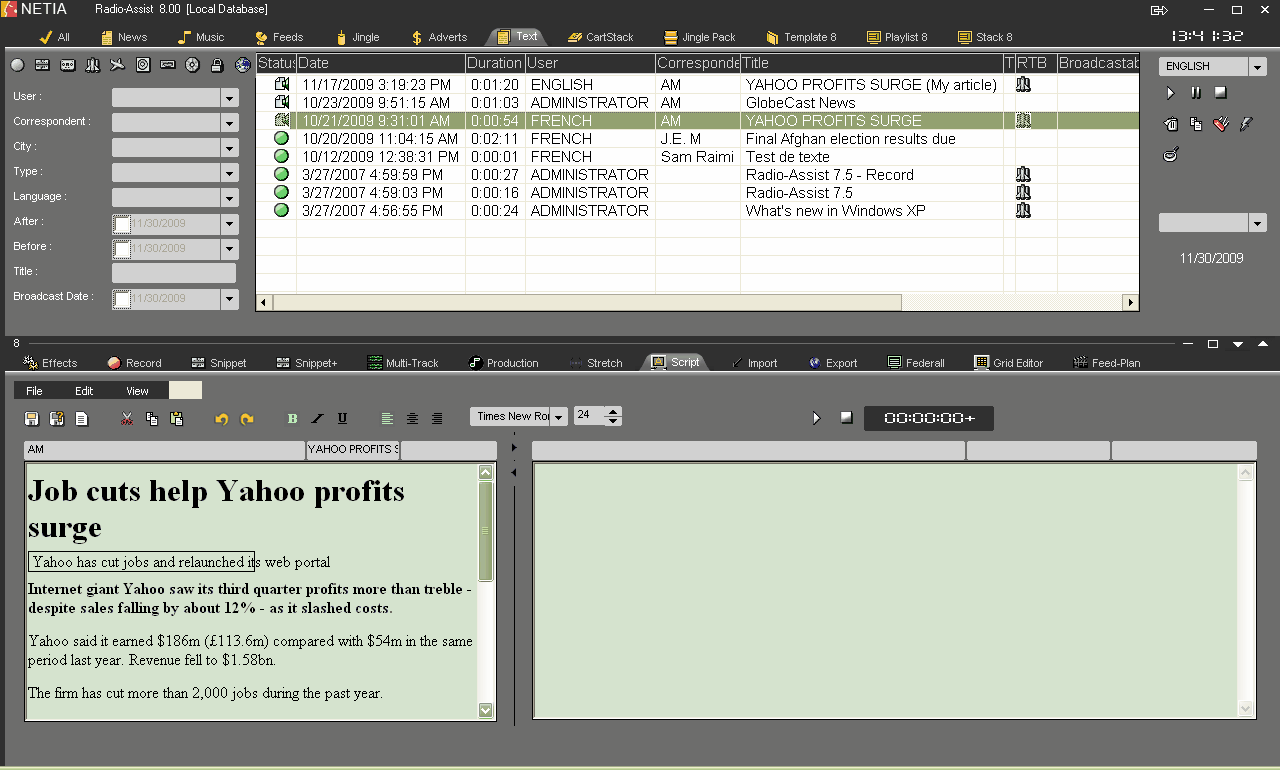
"Script" tool of Radio-Assist
18.1."Script" Definition
Script is a news wire processing module which combined with other Radio-Assist modules respects the way in which a newsroom works.
Thus the user can edit a news wire , create his own texts and associate a text with an audio item.
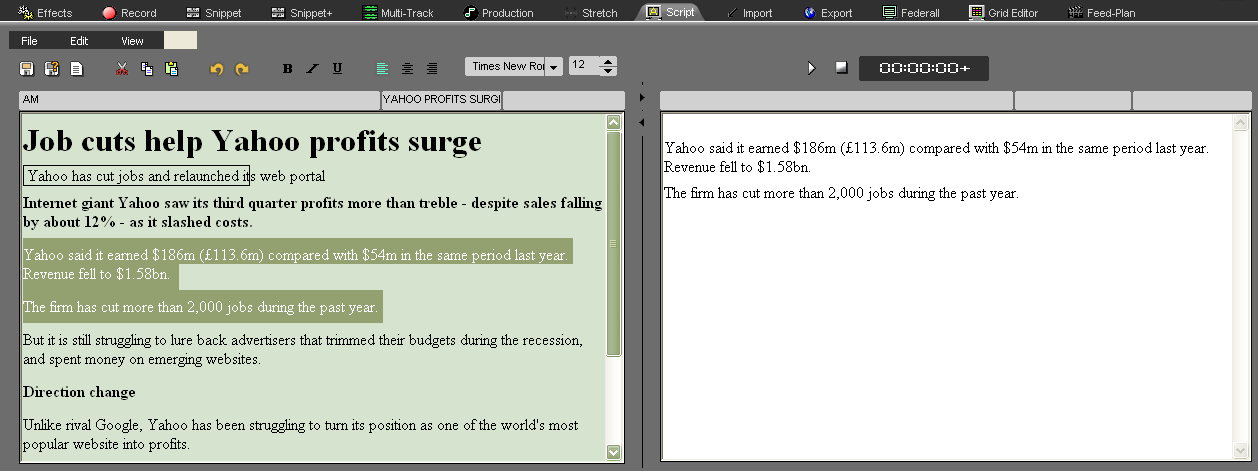
18.2.Introducing "Script" : User interface
The Script tool is divided into 4 parts :
1 : Database (Browser)
2 : Window for newswire editing
3 : Window for text creating
4 : Tools for text processing

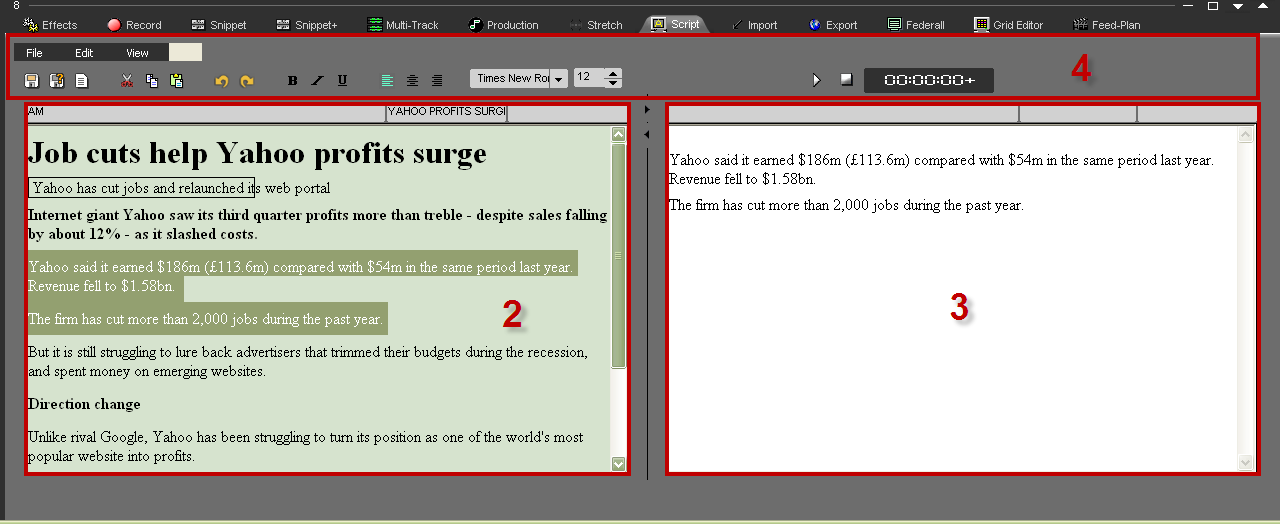
NB : if "invert screen" is chosen in the "view" menu, it is possible to modify the viewing of the Script tool, as follows :
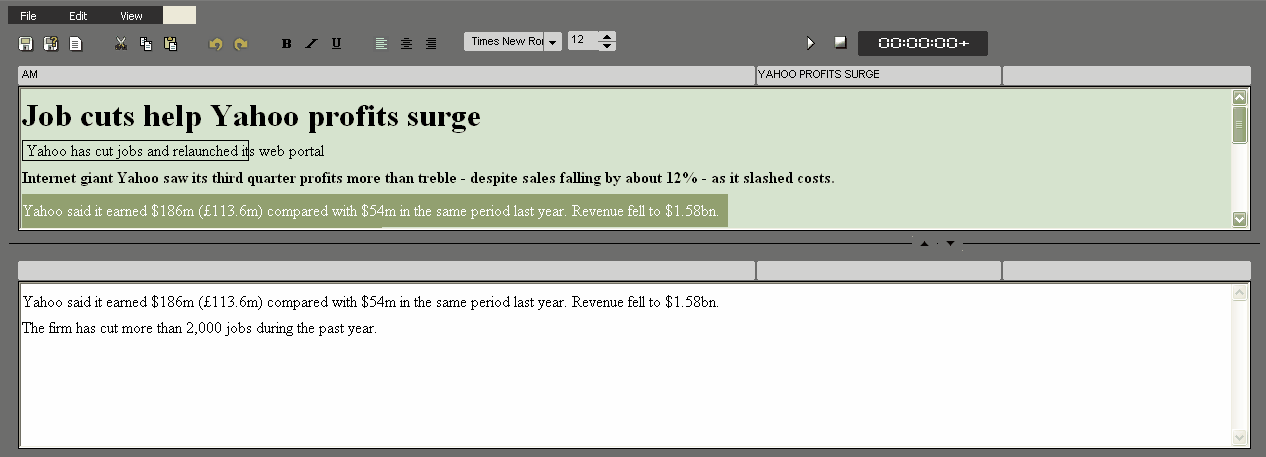
18.3.Newswire capturing
As the sources of newswires capture respect each suppliers protocol, capture can be via satellite, modem or any other mode.
Script is compatible with market standard protocols ie AFP, Reuters, AP, Bloomberg, IRN etc.
The newswires of several press agencies can be received simultaneously in Arabic, Chinese, Russian or Latin characters.
Once the newswires are received, they are stored in the database, under the "Text" tab.
The new newswires are notified by a blue color.
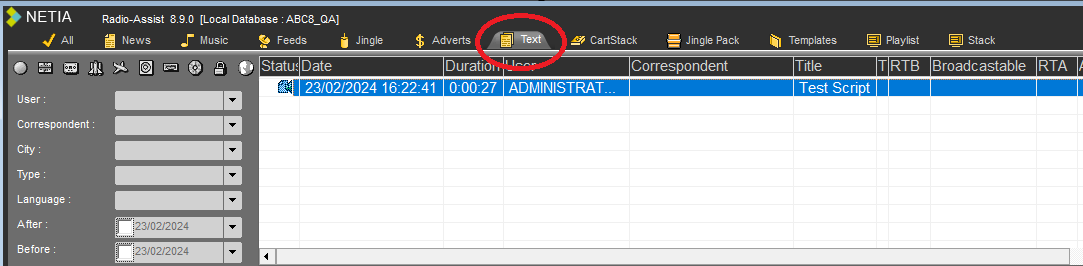
18.4.News wire editing
Lorsqu'une dépêche arrive, vous pouvez l'éditer afin de sélectionner les parties à garder.
Pour éditer une dépêche, sélectionnez-la d'abord dans le Browser et glissez-la dans la zone d'édition :
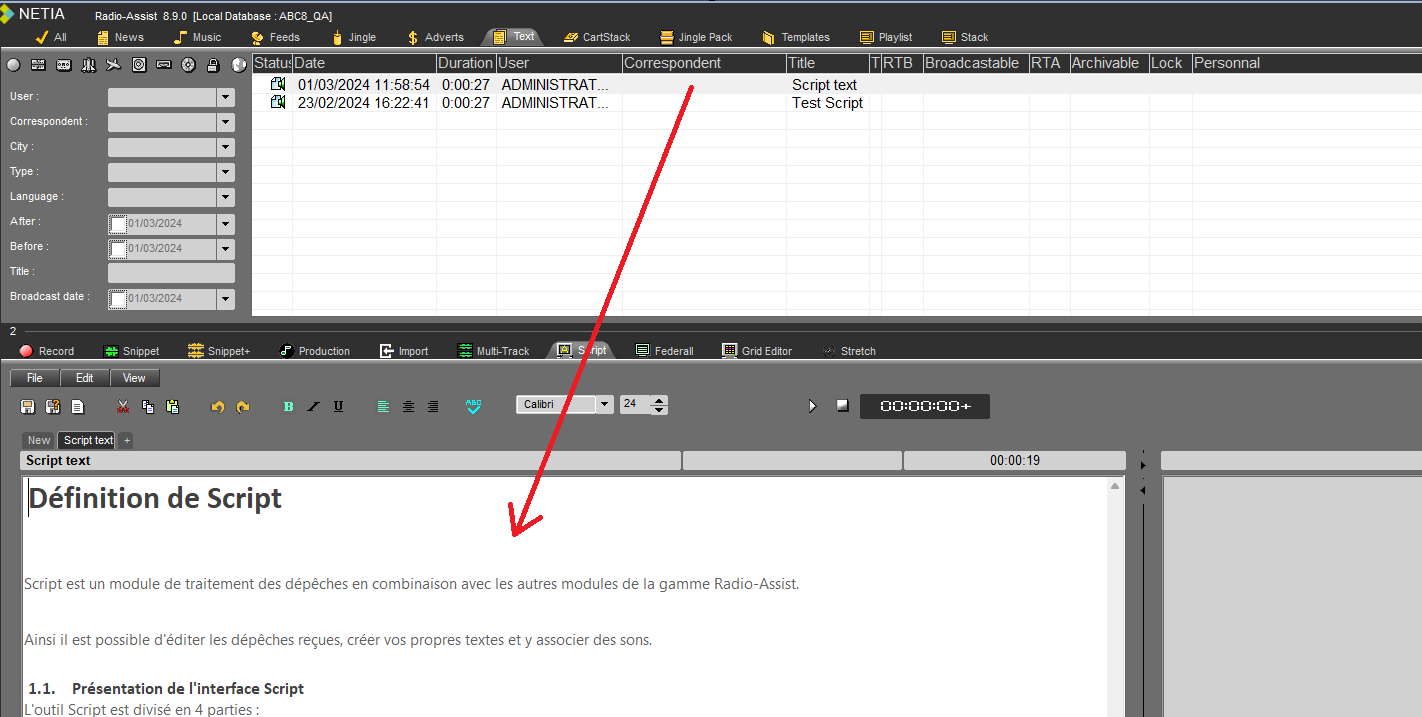
NB: it is of course possible to edit the dispatch on the right-hand side of the screen and use the left-hand side for text creation.
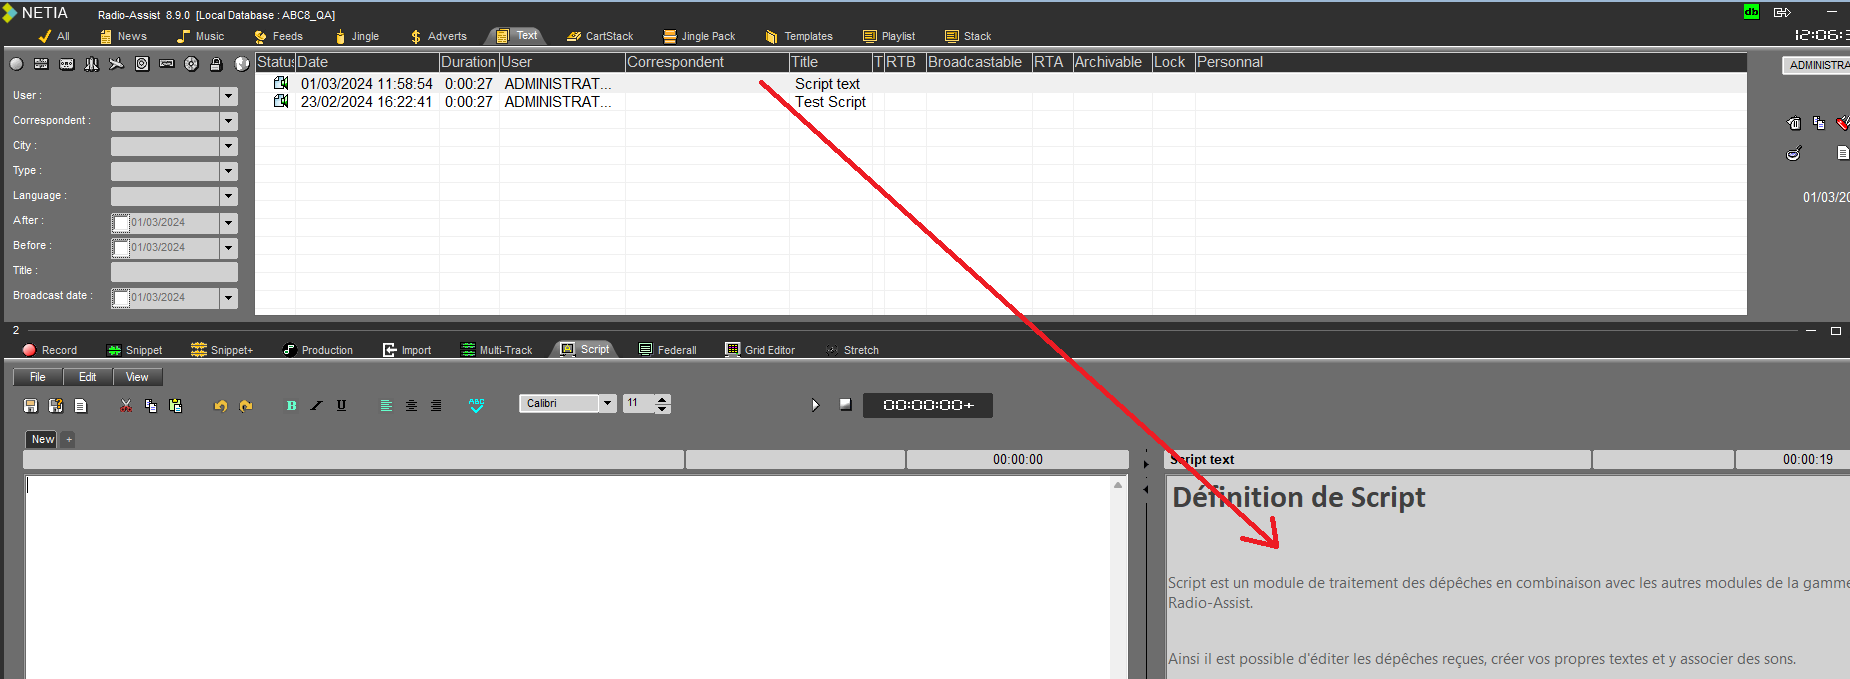
18.5.Creating a text from a news item
To create a text from a dispatch, select the parts of the dispatch you wish to keep using the editing functions available for word processing, which are as follows:

NB: these functions can also be obtained using the "File" and "Edit" menus.
So, to copy and paste a sequence :
- Select the part to be copied.
- Click on copy (or Ctrl + C).
- In the left-hand window, click on paste (or Ctrl + V).
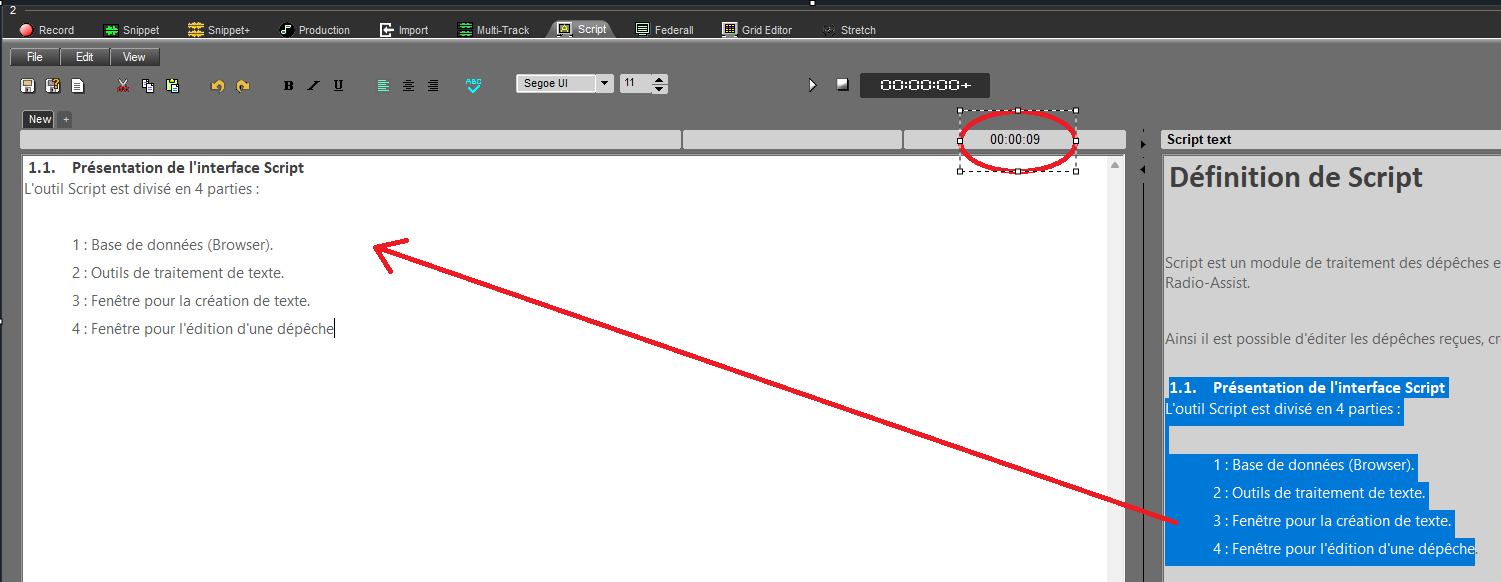
- Then enter your text and/or add sounds.
Text playback time changes as you add/remove text.
18.6.Associating an audio item
It is possible to associate a text with an audio file.
To do so :
Go to the Browser ans select the audio item to associate.
Drop it in the text zone. The audio item is associated to the text and it is displayed in blue.

You also have the possibility to play it.
18.7.Playing an audio file associated to a newswire
To play the audio file, Double-click on it. This one is loaded in the player and start playing.
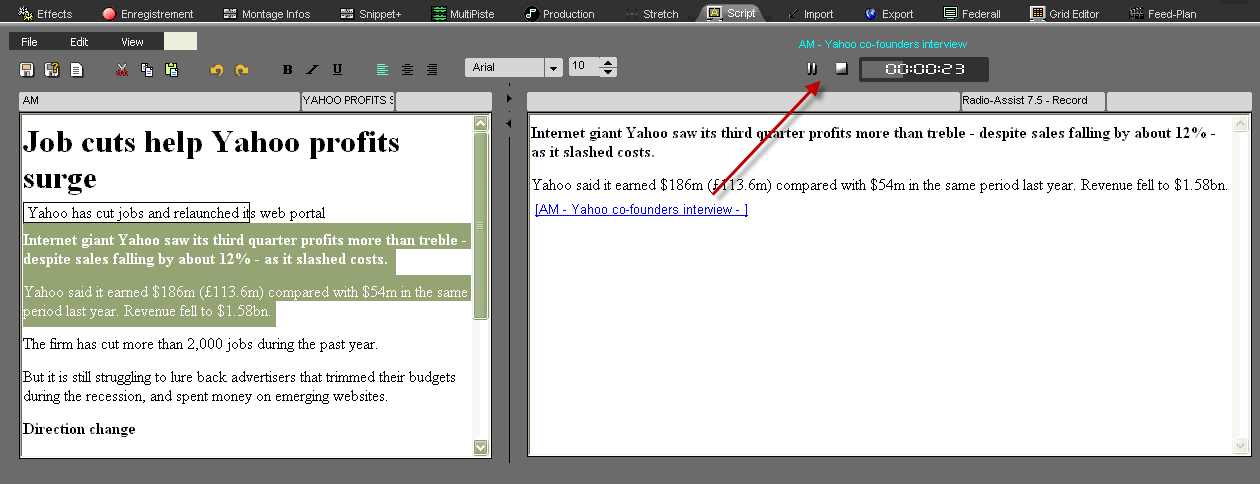
18.8.Printing a newswire
It is possible to print out either the newswire or the text created.
Choose one window by clicking inside thanks to the mouse. Thus, Script prints out the content of the chosen window.
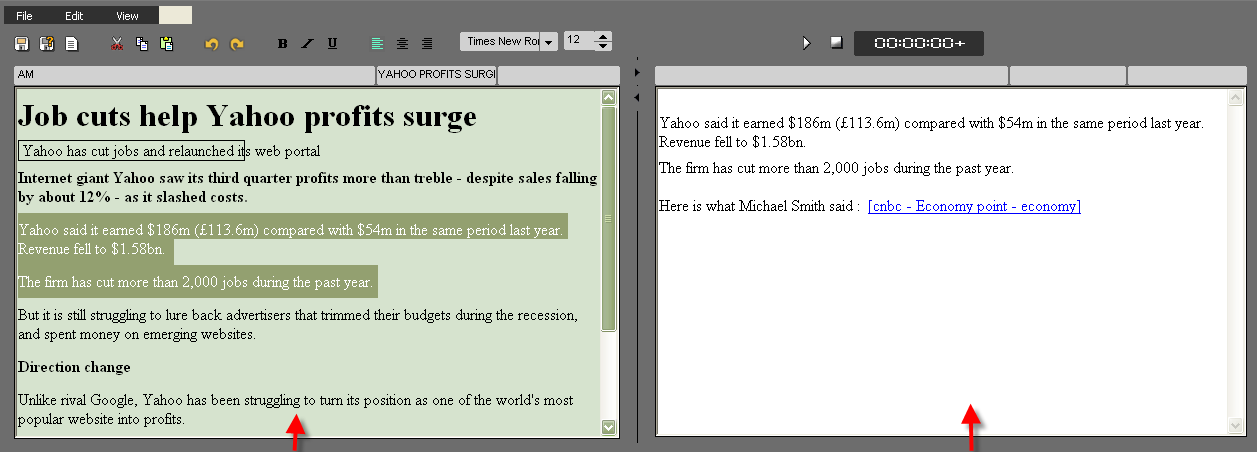
Choose the window by clicking on it thanks to the mouse.
18.9.Saving a newswire
To save a newswire with an associated audio file, use the following functions:
 Save : To save your work. the newswire and the associated audio file as well are inserted in the database under the "Text" tab.
If modifications are done from an existing newswire, this one is updated and the previous version is replaced by the new one.
 Save as : To save a associated newswire under a new name.
If modifications are done from an existing newswire, you will have two versions then.
 New : To create a new newswire.
19.Snippet

19.1.Workflow
19.2.Snippet definition
In the « Snippet » tool, 2 cut modes are available :
Removing mode (you select the part to delete).
To do so, use the "opened scissors" icon which is used to cut what you have selected between the blue and the yellow lines.
Adding mode (you select the part to keep).
To do so, use the "closed scissors" icon which is used to keep what you have selected between the blue and the yellow lines.

19.3.Editing in Snippet
Click on the « Snippet » tab.
In the Browser, select the item you want to edit.
- To edit a new item you can use original 
 or master items .
- To modify an edit session, you can select an edit session coming from the "snippet" tool or the "Production" tool .
Place the item on the track. To do so, 3 possibilities are available :
Drag and drop from the database to the track.
Double-click on the item.
Select the item and press "Enter" on you keyboard.
Place the blue and the yellow lines. Then, you have the possibility to keep the selection or to delete it.
Once your blue and your yellow lines are placed approximately, you can readjust them. To do so, go to the blue or to the yellow line and replace them.
You can also do this operation by using the following buttons :


To know the result before cutting, you can use the following play buttons :
 Plays 2 seconds before the start of a cut (before the blue line).
 Plays 2 seconds after the end of a cut (after the yellow line).
 Plays outside the cut (2 seconds after the blue and 2 seconds before the yellow) - (F6)
 Plays the content of a cut (2 seconds after the blue line and 2 seconds before the yellow line) - (F7).
NB : A right click on one of these buttons will play the sequence in loop until the stop button is activated, so cuts can be modified as you go along.
Once you are satisfied, click on :
 : To delete the selection
 : To keep the selection
Your cut goes to the bin.

To do other cuts, start the operation all over again (place the blue line, the yellow line...).
19.4.Setting the mark in (blue) - (F3)
To set the mark in, represented by the blue and marking the begin of your cut you have to :
Place the playhead where you want to place the blue line.
Click on the following icon :  .
.
NB : you can also set the blue line by using the right click of your mouse (function available in "Snippet" only ) or use F3 (shortcut) (see Snippet shortcuts).
In addition, note that by right-clicking on the blue or the yellow icons, the marks on the track will disappear.
19.5.Setting the mark out (yellow) - (F4)
To set the mark out, represented by the yellow and marking the end of your cut you have to :
Place the playhead where you want to place the yellow line.
Click on the following icon : .
.
NB : you can also set the yellow line by using the right click of your mouse (function available in "Snippet" only ) or use F4 (shortcut) (see Snippet shortcuts).
In addition, note that by right-clicking on the blue or on the yellow icons, the marks on the track will disappear.
19.6.Playing 2 seconds before the current cut
To play 2 seconds before the blue, to know if the blue is at the right position, click on the following icon : .
NB : if you do a right click on the icon, you play 2 seconds before the blue line in loop.
19.7.Playing 2 seconds after the current cut
To play 2 seconds after the yellow line, to know if the yellow is at the right position, click on the following icon : .
NB : if you do a right click on the icon, you play 2 after the yellow line in loop.
19.8.Simulating a cut (F6)
To simulate a cut, meaning to play the result before cutting what you have selected between the blue and the yellow lines, click on the following icon : .
NB : if you do a right click on the icon, you play 2 seconds before the blue line and 2 seconds after the yellow line in loop.
19.9.Playing the content of the cut (F7)
To play the content of the cut (between the blue and the yellow), click on the following icon:
If the cut duration is more than 4 seconds, only 2 seconds after the blue and 2 seconds before the yellow will be played.
NB : if you do a right click on the icon, you play between the blue and the yellow in loop.
19.10.Cutting a selection (F5 or Del)
Several ways are available to cut a selection.
Once you have placed the blue and the yellow lines :
Click on the « cut » icon  .
.
OR
Do a right-click on the wave form and choose the « Cut » function.

OR
Press "F5" or "Del" on you keyboard.
The cut is displayed in the bin.
19.11.Cutting a selection without putting it in the bin
You can cut a selection without putting it in the bin.
Once you have placed the blue and the yellow lines :
Do a right click on the « cut » icon  .
.
OR
Hold the "Shift" key down and click on the « cut » icon  .
.
19.12.Cutting outside the selection
"Cutting outside the selection" means that you keep what you have selected between the blue and the yellow lines.
Once you have placed the blue and the yellow lines :
Click on the « Cut outside selection » icon  .
.
19.13.Playhead
The playhead is the red vertical line in the middle of the track. The playhead is fixed.
When you want to insert the blue line, the yellow one, insert a blank or do any action, you HAVE TO place the playhead at the chosen place.
19.14.The bin
The bin is the cut list. Indeed, each time that you make a cut, this cut disappears from the sound and goes to the bin.

By doing a right click on a cut, the following menu is displayed :
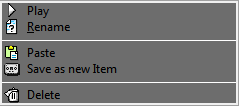
Play : plays the selected cut.
Rename : renames the selected cut
Paste : pastes the selected cut on the sound, where your playhead is.
Save as a new item : saves the selected cut as a master in the Browser.
Delete : deletes the cut from the bin.
19.14.1.Playing a cut
Go to the bin :

Select the cut to play and click on the following button :  .
.
You can also do a right click on the cut. The following menu is displayed :

Click on « Play ».
19.14.2.Renaming a cut
Go to the bin :

Select the cut to rename.
Do a right click on it. The following menu is displayed :

Choose « rename ». A window is shown to rename the cut.
Enter the cut name.

Click on « OK » or press « Enter » on your keyboard.
Your cut is renamed.
19.14.3.Restoring a cut
On the track, click on the cut mark (brown line).
The bin selects the cut belonging to the selected cut mark.
In the bin, do a right click on the highlighted cut.The following menu is displayed :

Choose « Paste ».
The cut is restored.
NB : you can also put the cut back by doing a drag and drop.
19.14.4.Deleting a cut (Del)
In the bin, select the cut to delete.
Do a right click on it. The following menu is displayed.

Choose « Delete ».
The cut is deleted.
19.15.Text Editing
19.15.1.The Splitter
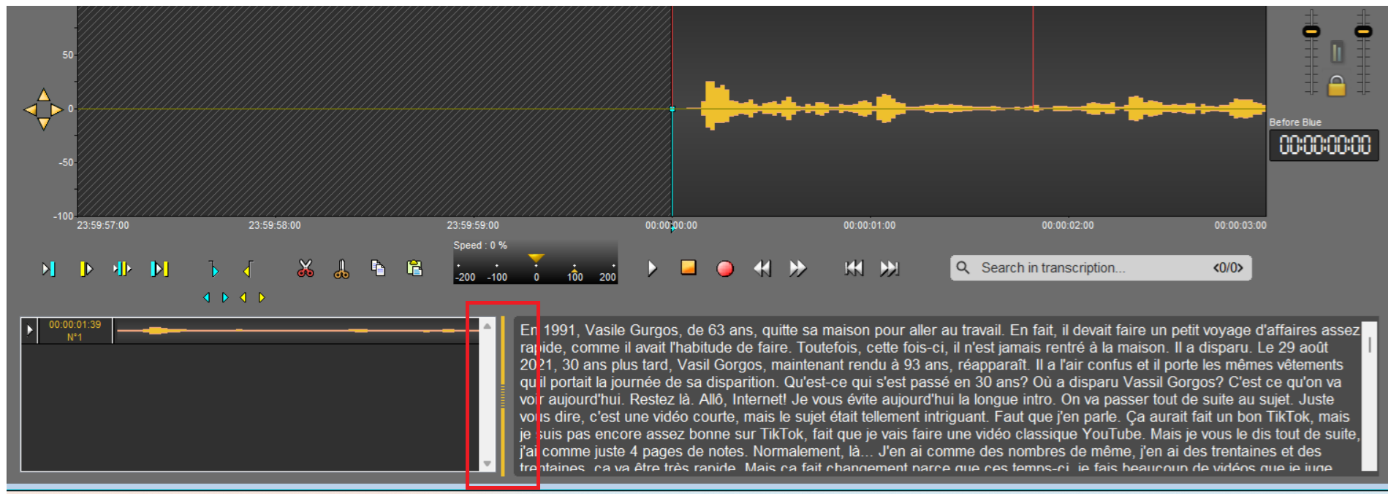
The splitter allows you to adjust the space allocated to the text area or the bin. Its position is saved when RadioAssist is closed, so it will be retained for the next startup.
19.15.2.Expanding the Text Area
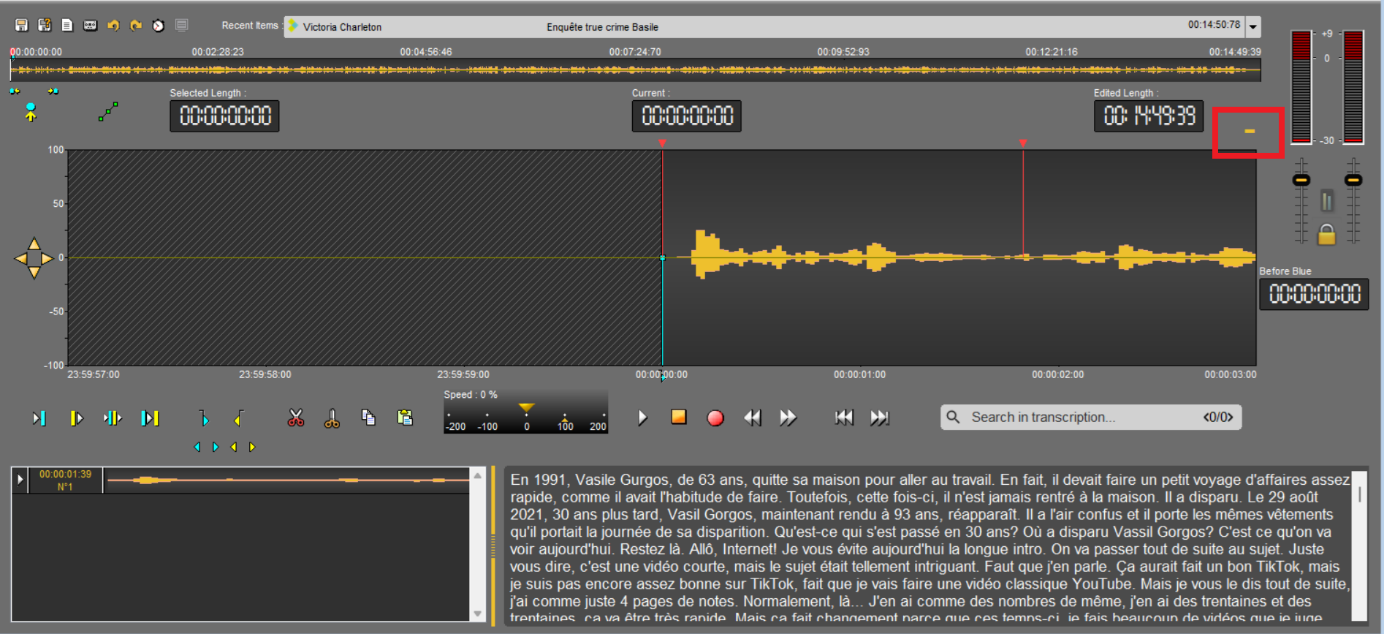
The +/- button located at the top right of the audio track allows you to minimize the track, giving more space to the text area and the bin, thus reducing the size of the audio track.
19.15.3.The Text Area
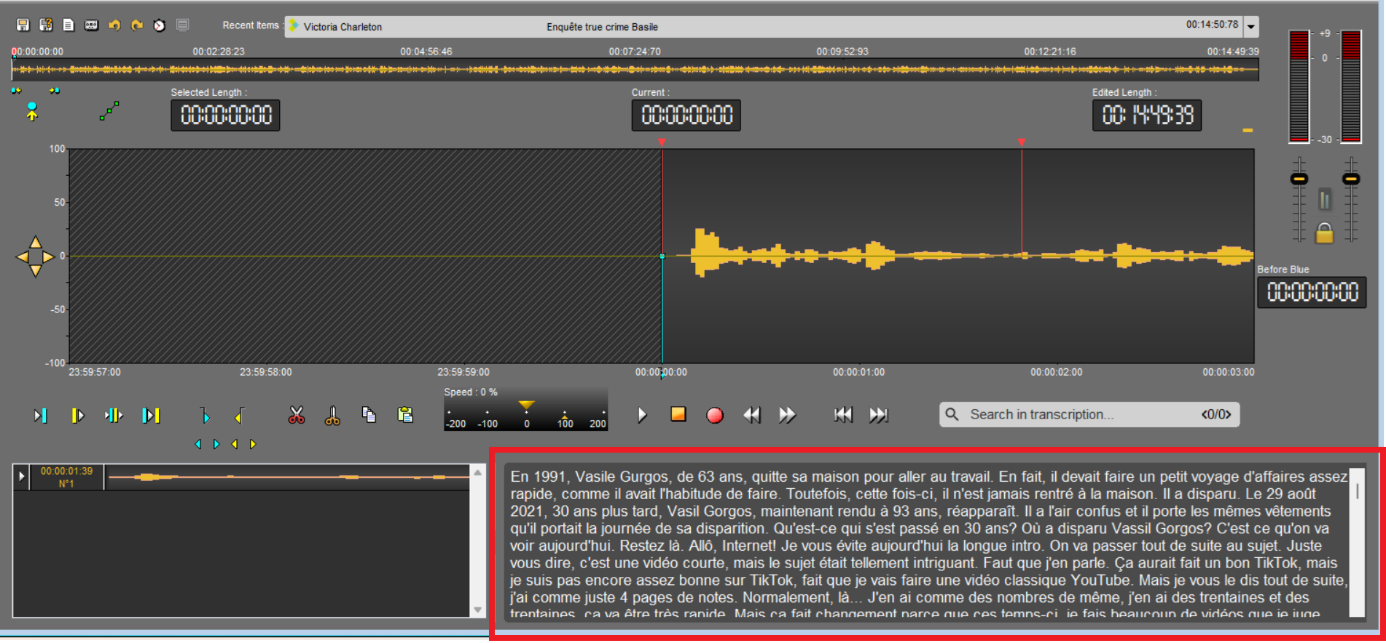
If a raw file or master is dragged and dropped into Snippet and has a transcription, the transcription will appear in the text area.
Text selection can only be made from left to right; the background of the selected text appears in blue.
Any selection in the text also selects the corresponding audio, and vice versa.

During playback, if the playhead is positioned on a word in the audio track, the background of that word appears in yellow. It will turn green if the playhead is within a selected text.
You can zoom in or out of the text in the text area by holding down the Ctrl key and using the mouse wheel.
19.15.4.Text Search
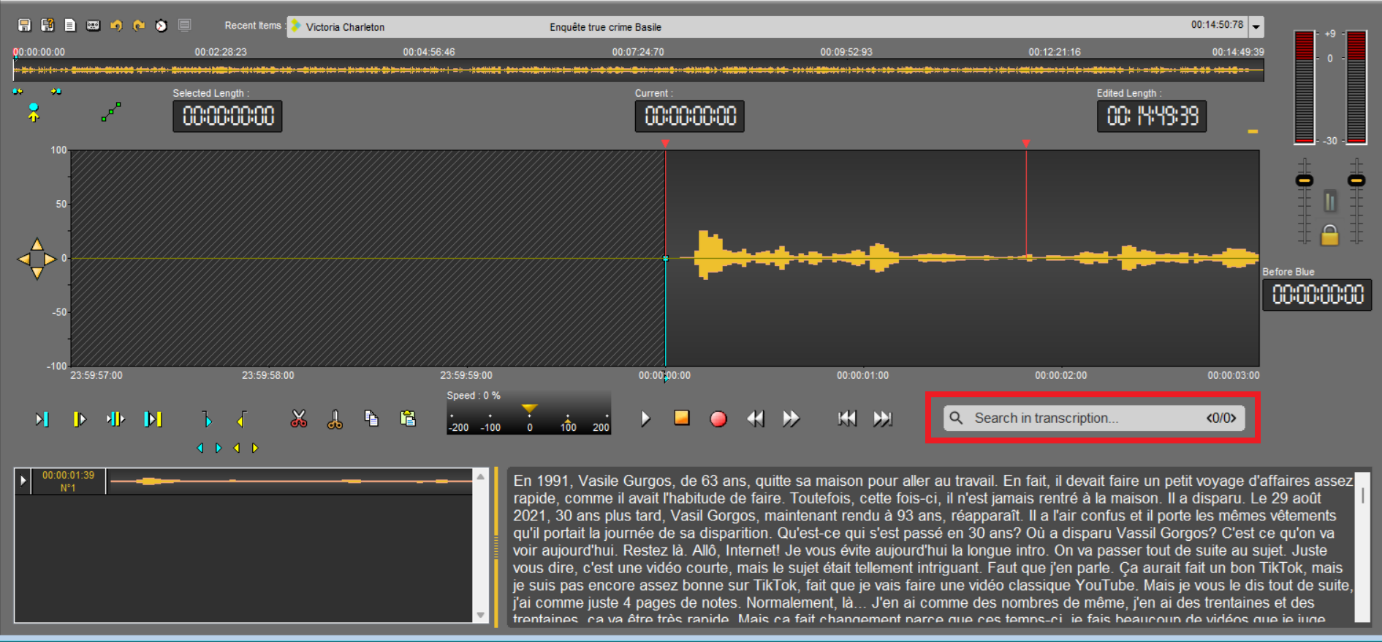
The text search feature allows you to find and select a word in the text area.
The left and right arrows allow you to navigate through the text area if there are multiple occurrences of the searched word.

Each click on the arrows selects the next or previous occurrence.
The number of occurrences is displayed as a fraction: the numerator shows the selected occurrence, and the denominator shows the total number of occurrences found in the text area.
19.16.Generating a master from Snippet (Ctrl + W)
To generate a master from "Snippet" :
Select the sound-bite to masterize thanks to the blue and the yellow lines (press Ctrl + A to select the entire sound file).
Do a right-click on it. The following menu is displayed.
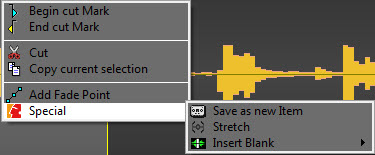
Click on « Special » and then « Save as a new item ».

Modify the data if needed.
Save.

The item is saved in the database
NB : this feature is available in the bin as well.
19.17.Straightening a cut
If a cut is not good (the end of a word is missing for instance), you can straighten it to retrieve just the part of the word that you have cut by mistake.
To straighten a cut, click on the cut mark (arrow pointing downward). This one turns to orange.

Straighten your cut thanks to the following buttons :
to straighten the beginning of the cut (blue).
to straighten the end of the cut (yellow).
19.18.The trimming "function"
The "Finalize" function is used to delete blanks at the beginning and at the end of the recording.
To do so, do a right click on the closed scissors icon  .
.
19.19.Undo (Ctrl + Z)
To undo an action, Click on the following icon : 
NB : you can undo up to 256 actions before saving.
19.20.Redo (Ctrl + Y)
When you undo and you change your mind, you can redo the action by clicking on the following icon : .
19.21.Juxtaposing several audio items
In snippet, you can juxtapose several audio items on the same track.
Once you have inserted the first item, replace the playhead where you want to insert the second audio item.
Then, select the item from the database and drag it down on the track (or double-click on it, or press "Enter" ).
The second audio item is inserted. The color is different.
You can insert as many items as you want.
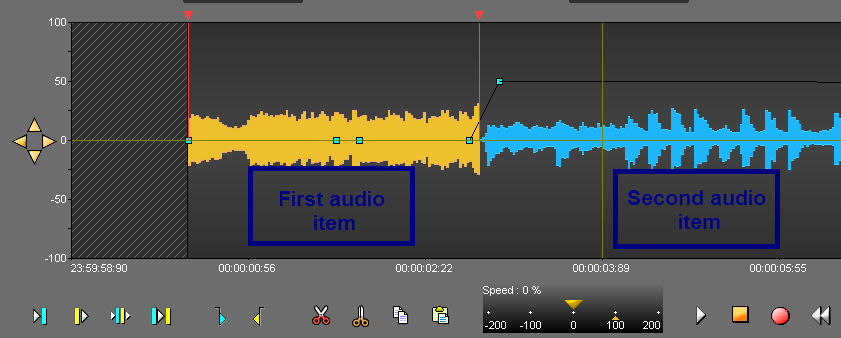
Attention : you can juxtapose original items 

 , master items but not edit sessions together.
19.22.Go to beginning (F8)
To go to the begin of an item, click on the following icon :

19.23.Go to end (F9)
To go to the end of an item, click on the following icon :

19.24.Adding a fade point in Snippet (Ctrl + right click)
To add a fade point :
Do a right click on the wave form, where you want to add a new fade point.
The following menu is displayed.

Click on « Add fade point ». The fade point is displayed.
NB : Ctrl + right click on the wave form allows you to create a new fade point without using the contextual menu.
19.25.Deleting a fade point in snippet (Ctrl + right click)
To delete a fade point :
Do a right click on the fade point you want to delete.

Click on "Remove fade point" (this function is only available if you are on a fade point. Otherwise, it is the "add a fade point" which is displayed).
The fade point disappears.
Attention : you can not delete the default points (set by Radio-Assist).
NB : Ctrl + right-click on the wave form allows you to delete a new fade point without using the contextual menu.
19.26.Hiding the fade points
To hide fade points, click on the following icon : 
a red cross is displayed on the icon  .
.
NB : The fade points are not visible but you can still listen to them.
19.27.Visualizing the fade points
If you have hidden your fade points and you want them back, click on the following icon :  .
.
The red cross on the icon disappears  , and your fade points are visible again.
19.28.Modifying the global level of the sound
To modify the global level of your sound :
Click on the red horizontal line (separating your track in 2), a double arrow is displayed.
Increase or decrease the sound level by moving the black line which appears.
Release the mouse button.

19.29.Modifying the sound level
To modify a fade point :
Click on the fade point to move (four arrows are displayed) and drag it to the chosen place.
Release the mouse button.
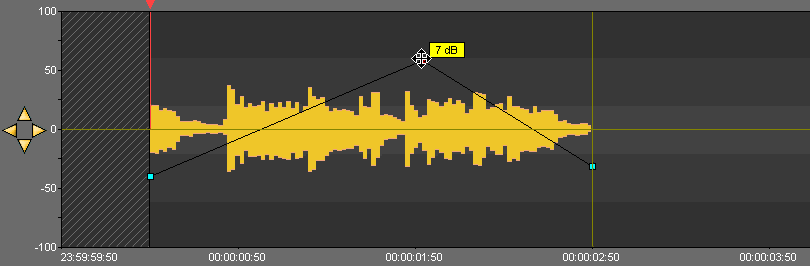
19.30.Display AirRun markers
It is possible to display on the sounds that comes from the Feed, the markers that delimit each element played (beginning of songs, beginning of ads, beginning of jingles, etc ...)
To make these markers appear, you must :
Select a sound from the Feed tab in the Browser.
Drag and Drop it into Snippet
Right click on the button  to display the list of channels.
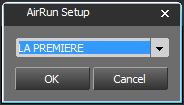
Select the channel for this sound.
Click on  .
.
The button turns green  and the markers are displayed in the sound.
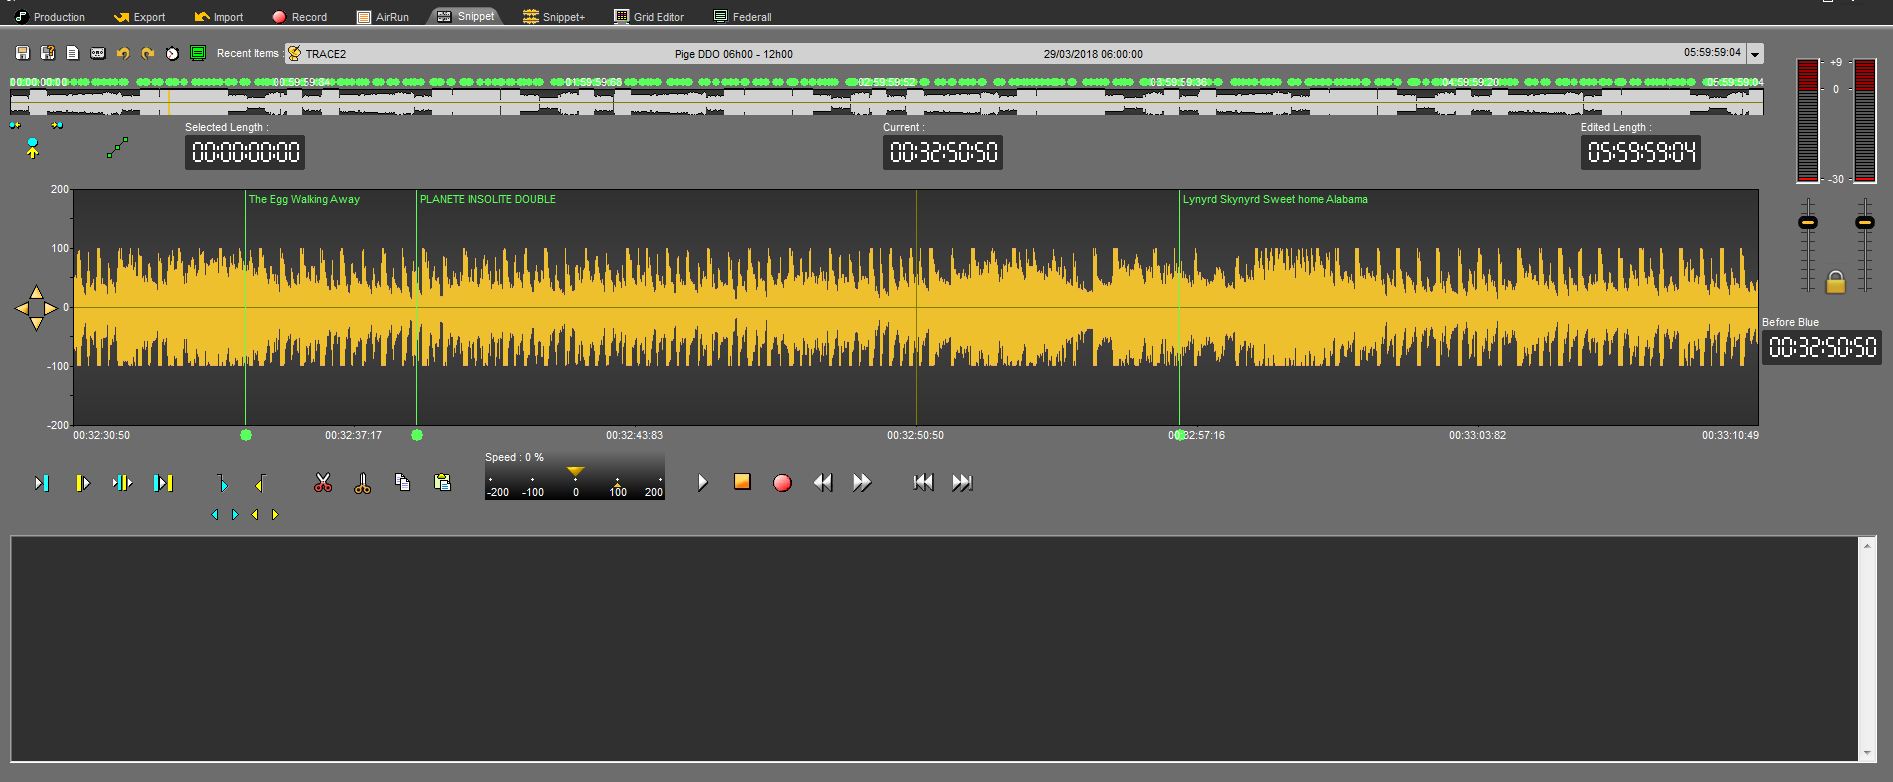
To make the markers disappear, click on 
 . It turns grey and the markers are not shown anymore.

19.31.Set a marker in Snippet (F1)
To set a marker on your item :
Place the playhead where you want to insert the marker.
Click on « Set a marker »  .
.
19.32.Renaming a marker in Snippet
To rename a marker :
Do a right-click on the marker number you want to rename. A menu is displayed.

Choose « Rename locator ».
Enter the marker name.
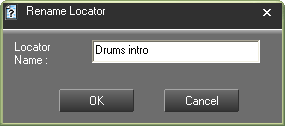
Click on « OK » or press "Enter" with you keyboard.
19.33.Moving from marker to marker (1...9)
To move from marker to marker, you can go straight to specified marker using the number pad, from 1 to 9.
Or, use the arrows below the "set locator" icon to go from one marker to the other with no number limitation.

19.34.Deleting a marker
To delete a marker :
Do a right-click on the marker number you want to delete. A menu is displayed.

Choose « delete the locator ».
19.35.Copying and pasting a soundbyte in snippet (Ctrl + C/Ctrl + V)
To copy and paste a sound bite :
Select between the blue and the yellow lines the part to copy.
Click on « Copy » (or Ctrl + C)  .
.
Place the playhead where you want to paste the sound bite.
Click on « Paste » (or Ctrl + V)  .
.
19.36.Stretching a selection
The "Stretch" function enables you to increase or decrease the duration of the sound bite you have selected, without altering the pitch.
To stretch a selection :
Select the part you want to stretch thanks to the blue and the yellow lines.
Do a right-click. A menu is shown.
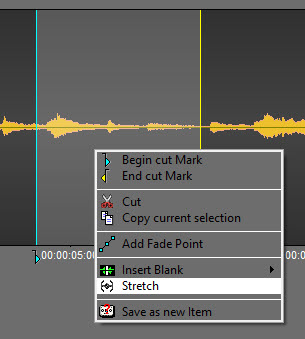
Click on Special then, click on Stretch.

In the stretch window, enter the new duration or modify the percentage (up to 10%).
You can listen to the result by clicking on  .
.
Click on "Save"  .
.
The sound bite you have stretched is displayed on the track, with another color.
If you click on  , the following window is shown :

Click on  .
.
The sound bite you have stretched is displayed on the track, with another color and is also saved in the database.
NB : The original sound bite is available in the bin. Therefore, you can retrieve it at any moment.
19.37.Inserting a blank
The "insert blank" function enables you to insert a blank of a predefined length.
To insert a blank :
Place the playhead where you want to insert the blank.
Do a right click. A menu is shown. Click on "Insert blank" and choose the length of your blank.
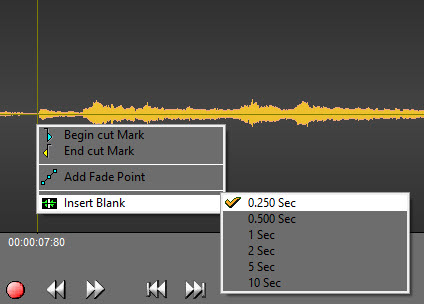
The blank is inserted :

19.38.Crossfade
A crossfade is used to fade out a part of a sound and to fade in another part simultaneously.
The "crossfade" function is used on a cut mark only.
To do a crossfade :
Click on the cut mark. It turns to orange and the "crossfade" function is displayed :
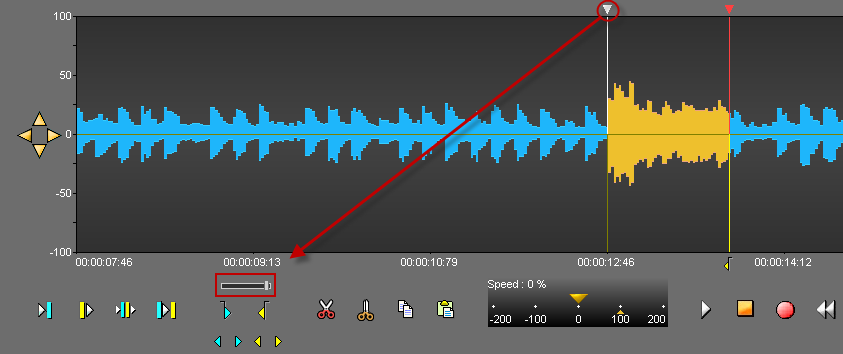
Drag the cursor according to the kind of crossfade you want (light or strong). The more you drag the cursor to the right side, the stronger the crossfade is.
19.39.Recording in "Snippet"
To record in "Snippet":
Click on « record »  .
.
Click on « Pause »  to stop momentarily the recording.
You can resume the pause where the playhead is or somewhere else. To do so, replace the playhead.
Once the recording is finished, click on « stop »  .
.
A window is displayed to save you recording in the Browser.
Fill in the data and save by clicking on the floppy disk icon  (or press "Cancel" to start over).
NB : Your recording has the raw status  .
.
19.40.Absolute time
When the "Absolute time" icon is pressed, the piece does not start at 0, but at the time of the original recording starts. This function is especially useful for simultaneous recordings.
Example : I have a feed which has been recorded at 20h02 until 21h34.
It means that when I play my feed, my counter will go from 00h00h00 to 01h34h00.
However, I would like to go at 20h15 because there was something interesting at that time.
Thus, when I click on the "absolute time" icon, the counter will start at 20h02 and will end at 21h34.
Moreover, by a double-click on the "current" counter, I can enter the time where I want to go.
19.41."Selected length" counter
The "Selected length" counter gives the duration of a selected sequence (between the blue and the yellow lines).

19.42."Current" counter
The "Current" counter gives the position of the playhead (red line). The playhead can be moved to another position on the spectrum by double-clicking on the counter and entering the exact position required. To validate, press Enter or press "Esc" to cancel.
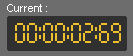
19.43."Edited length" counter
The "edited length" counter gives the total duration of an edit session. Each time you cut a selection, the duration is refreshed.

19.44."Before blue" counter
The "Before blue" counter gives you the duration between the reading head and the blue marker.
If numbers are white, the reading head is after the blue marker.
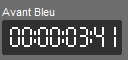
If numbers are orange, the reading head is before the blue marker.

19.45.Recent items list
To get the list of items you have used :
Go to « Recent items ».
Click on the down arrow. A drop-down list is displayed containing the last items used.
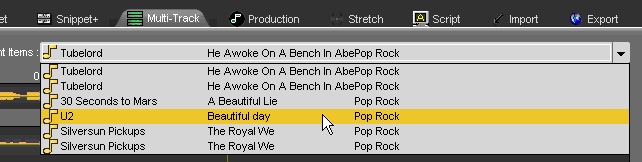
If you click on one item of the list, you insert the item on the track, where the playhead is.
19.46.Resizing the spectrum
Several possibilities are available to resize the spectrum.
Thanks to your keyboard by using the Ctrl + arrow keys.
OR
Use the 4 arrows available at the left side of your spectrum (2 horizontal arrows and 2 vertical arrows).

OR
Use the mouse wheel.
19.47.Saving an edit session (Ctrl + S)
To save an edit session, use the following functions :
 Save : to save an edit session. This edit session is inserted in the database under the chosen category.
If modifications are done from an existing edit session, this one is updated and the previous version is replaced by the new one.
 Save as : To save an edit session under a new name.
If modifications are done from an existing edit session, you will have two versions of it.
 New : to create a new edit session.
19.48.Snapshot
A right click on the "Save" icon  displays the "Snapshot" function.
The "Snapshot" function is designed to save different versions of the edit session each "x" minutes automatically.
Thus, it is possible to reload an edited version.
To reload a previous version of an edit session :
Do a right-click on the "save" icon  .
.
A "Load Snapshot save" window will appear with all the different versions.
Select the version to reload.
Double-click on it or click on "OK".
19.49.Snippet Shortcuts
F1 : Set locators - or - Ctrl + locator number
F3 : Set the blue line
F4 : Set the yellow line
F5 or Del : Cut the selection
F6 : Play 2 seconds before the blue, 2 seconds after the yellow
F7 : Play the contents of a cut (2 seconds after the blue line and 2 seconds before the yellow line)
F8 : Go to the beginning
F9 : Go to the end
F10 : Fast rewind
F11 : Fast forward
Space bar : Play/Stop
Ctrl + A : Select the track
Ctrl + N : New document
Ctrl + Z : Undo
Ctrl + Y : Redo
Ctrl + C : Copy
Ctrl + X : Cut
Ctrl + V : Paste
Ctrl + 1..9 : Replace the markers
Ctrl + O : Retrieve the audio file used in the track from the Browser
Ctrl + S : Save
Ctrl + W : Generate a master
Ctrl + left arrow* : Zoom backward
Ctrl + right arrow* : Zoom forward
Page up : Go to the blue line
Page down : Go to the yellow line
1…9 : Go straight to one specified locator using the number pad
With the mouse wheel :
Mouse wheel : horizontal zoom in/zoom out
Shift + Mouse wheel : vertical zoom in/zoom out
Ctrl + Mouse wheel : scroll right/left one page
NB : "Left arrow" and "right arrow" are keys board.
20.Snippet+

"Snippet+" tool of Radio-Assist
20.1.Workflow
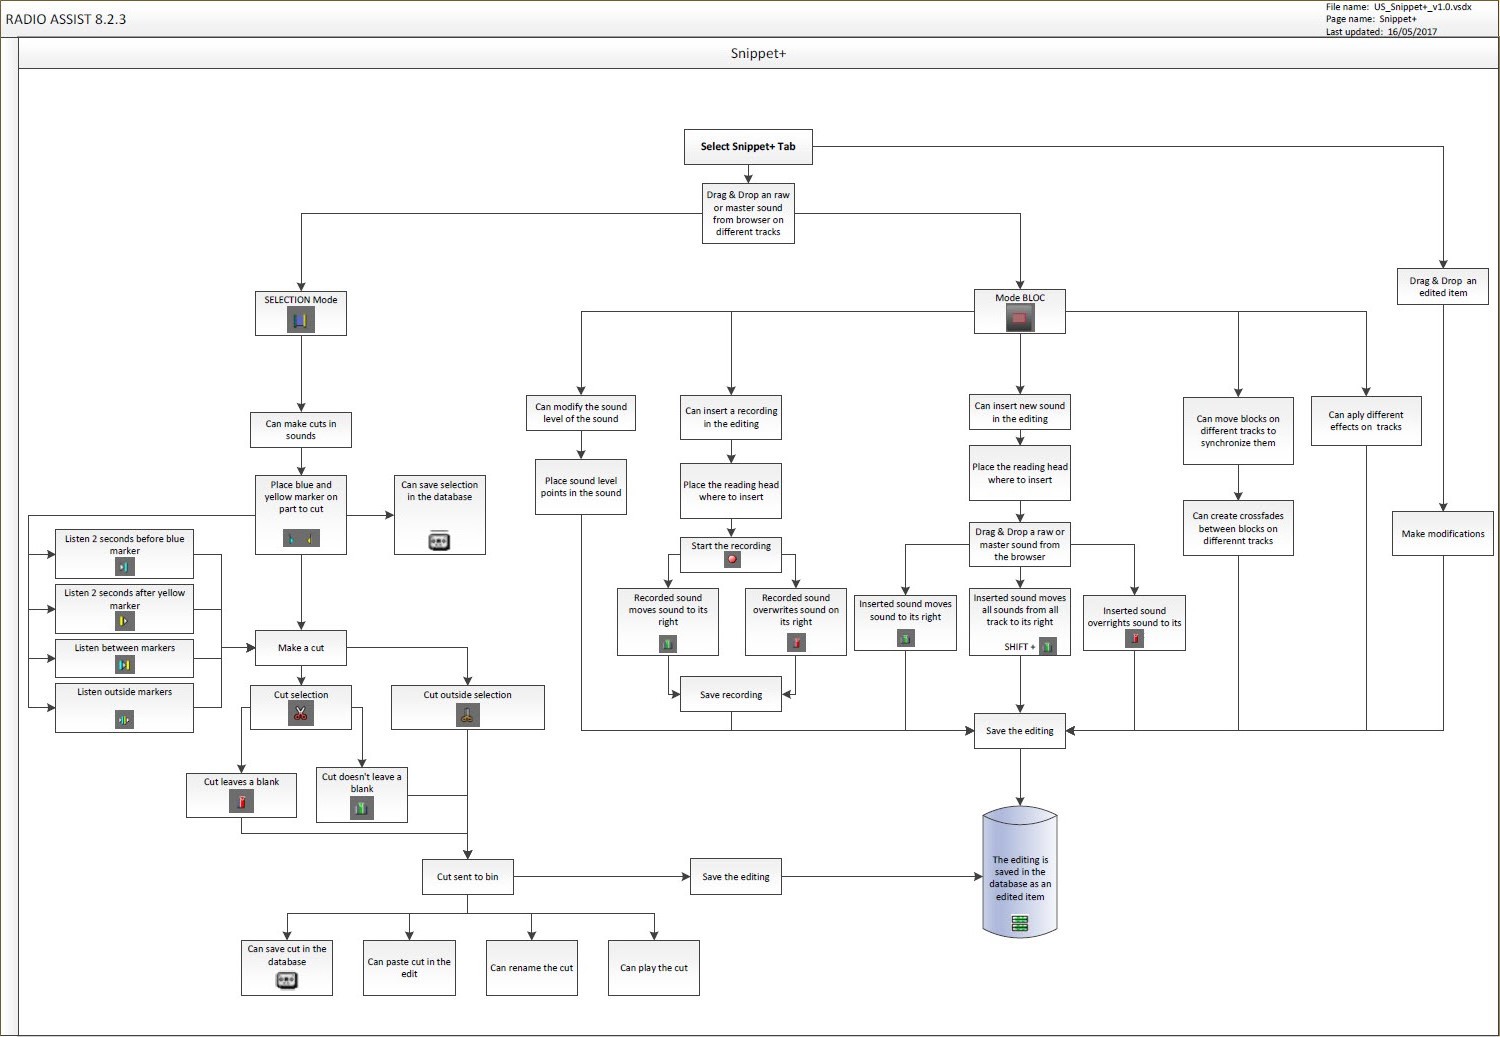
20.2.Snippet+ definition
Snippet+ is a multi-track tool allowing users to edit their work based on several sound files.
20.3.Clip and Selection modes
In Snippet+, you can choose between two modes :
Clip mode  : it allows you to move the clips on the tracks.
Selection mode  : it allows you to create a selection area (with the possibility to include several tracks, simply by extending your selection to the next tracks)
20.4.Zoom buttons
Buttons on the right of the screen are used to zoom or center the tracks on the screen.

Left arrow button : backward zoom.
Right arrow button : forward zoom.
Up button : Vertical zoom on tracks.
Down button : Vertical un-zoom on tracks.
Middle button : Center all the tracks on the screen.
20.5.Cutting options
In the « Snippet+ » tool, 3 cutting options are available :
IN SELECTION MODE
Ø Removing mode (you select the part to delete).
To do so, use the "opened scissors" icon which is used to cut what you have selected between the blue and the yellow lines.
Ø Adding mode (you select the part to keep).
To do so, use the "closed scissors" icon which is used to keep what you have selected between the blue and the yellow lines.
IN CLIP MODE
Whatever the pair of scissor you choose, the function is the same: the track is divided into two parts and the separation is done where your playhead is.
In this mode, the blue and yellow lines are here to pre-listen to the sound. It has nothing to do with the cutting action.
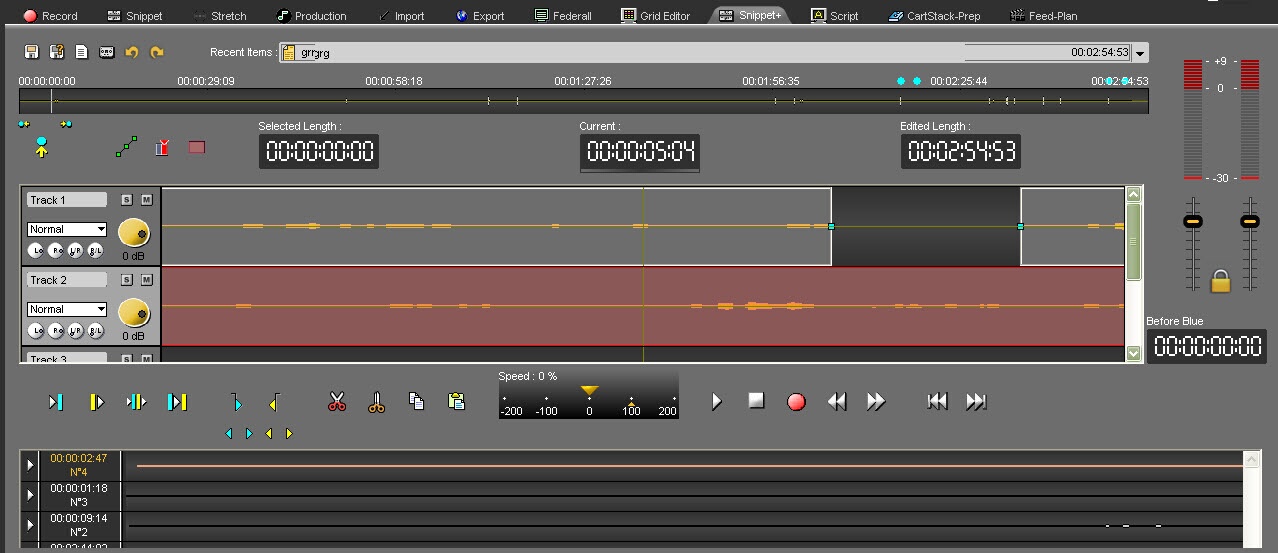
20.6.Insertion / Replacement mode
It is important to clearly dissociate the "Insertion mode" from the "Remplacement mode" according to what you want to do in Snippet+.


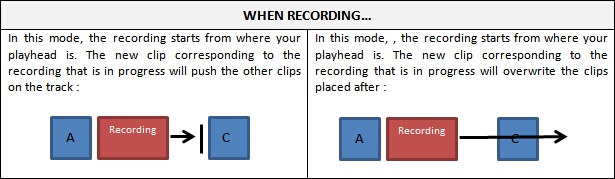
20.6.1.Multi-track insertion
When you want to insert sounds that are present on several tracks, you can insert one sound and shift all the tracks.
Sounds that "straddle" the playback head will not be cut.
To do this, use the "Shift" button at the same time as you drag and drop the sound into the edit.

Starting situation:
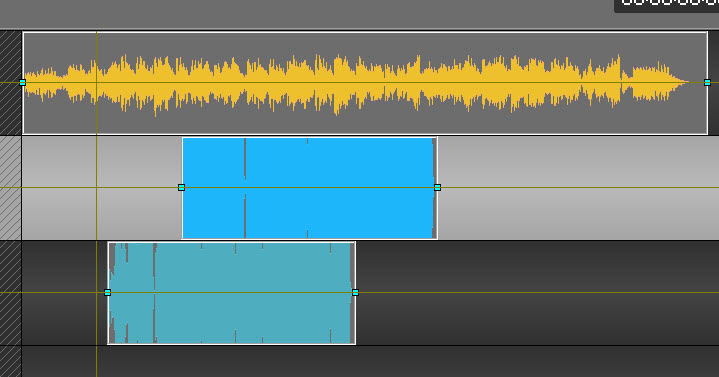
Insert without using the "Shift" key by dragging the sound:
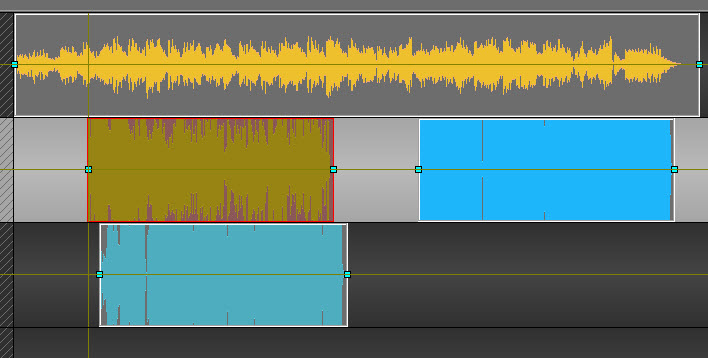
Only the sound of track 2 has been moved
Insert using the "Shift" key by dragging the sound:
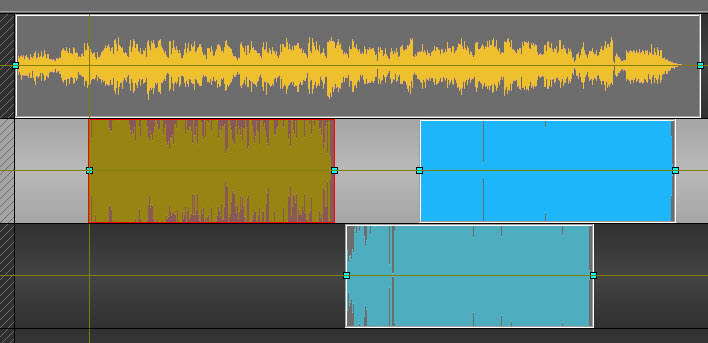
The sounds of tracks 2 and 3 have been moved.
The sound of track 1 is not muted.
IMPORTANT: In the same way, for deletion, we use the "SHIFT" key to shift all tracks when deleting a block.
NEW: Multi-track insertion mode  (Insert All) gives you the same behaviour as the "SHIFT" key.
20.7.Ripple edit (in Clip mode)
Linked to the activation of insert modes, the "ripple edit" function has the following effects:
In Replace mode  : moving a clip in a track affects only the selected clip.
In Insert mode  : moving a clip selects all the clips located after it on the same track and moves them at the same time, preserving the gap between the clips. The track is "shifted" from this block onwards.
In Multi-track Insert (Insert All) mode  : all the clips starting at the same time or located after the beginning of the moved clip - on all the tracks - are selected and moved at the same time as the chosen clip, preserving their relative spacing. The edit is "shifted" from this block.
The "R" key (like Ripple) toggles between Replace and Insert modes, and the "T" key (next to the R) toggles between Replace and Insert All modes. So you're always 1 key away from each mode...
20.8.Editing in Snippet+
Click on the "Snippet+" tab.
In the Browser, select the item you want to edit.
To edit a new item you can use original 
 or master items .
To modify an edit session, you can select an edit session coming from the "Snippet+" tool 
 or the "Production" tool .
Place the item on the track. To do so, 3 possibilities are available :
Drag and drop from the database to the track.
Double-click on the item.
Select the item and press "Enter" on you keyboard.
Place the blue and the yellow lines. Then, you have the possibility to keep the selection or to delete it.
Once your blue and your yellow lines are placed approximately, you can readjust them. To do so, go to the blue or to the yellow line and replace them.
You can also do this operation by using the following buttons :


To know the result before cutting, you can use the following play buttons :
 Plays 2 seconds before the start of a cut (before the blue line).
 Plays 2 seconds after the end of a cut (after the yellow line).
 Plays outside the cut (2 seconds before the after and 2 seconds before the yellow line) - (F6)
 Plays the content of a cut (2 seconds after the blue and 2 before the yellow line) - (F7).
NB : A right-click on one of these buttons will play the sequence in a loop until the stop button is activated, so cuts can be modified as you go along.
Once you are satisfied, click on :
 : To delete the selection
 : To keep the selection
Your cut goes to the bin.

To do other cuts, start the operation all over again (place the blue line, the yellow line...).
20.9.Add a track
You can add one or more tracks to "Snippet+"
By default, 4 tracks are available for editing when you open "Snippet+"
If you want to add a new track, right click on any of the track's header.

Select "Add an audio track"
The new track is added :

20.10.Remove a track
To remove a track from "Snippet+", right-click on the track to remove :

Then select "Remove the track".

The track is removed.
20.11.Setting the mark in (blue) - (F3)
To set the mark in, represented by the blue line and marking the begin of your cut, you have to :
Place the playhead where you want to place the blue line.
Click on the following icon :  .
.
NB : you can also set the blue line via the contextual menu, by using the right click of your mouse (function also available in "Snippet") or use F3 (shortcut) (see Snippet+ shortcuts).
20.12.Setting the mark out (yellow) - (F4)
To set the mark out, represented by the yellow line and marking the end of your cut, you have to :
Place the playhead where you want to place the yellow line.
Click on the following icon : .
.
NB : you can also set the yellow line via the contextual menu, by using the right click of your mouse (function also available in "Snippet") or use F4 (shortcut) (see Snippet+ shortcuts).
20.13.Playing 2 seconds before the current cut
To play 2 seconds before the blue line, to know if the blue line is at the right position, click on the following icon : .
NB : if you do a right click on the icon, you play 2 seconds before the blue line in a loop.
20.14.Playing 2 seconds after the current cut
To play 2 seconds after the yellow line, to know if the yellow line is at the right position, click on the following icon : .
NB : if you do a right click on the icon, you play 2 after the yellow line in a loop.
20.15.Simulating a cut
To simulate a cut, meaning to play the result before cutting what you have selected between the blue and the yellow lines, click on the following icon : .
NB : if you do a right-click on the icon, you play 2 seconds before the blue line and 2 seconds after the yellow line in a loop.
20.16.Playing the content of the cut (F8)
To play the content of the cut (between the blue and the yellow lines), click on the following icon:
If the cut duration lasts for more than 4 seconds, only 2 seconds after the blue line and 2 seconds before the yellow line will be played.
NB : if you do a right-click on the icon, you play between the blue and the yellow lines in a loop.
20.17.Cutting a selection (F5 or Del)
There are several ways to cut a selection.
Once you have placed the blue and the yellow lines :
Click on the « cut » icon  .
.
OR
Do a right click on the spectrum and choose the « Cut » function.

OR
Press "F5" or "Del" on your keyboard.
The cut is displayed in the bin.
20.18.Cutting a selection without putting it to the bin
You can cut a selection without putting it to the bin.
Once you have placed the blue and the yellow lines:
Do a right click on the « cut » icon  .
.
OR
Hold the "Shift" key down and click on the « cut » icon  .
.
20.19.Cutting outside the selection
"Cutting outside the selection" means that you keep what you have selected between the blue and the yellow lines.
Once you have placed the blue and the yellow lines:
Click on the « Cut outside selection » icon  .
.
20.20.Playhead
The playhead is the red vertical line in the middle of the track. The playhead is fixed.
When you want to insert the blue, the yellow lines, inset a blank or do any other type of action, you HAVE TO place the playhead at the chosen place.
20.21.The bin
The bin includes the list of all your cuts. Indeed, each time you make a cut or delete an item/block, this cut/delete disappears from the sound and goes to the bin.

By using the combination "Ctrl" + "Sup" or "F5", the element or block is deleted but not moved to the bin.
By doing a right click on a cut, the following menu is displayed :

Play : plays the selected cut.
Rename : renames the selected cut
Paste : pastes the selected cut on the sound, where your playhead is.
Save as a new item : saves the selected cut as a master in the Browser.
Delete : deletes the cut from the bin.
20.21.1.Playing a cut
To play a cut :
Go to the bin :

Select the cut to play and click on the following button :  .
.
You can also do a right-click on the cut. The following menu is displayed :

Click on « Play » to listen to your cut.
20.21.2.Renaming a cut
To rename a cut :
Go to the bin :

Select the cut to rename.
Do a right-click on it. The following menu is displayed :

Choose « rename ». A window is shown to rename the cut.
Enter the cut's name.

Click on « OK » or press « Enter » on your keyboard.
Your cut is renamed.
20.21.3.Restoring a cut
To restore a cut :
On the track, click on the cut mark (brown line).
The bin selects the cut belonging to the selected cut mark.
In the bin, do a right-click on the highlighted cut. The following menu is displayed :

Choose « Paste ».
The cut is restored.
NB : you can also put the cut back by doing a drag-and-drop.
20.21.4.Deleting a cut (Del)
To delete a cut :
In the bin, select the cut to delete.
Do a right-click on it. The following menu is displayed.

Choose « Delete ».
The cut is deleted.
20.22.Clipping Tool
The clipping tool is a tool that allows selecting parts of a sound to insert them into the editing. The tool is located in the tools window of Snippet+.
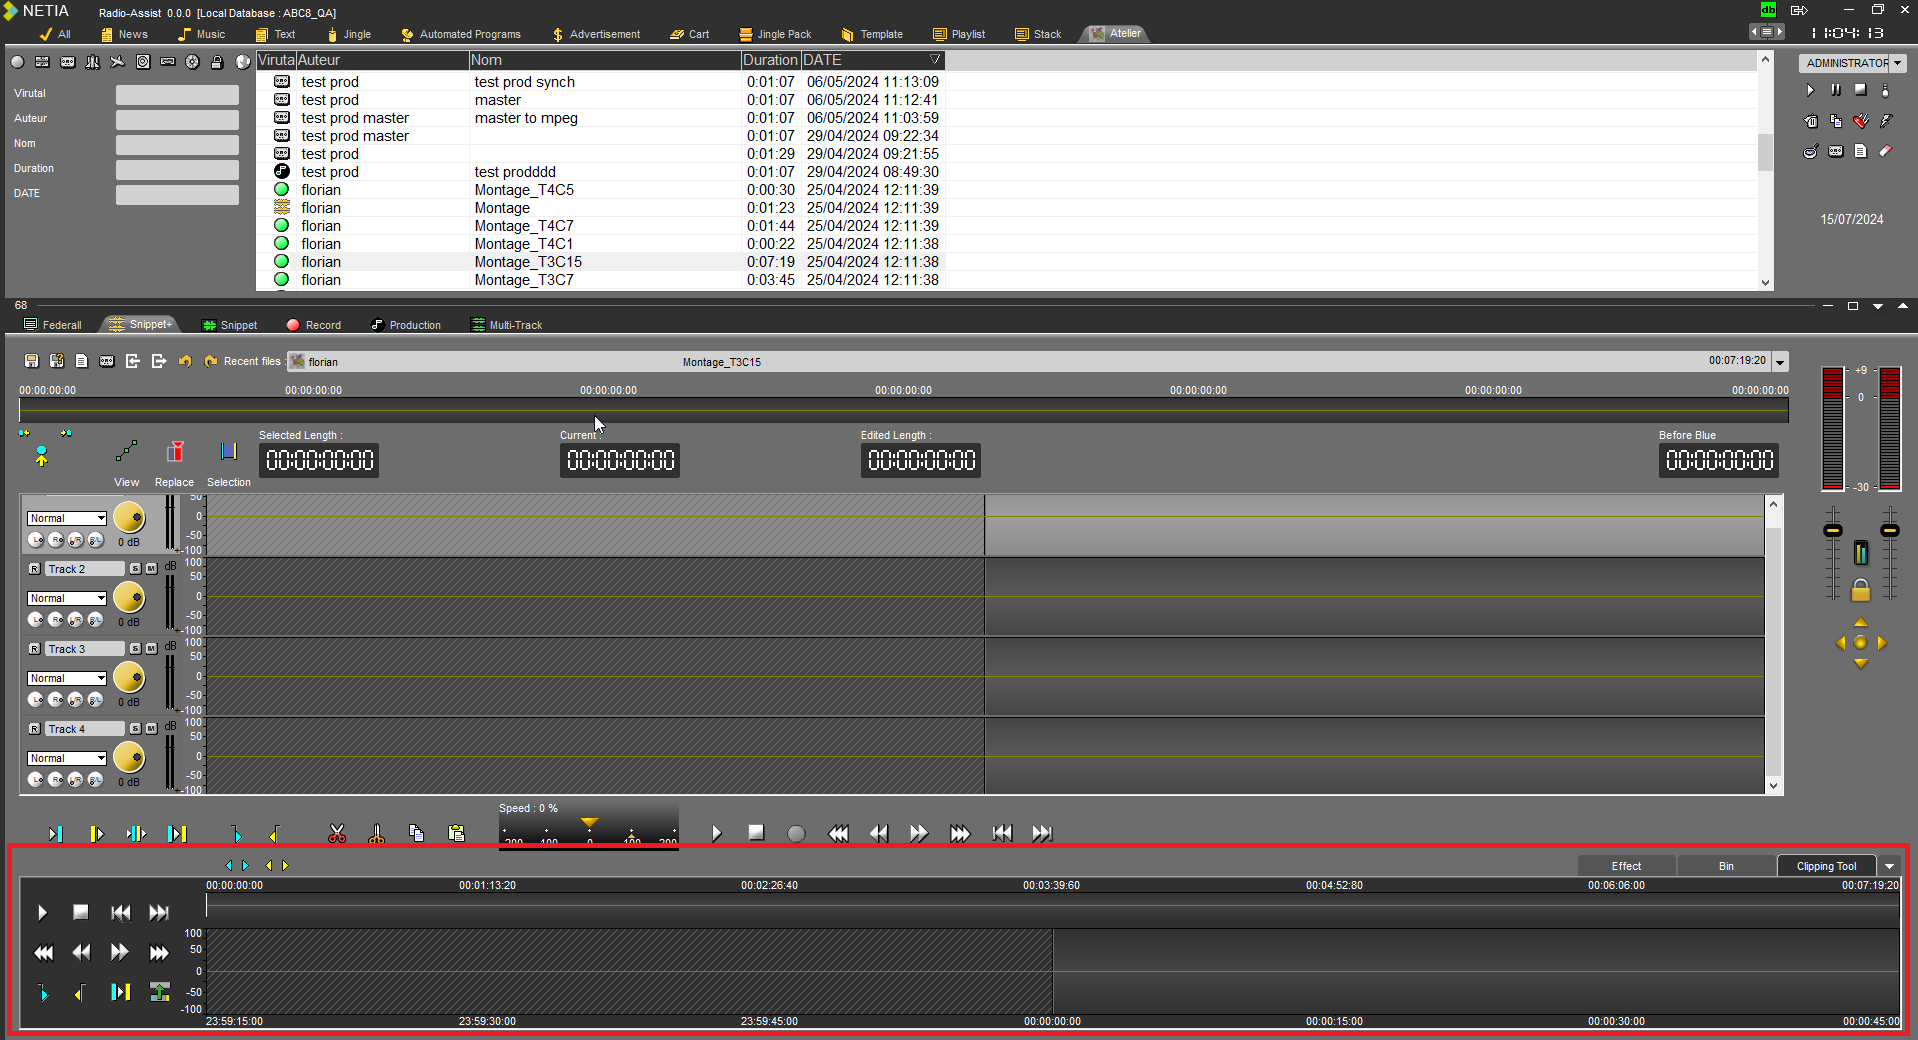
20.22.1.Loading the clipping tool track
To load an item into the clipping tool track, simply drag and drop directly from the browser.
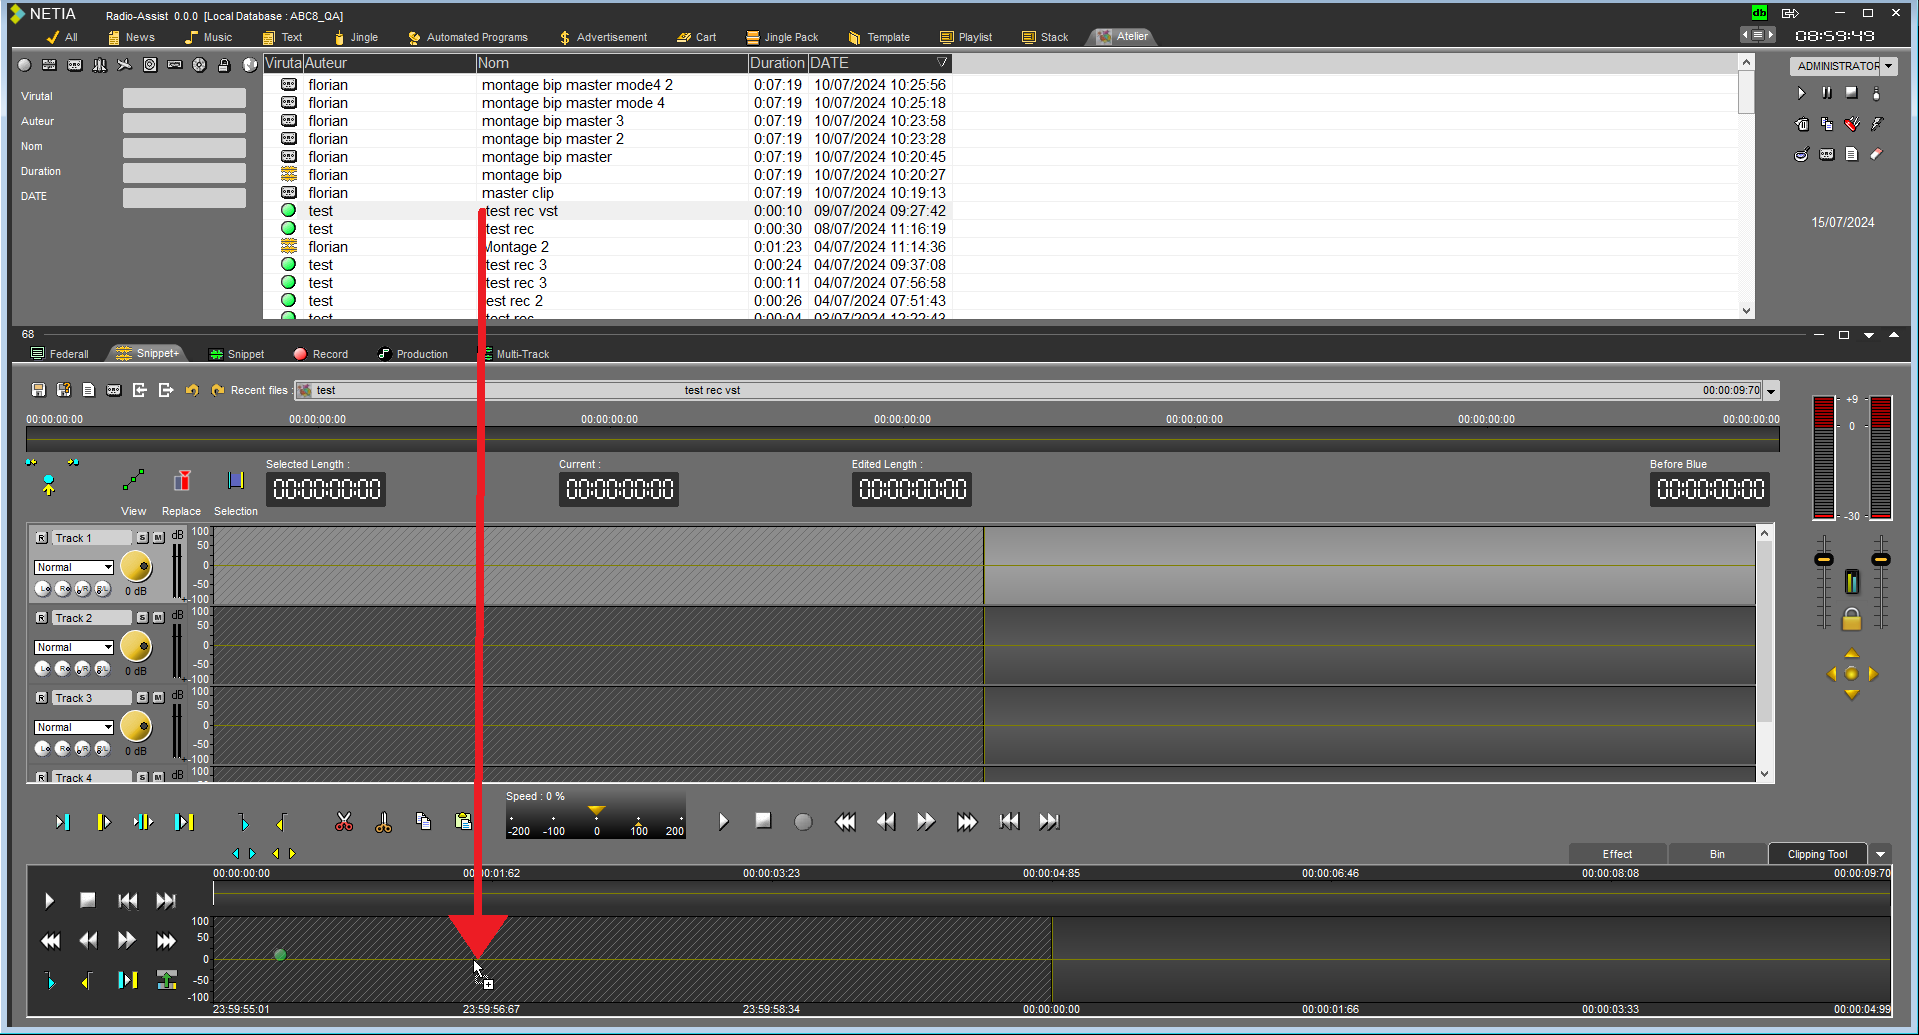
Four types of items can be loaded into the clipping tool track:
A raw file : 
A master : 
A production :
A raw file in progress :
The raw file in progress can come from the automatic recording system FeedIn or from any user workstation making a recording via the Record tab, Snippet, or Snippet+ of RadioAssist.
It is also possible to load the clipping tool track with an item currently being recorded directly from the Recording tab by pressing the Snippet+ button.
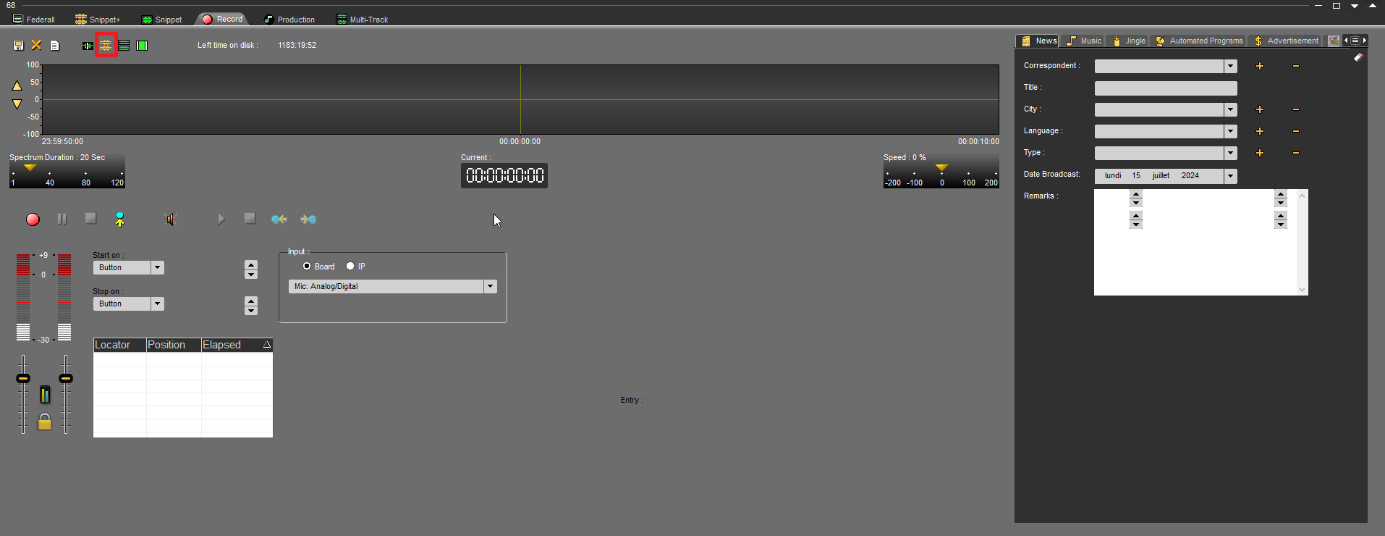
20.22.2.Making a selection in the clipping tool track
To make a selection, hold down the left mouse button while sliding it over the track. The selection ends when you release the left mouse button.
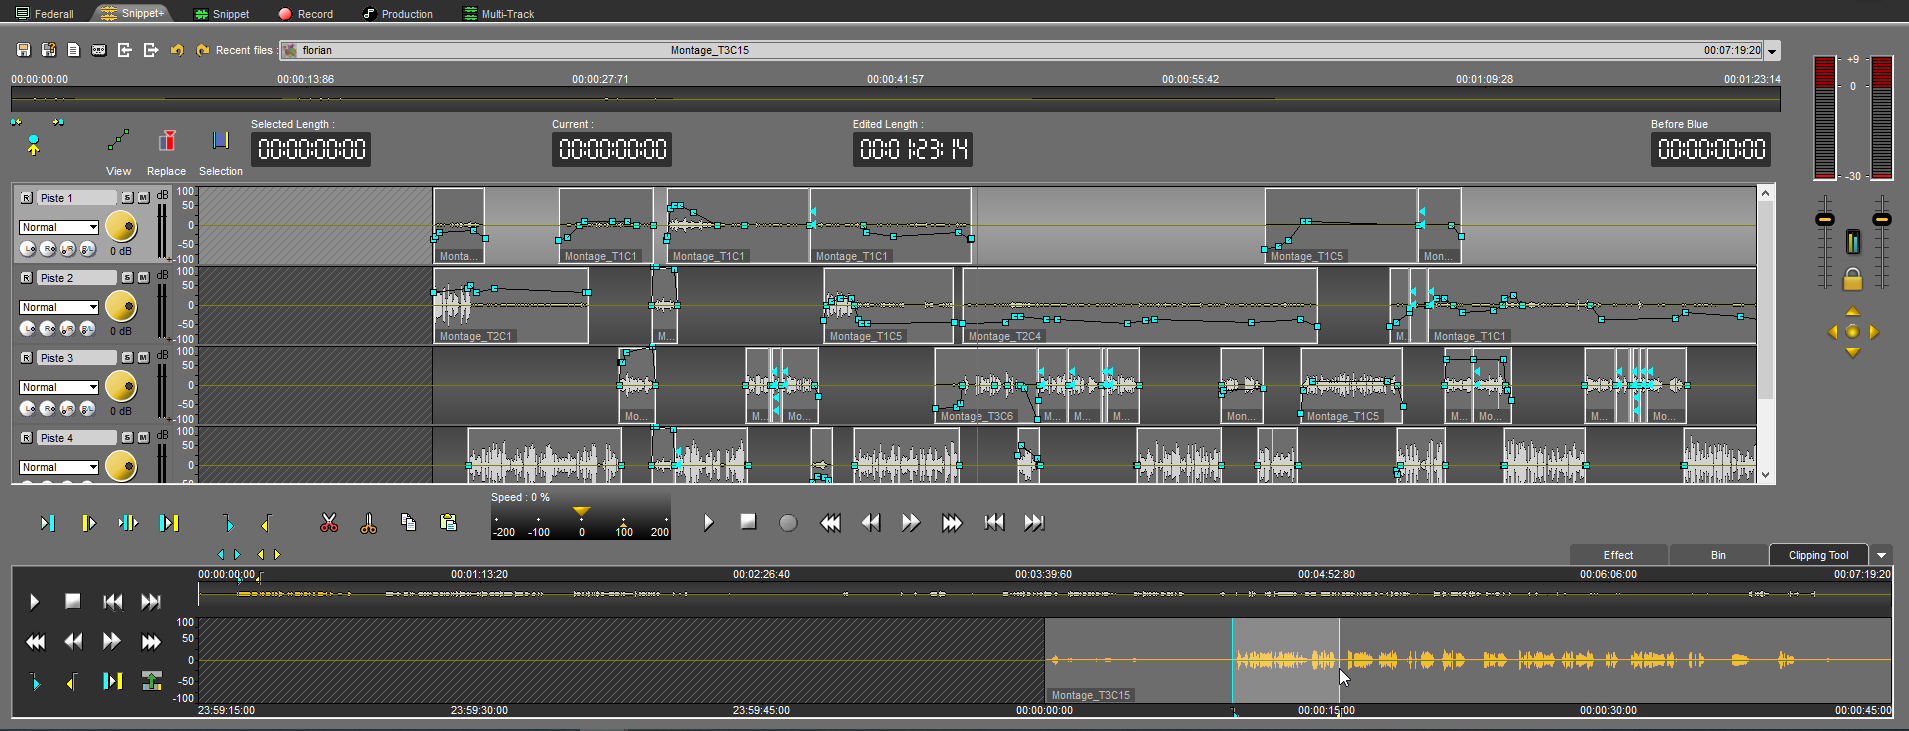
It is possible to place a selection directly by pressing the blue locators buttons (start of selection) and yellow (end of selection).

It is possible to delete a selection by right-clicking on the blue or yellow locators buttons.
20.22.3.Controls
To the left of the clipping tool track are all the controls:
Play : 
Stop : 
Go to start : 
Go to end : 
Fast rewind : 
Slow rewind : 
Slow forward : 
Fast forward : 
Blue locator (start) : 
Yellow locator (end) : 
Play two seconds in the selection : 
Insert :
20.22.4.Copy-Paste
It is also possible to copy a selection using the Ctrl-C shortcut or right-click copy.

To paste the copied selection into the clipping tool track, there are three options:
The paste button or the Ctrl-V shortcut which will paste directly at the playhead of the selected track. 
Right-click on a track and in the menu that appears, left-click on paste will paste directly where the right-click was made.
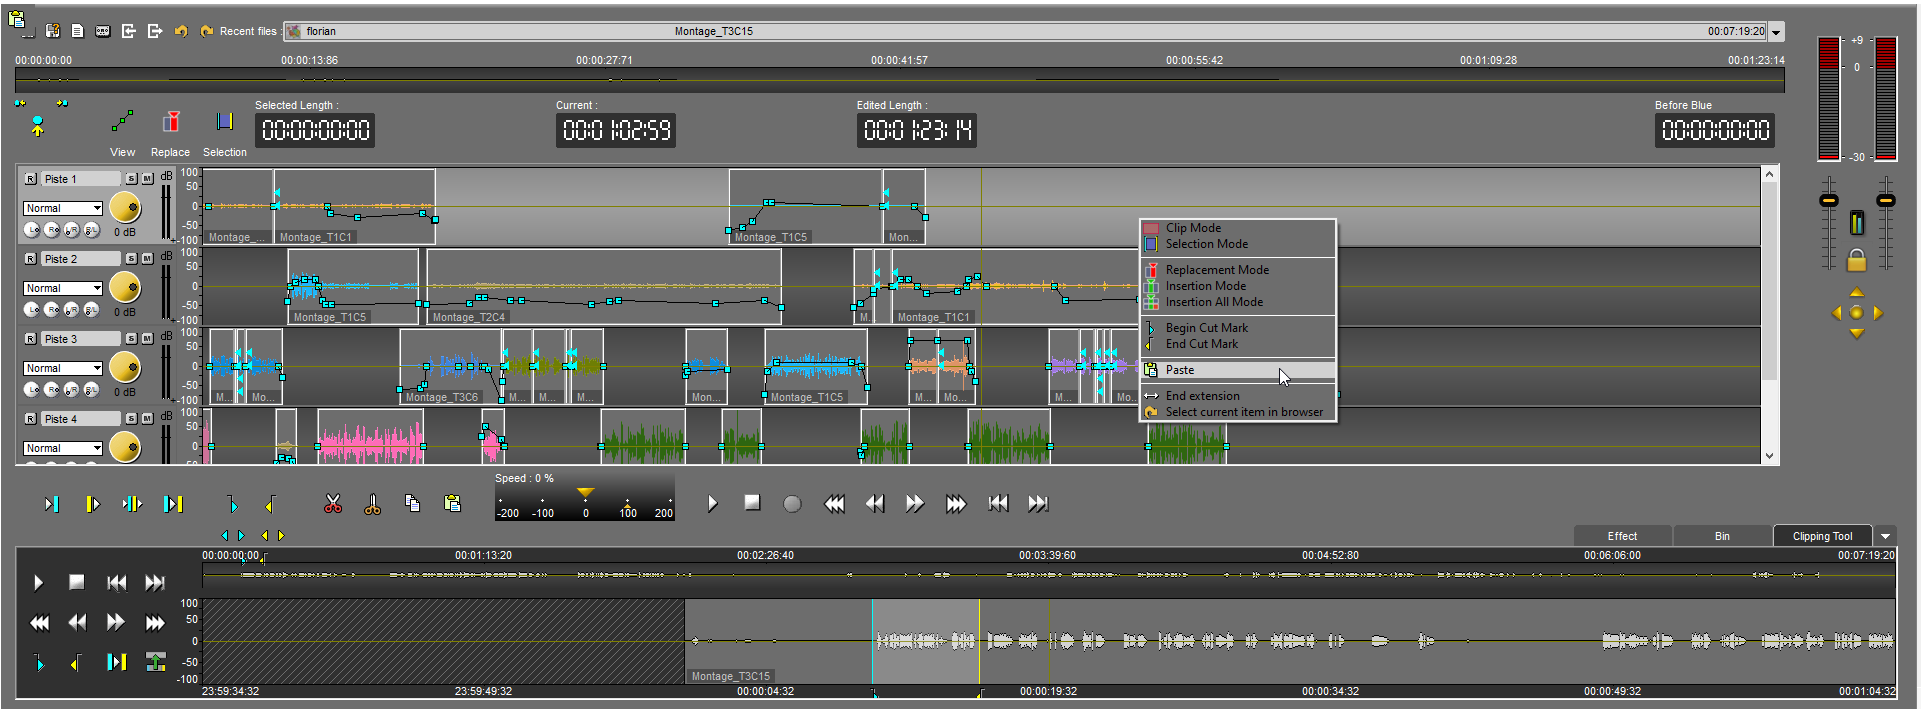
20.22.5.Insert button
The insert button allows you to send the selection directly to the playhead of the selected track in Snippet+ without leaving the focus of the clipping tool track. The Enter key is the shortcut for the insert action.

20.22.6.Focus between clipping tool and Snippet+ editing
If the focus is on the clipping tool track, then the Snippet+ editing will appear in white. If the focus is on the Snippet+ editing, then the clipping tool track will appear in white.
Keyboard shortcuts are focus-sensitive:
For example, play by the space bar depends on the focus between the clipping tool track or Snippet+ editing.
It is possible to switch focus between the clipping tool track and Snippet+ editing directly by pressing the "b" key.
Focus on Snippet+ editing :
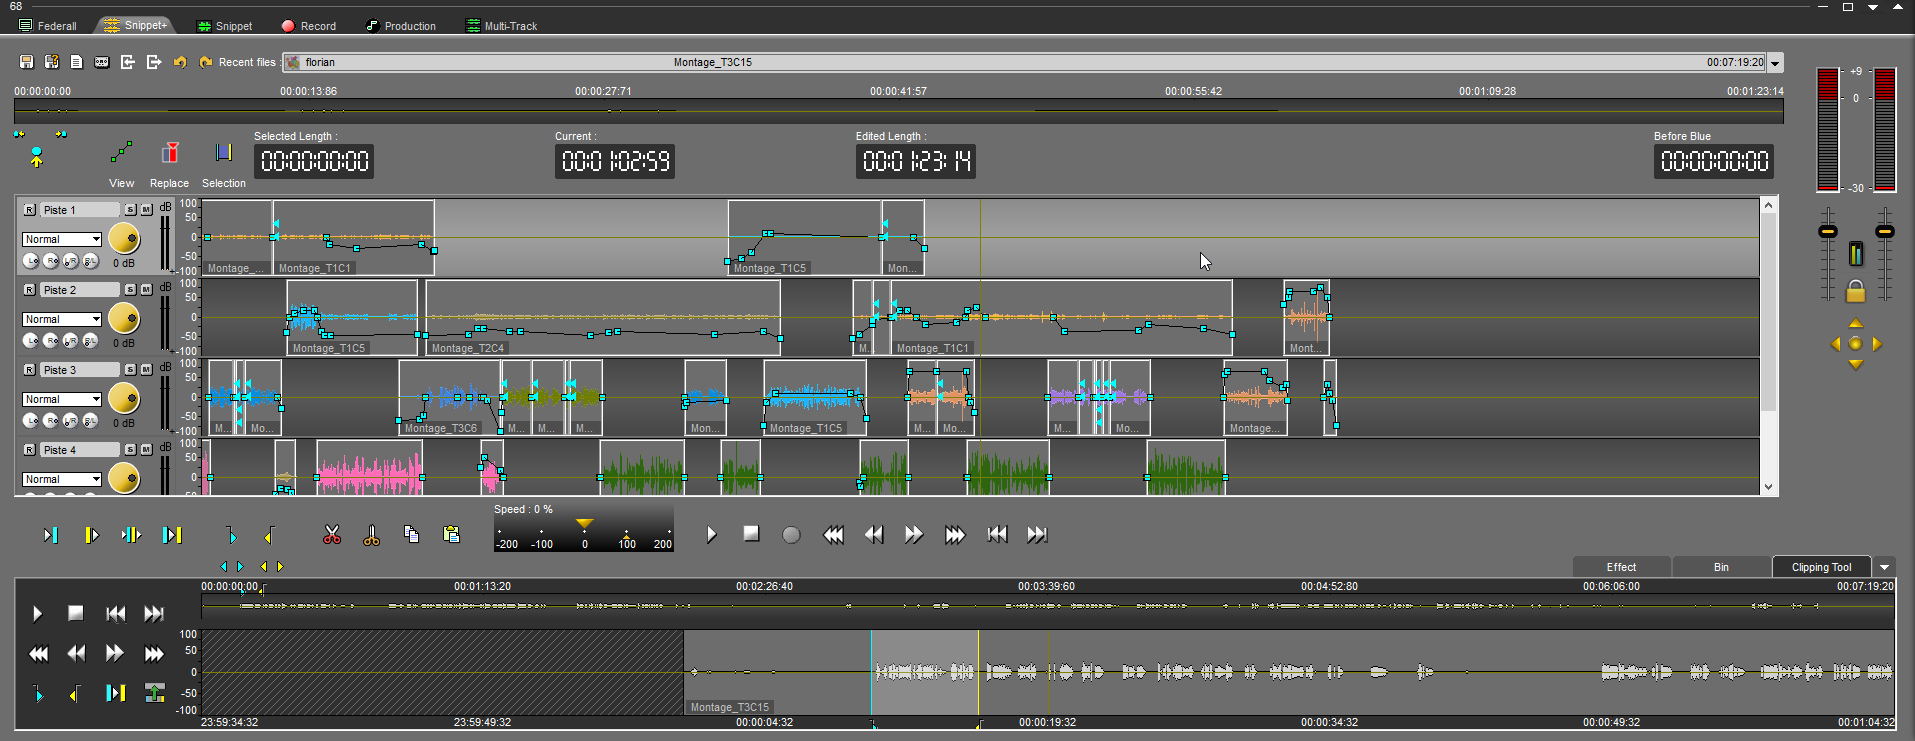
Focus on Clipping Tool track :
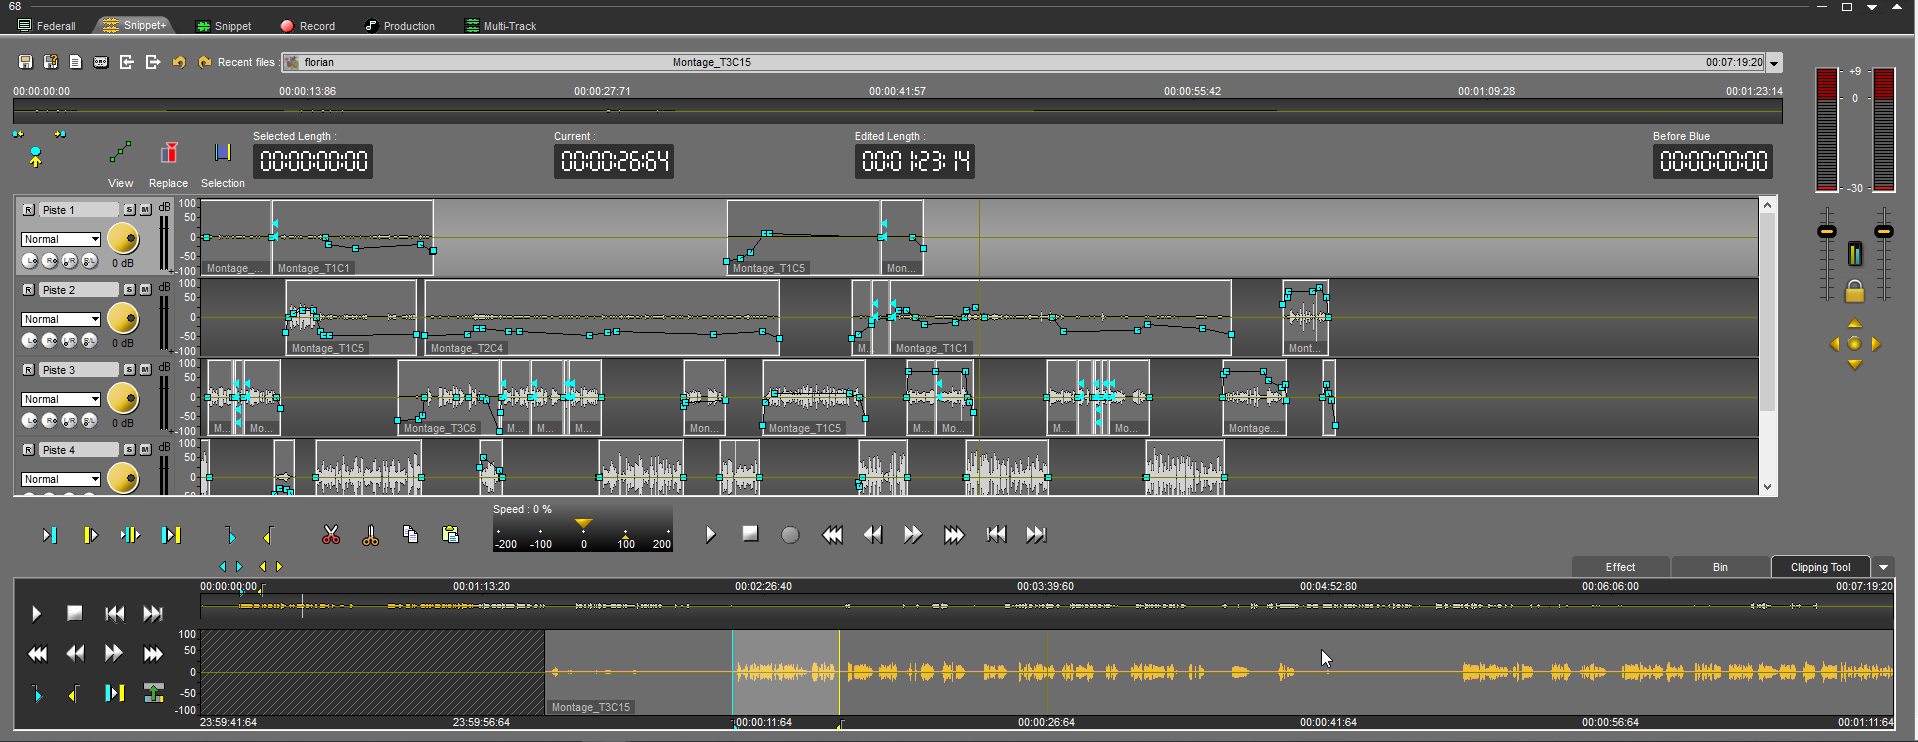
20.22.7.Recording in Snippet+
During a recording in Snippet+, the clipping tool track is no longer available. It reappears when the recording is stopped.
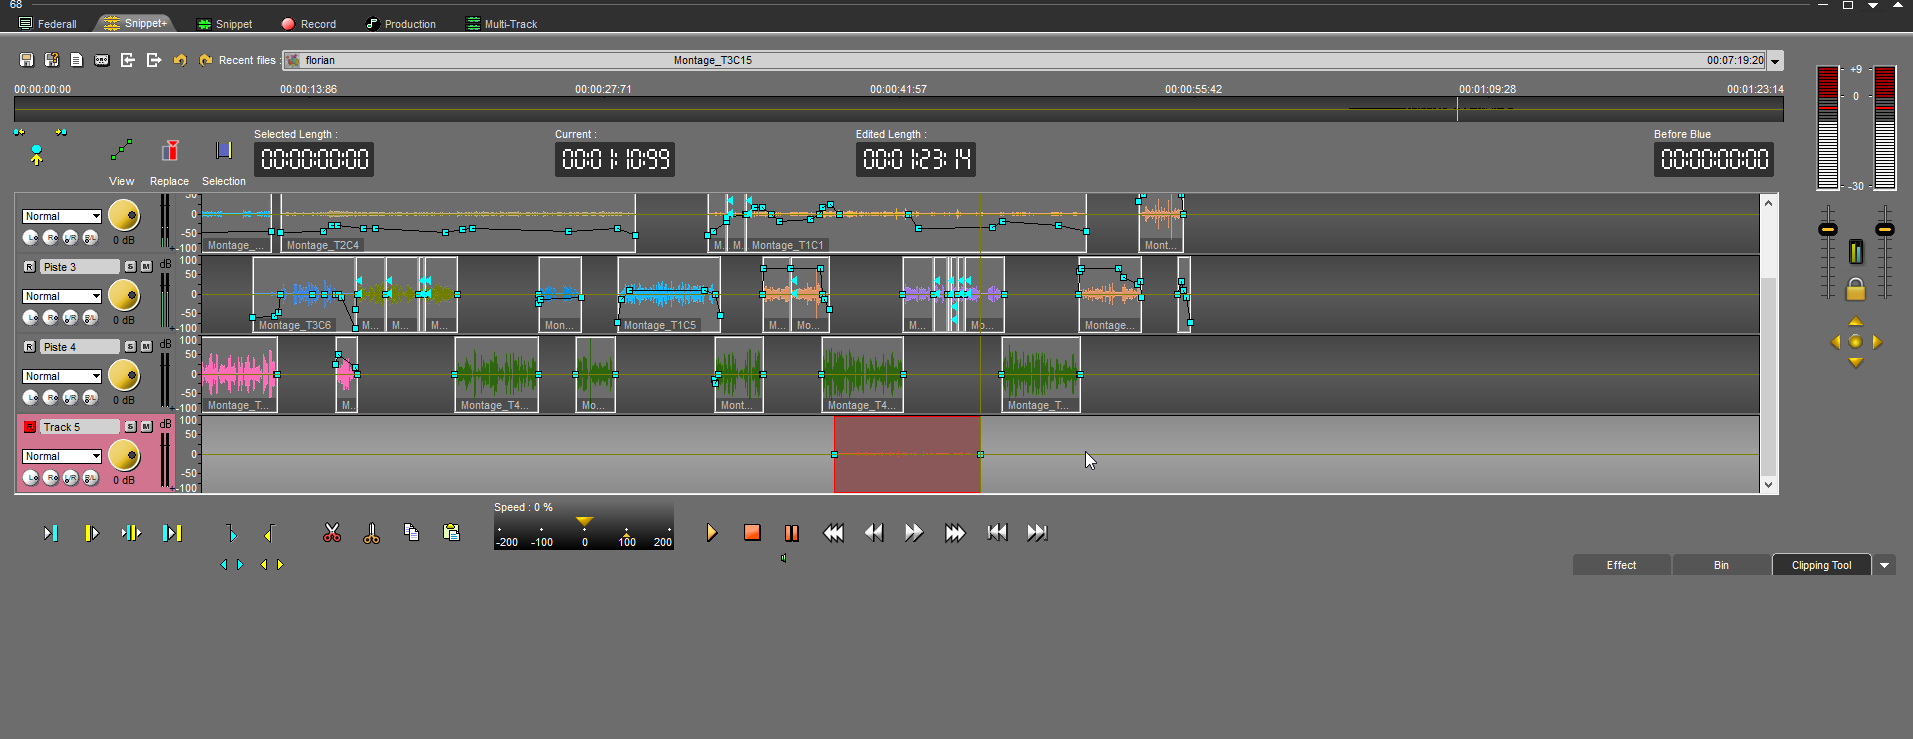
Shortcuts
B: switches focus between the clipping tool track and Snippet+ editing
Enter: allows for an insertion
20.23.Generating a master from Snippet+ (Ctrl + M)
To generate a master from "Snippet+" :
Click on the tape cassette symbol  to masterize your mix.
A window appears to identify your master in the database before saving it.
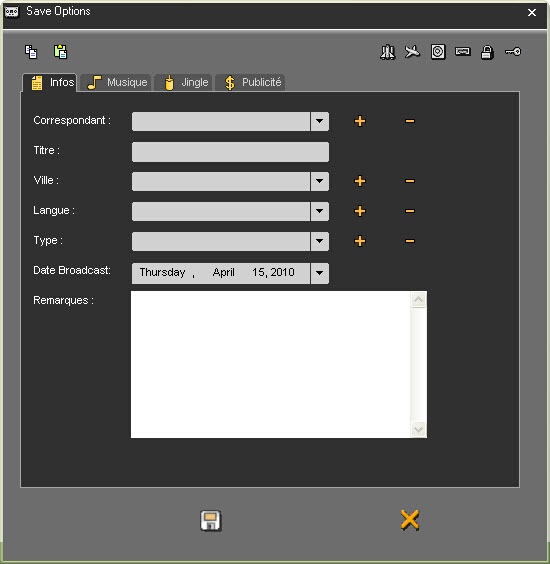
The master generation appears.

Once the process is over, you can use the master file.
20.24.Masterization on the track
As it is possible to masterize your whole work, Snippet+ also allows users to masterize only one part of their selection.
To do so, you only have to define a selection, do a right-click to display the contextual menu and select the option "Generate a master":

A window appears to identify your master in the database before saving it.

The master generation appears.

Once the process is over, you can use the master file.
20.25.Show / Hide Bin
In Snippet+, it is possible to show or hide the bin to gain more space on the screen.
To do so, use the tab on the top right corner of the bin:
20.26.Straightening a cut
If a selection is not good (the end of a word is missing for instance), you can straighten it to retrieve just the part of the word that you have excluded from the selection by mistake.
Straighten your selection thanks to the following buttons :
to straighten the beginning of the selection (blue).
to straighten the end of the selection (yellow).
Similarly, when you cut too much of a track by mistake, you can restore the missing part by placing your cursor over the extremity of the clip. The cursor will turn to a double-arrow. Click over the edge, maintaining the button pressed, and slide your mouse to resize the clip that has been left on the track.

20.27.The trimming "function"
The "Finalize" function is used to delete blanks at the beginning and at the end of the recording.
To do so, do a right-click on the closed pair of scissors icon  .
.
20.28.Undo (Ctrl + Z)
To undo an action, Click on the following icon : 
NB : you can undo up to 256 actions before saving.
20.29.Redo (Ctrl + Y)
When you undo and you change your mind, you can redo the action by clicking on the following icon : .
NB : you can redo up to 256 actions before saving.
20.30.Go to the beginning
To go to the beginning of an item, click on the following icon : 
20.31.Go to the end
To go to the end of an item, click on the following icon : 
20.32.Adding a fade point in Snippet+
To add a fade point :
Do a right-click on the spectrum, where you want to add a new fade point.
The following menu is displayed.
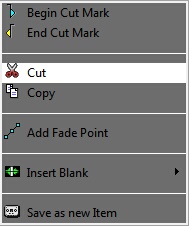
Click on « Add fade point ». The fade point is displayed.
20.33.Deleting a fade point in Snippet+
To delete a fade point :
Do a right click on the fade point you want to delete.

Click on "Remove fade point" (this function is only available if you are on a fade point. Otherwise, it is the "add a fade point" that is displayed).
The fade point disappears.
Attention : you can not delete the default points (set by Radio-Assist).
20.34.Gradual Fade
When you wish to add new fade point, at the beginning or at the end of the track, you have the possibility to create a gradual fade curve by performing the following action :
Ctrl + click (at the beginning / end of the clip)

20.35.Hiding the fade points
To hide the fade points, click on the following icon : 
A red cross is displayed on the icon  .
.
NB : The fade points are not visible but you can still hear them.
20.36.Visualizing the fade points
If you have hidden your fade points and want them back, click on the following icon : .
The red cross on the icon disappears  , and your fade points are visible again.
20.37.Modifying the global level of the sound
To modify the global level of your sound :
Click on the red horizontal line (separating your track in 2), a double-arrow is displayed.
Increase or decrease the sound level by moving the black line appearing in the middle of the track.
Release the mouse button.

20.38.Mono / Stereo settings
Snippet+ allows you to balance and pan your sound.
This function is available for each track on the left bottom part.
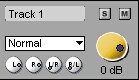
Normal : what is supposed to be played on the right is actually played on the right channel and what is supposed to be on the left is logically played on the left channel.
Left Only : on both sides is played what is supposed to be played on the left channel.
Right Only : on both sides is played what is supposed to be played on the right channel.
Custom : 4 level settings buttons :
"L" : To set the level of the left channel.
"R" : To set the level of the right channel.
"L/R" : To set the level of the left channel when it is played on the right channel.
"R/L" : To set the level of the right channel when it is played on the left channel.
20.39.Mute a track
The "Mute" function (which allows you to de-activate a track when you play your mix) is represented by the following symbol  .
.
Click on the  button which appears on the track you want to mute.
The button turns to red  .
.
To be able to listen to it again, click on the red button  .
.
20.40.Isolate a track
Click on the solo button  .
.
The sound on the other tracks is muted. The Mute button turns to red.
To listen to all the tracks again, click once more on the button which has turned to green  .
.
20.41.Lock tracks
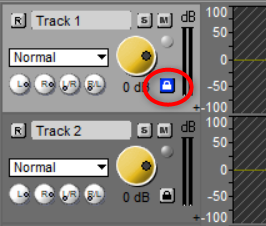
The “padlock” button in the header of each track protects the track against unintentional editing. How it works:
- Clicking on the padlock locks/unlocks the track.
- Right-click on the padlock of an unlocked track: locks the other tracks and lets you concentrate on editing that track.
- Right-click on the padlock of a locked track: unlocks all tracks.
N.B.: Locking tracks is not taken into account when saving.
20.42.Group / Ungroup functions
In Snippet+, it is possible to "group" or "ungroup" the clips.
To do so, you just have to select while in clip mode the different clips you want to group together (these can be located on the same track or on different tracks) and click on the right button of your mouse, so as to display the contextual menu. The "group" function will appear:
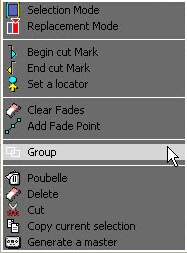
1) You can group individual clips : clip A + clip B + clip C = ABC
2) You can group "clip groups" or "sub-groups" altogether: (clip A + clip B) + clip C = AB+C = ABC (AB is a sub-group of ABC)
Afterwards, it is possible to ungroup completely or partially your selection by displaying the contextual menu again:

The "Ungroup" function : it separates the different units that have been grouped together. Therefore, one may find after the process individual clips or, possibly, clip groups.
The "Ungroup all" function" : it separates all clips from one another.
20.43.Modifying the sound level
To modify a fade point :
Click on the fade point to move (four arrows are displayed) and drag it to the chosen place.
Release the mouse button.

20.44.Set a locator in Snippet+ (F2)
To set a mark on your item :
Place the playhead where you want to insert the locator.
Click on « Set a locator »  . Your locator appears on the track, and it comes with a number.
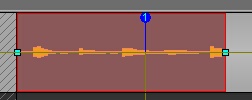
When your locator is positioned on the track, you can rename it by right-clicking on its number to see the popup menu. From that point, you can choose between two options : "Rename Locator" / "Delete Locator".

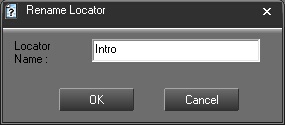
Once you have renamed your locator, a label will appear inside the clip.
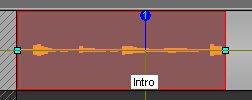
20.45.Moving from one locator to the other
To move from one locator to the other, you can use the arrows below the "set locator" : you will go from one locator to the other, regardless of the tracks where the locators are.

If you want to go from one locator to the other in the same track, use the arrows and click on "Shift" at the same time.
20.46.Deleting a locator
To delete a locator :
Do a right-click on the locator number you want to delete. A menu is displayed.

20.47.Copying and pasting a soundbyte in Snippet+ (Ctrl + C/Ctrl + V)
To copy and paste a sound bite : (in selection mode only)
Select between the blue and the yellow lines the part to copy.
Click on « Copy » (or Ctrl + C)  .
.
Place the playhead where you want to paste the sound bite.
Click on « Paste » (or Ctrl + V)  .
.
NB: in clip mode, copy-paste will copy and paste the whole clips that are selected in red, regardless of the blue and the yellow lines.
20.48.Recording
To record in "Snippet+":
Select on which track you want to record, then place the playhead where you want to start the recording.
REMARK :
If "Snippet+" is in Insertion mode, the block(s) on the same track after the recording will be moved to the right during the recording.
If "Snippet+" is in Replacement mode, the block(s) on the same track after the recording will be erased while the recording is going on.
Click on  . The recording starts.
Click on  to pause momentarily the recording.
You can resume the recording where the playhead is by clicking again on
Once the recording is finished, click on  .
.
A window is displayed to save you recording in the Browser.
Fill in the data and save by clicking on the floppy disk icon  (or press "Cancel" to start over).
NB : Your recording has the raw status  .
.
20.49.Multi-channel recording
Depending on the audioboard installed on the workstation and on the settings done, it is possible to create a multi-channel recording.
For example, you will record on Track 1, the singer of a band, then a Track 2 the bassist and on Track 3 the drums.
To do so, click on the "R" button of the track's header.
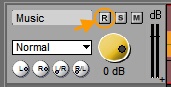
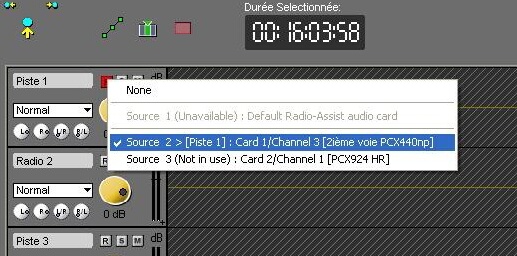
Select the audio channel for each track.
Then start the recording.

NB: Note that the Vu-meter allows you to adjust the volume while listening and recording. It flashes when your signal saturates the track.
Click on  .
.
Click  to momentarily stop recording.
Then stop  and save your recording in the database.
A window appears, allowing you to save your recording in the Browser. In the case of a multitrack recording, there will be only one save window, but the takes will be dissociated in the Browser (they will contain: the name you gave to the recording* + the track name).
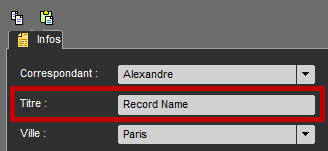
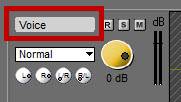 +
+
* Editable in the Registry: HKEY_LOCAL_MACHINE\SOFTWARE\NETIA\Radio-Assist\8.0\MultiSupEdit\MultiRec
Pass the key AutoIndexField = String (value to be defined)
Fill in the information and save by clicking on the floppy disk icon  (or press "Cancel" to start again).
Note : The recording will be saved as a raw file  .
.
20.50.On-the-fly and Punch In recording
Please note: these recording modes are (for the moment) not active if the "Multitrack recording" function is activated in RadioAssist Setup.
From RadioAssist 8.10.0, Snippet+ lets you listen to the sound of other tracks while recording on a given track.
In addition, content already present on this track remains visible. This content is audible until recording starts.
There are two ways to start recording:
- Option 1: Start playback first, then manually start recording "on the fly".
- Option 2: Place a blue locator 
 (F3) at the point where you want to start recording, then place the front playback head at the point where you want to start replaying the elements present on the track. You can then start the process by pressing the "Record" button . Snippet+ first plays back (the "record" button flashes) and then automatically switches to recording at the blue locator: this is the "Punch In". You can then stop recording manually.
You can also place a yellow locator  to automatically stop recording (Punch Out).
This function makes it easy to retake a recording while listening back to the first take up to the desired point.
The Replace and Insert (simple) modes are respected.
20.51.Exporting an edit session
In order to make the exchange with different editing tools easier, Snippet + allows to export the edit session into the following formats: AAF, AES31 or Snippet + project file.
By clicking on the “Export Edited”, you will access to the available export formats.
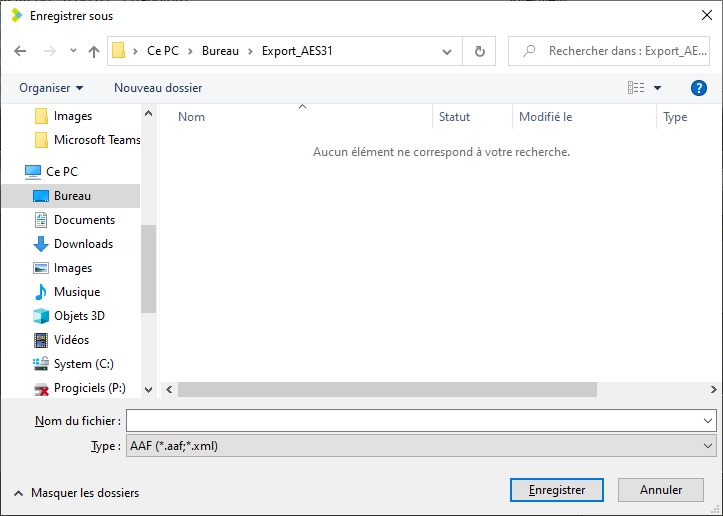
Fill in the edit session name and select the target directory.
20.51.1. Snippet+ Project Export
Select the export format “Snippet+ Project File”.

20.51.2.AAF Export
Select the export format “AAF”.

Click on the “Save” button.
An “AAF configuration” window appears to specify the export parameters.
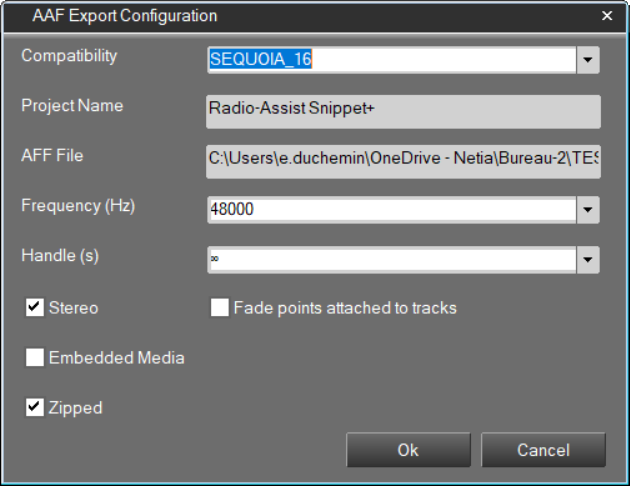
Enter the settings in the configuration window, such as:
Compatibility: choice of target software (Netia / Sequoia / ProTools)
Project name: allows you to name the project
AAF file: path of the exported file
Frequency (Hz): frequency in Hz of the exported file
Handle (s): allows you to specify the size of the start and end handles to be exported for each sound block
Stereo: allows you to choose between stereo media files (essences) or a mono reduction
Fade points attached to tracks: allows you to attach fade points to tracks rather than clips
Embedded Media: allows you to specify whether media files (essences) should be embedded in the AAF export file or attached to it
Zipped: allows you to specify whether exported files should be archived in a ZIP file
NB: some options are reserved for specific target software.
Click the ‘OK’ button.
Snippet+ generates an *.aaf file and a *.json file or a *.zip folder if the option is enabled.
20.51.3.AES31 Export
Select the export format “AES31”.

Fill in the data and save the edit in the right repertory.
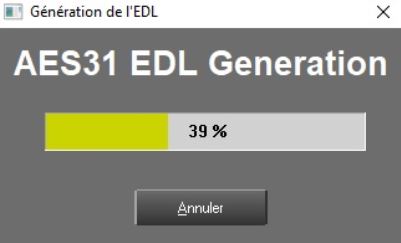
20.52.Importing an edit session
20.52.1.Importing the Snippet+ project.
Importing the Snippet+ project works on RadioAssist only from projects .spt exported with version 8.9.0 onwards. On the other hand, Snippet+ StandAlone can import any .spt project without being limited by version 8.9.0 or later.
20.52.2.On RadioAssist
Importing a Snippet+ project follows these different steps:
- Click on the "Import" button and choose your montage, or perform a Drag&Drop of the montage into Snippet+.

- Loading the project.
- Opening an indexation form to save the montage and its sounds into the database.
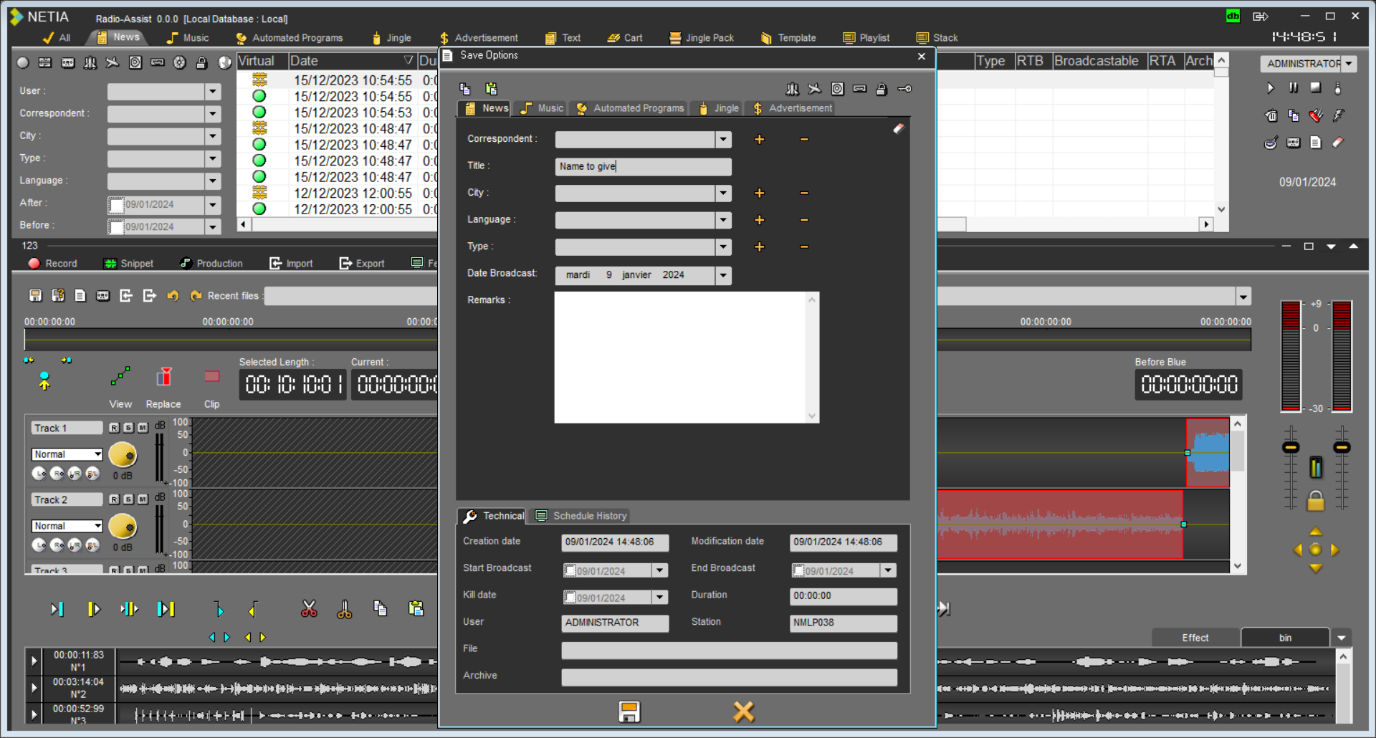
- Once the user has filled out the indexation form and clicked on the floppy disk icon (save):
- For each clip and drop having a different sound file from the others.
- Each sound is then converted into the RA pivot format if needed.
- They are saved in the selected tab if the sound file is not already present in the database:
- If the sound file comes from a clip:
[TitleGivenInTheIndexationForm]_TxCy
[TitleGivenInTheIndexationForm]: Corresponds to the title entered in the indexation form; if no title is provided, this part is left blank.
y: corresponds to the clip number encountered on the track to which the sound belongs.
x: corresponds to the track number on which the clip is located.
- If the sound comes from a drop:
[TitleGivenInTheIndexationForm]_B_N°x
[TitleGivenInTheIndexationForm]: Corresponds to the title entered in the indexation form; if no title is provided, this part is left blank.
x: corresponds to the drop number where the sound was encountered.
- If it is already present in the database:
- If the sound file is normal (State 2): nothing is done.
- If the sound file is deleted (State 3): the sound is changed to normal (State 2).
- If the sound is archived (State 4): nothing is done.
- If the sound is archived and deleted (State 5): the sound is changed to archived (State 4), and its content is copied to the server.
Once the import of sound files is completed, the montage is then saved in the database and opened in Snippet+.
On StandAlone
Click on the "Import" button and choose your montage, or perform a Drag&Drop of the montage into Snippet+.
The montage opens, and you can work directly on it.
Conversion of audio files to the chosen pivot format in Snippet+ is done if necessary.
20.53."Selected length" counter
The "Selected length" counter gives the duration of a selected sequence (between the blue and the yellow lines).

20.54."Current" counter
The "Current" counter gives the position of the playhead (red line). The playhead can be moved to another position on the wave form by double-clicking on the counter and entering the exact position required. To validate, press Enter or press "Esc" to cancel.
 (active phasemetre)
 (inactive phasemetre)
Just below this counter, one can see a phasemeter it is possible to activate (the phasemeter appears in colours) or deactivate (the phasemeter turns to grey) by simply clicking on the phasemeter bar. This tool allows you to measure the difference of phases between two alternating currents with the same frequency.
The phase meter gives a simple indication to non-technical people regarding phase opposition, which can prove extremely useful for mono (AM) transmissions produced in stereo.
When the white dot is in the green side, both left and right channels are in phase: indicates no stereo effect.
When the dot is on the red side left and right channel phase are opposed: indicates problems in case of mono mixdown (summing opposed signal to mono mixdown will result in silence or muffled sound).
20.55."Edited length" counter
The "edited length" counter gives the total duration of an edit session. Each time you cut a selection, the duration is refreshed.

20.56.End Extension
The "End extension" fonction allows you to add seconds and/or millisecondes at the end of an editing.
To create a blank for example.
Right click on any track of Snippet+.

Select "End extension"

Type the wanted duration, here 1 second and 4 tenths of a second.
And click on 
The sound will now stop after 1.4s after the end of the last block of the editing.
20.57.Recent items list
To get the list of the items you have used :
Go to « Recent items ».
Click on the down arrow. A drop-down list is displayed, containing the last items used.

If you click on one item of the list, you insert the item on the track, where the playhead is.
20.58.Saving an edit session (Ctrl + S)
To save an edit session, use the following functions :
 Save : to save an edit session. This edit session is inserted in the database under the chosen category.
If modifications are done from an existing edit session, this one is updated and the previous version is replaced by the new one.
 Save as : To save an edit session under a new name.
If modifications are done from an existing edit session, you will have two versions of it.
 New : to create a new edit session.
20.59.Snapshot
A right click on the "Save" icon  displays the "Snapshot" function.
The "Snapshot" function is designed to save different versions of the edit session each "x" minutes automatically.
Thus, it is possible to reload an edited version.
To reload a previous version of an edit session :
Do a right-click on the "save" icon  .
.
A "Load Snapshot save" window will appear with all the different versions.
Select the version to reload.
Double-click on it or click on "OK".
20.60. Effects
20.60.1.How they work
Effects are activated in RadioAssist Setup in the "Snippet+" tab.
In Snippet+, users have:
- 1 rack of effects per track.
- 1 rack of post-master effects (these effects are applied after the tracks have been mixed and the master level fader adjusted).
- 4 effects per rack.
When effects are assigned, each track is processed in real time: the effects are not applied directly to the audio file and it is possible at any time to listen to the sound again without processing, without superimposing effects.
At the origin of each effect is a VST plugin (Virtual Studio Technology from Steinberg). RadioAssist supports the VST 2.4 standard.
By default, RadioAssist does not offer any basic effects (such as compressors, equalisers, etc.) but each radio station can add its own, as it sees fit.
See for example: or (version 15 is 32-bit / VST 2.4 compatible)
Note: Snippet+ takes effects into account when saving Snapshots.
20.60.2.Adding/removing an effect
To add an effect, click on the dedicated tab at the bottom right of Snippet+.

This gives you access to the racks corresponding to the tool tracks. A drop-down menu lets you choose the effect to add to the track. You can undo/redo the setting.
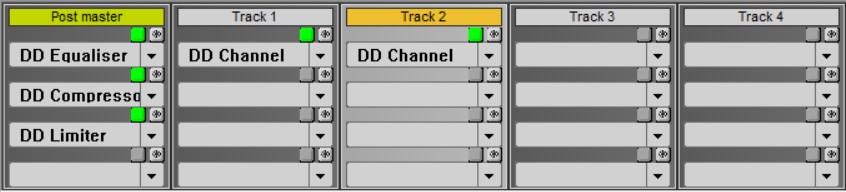
By default, when the user selects an effect, it is active 
 and visible . You can deactivate these options at any time by simply clicking on the relevant button.
20.60.3.Copying and pasting an effect or rack of effects
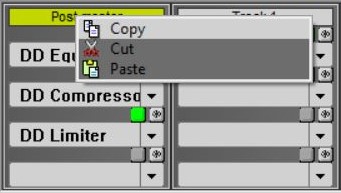
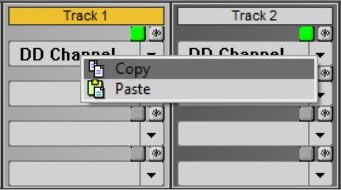
You can copy/paste an effect or rack of effects from one track to another (and even from one Snippet+ project to another) by right-clicking on the effect name or rack header. You can undo/redo the operation.
20.60.4.Effects activity indicator
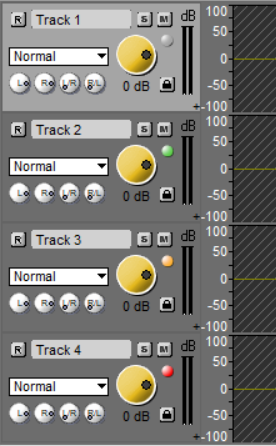
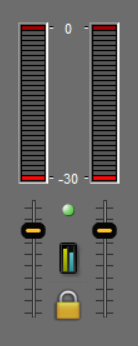
A LED indicating the status of the VST effects is located in the header of each track and on the master fader.
This LED can take 4 colours, corresponding to 4 effect states:
GREY: no effect loaded on the track.
GREEN: one or more effects are loaded in the rack. All effects are active.
ORANGE: one or more effects are loaded in the rack. At least one effect is inactive.
RED: one or more effects are loaded in the rack. All effects are inactive.
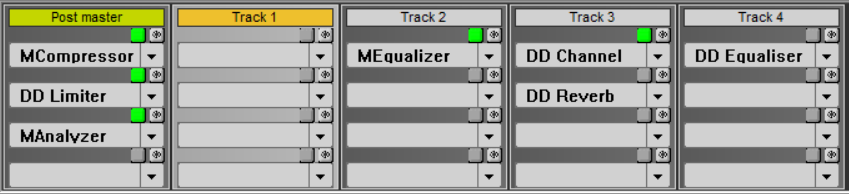
20.61. Snippet+ Shortcuts
Drag and Drop from the Browser (Original, master, production and mono mix) on a track :
Adds the item in replacement mode on the track at the location the playhead is.
Drag and Drop + SHIFT from the Browser (Original, master, production and mono mix) on a track :
Adds the item with inversion of the insertion or replacement mode on the track at the location the playhead is.
F1 : Set locator.
F2 : Go to next locator.
F3 : Set the blue line.
F4 : Set the yellow line.
F5 or Del : Cut the selection (cut is binned in Selection mode) / F5 Splits the clip (in Clip mode).
Shift + F5 : Cut the selection (cut isn't binned).
Shift + Del : Idem (cut isn't binned).
F6 : Play outside the selection area (2 seconds before the blue and 2 seconds after the yellow).
F7 : Play inside the selection area (2 seconds after the blue and 2 seconds before the yellow).
F8 : Slow rewind.
F9 : Slow forward.
F10 : Fast rewind.
F11 : Fast forward.
Space bar : Play/Stop.
Ctrl + A : Selects all clips from selected tracks.
Ctrl + N : New project.
Ctrl + Z : Undo.
Ctrl + Y : Redo.
Ctrl + Inser : Copy
Shift + Inser : Paste.
Ctrl + C : Copy.
Ctrl + X : Cut (cut is binned).
Ctrl + Shift + X : Copy all selected clips or what is inside the selection area without generating a copy inside the bin.
Ctrl + V : Paste.
Ctrl + O : Retrieve in the Browser the audio file used in the track.
Ctrl + S : Save.
Ctrl + M : Generate a master.
Ctrl + I : Import a sound.
Ctrl + G : Group all selected clips.
M : Switch from Selection to Clip mode.
Page up : Go to the blue line.
Page down : Go to the yellow line.
With the mouse wheel :
Mouse wheel : Horizontal zoom in/zoom out.
Shift + Mouse wheel : Vertical zoom in/zoom out.
Ctrl + Mouse wheel : Scroll right/left one page.
Ctrl +  : Automatic positioning of the playhead at the beginning of the previous sequence of the selected track.
Ctrl +  :Automatic positioning of the playhead at the beginning of the following sequence of the selected track.
Ctrl +  : Moves to the top the selected track(s).
Ctrl +  : Moves to the bottom the selected track(s).
Ctrl + Clip selection: Clip selection (one by one).
Ctrl +  (beginning) : In Clip mode : Selection of all the clips of selected tracks from the reading head to the beginning of the track.
Ctrl + (end) : In Clip mode : Selection of all the clips of selected tracks from the reading to the end of the track.
Shift +  : Horizontal zoom-in.
Shift +  : Horizontal zoom-out.
Shift + : From a selected clip, selection of the next clip(s).
Shift +  : From a selected clip, selection of the previous clip(s).
Ctrl + Shift + A or Alt + A : Select all clips from all tracks.
Shift + Mouse Click on a clip (multi-selection).
Double-click on the track header: Enlarges/shrinks the selected track.
 : Place the playhead at the beginning of the mix.
Fn : Place the playhead at the end of the mix.
 : Selection of the upper track.
 : Selection of the lower track.
 : Move the playhead forward or accelerate the speed of playing.
 : Move the playhead backward or slow down the speed of playing.
+ : Wider display of the selected track. By clicking a second time, the track returns to its original size.
Alt + creation of an area with the mouse (in selection and clip mode) : Creation of a multitrack selection area.
Alt + click : Move the playhead without selecting or unselecting the track (Clip Mode).
Page up : In Selection mode, go to blue marker.
Page down : In Selection mode, go to yellow marker.
21.Strech
21.1.Definition of stretch
When an element is a little too long or too short for its allotted broadcast time, RadioAssist allows you to "stretch" this element, i.e. modify its duration without changing its tonality (pitch bend).

21.2.Which elements can be stretched?
You can stretch raw 
 or master elements .
21.3.Stretching a sound
- Click on the "Stretch" tab.
- In the Browser, select the element you wish to stretch. You can only select original elements or masters.
- Simply drag and drop your element onto the track.
- To listen, click on the icon:
The item's total duration is displayed:
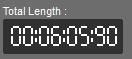
- Enter the new duration you wish to assign to the element:
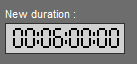
The percentage counter is updated after calculation:

- Then click on Pre-listening :
A message may appear if you exceed the tolerance threshold (+/-10%), advising you against using this new time. A maximum or minimum time is given; this corresponds to the maximum or minimum time recommended by the system for optimum voice or sound throughput.
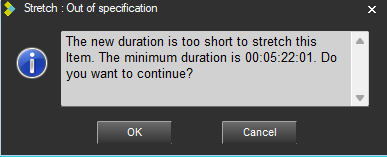
However, you can override this warning by clicking on "Validate". Pre-listening will then start automatically.
- Once you're happy with the new duration, save.
A new master is created.
You can retrieve the stretched sound from the database by selecting it and pressing "CTRL+O" (the letter).
21.4.Listening to a stretched sound
To listen to a sound with the duration stretched, click on the "Pre-listening" function: 
21.5.Go to begining (F8)
To go directly to the beginning of the sound element, click on the "Go to beginning" icon: 
21.6.Go to end (F9)
Pour aller directement à la fin de l'élément sonore, cliquez sur l'icône "Aller à la fin" : 
21.7.The limits of Stretch
If you exceed a certain limit in the "Stretch" tab, a message may appear advising you against using this new duration, as the file could be significantly degraded during the operation.
In fact, you are given a maximum or minimum time; this corresponds to the maximum or minimum time recommended by the system for optimum voice or sound throughput.
This limit is approximately +/-10%.
21.8.Saving a stretched element
To save an item with its new duration, click on the "Save" function: 
Please note: if you have stretched a raw, you will create a master without altering the raw. If you've stretched a master, you'll create a new master.
21.9.Stretch keyboard shortcuts
F8 : Go to beginning of sound
F9 : Go to end of sound
F10 : Fast forward
F11 : Fast rewind
F12 : Change listening mode (original mode - edited mode)
Barre Espace : Play/Stop
Ctrl + N : New document
Ctrl + Z : Undo
Ctrl + Y : Redo
Ctrl + S : Save
22.Soundcheck : quality control
22.1.Presentation of the solution
SoundCheck is a set of features that allows you to control the quality of sound elements generated, catalogued and played back in Radio-Assist.
It includes:
- LevelMonitor, a tool for real-time monitoring of peak and loudness levels.
(See section 13. LevelMonitor)
- Quality analysis, which measures the essential characteristics of the element (DC offset, LUFS-I, LUFS range, peak, true-peak), raises alerts based on configurable thresholds and delivers a report on notable events detected (silences, clipping, panning, phase). The results are available in the item's indexing sheet.
- Loudness normalisation, which allows files to be normalised to a target loudness level rather than to peaks. A limiter can be activated to process peaks during loudness normalisation.
The quality analysis displays an icon in the quality column of the Browser.
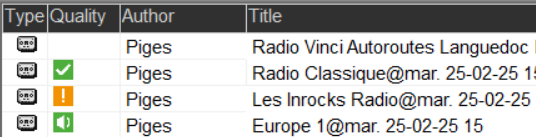
This icon can have three states:
- Speaker on a green background: no problems detected
- Exclamation mark on an orange background: one or more alerts have been raised
- Tick on a green background: alerts have been raised but the file has been checked and validated manually
(an item with no icon has not been analysed)
22.2.22.2. Activation and rights
22.2.1.22.2.1. Activation
To activate the SoundCheck feature, please contact Netia.
22.2.2.22.2.2. Rights
- ‘Perform SoundCheck analysis after mastering’: allows you to perform an automatic audio analysis after any mastering launched from RA
- ‘Manually validate item quality’: allows the user to manually validate items after analysis if alerts have been raised.
These rights can be configured in Administrator in the ‘Item Management’ section.
22.3.22.3. Setup (Radio-Assist Setup)
Setup is performed in the SoundCheck tab of Radio-Assist Setup.
It allows you to associate analysis and normalisation presets with each static or dynamic tab in the form of a profile. This allows you to refine the requirements according to the type of item.
22.4.22.4. Generating quality reports
The analysis is performed asynchronously (you can continue working during the analyses) and progress can be monitored in the asynchronous tasks window.
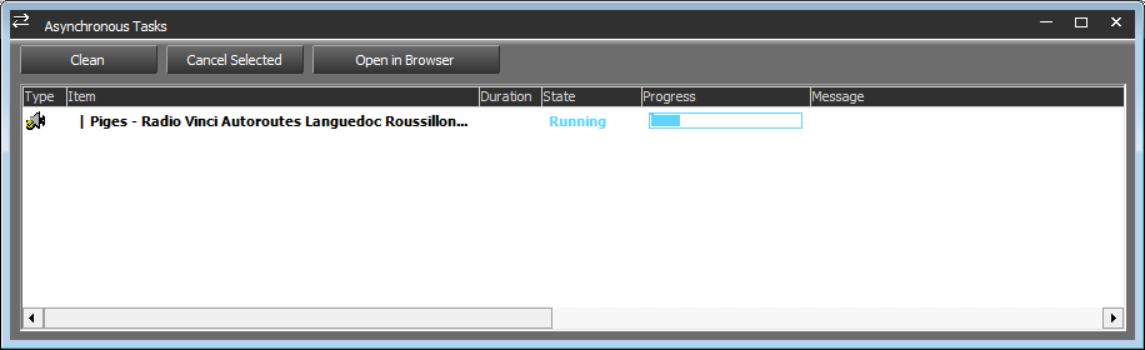
Quality reports can be obtained in two ways:
- Using the Browser context menu: right-click on an item in the browser to access the ‘Analyse audio quality’ function.
- When mastering an item (from the Browser, editing in Snippet+, etc.), the analysis is launched automatically after the new item is created. This automatic feature can be disabled in Administrator, but the analysis remains accessible manually via the context menu.
N.B.: It is not possible to analyse a Montage Info, Snippet+ or Production edit directly from the Browser using the context menu: it must first be mastered.
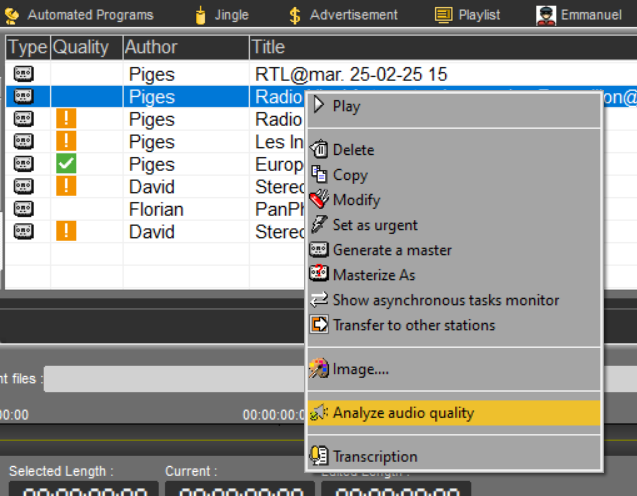
At the end of the analysis, an icon appears in the ‘Quality’ column of the Browser indicating whether defects have been detected (orange exclamation mark) or not (green loudspeaker).
Clicking on ‘Modify’ in the context menu opens the index card.
In the ‘Quality’ tab, you can view the analysis results:
- The DC Offset measurement, i.e. the continuous component of the signal as a percentage of the dynamic range, over the entire duration of the file.
- The maximum peak level measurement over the entire duration of the file.
- The measurement of the integrated loudness, the loudness range and the measurement of the ‘true peak’ over the entire duration of the file.
- A report on the silences detected with a reminder of the detection threshold, the number of events detected and a table indicating their location in the file.
- A report on detected clipping with a reminder of the detection threshold, the number of detected events, and a table indicating their location in the file.
- A report on detected panning with a reminder of the detection threshold, the number of detected events and a table indicating their location in the file.
- A report on detected phase shifts with a reminder of the detection threshold, the number of detected events and a table indicating their location in the file.
- A report on the loudness areas detected, with a reminder of the detection threshold, the number of events detected, and a table indicating their location in the file.
- A report on the true peaks detected, with a reminder of the detection threshold, the number of events detected, and a table indicating their location in the file and the measured value.
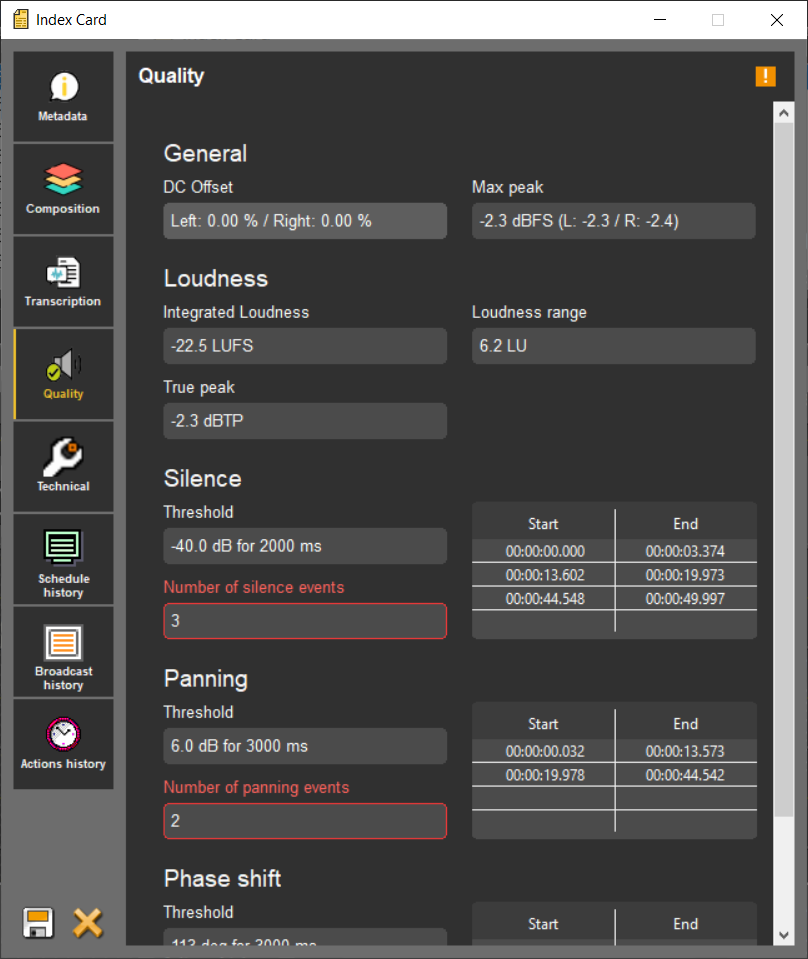
22.5.22.5. Manual validation of analysis results
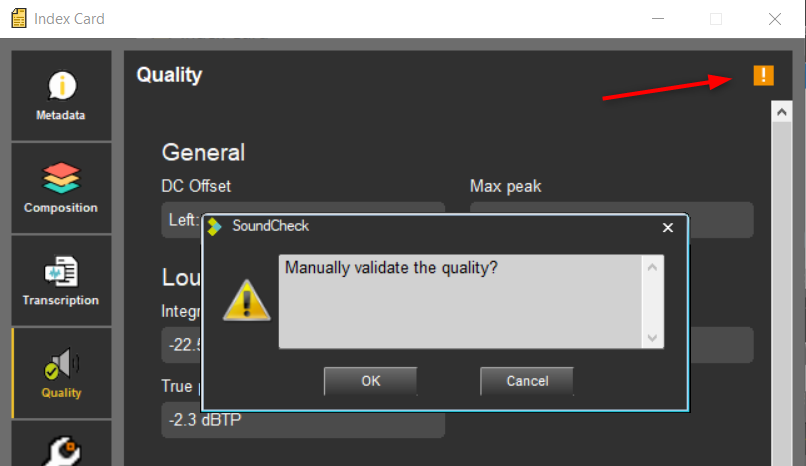
At the top right of the Quality tab, there is an icon showing the result of the analysis and any ‘defects’ detected in the sound file.
If the right is enabled and a problem is detected (orange icon with an exclamation mark), you can click on the icon and manually validate the sound quality: after confirmation, the icon changes to a white tick on a green background.
This action allows you to deal with ‘false positives’ and notify users that although there were alerts on the audio file, they have been manually checked and deemed not to prevent the file from being used.
(Note that you can return to the orange icon in the same way).
The other solution for dealing with recurring ‘false positives’ is to modify the detection settings to make them less ‘strict’.
23.Shortcuts Radio Assist
23.1.Browser
Ctrl + D : Deletes the selected item.
Ctrl + l : Copies the selected item.
Ctrl + L : Set the "Lock" status on the selected item.
Ctrl + M : Modifies the sound data
Ctrl + T : Launches a search
Ctrl + G : Generates a master
Ctrl + P : Play/Stop the selected item
Ctrl + R : Puts the RTB validation on the selected item
Ctrl + B : Puts the Broadcastable validation on the selected item
CTRL + / : Puts the RTA validation on the selected item
Ctrl + Master (button or dedicated line in the popup menu - when item is selected) : Masterization of selected item without opening its metadata sheet
Alt + T : displays the whole items of the database
Alt + N : Go to the "News" category
Alt + M : Go to the "Music" category
Alt + F : Go to the "Feed" category
Alt + J : Go to the "Jingle" category
Alt + A : Go to the "Ads" category
SHIFT + Selecting a sound then another sound lower / higher in the list : Selecting an item group.
Ctrl + Select multiple items from the list : Line by line selection.
23.2.Snippet
IMPORTANT :
"Fx" shortcuts are standard shortcuts defined by NETIA.
It is possible to modify them. Speak to your administrators.
F1 : Set locators - or - Ctrl + locator number.
F2 : Go to next locator.
F3 : Set the blue line.
F4 : Set the yellow line.
F5 or Del : Cut the selection.
F6 : Play 2 seconds before the blue, 2 seconds after the yellow.
F7 : Play the contents of a cut (2 seconds after the blue line and 2 seconds before the yellow line).
F8 : Go to the beginning.
F9 : Go to the end.
F10 : Fast forward.
F11 : Fast rewind.
Space bar : Play/Stop.
Ctrl + A : Select the track.
Ctrl + N : New document.
Ctrl + Z : Undo.
Ctrl + Y : Redo.
Ctrl + C : Copy.
Ctrl + X : Cut.
Ctrl + V : Paste.
Ctrl + 1..9 : Replace the markers.
Ctrl + O : Retrieve the audio file used in the track from the Browser.
Ctrl + S : Save.
Ctrl + W : Generate a master of the selection.
Ctrl + left arrow : Zoom in horizontally.
Ctrl + right arrow : Zoom out horizontally.
Ctrl + left up : Zoom in vertically.
Ctrl + right down : Zoom out vertically.
Page up : Go to the blue line.
Page down : Go to the yellow line.
1…9 : Go straight to one specified locator using the number pad.
With the mouse wheel :
Mouse wheel : horizontal zoom in/zoom out
Shift + Mouse wheel : vertical zoom in/zoom out
Ctrl + Mouse wheel : scroll right/left one page
NB : "Left arrow" and "right arrow" are keyboard keys.
23.3.Multitrack
IMPORTANT :
"Fx" shortcuts are standard shortcuts defined by NETIA.
It is possible to modify them. Speak to your administrators.
F3 : Set the blue.
F4 : Set the yellow.
F5 or Del : Cut the selection.
F7 : Play the contents of cut (2 seconds after the blue and 2 seconds before the yellow).
F8 : Go to begin.
F9 : Go to end.
F10 : Play fast forward.
F11 : Play fast backward.
F12 : Change the play mode (original mode – edited mode).
Space bar : Play/Stop.
Inser : Insert.
Ctrl + A : Select the entire track.
Ctrl + N : New document.
Ctrl + Z : Undo.
Ctrl + Y : Redo.
Ctrl + C : Copy.
Ctrl + X : Cut.
Ctrl + V : Paste.
Ctrl + S : Save.
Ctrl + left arrow : increase zoom.
Ctrl + right arrow : decrease zoom.
Page up : Go to blue.
Page down : Go to yellow.
+ : Display more tracks.
- : Display less tracks.
Click + left arrow : Un/Select all clips before the current point.
Click + right arrow : Un/Select all clips after the current point.
With the mouse wheel :
Mouse wheel : horizontal zoom in/zoom out.
Shift + Mouse wheel : vertical zoom in/zoom out.
Ctrl + Mouse wheel : scroll right/left one page.
23.4.Snippet+
Drag and Drop from the Browser (Original, master, production and mono mix) on a track :
Adds the item in replacement mode on the track at the location the playhead is.
Drag and Drop + SHIFT from the Browser (Original, master, production and mono mix) on a track :
Adds the item with inversion of the insertion or replacement mode on the track at the location the playhead is.
IMPORTANT :
"Fx" shortcuts are standard shortcuts defined by NETIA.
It is possible to modify them. Speak to your administrators.
F1 : Set locator.
F2 : Go to next locator.
F3 : Set the blue line.
F4 : Set the yellow line.
F5 or Del : Cut the selection (cut is binned in Selection mode) / F5 Splits the clip (in Clip mode).
Shift + F5 : Cut the selection (cut isn't binned).
Shift + Del : Idem (cut isn't binned).
F6 : Play outside the selection area (2 seconds before the blue and 2 seconds after the yellow).
F7 : Play inside the selection area (2 seconds after the blue and 2 seconds before the yellow).
F8 : Slow rewind.
F9 : Slow forward.
F10 : Fast rewind.
F11 : Fast forward.
Space bar : Play/Stop.
Ctrl + A : Selects all clips from selected tracks.
Ctrl + N : New project.
Ctrl + Z : Undo.
Ctrl + Y : Redo.
Ctrl + Inser : Copy
Shift + Inser : Paste.
Ctrl + C : Copy.
Ctrl + X : Cut (cut is binned).
Ctrl + Shift + X : Copy all selected clips or what is inside the selection area without generating a copy inside the bin.
Ctrl + V : Paste.
Ctrl + O : Retrieve the audio file used in the track from the Browser.
Ctrl + S : Save.
Ctrl + M : Generate a master.
Ctrl + I : Import a sound.
Ctrl + G : Group all selected clips.
M : Switch from Selection to Clip mode.
With the mouse wheel :
Mouse wheel : Horizontal zoom in/zoom out.
Shift + Mouse wheel : Vertical zoom in/zoom out.
Ctrl + Mouse wheel : Scroll right/left one page.
In clip mode :
Ctrl +  : Automatic positioning of the playhead at the beginning of the previous sequence of the selected track.
Ctrl +  :Automatic positioning of the playhead at the beginning of the following sequence of the selected track.
Ctrl +  : Moves to the top the selected track(s).
Ctrl +  : Moves to the bottom the selected track(s).
Ctrl + Clip selection : Clip selection (one by one).
Ctrl +  (beginning) : In Clip mode : Selection of all the clips of selected tracks from the reading head to the beginning of the track.
Ctrl + (end) : In Clip mode : Selection of all the clips of selected tracks from the reading to the end of the track.
Shift +  : Horizontal zoom-in.
Shift +  : Horizontal zoom-out.
Shift + : From a selected clip, selection of the next clip(s).
Shift +  : From a selected clip, selection of the previous clip(s).
Ctrl + Shift + A or Alt + A : Select all clips from all tracks.
Shift + Mouse Click on a clip (multi-selection).
Double-click on the track header: Enlarges/shrinks the selected track.
 : Place the playhead at the beginning of the mix.
Fn : Place the playhead at the end of the mix.
 : Selection of the upper track.
 : Selection of the lower track.
 : Move the playhead forward or accelerate the speed of playing.
 : Move the playhead backward or slow down the speed of playing.
+ : Wider display of the selected track. By clicking a second time, the track returns to its original size.
Alt + creation of an area with the mouse (in selection and clip mode) : Creation of a multitrack selection area.
Alt + click : Move the playhead without selecting or unselecting the track (Clip Mode).
Page up : In Selection mode, go to blue marker.
Page down : In Selection mode, go to yellow marker.
23.5.Record
IMPORTANT :
"Fx" shortcuts are standard shortcuts defined by NETIA.
It is possible to modify them. Speak to your administrators.
F1 : Sets locators during recording or listening
F2 : Starts a new recording
Ctrl + S : Saves recording in the database
23.6.Import
Selection of all the tracks to be imported then CTRL + Floppy disk : Filled identically all the selected files.