1.RadioAssist Setup
1.1.Install RadioAssist Setup
1.1.1.Prerequisites before installation
The Microsoft Visual C++ 2017 SP1 Redistributable Package (x86) is required to execute the RadioAssist 8.0 range of products.
Microsoft Visual C++ 2017 SP1 Redistributable Package (x86) wil install the runtime components from the Visual C++ libraries on a computer where Visual C++ 2017 SP1 is not installed.
1.1.2.Installation Specification User Mode
The 19.1 release of RadioAssist is able to work in User mode (in the Windows sense) with the following tabs:
• ActivityWatcher
• AirRun
• Production
• FederAll / GridEditor
• Record
• Import
• Export
• Snippet
• Snippet +
As usual, it is necessary to install and launch RadioAssistSetup as administrator.
WARNING:
To operate in User mode, it is necessary to launch RadioAssist for the first time as an administrator and more generally whenever you modify the Audio configuration in RadioAssistSetup.
As the registry keys of Cartes32 are created or modified at the launch of RadioAssist according to the choice of the sound card.
1.1.3.Radio Assist Automatic Software Installation
Radio Assist Setup is installed while installing Radio Assist
To install Radio Assist, execute the installation program "RadioAssist.msi".

Click on  to start the Setup Wizard
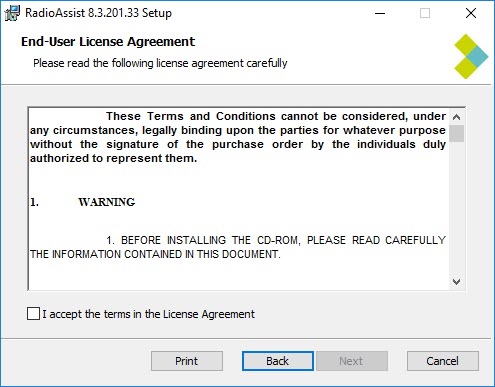
Check the bow to accept the terms on License Agreement, then click on  to continue
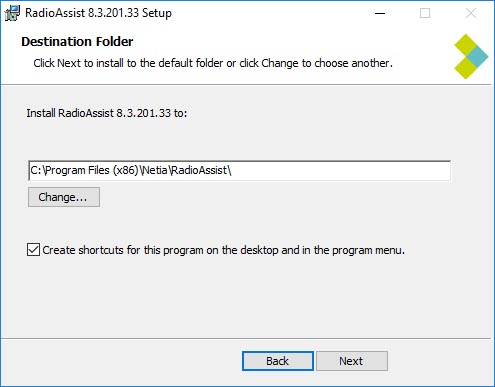
By default the Setup Wizard installs all files on the directory "C\Program Files(x86)\Netia\RadioAssist\". You can modify it.
The Setup Wizard creates a shortcut on the Desktop and a "Netia" shortcut in the Start Menu. Click on  to continue.
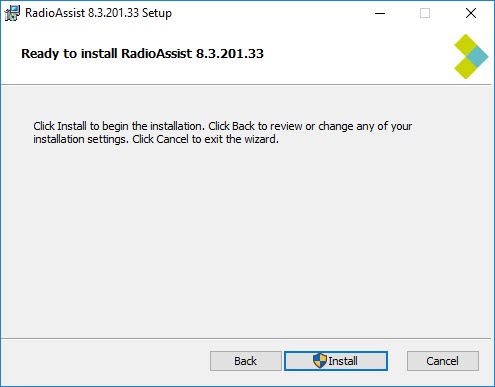
The Setup Wizard is now ready to install Radio Assist. Click on  to continue.
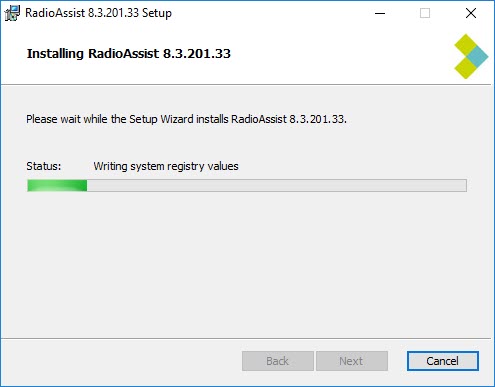
Click on Finish
RadioAssist is installed.
1.2.Connection to RadioAssist Setup
To connect to the Radio Assist setup :
Double click on the icon on your desktop :

Or double click on the exe on the RAdio Assist folder :

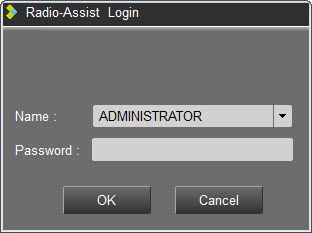
Enter your user ID and your password.
To disconnect from the Radio Assist setup:
Click on 
 to save your modification or to quit without saving.
When modifications are saved, some of the elements are saved in the registry and others in the database.
Registry key :
[HKEY_LOCAL_MACHINE\SOFTWARE\NETIA\RadioAssist\8.0]
If a previous version of RadioAssist is installed, the setup will do a migration of the existing registry to [HKEY_LOCAL_MACHINE\SOFTWARE\NETIA\RadioAssist\8.0]
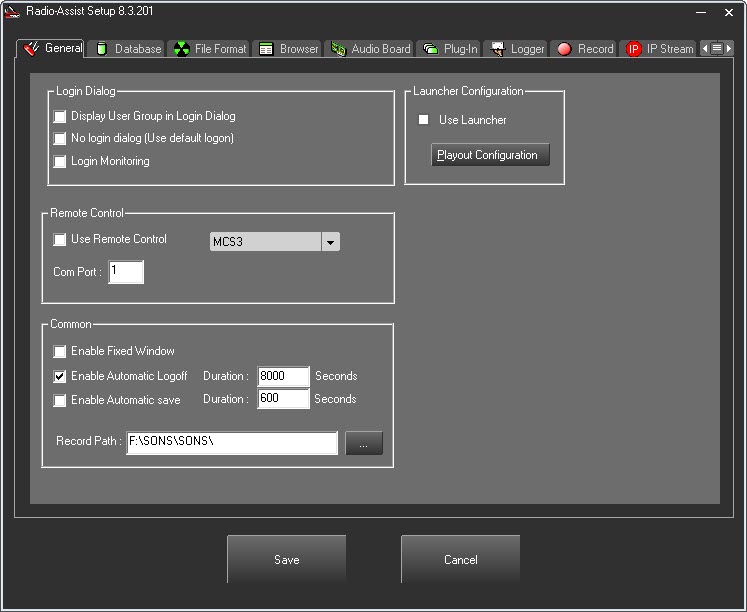
1.3.RadioAssist Software Setup
The "Radio Assist Setup" software allows you to manage locally on a workstation all the production tools and hardware ressources.
"Radio Assist Setup" can only be opened if Radio Assist is not in use.
The interface is shown with the standards and additional tabs.
To access "RadioAssist setup, an adminitrator account is needed.
 This button will allow you to navigate through tabs.
Standard tabs :
General tab : Login window, remote controlled console and common apllication settings.
Database tab : Database connection settings.
File Format tab : File format settings.
Browser tab : Browser settings.
Audio Board tab : Audio board settings.
Plug-in tab : Production tab settings.
Logger tab : Log files sent to logger service settings.
Record tab : Record settings.
IP Stream : IP stream settings.
Additional tabs :
Snippet tab : Snippet tab settings.
Snippet + tab : Snippet+ tab seetings.
Import tab : Import tab settings.
Export tab : Export tab settings.
Feder All tab : Feder All tab settings.
Feed-in tab : Feed-in tab settings.
Messages tab : Messages tab settings.
NOTE :
To know and/or modify the path to the RadioAssist logs, it is necessary to open the Registry ;
HKEY_LOCAL_MACHINE\SOFTWARE\WOW6432Node\NETIA\Logs].
Then select RadioAssist.
Read and/or change the path specified in the "DefaultLogsDirectory" key.
1.3.1.GENERAL Tab

"Login Dialog" box
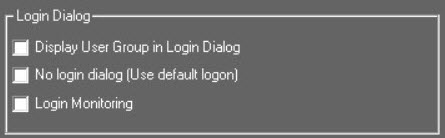
Display user group : To show in the login window all users groupe.
Display new user button : Display a button (a key) to create a new user.
Login Monitoring : This feature is specific to a customer. It shows all connections to RadioAssist. This feature is available in the "Activity Watcher" tab in RadioAssist.
"Remote Control" box
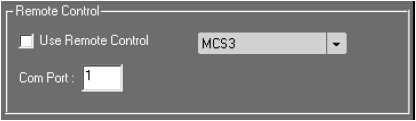
Use Remote Control : Allows you to connect a remote control.
List of the supported remotes :
NA-RC1 - JL Cooper
RA-2000
Eela Audio-Logos
D-Cart
MCS3 – JL Cooper
EdiDesk.
Shuttle Xpress.
Shuttle Pro.
Com port : RS-232 Port number for the remote.
"Common" box

Enable Fixed Window : Open Radio Assist in full screen.
Enable Automatic Logoff : Log off Radio Assist after a duration of inactivity of "n" seconds.
Enable Automatic Save : Automatically save your work after "n" seconds.
Record Path : Path where all sounds will be saved using UNC (Universal Naming Convention).
Record is composed in \\UNC\Rep root\\.
These 2 parts are used for the mirroring system for databases servers.
\\SERVERNAME\DATA\AUDIO\
SERVERNAME : Server name where sounds are stored.
DATA : name of the shared disk – Sharing of the disk is mandatory in order for the workstations to access it.
AUDIO : folder for the sounds
Record Path is defined by the 2 following ways :
- by the users configuration (UsersCfg) in the database
- in the registry (if nothing is set in T_GROUP_USER)
Wherever the record path is defined, the following rules apply :
record Path can include variables :
$USER : User name connected.
$GROUP : User group name connected.
$LANGUAGE : User language name connected.
$MACHINE : Workstation name.
$YEAR : Current year.
$MONTH : Current month.
$DAY : Current day.
For example if we configure the following record path :
\\SERVEUR1\DATA\$GROUP\$LANGUAGE\
If user GONZALES from TECHNOS group with SPANISH language configured creates a recording or a master, the item would be writtten in the following folder :
\\SERVEUR1\DATA\TECHNOS\SPANISH\
"Launcher Configuration"
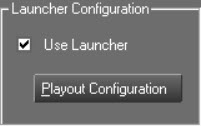
Tick the box in order to use the Multisite Launcher option with Radio Assist.
Databases setting can be done in the "General" chapter.
Click on  to configure the launcher for Air DDO.
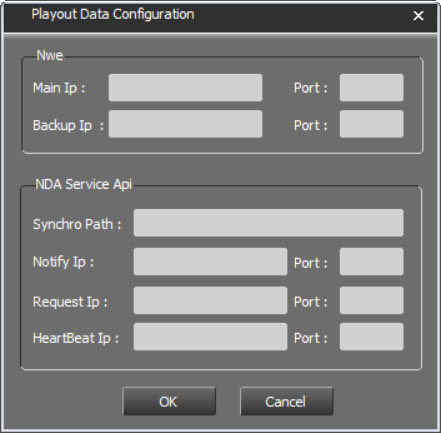
Section NWE : NWE connection informations.
Main IP : IP adress for the main NWE.
Port : AirRun listener defined in the NWE configuration : /CONF/AIRRUN_EVENT_CONF/RADIO/AIRDDO/PORT
Backup IP : IP adress for the backup NWE
Port : AirRun listener defined in the NWE configuration : /CONF/AIRRUN_EVENT_CONF/RADIO/AIRDDO/PORT
Section "NDA Service API" : Used for the live synchronization of cartstacks when a "strory" is modified in an NRCS tool (iNews, ENPS, etc...)
Synchro Path : Synchro path for cartstack management between Netia (DDO, Air-Cart, Newlink) and a NRCS (order management)
Notify IP / Port : IP/Port for order connection.
Request IP / Port : IP/Port for order return connection.
HeartBeat IP / Port : IP/Port for "alive" signal.
"Multicast" box
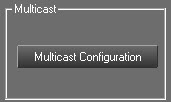
This section allows you to set up the Multicast for 3 elements :
- Hotbox.
- LogCenter.
- Item.
To start the setup, click on  .
.
The following window opens :
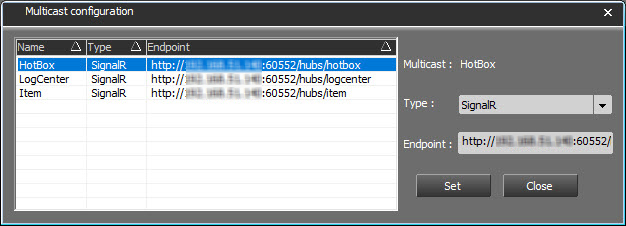
For each item selected in the list, choose the type of connection (SignalR or Socket) and enter the IP address.
Once you have entered the information, click on 
 and then on to close the window.
1.3.2.DATABASE Tab
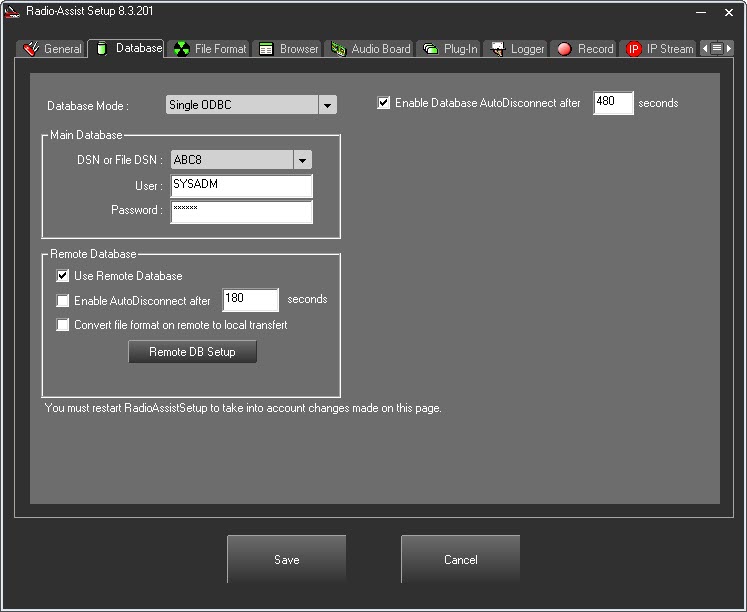
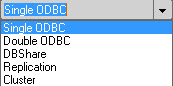
This tab will display different informations depending on the type of connection selected :

Enable Database AutoDisconnect : Radio Assist will disconnect after "n" seconds of inactivity.
Single ODBC
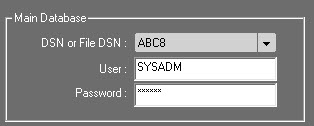
Main Database : Type information to connect to the database.
DSN ( Data Source Name) : Data Source name in the ODBC settings.
File DSN : File source name in the ODBC.
Creating a File Source Name allows you to centralize and share them in order to be accessible from workstations. You won't have to create an ODBC for every workstation.
User : SYSADM.
Password : SYSADM.
Double ODBC

Main Database : Type information to connect to the database.
DSN or File DSN : Data Source name in the ODBC settings.
Creating a File Source Name allows you to centralize and share them in order to be accessible from workstations. You won't have to create an ODBC for every workstation.
User : SYSADM.
Password : SYSADM.
Use Backup Database : Activate and set the backup database
DbShare
OBSOLETE
Replication

Main Database : Type information to connect to the database.
DSN or File DSN : Data Source name in the ODBC settings.
Creating a File Source Name allows you to centralize and share them in order to be accessible from workstations. You won't have to create an ODBC for every workstation.
User : SYSADM.
Password : SYSADM.
Use Backup Database : Activate and set the backup database
Cluster

Main Database : Type information to connect to the database.
DSN ( Data Source Name) : Data Source name in the ODBC settings.
File DSN : File source name in the ODBC.
Creating a File Source Name allows you to centralize and share them in order to be accessible from workstations. You won't have to create an ODBC for every workstation.
User : SYSADM.
Password : SYSADM.
"Remote Database" box
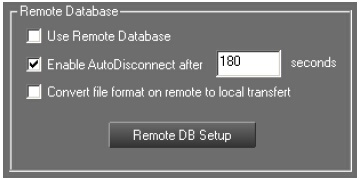
Use Remote Database : Activate the combo box to access all remote databases.
Enable Autodisconnect After : Disconnect Radio Assist client from remote database after "n" seconds of inactivity.
Convert file format on remote to local transfert : Convert remote file format to local format.
"Remote DB Setup" box
By clicking on  , access to remote database settings.
An identification to the the database and modification rights are needed.
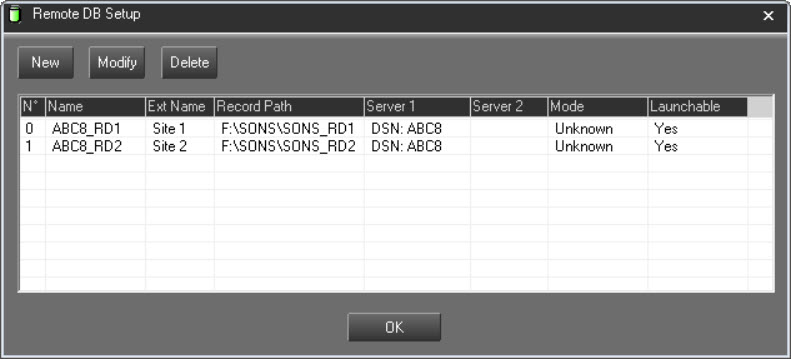
Click on  to open the setting window :
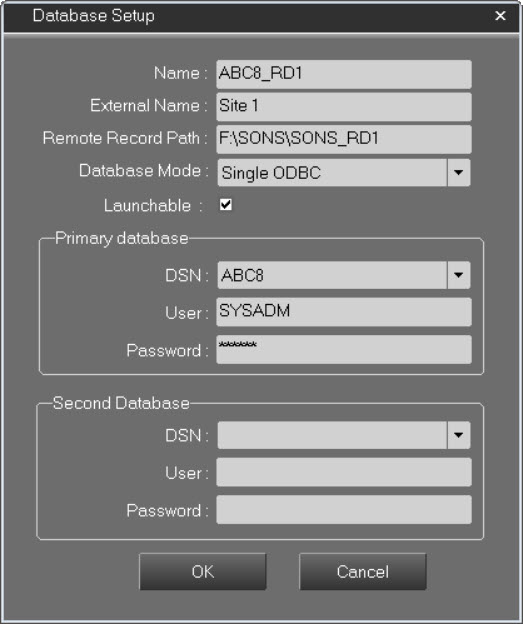
Name : Remote DB name.
External Name : Database name used to differentiate one database from the other.
Database Mode : Connexion mode for the database (single ODBC, double ODBC, cluster, replication)
Remote Record Path : Record path for distant audio server files
DSN : Path and name of the DSN file
Launchable : Tick this box to enable the database to be used with the feature "Multisite Launch"
DSN File example :
[ODBC]
DRIVER=SQL Server
UID=SYSADM
Address=192.168.1.1,1433
Network=DBMSSOCN
LANGUAGE=Français
DATABASE=REMOTE1
WSID=BDDSRV1
APP=Microsoft Data Access Components
SERVER=192.168.1.1
User : User name.
Password : User Password.
Use secondary Database : Remote backup database.
DSN : DSN file name.
User : User name.
Password : User password.
Use DB Share : Activate the use of main DbShare.
Main server : Main DbShare IP adress.
Use Backup DB Share : Activate backup DbShare.
Backup server : Backup DbShare IP adress.
To modify the setup of a remote database, click on  .
.
Enter modifications, then click on 
To delete a remote database, select it from the list and click on  .
.
1.3.3.AUDIO FORMAT Tab
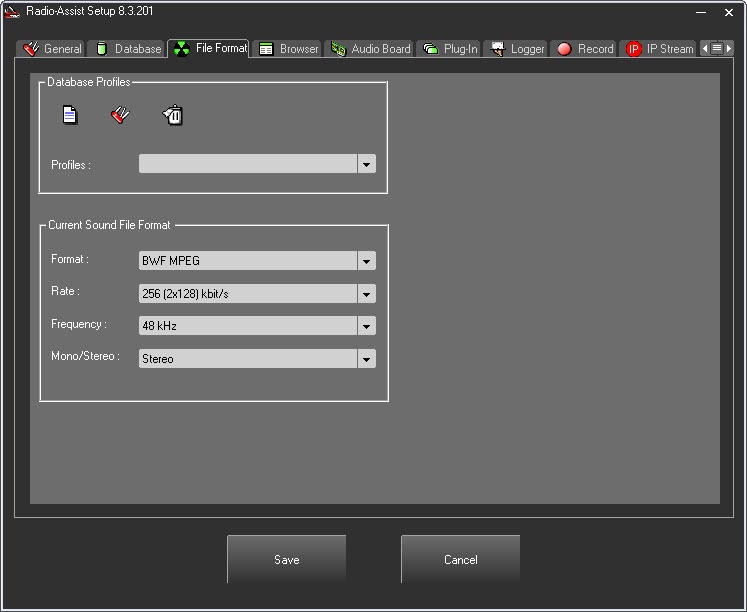
"Database profiles" box

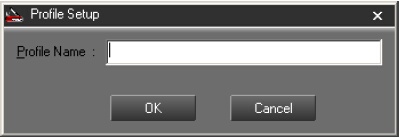
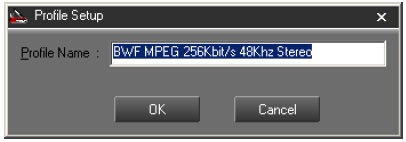
You can either choose a profile or create a new one. To create file format profiles for groups of users in the database, click on the first icon  and name the profile in the new popup window.
Select the different parameters for the new profile.
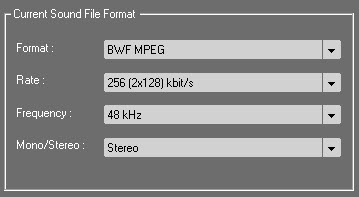
Format : Audio formats supported by Radio Assist
Raw MPEG
BWF MPEG
Linear BWF
Linear WAV
Rate : Compression rate
Frequency : Sample rate frequency. From 8kHz to 48 kHz.
Mono/Stereo :
Mono : Monochannel recording
Stereo : Redundancy on both channels
Dual channel : Each channel is encoded separately
Click on 
 : Modify existing profiles
 : Delete the current profile
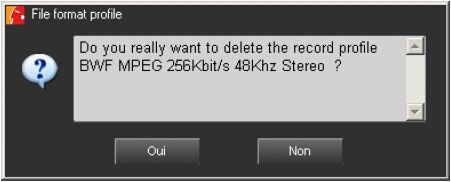
Click on "OUI" for "Yes"
"Transfer audio format" box
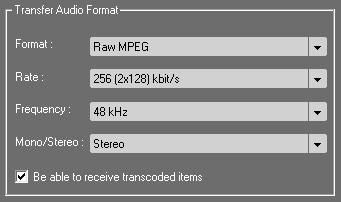
This section lets you choose the format in which audio files will be transferred.
If « Be able to receive transcoded item » is ticked and the file transferred to you is not in this audio format, then transcoding will take place.
If « Be able to receive transcoded item » is unchecked, then the file will be transferred to you in its original audio format.
This audio format is stored in the T_AUDIO_FORMAT table in the database with the following values:
NAME_FORMAT = Transfer format
TAB = TRANSFER
The Boolean “Be able to receive transcoded item” is stored in T_RA_SETUP with the following values:
MODULE_NAME = ASYNC_TRANSFER
VALUE_NAME = ReceiveTranscodedItems
VALUE_INT :
0 = This station cannot receive transcoded elements
1 = This station can receive transcoded elements
1.3.4.BROWSER Tab
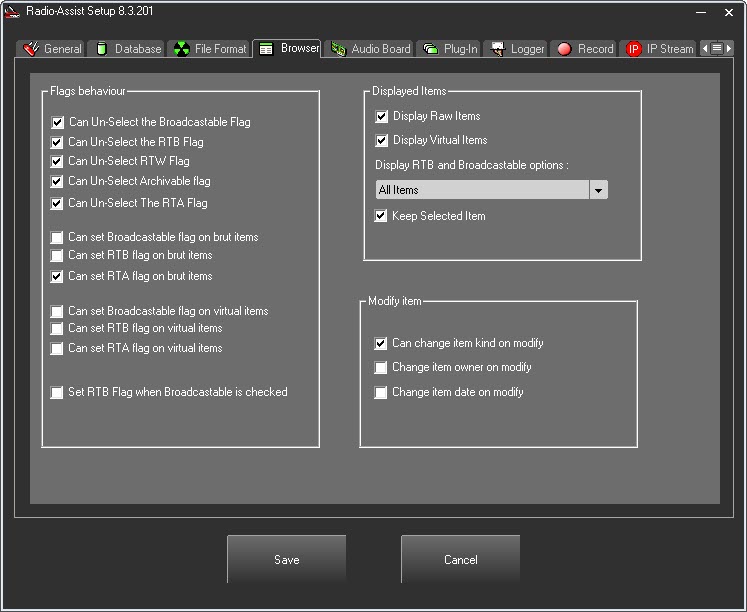
"Flags behaviour" box
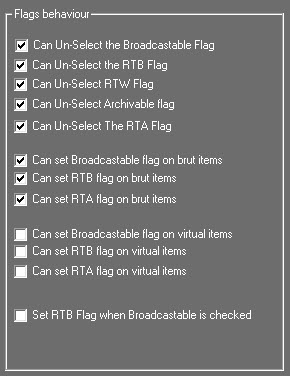
Can Un-Select the Broadcastable Flag : Option to unselect the "Broadcastable" flag on items.
Can Un-Select the RTB Flag : Option to unselect the "Ready To Broadcast" flag on items.
Can Un-Select the RTW Flag : Option to unselect the "Ready To Web" flag on items.
Can Un-Select Archivable flag : Option to unselect the "Archivable" flag on items.
Can Un-Select the RTA flag : Option to unselect the "Ready To Archive" flag on items.
Can Set the Broadcastable Flag on brut (raw) items : Option to set the "Broadcastable" flag on raw items.
Can Set the RTB Flag on brut (raw) items : Option to set the "Ready To Broadcast" flag on raw items.
Can Set the RTA Flag on brut (raw) items : Option to set the "Ready To Archive" flag on raw items.
Can Set the Broadcastable Flag on virtual items : Option to set the "Broadcastable" flag on virtual items.
Can Set the RTB Flag on virtual items : Option to Set the "Ready To Broadcast" flag on virtual items.
Can Set the RTA Flag on virtual items : Option to Set the "Ready To Archive" flag on virtual items.
Set the RTB Flag when broadcastable is checked : Automatically flag "Ready To Broadcast" for the "Broadcastable" items
IMPORTANT NOTE : These settings are only for the local workstation. They have the priority over settings made in "Administrator".
"Modify Item" box
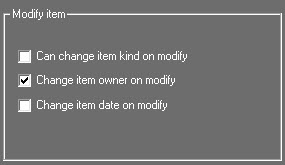
Can change item kind on modify : Possibility to change the category of an item when saving modifications.
Change item owner on modify : Change the owner of an item when saving modifications.
Change item date on modify : Change the current date on an item when saving modifications.
"Displayed item" box
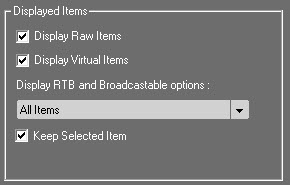
Display Raw Items : Only display raw items.
Display Virtual Items : Only display virtual items.
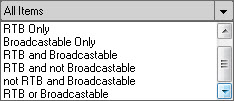
Display RTB and Broadcastable options : Apply "RTB and Broadcastable" filter to selected items.
Keep selected items : When switching from one tab to another, the item selected on the 1st tab will still be selected on the new tab.
1.3.5.AUDIO BOARD Tab
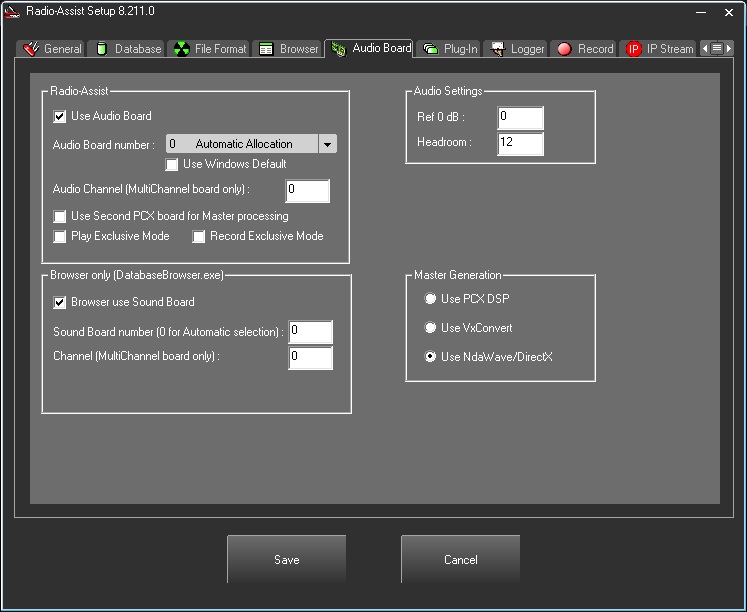
"RadioAssist" box
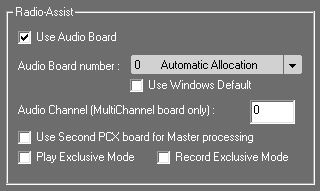
Use Audio Board : Activate the use of an audio card on the workstation.
Use Windows Default : Activate the use by default, when in "Automatic Allocation", of the Windows audio board.
Audio Board number : Select the audio card number and name. "0" for an automatic allocation.
Audio Channel : Type the channel number used by multi-channel audio card.
Use Second Pcx Board for Master processing : Activate the use of a specific audio card for master generation.
Play Excusive Mode : Activates the use of the audio board for playback in exclusive mode.
Record Exclusive Mode : Activates the use of the audio board for recording in exclusive mode.
"Browser only (Database Browser.exe)" box

Browser use Sound Board : Allocate a specific audio card for the Browser.
Sound Board number : Audio card number used. "0" for an automatic allocation.
Channel : Channel used for recording (for multi channel audio cards).
"Audio Settings" box
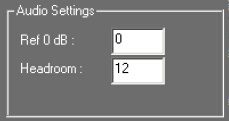
Ref 0 dB : Sound level for the "0 db"
Headroom : In db, security amount to avoid sound saturation.
"Master Generation" box
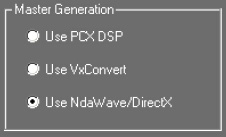
The master generation can use:
Use PCX DSP : Activate the use of the DSP on PCX audio cards.
Use VxConvert : Activate the use of VxConvert from Digigram.
Use NdaWave/DirectX : Activate the use of NdaWave/DirectX.
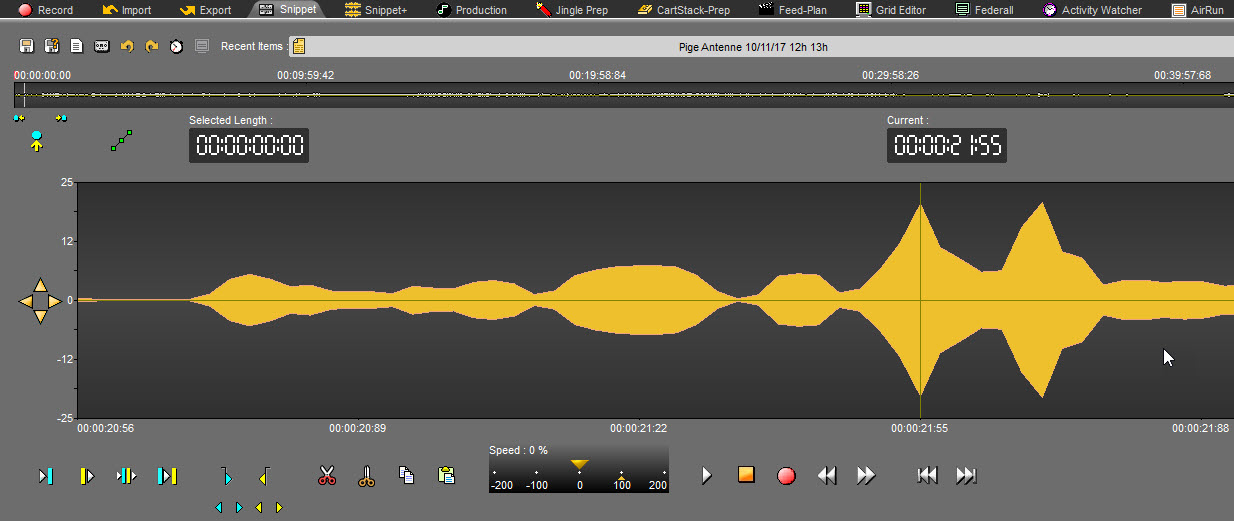
Wave format
The wave form can be represented in 2 ways.
This option is set by the registry key under :
HKEY_LOCAL_MACHINE\SOFTWARE\Wow6432Node\NETIA\RadioAssist\8.0\Sound\RealQuantumInSpectrum.
If the value of the key "RealQuantumInSpectrum" is "No", the waveform has a peak representation.
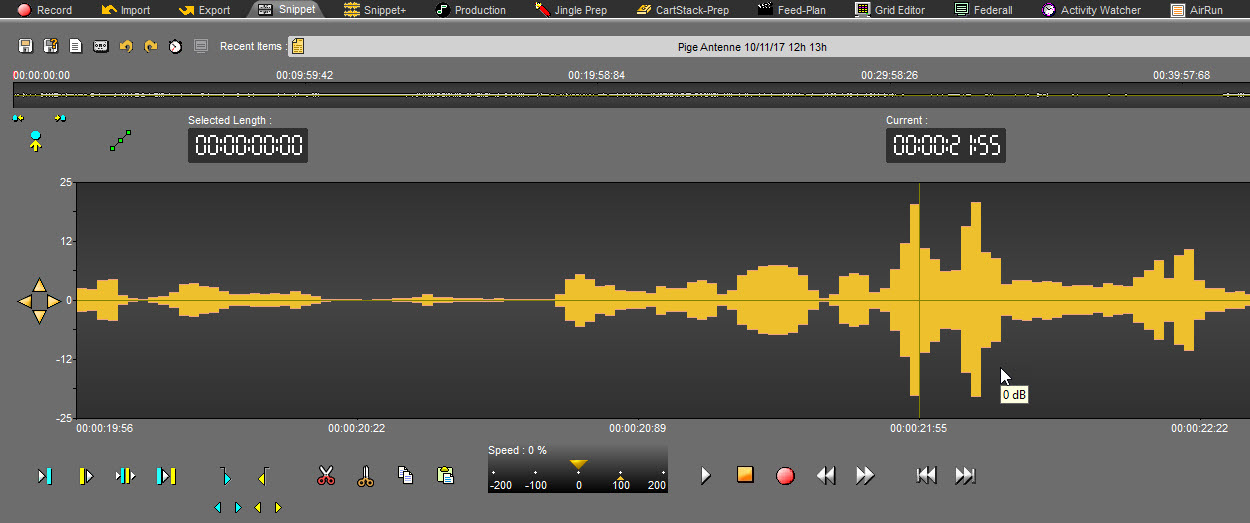
If the value of the key "RealQuantumInSpectrum" is "Yes", the waveform has a bar representation.
Registry
Windows 10:
In the case of stream management, RadioAssist may be slowed down during the stream search scan.
The "HKEY_LOCAL_MACHINE\SOFTWARE\WOW6432Node\NETIA\CART_S32\Flux\Disable ScanDir" registry key must be changed to YES to adjust this slowdown.
1.3.6.PLUG-IN Tab
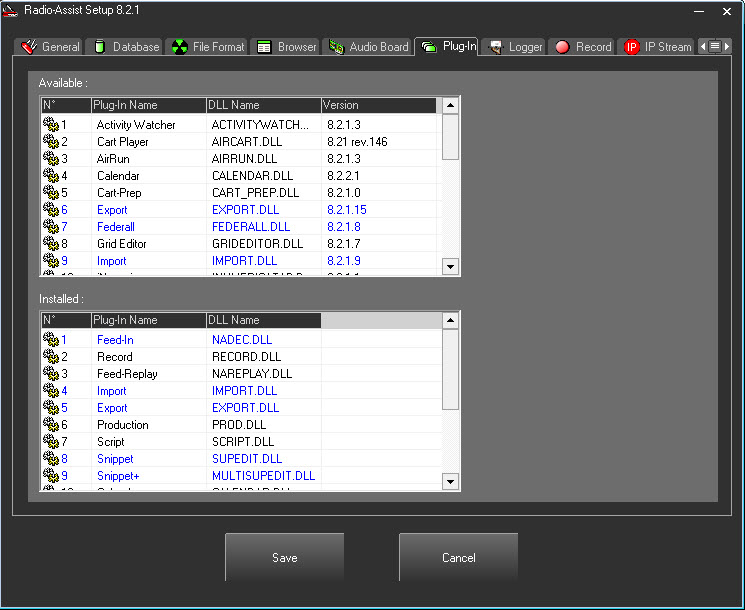
The tab will allow you to install the different production tabs in Radio Assist.
The upper window shows all the available tabs.
The lower window shows installed tabs. The installation is done with a Drag/Drop from the upper to the lower window.
The display order in Radio Assist (from left to right) follows the order number from the left column. It can be modified by moving up or down the tab in the list.
Blue tabs are additionals. Once installed, tabs are shown in Radio Assist Setup and can be configured.
1.3.7.LOGGER Tab
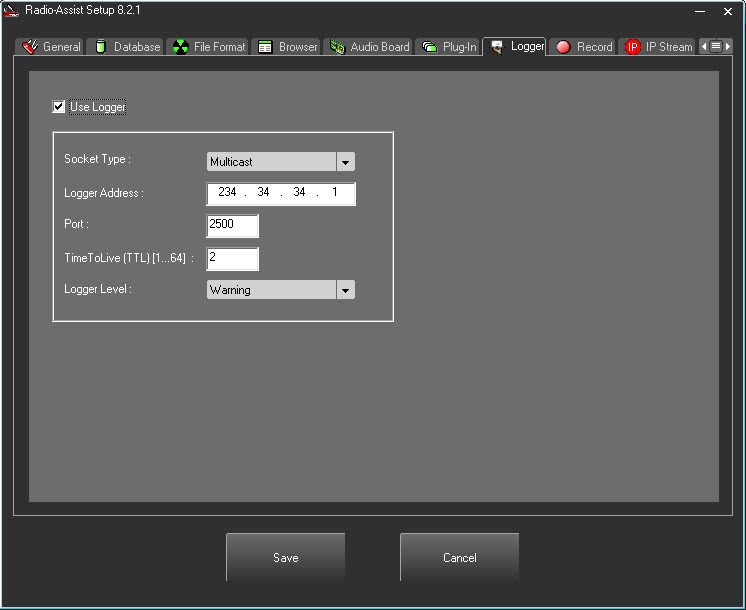
Use Logger : Activates Logger. It will send messages to service Logger. "Use Logger" can only be selected if the service is installed.
Service Logger is a warning messages management application (optional). For further information see Logger documentation.
Socket Type : Select the type of communication used by Service Logger : UDP, Broadcast and Multicast.
Logger Address : IP adress to communicate with Service Logger.
Port : Communication port : 2500 by default.
TimeToLive : Diffusion limit for messages through routers. Only used with Multicast mode.
Logger Level : Security level of messages sent to service logger.
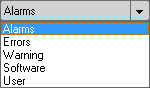
"Alarms" is the lower level and "Users" the lowest
This errors are logged in the "Alarm Manager" tool and in the file "RA8.log"
1.3.8.RECORD Tab
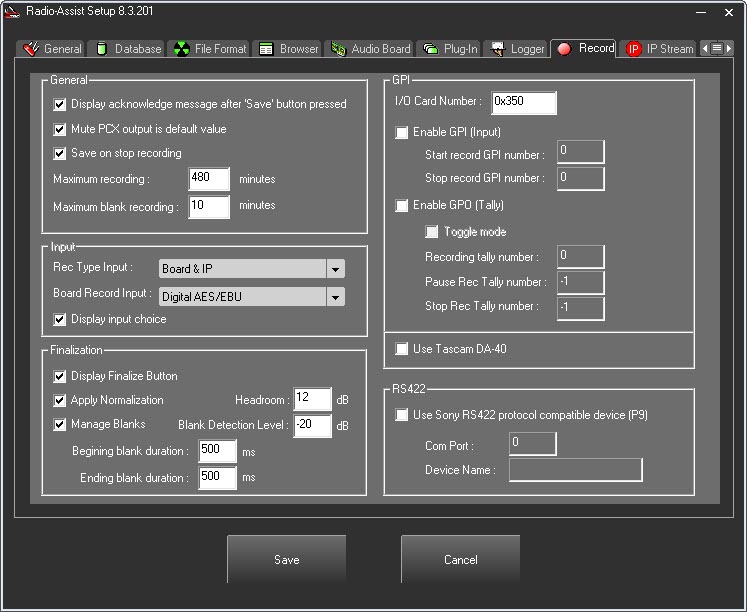
"General" box
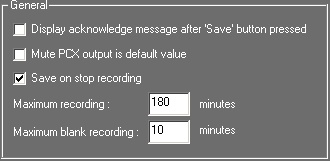
Display acknowledge message after ‘Save’ button pressed : Activate a confirmation message after saving a recording.
Mute Pcx output is default value : Define the mute PCX output by default.
Save on stop recording : Allows user to save a recording when clicking on Stop.
Maximum recording : Maximum recording length for the workstation in minutes.
Maximum Blank recording : Maximum blank recording length for the workstation in minutes.
A popup message "Would you like to continue recording?" is displayed after the maximum time with a one-minute countdown to answer Yes or No. If you answer Yes, the recording continues until the maximum duration of the recording. If you answer no, the recording stops. If there is no response, the recording stops.
"Input" box
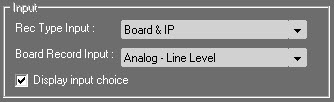
Rec Type Input : Allows to select the incoming source :
Board & IP : Choice given in the RadioAssist "Record" tab between the audio board and an IP feed.
IP only : Only IP feed.
Board only : Only Audio Board.
Record input : Select inputs for recording
Analog - Line level : Analog line.
Analog - Mic level : Microphone input level.
Analog - Stereo Mix : Stereo mix.
AES/EBU : Digital input.
AES/EBU + Ext AES Sync : Digital input with AES signal.
Display Input choice : Activate a choice list in Radio Assist.
"Finalization" box
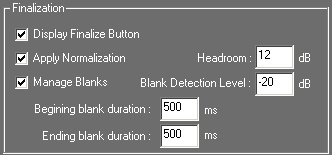
Display Finalize Button : Activate the display of the button in Radio Assist
Apply Normalization : Apply normalization using the Headroom criteria.
Headroom : Headroom value for normalization.
Manage Blanks : Activate blank detection.
Blank Detection Level : Blank detection level.
Beginning blank duration : Add "n" ms of blank at the beginning of a recording.
Ending blank duration : Add "n" ms of blank at the end of a recording.
"GPI" box
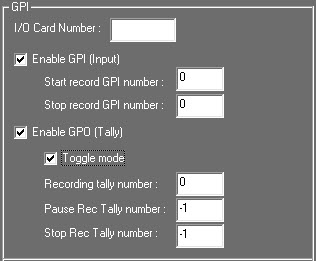
I/O Card Address : Address In/Out of the GPI card. (For further information see the the documentation on GPI cards).
Enable GPI Input : Activate inputs.
Start record GPI number : Pin card number for starting a recording.
Stop record GPI number : Pin card number for stopping a recording.
Enable GPO (Tally) output : Activate outputs.
Toggle mode : Activate Toggle mode.
Recording tally number : Pin card number for unload signal for recording start signal.
Pause Rec tally number : Pin card number for unload signal for recording pause signal.
Stop Rec tally number : Pin card number for unload signal for recording stop signal.

Use Tascam DA-40 : Activate the use of a DAT Tascam DA-40
"RS422" box
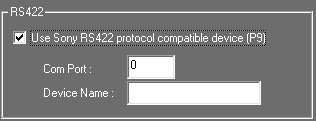
Use Sony RS 422 protocol compatible device : Activate the use of Sony RS422 protocol compatible device.
Com Port : Communication port number.
Device name : Name of the device.
1.3.9.IP-STREAM Tab
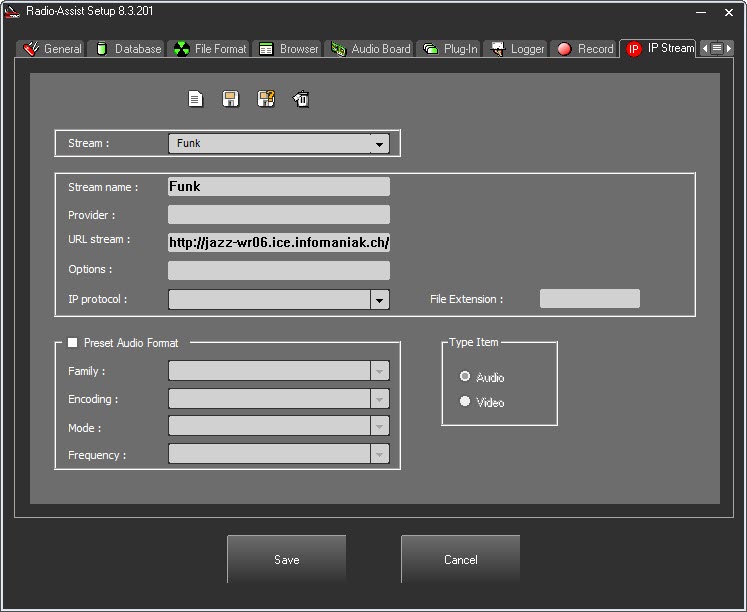
This section of the setup allows you to add, save, save as or delete a stream from the list of feeds you capture with RadioAssist.
"Stream" box

Stream : Allows you to select a stream among the list of existing ones in order to edit the properties fields.
"Stream Properties" box
This box is designed to enter the properties of your stream.
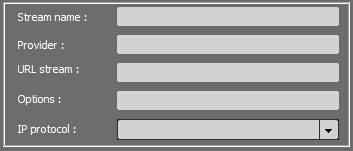
Stream Name: allows you to enter the name of the Stream you're about to record.
Provider: allows you to enter the name of the provider of the Stream.
URL Stream: allows you to enter the address of source of the stream.
URL have the following syntax :
[service:://][user[:pass]@] IP address or host [:port][/directory(ies)][/name_file_or_resource]
When the service is not specified, the port N° must necessarily be known.
When the port number AND the service are provided, the port N° is the one chosen.
The required components are the IP address or host and the port N° (or service).
Options : the flux options are used in conjunction with the standard separator ‘?’ from an http request 'get' : ?param1[;param2;…]. Nevertheless, it is possible to copy the entire URL in the previous field (concatenation is done automatically).
Options: that is, all the information placed after the "?" of a " http 'get' : ?param1[;param2;…] " request in the URL Stream. If you have copied the entire URL Stream in the previous field, there is no need to re-enter the information here (concatenation between the 2 string of characters - URL stream and Options" will be done automatically).
-transcode : explicitly deactivates the transcoding operations for the flux that is being recorded.
+transcode [:gain_dB] : activates the transcoding operation while recording, with a gain level you can apply during the process. This gain replaces the level of gain by default (cf. cartes32 registry).
+data : specifies that the flux is of the ‘data’ type: it will be considered as a non-audio file. All other option become meaningless.
+pcm:fs,can,codage : identifies the flux as a linear raw/pcm, with a frequency sampling rate given in KHz, the number of channels(1=mono, 2=stereo), the coding sample (24=24 bits, 0=16 bits Motorola, 2=16 bits Intel, 4=8 bits not signed, 128=8 bits signed).
+ts-pid or +ts-num or +ts-sid or +ts-name : Only on a MPEG-TS flux : selects the subjacent flux based on a PID, an index number N°, a SID, a name.
+bitrate:debit_kbytes_S1 : limit of debit while recording, done at the value given in Kbytes/s you have specified. Only available for fluxes of the ‘data’ type, (non-audio fluxes) (Audio flux are autoregulated, based on the nominal debit of the flux).
Examples of URL :
http://mp3.live.tv-radio.com/franceinfo/all/franceinfo.mp3?+transcode:-18
tcp://user:pass@127.0.0.1:80
udp://127.0.0.1:1234/?-transcode;+pcm:48,2,24
IP Protocol: allows you to choose between TCP (TCP is connection-oriented protocol. When a file or message send it will get delivered unless connections fails. If connection lost, the server will request the lost part. There is no corruption while transferring a message) or UDP protocol (UDP is connectionless protocol. When you a send a data or message, you don't know if it'll get there, it could get lost on the way. There may be corruption while transferring a message).
"Preset Audio Format" box
This box is designed to enter all the information regarding your stream. When this information is not specified, the administrator will have to enter it manually.
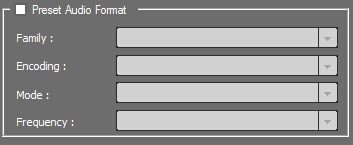
Family: allows you to define if the format is MPEG or LINEAR.
Encoding: Type of encoding used in the stream.
Mode: allows you to choose the method of reproduction, MONO or STEREO.
Frequency: number of samples per unit of time (usually seconds) taken from a continuous signal to make a discrete signal.
"Type Item" box
By default, the item type is "Audio".
1.3.10.FEED-IN Tab
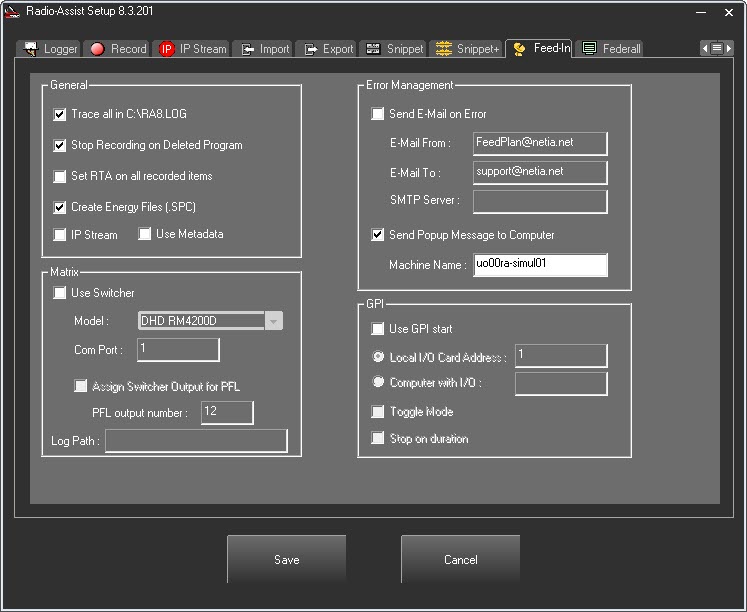
"General" box
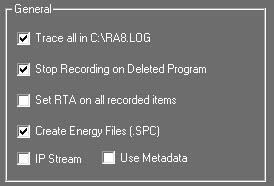
Trace all in C:\RA8.LOG : Save all events in the trace log file :RA8.LOG.
Stop Recording on Deleted Program : Option to stop the recording if we delete the scheduled recording.
Set RTA all recorded items : Option to set the flag Ready To Archive on all recorded items.
Create Energy Files (.SPC) : Creates audio spectrum files.
IP Stream: Option designed to capture IP streams (note that you can either choose to capture an audio stream OR an IP stream but not both type of streams at the same time).
Use Metadata : Used when recorded items have metadata not defined in RadioAssist. Allows to display these metadatas in the Feed-In tab.
"Matrix" box
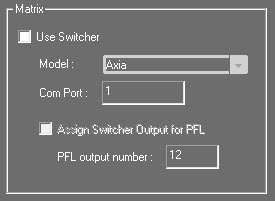
Use Switcher : Allows the use of a switcher.
Model : Switchers used in RadioAssist :
Audio Concept
Axia
Broadcast Tools SS 12.4
Broadcast Tools SS 16.16
DHD RM3200D
DHD RM4200D
Digitec 6000
Netia Air-Switcher
Onyx
Pro-Bel FreeWay
SAS 64000
TESI AR48
VM3000 Controler
WheatStone (IP Broadcast UDP port : 55555)
Com Port : Port communication number of the workstation with the switcher.
Assign Switcher Output for PFL : Activates the PFL output on the switcher.
PFL output number : Output number for the PFL on the switcher.
The following registry key allows the display of the scrolling list.
[HKEY_LOCAL_MACHINE\SOFTWARE\NETIA\RadioAssist\8.0\NADEC\PFLList]
Display=Yes Scrolling list display (Yes/No)
"Error Management" box
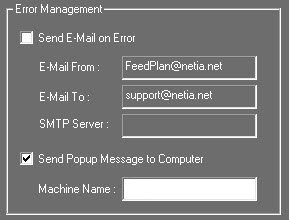
Send E-mail on Error : Enables an error message to be e-mailed.
E-Mail From : Email sender's.
E-Mail To : Target reicpient's e-mail address.
SMTP Server : SMTP server.
Send Popup Message to Computer : Activate a pop up message to a workstation in the local network.
Machine Name : Workstation name.
"GPI" box
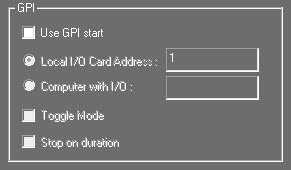
Use GPI start : Activate a GPI start for recordings.
Local I/O Card Address : GPI address card.
Computer with I/O : Workstation name with the GPI.
Toggle Mode : Activate Toggle mode.
Stop on duration : Option to stop the recording on the scheduled duration.
1.3.11.IMPORT Tab
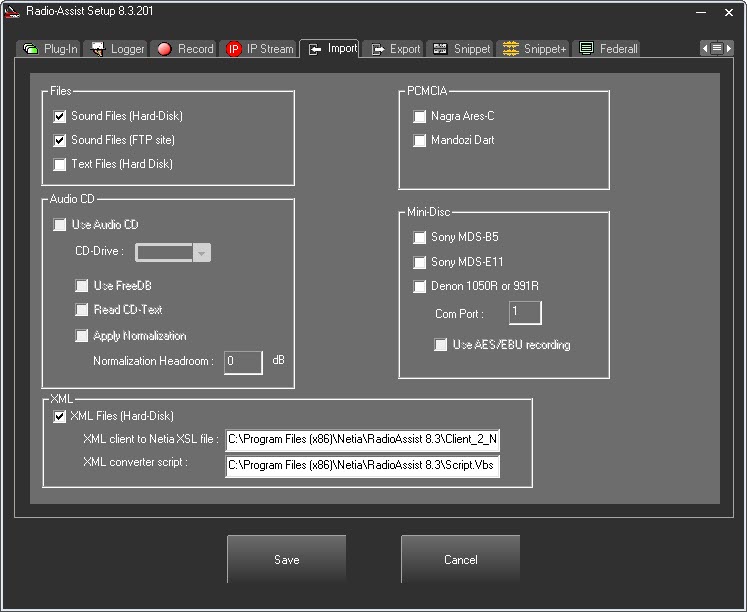
This screen will allow the display of the diffferent sources available for import on the RadioAssist Import tab.
"Files" box
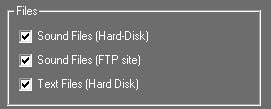
Sound Files (Hard Disk) : Add Hard Disk tab for import from a local or network hard drive.
Sound Files (FTP site) : Add the FTP tab for imports from an FTP site.
Text Files (Hard-Disk) : Add the Text tab to import texts.
"Audio CD" box
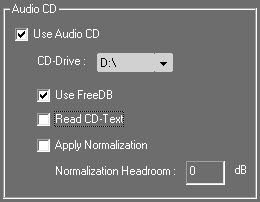
Use Audio CD : Add the CD Audio tab.
CD Drive : Specify from which drive the Audio CD import will be done.
Use FreeDB : Automatic CD identification with online database.
Read CD Text : Some of the Audio CD's have a text file attached with tracks.
Apply Normalization : Apply a normalization on tracks.
Normalization Headroom : Apply the headroom if different from the PCX Card tab.
"XML" box
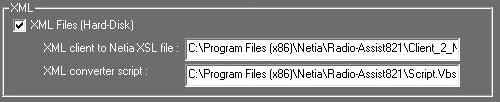
XML Files (Hard Disk) : Add the XML tab in the Hard-Disk tab.
XML client to Netia XSL file : Type the path and name of the XSL file.
XML converter script : Type the path and name of the VBS file.
Components and registry keys for XML import :
List of components necessary for the use of XML for imports and exports in RadioAssist :
XMLFormatu.dll
Script.vbs
Client2Netia.xsl
Netia2Client.xsl
Informations of global registry :
Basic informations are stored in the following key and are read by "XMLFormatu.dll" :
[HKEY_LOCAL_MACHINE\SOFTWARE\NETIA\RadioAssist\8.0\XMLFormatViewer] "Temp path"="C:\Temp\" "HTML script path"="C:\XML\script.vbs" "Netia to client XSL path"="C:\XML\Netia_2_Client.xsl" "Client to netia XSL path"="C:\XML\Client_2_Netia.xsl"
"PCMCIA" box
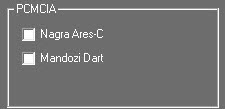
Nagra Ares- C : Add the Ares C tab to import Nagra files.
Mandozi Dart : Add the Dart tab for import of Mandozi files.
"Mini-Disc" box
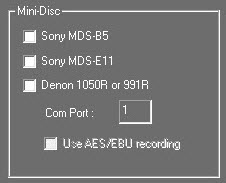
Sony MDS-B5 : Add the Mini-Disc tab for MDS-B5 from Sony.
Sony MDS-E11 : Add the Mini-Disc tab for MDS-E11 from Sony.
Denon 1050R ou 991R : Add the Denon tab for Denon players 1050R or 991R.
Com Port : Communication port number.
Use AES/EBU recording : Activate a digital audio connection.
1.3.12.EXPORT Tab
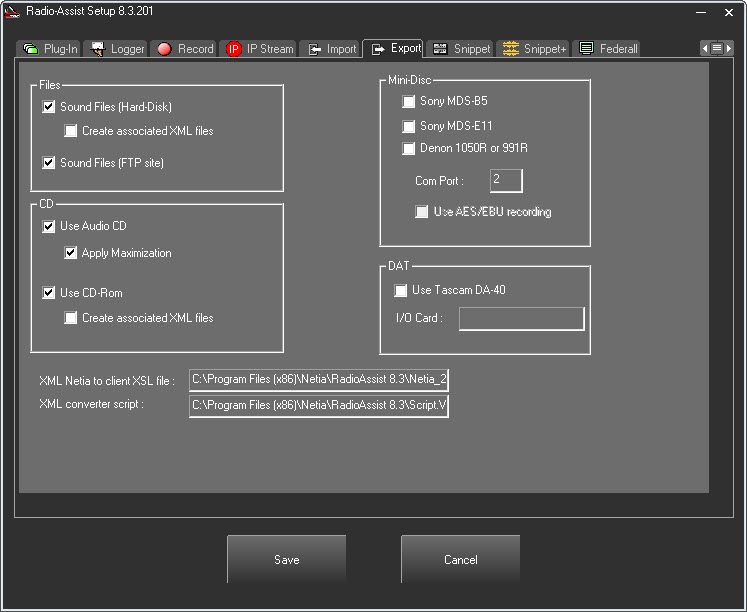
The Export tab is configurable depending on the available devices (see the Export user documentation).
"Files" box
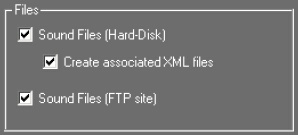
Sound Files (Hard Disk) : Add the Hard-Disk tab to export to a local or network hard-disk.
Create associated XML files : Activate the creation of an XML file linked to the exported file.
Sound Files (FTP site) : Add the FTP tab to export to a FTP server.
When "Create associated XML files" box is ticked, the 2 fields in the lower part need to be files :

XML client to Netia XSL file : Path and name of the XSL file.
XML converter script : Path and name of the VBS file.
"CD" box
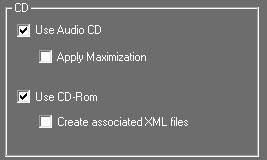
Use Audio CD : Add the Audio CD tab to export to a Audio CD.
Apply Maximization : Apply normalization.
Use CD-Rom : Add the CD-Rom tab for the manual archiving.
Create associated XML files : Activate the creation of an XML linked to the exported file.
NOTE : Once archived, it will not be possible to archive this file again with the Archiving application. A file already archived is still present in the system and could be archived manually once or several times. The last reference of the CD-Rom will be saved. The name of the CD-Rom will the letter M followed by the archiving number.
When "Create associated XML files" box is ticked, the 2 fields in the lower part need to be files :

XML client to Netia XSL file : Path and name of the XSL file.
XML converter script : Path and name of the VBS file.
"Mini-disc" box
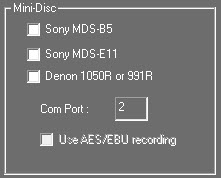
Sony MDS-B5 : Add the Mini-Disc tab for MDS-B5 from Sony.
Sony MDS-E11 : Add the Mini-Disc tab for MDS-E11 from Sony.
Denon 1050R ou 991R : Add the Denon tab for Denon players 1050R or 991R.
Com Port : Communication port number.
Use AES/EBU recording : Activate a digital audio connection.
"DAT" box
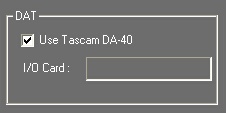
Use Tascam DA-40 : Activate the use of the DAT Tascam DA-40.
I/O Card : GPI card address for the device.
1.3.13.SNIPPET Tab
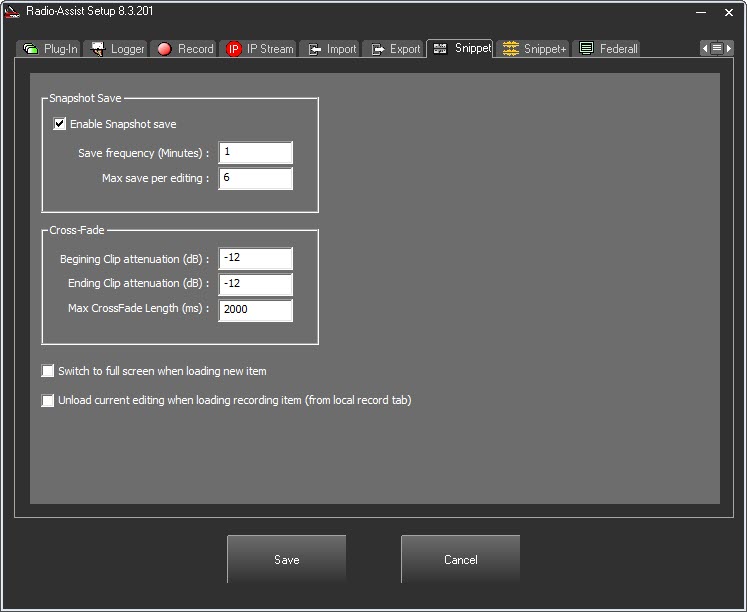
"Snapshot Save" box
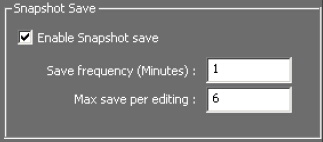
Enable Snapshot save : Activate automatic save on the workstation.
Save frequency (Minutes) : Frequency in minutes of the automatic save.
Max save per editing : Define how many maximum saves per editing.
This feature allows the creation of automated saves which can be used in case of a lost file.
These files are stored in the "SNIPPET" folder of the installation folder of RadioAssist (usualy C:\Program Files (x86)\Netia\RadioAssist\).
The file's format is .SAV
To use them, drag and drop them from the folder into the "Snippet" tab.
"Cross-Fade" box
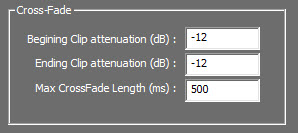
Begining Clip attenuation (dB) : Attenuation level at the beginning of a cut.
Ending Clip attenuation (dB) : Attenuation level at the end of a cut.
Max CrossFade length (ms) : Maximum size in ms of the crossfade between the beginning and the end of a cut.
Others

Activate the full screen when loading an item from Browser.

Activate unloading of the current edit when loading a recording from the record tab.
1.3.14.SNIPPET+ Tab
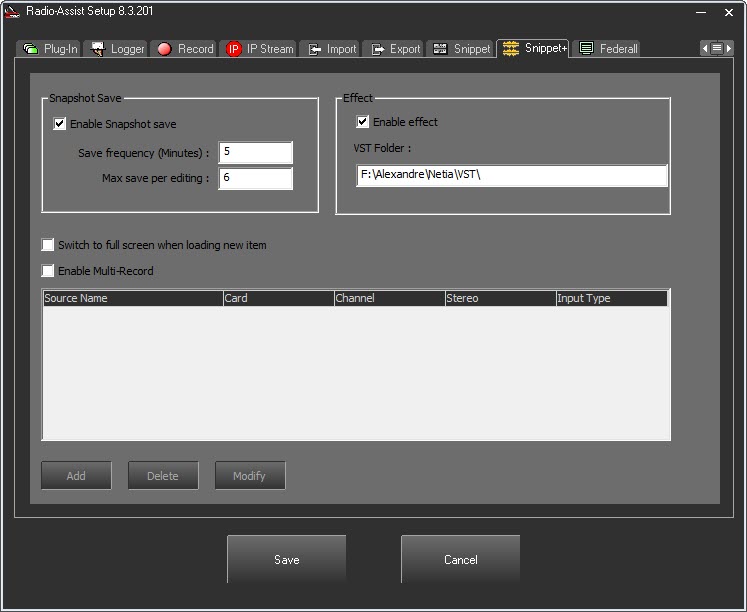
"Snapshot Save" box
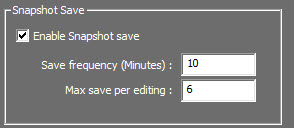
Enable Snapshot save : Activate automatic save on the workstation.
Save frequency (Minutes) : Frequency in minutes of the automatic save.
Max save per editing : Define how many maximum saves per editing.
This feature allows the creation of automated saves which can be used in case of a lost file.
These files are stored in the "SNIPPET+" folder in C:\ProgramData\Netia\RadioAssist\
The file's format is .SAV
To use them, drag and drop them from the folder into the "Snippet+" tab.
"Effect" box
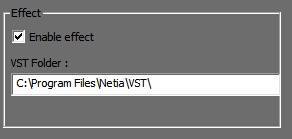
This section allows you to display effects in Snippet+ (just tick the box)
VST Folder: Path to the folder where all the VST plugins are stored. VST plug-ins add effects (reverberation, equalizer, chorus, flanger...) for audio recording and sequencing programs.
The "\" must be put at the end.
"Multi-Record" box
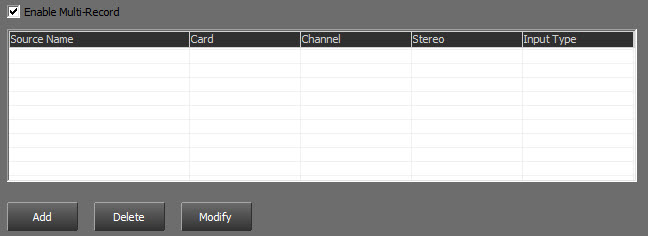
Enable Multi-Record : Enables the multi channel record in Snippet+.
Mutli-Record setup :
Click on  to create the different record channels.
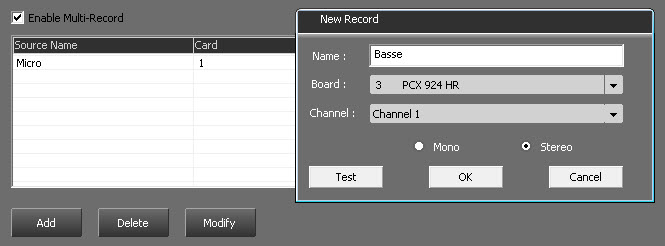
Name : Nam of the track.
Board : Audio board used for this track.
Channel : Channel used on the audio board.
Select "Mono" or "Stereo".
Click on "OK" to validate.
Additional Option

Tick the box in order to enlarge Snippet+ and hide the Browser when one audio item is loaded onto a track.
1.3.15.FEDERALL Tab
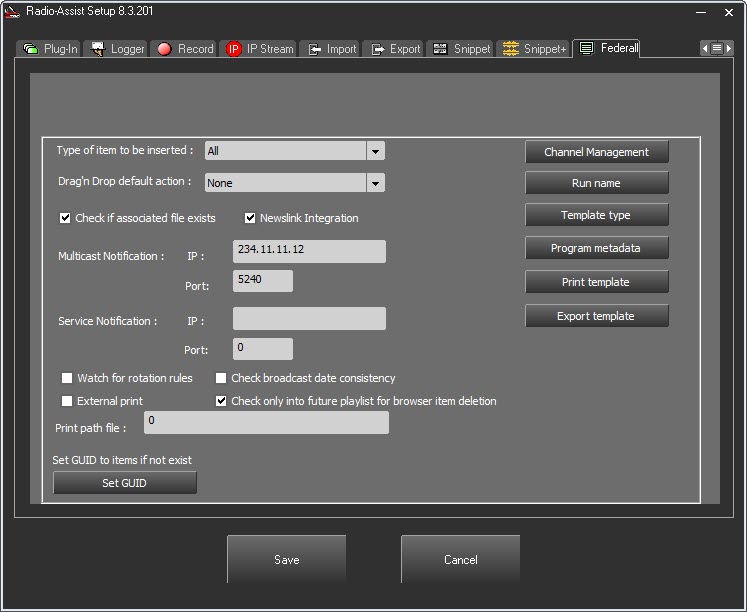

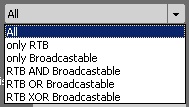
Type of items to be inserted : Allows to select the type of item which can be inserted in a playlist or a stack.
Only RTB : Only item marked as "RTB".
Only Broadcastable : Only item marked as "Broadcastable".
RTB AND BROADCASTABLE : Only item marked as "RTB" AND "Broadcastable".
RTB OR BROADCASTABLE : All items which are "RTB", or "Broadcastable" or both.
RTB XOR BROADCASTABLE : Only item marked as "RTB" OR "Broadcastable".

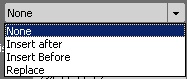
Drag’n Drop default action : Define how items are inserted :
None : While inserting the item, a menu is presented with the choice of location.
Insert before : The item will be inserted before the target run.
Insert after : The item will be inserted before the target run.
Replace : The item will replace the target run.
If the choice is different from "None", no location menu is going to be shown. But, by using the "CTRL" key while dropping the item on a target run, a menu will be shown.

Check if associated file exits : Checks if an associated file is present in the database.

Watch for rotation rules : If using the RadioAssist scheduling tool, rotatrion rules can be apllied to an item. It will check for these rules when inserting an item in the playlist.

Check broadcast date consistency : When an item is dragged and dropped in a playlist, the following will be checked :
- that the limits of the playlist are in the broadcast limits of the item. So DATE_BEGIN and DATE_END for the playlist are included in the START_BROADCAST and the END_BROACAST of the item.
- that the added item in the limit is still valid. So, its KILL_DATE is not higher than the DATE_BEGIN of the playlist.
Check only into future playlist for browser item deletion : Allows the deletion of elements unless they are inserted into future playlists. Elements inserted into past playlists can thus be deleted.
Check only into future grid for browser item deletion : Allows the deletion of elements unless they are inserted into future programming grids. Elements inserted in past programming grids can thus be deleted.

Multicast Notification : IP adress and port used to send notifications trough Multicast.
By default IP adress : 234.11.11.12
By default Port : 5240.

Service Notification : If using the "Federall Service" tool to import playlists, the import is not local anymore.

Newslink Integration : All playlists modifications made in the NRCS tool will be applied in Radio Assist playlists.
However, by checking the box, the modification of the lines in the NRCS tool will be applied in the Radio Assist lines, but the screens can not be modified in Radio Assist.
This is to avoid any discrepancy between the 2 tools.
If the box is not checked, the Radio Assist lines can be modified but the changes will not be returned to the NRCS tool.

External Print : If the box is ticked, the playlist print is not done with "Federall". It will copy all the playlist informations in a folder. These informations will be treated and the lay out will be done by a third party tool who will print.
Print path file : Folder path for these informations.
Set GUID
Set GUID to items if not exist : Generates a GUID for items without one.
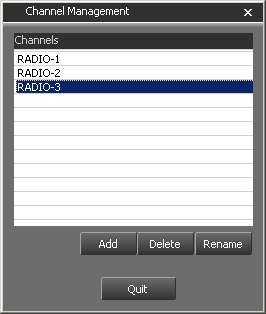
Channel Management

Channel Management : Adding new channels to the database..
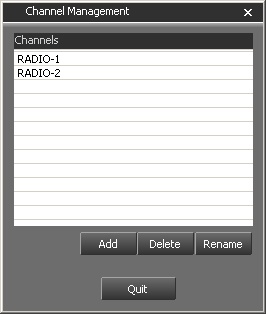

Buttons to add, delete or rename channels.
Add a channel : Click on "Add", type the name and click on "OK".

Delete a channel : Select the channel to delete and click on "Delete".

Rename a channel : Select the channel to rename, modify the nam and click on "OK".
 Quit the "Channel Management".
Run Name

This option allows users to define the way the runs should be named in the database.
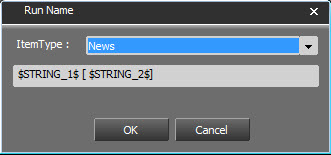
The way runs are to be named is defined in this popup.
A different naming can be associated to each type of run. The naming depends on the columns of the T_ITEM tab. The maximum amount of columns which can be concatenated to produce the name of a run is set to 5.
Choose first an item type. Then, populate the second field by indicating he type of format which should be applied. The name of each columns must appear between "$". Anything written outside of these marks will be transcribed as such in the name of the run.
Example:
To find back the value in use in STRING_1, and then, the value in STRING_2, you'll need to write:
$STRING_1$ ($STRING_2$)
Template Type

This button allows users to associate a type to a model in the database.
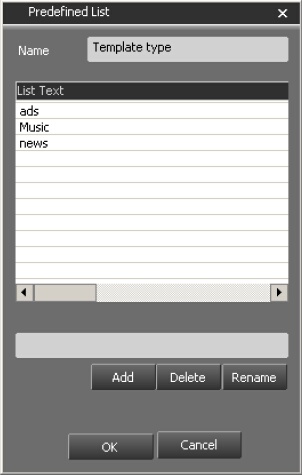
A type can be associated to the different existing models. They are different from the audio items types. You can Add, Delete" or Rename those types here.
Program Metadata

This button allows users to define the metadata fields to associate to the different shows in the database.
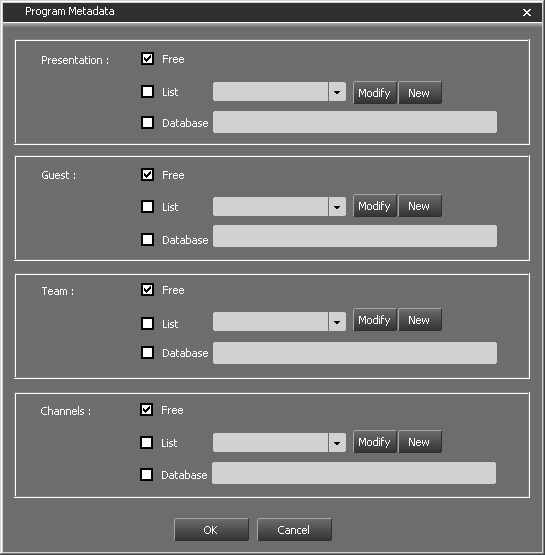
This window allows users to define the metadata which can be associated to the shows. For these 4 types of metadata (Presentation/Guest/Team/Channels), 3 choices are offered:
Free : Free text.
List : Choices appear in the predefined list.
Database : Choices are made among the values returned by the SQL request in the field.
Print Template

This button allows users to define the printing format based on the selected style sheet.
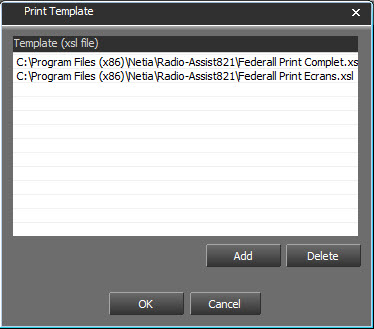
The printing format of the playlists can be configured using style sheets (*.xsl). An XSL template contains the HTML code that will be generated from the playlist’s data.
If no print template is specified, the two default formats will be proposed. The default print templates are located in the Radio Assist installation folder, and are named Federall Print Complet.xsl (prints programs, screens and runs), and Federall Print Ecrans.xsl (programs and screens).
If one or more templates are added, the default ones are no longer proposed in Federall. If only one template is added, it will be used by default.
Export template

Export template : Allows you to define which driver export format will be available by clicking on the button  in the Federall tab of Radio Assist.
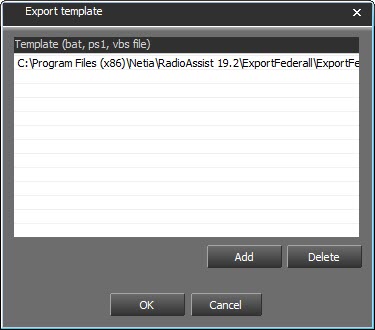
Click on  to open Windows Explorer to select the export format.
The files used are .bat.
If several files are filled in, the user can choose the desired format.
1.3.16.SOUNDCHECK Tab
This setting should only be used by technicians with extensive expertise in the field of digital audio.
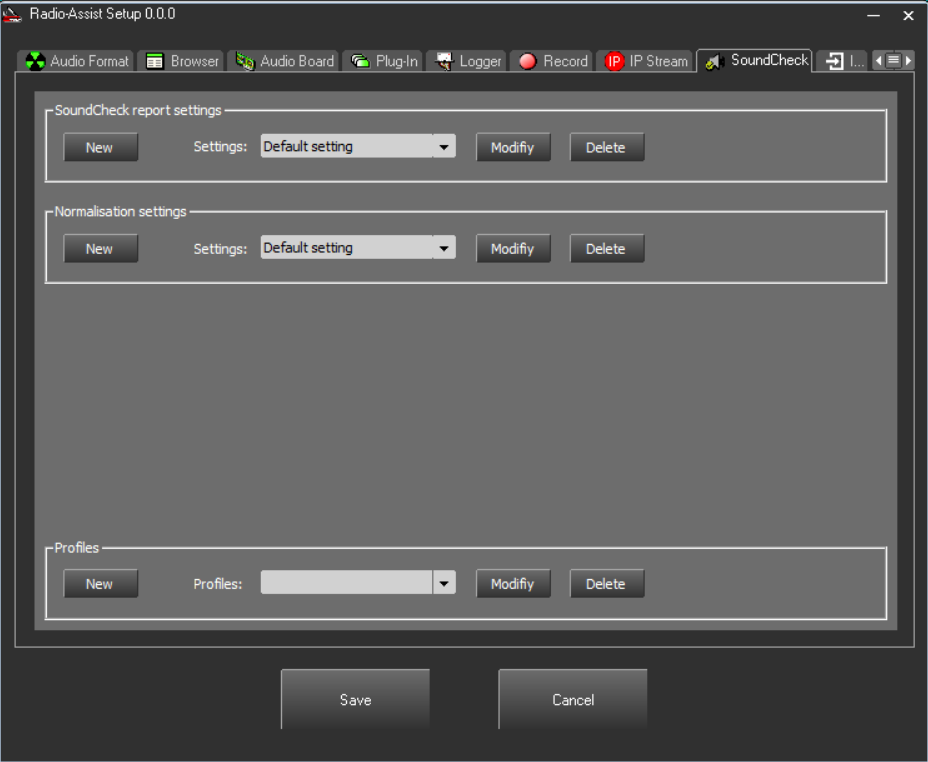
The SoundCheck tab in Radio-Assist Setup has three configuration areas:
- Soundcheck report settings: allows you to create analysis and quality report presets
- Normalisation settings: allows you to create loudness normalisation presets, peak or loudness, and activate a limiter.
- Profiles: this allows you to associate the previous presets with the sound elements in the database according to the dynamic or static tab in which they are listed.
SoundCheck report settings
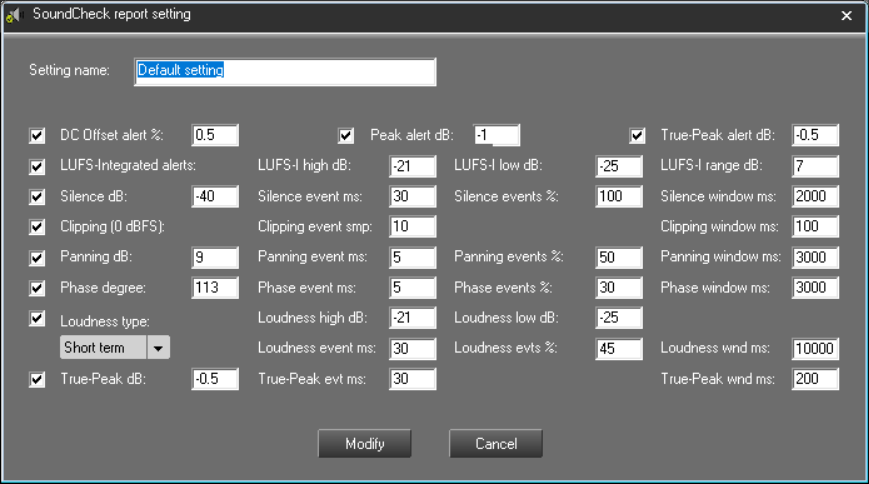
After the preset naming field, the first two lines allow you to set alert thresholds on the overall values measured on the sound element. Each of these alerts can be enabled/disabled using checkboxes.
The following lines concern the configuration of events to be detected in the analysed sound files, such as the presence of silent intervals or phase shifts. They contain a trigger threshold, the minimum duration of a single event, the tolerance (as a percentage) for the number of these events in a given time window, and the settings for this time window. For example, if you are looking for silences of at least 2 seconds, the ‘Silence window ms’ parameter should be set to 2000 ms.
You can also enable/disable alerts for these events using checkboxes.
Note that, for panning, the threshold in dB corresponds to a level difference between the right and left channels. The phase shift threshold is in degrees: a phase opposition corresponds to a phase shift of 180 degrees.
When creating your first preset, you will be prompted to create a ‘Default setting’ based on the default values we have defined. This is a working base that you can customise. Once this preset has been saved, it can be used as a basis for your future presets.
Back in the SoundCheck tab, you can create new presets based on an existing preset. To do this, simply select the preset from the ‘Settings’ drop-down menu before clicking ‘New’.
You can also modify each preset.
You can rename a preset without changing its assignment in the profiles: presets are identified by GUIDs.
It is not possible to delete a preset that belongs to a profile.
Normalisation settings
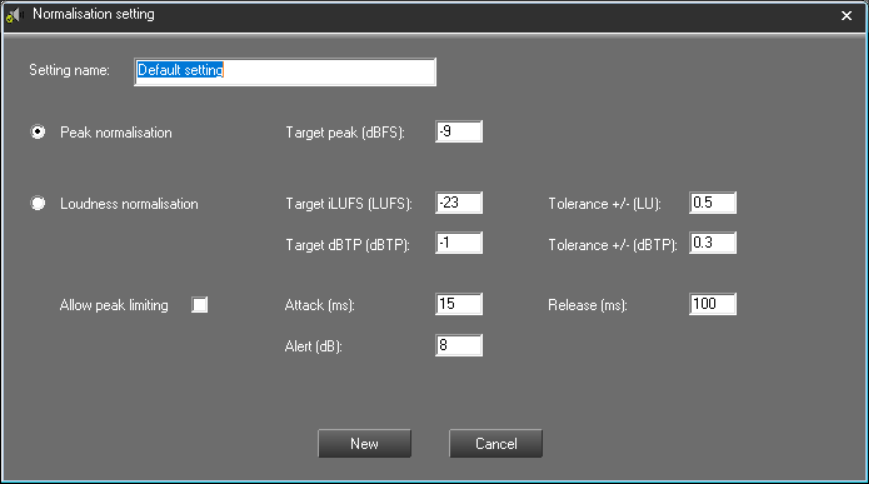
It is still possible to choose peak normalisation similar to Radio-Assist's historical normalisation, but it is now possible to choose normalisation based on a target loudness level. Normalisation is performed during mastering, if requested. The buttons are the same and the associated rights have not been changed.
The first loudness normalisation parameter allows you to choose the desired loudness level, with a tolerance on the source level below which the normalisation process will not be triggered.
On the line below, you can define a target true-peak level, also with a tolerance.
You can then activate a limiter. If it is not activated, the level correction will depend on the peak level of the source and be limited to its difference from the target true-peak level: if an element has a loudness level that is too low by 6 dB LUFS but has a peak of -3 dBFS, the correction can only be +2 dB to reach the target of -1 dBTP. The desired loudness level will therefore not be achieved.
The limiter allows peaks to be processed in order to obtain the desired loudness level.
It is advisable not to exceed a limitation of 8 dB: an alert (configurable) will be given to the user if this threshold is exceeded.
Profiles
A profile is used to match the audio elements contained in a Radio-Assist Browser tab with the analysis and normalisation presets.
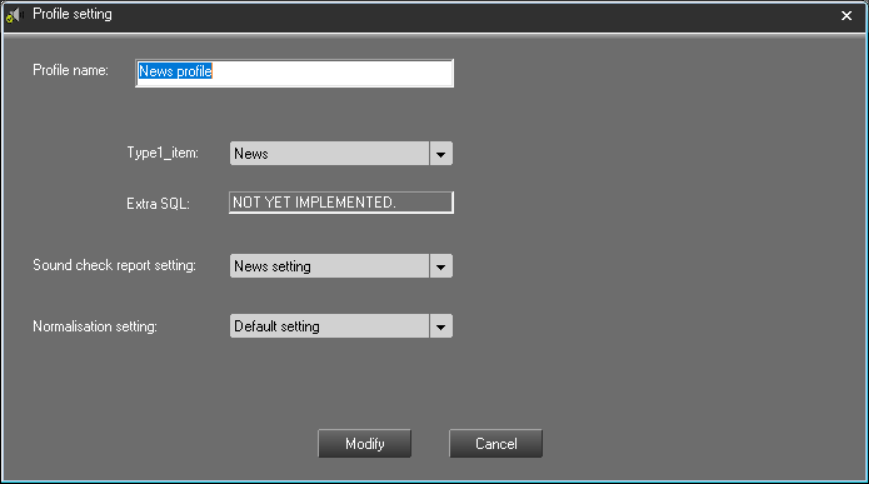
The settings window allows you to select a tab (News, Jingle, Music, User-A, Group-B, etc.) and assign a preset to it.
In a future version, it will be possible to supplement the tab selection with an SQL query.