1.Federall Service
1.1.Part 1 : Install Federall Service
To install Federall Service, double-click on "FederallSvcInstaller.msi".
The following window opens :
Click on  .
.
Tick the box to accept the terms in the License Agreement.
Click on  .
.
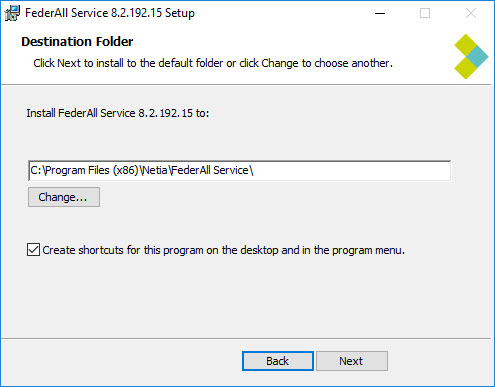
To change the installation folder for Federall Service, click on  .
.
Tick the box for shortcuts on your desktop.
Then click on  .
.

Click on 
Federall Service is installed.
The shortcut  is present on the desktop.
1.2.Part 2 : Federall Service Presentation
Federall Service is an interface allows you to:
- to automate RadioAssist playlist generation using the RadioAssist GridEditor tab.
- to automate imports from external tools (music scheduling, advertising, etc...) into RadioAssist playlists.
- to set the communication parameters with Nexus (communication tool for the music scheduling software MusicMaster).
- to allow Insider to monitor RadioAssist playlist.
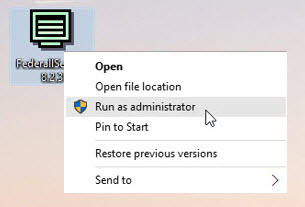
1.2.1.Open Federall Service
Federall Service needs to be opened as administrator.
To do so, right click on the icon and select "Run as administrator" :
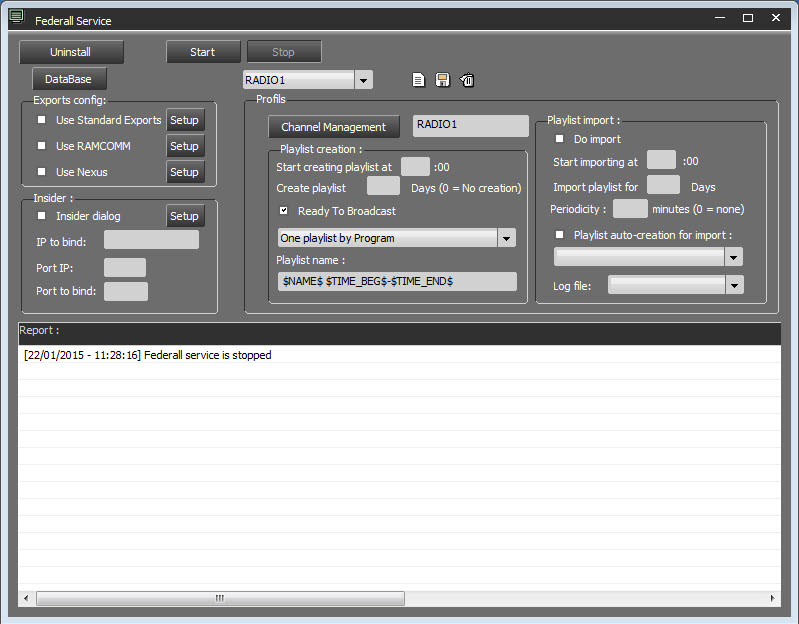
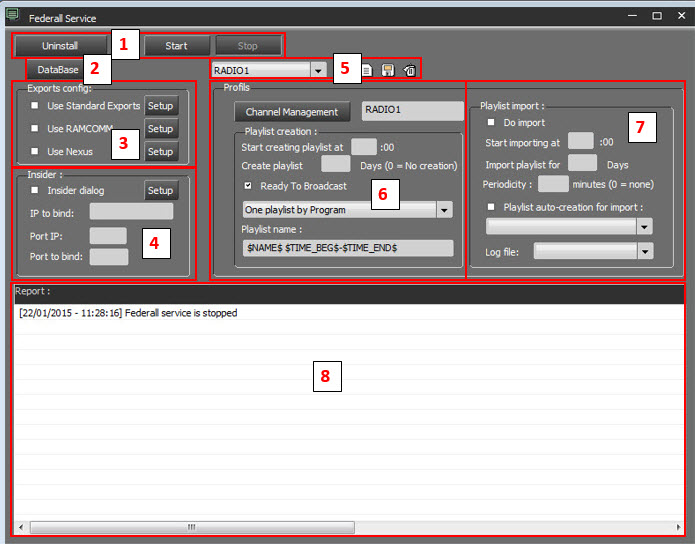
1.2.2.Interface presentation
Federall Service is divided in 7 blocks :
1 - Command buttons.
2 - DB : Settings for database connection.
3 - Exports Config : Setting of different exports available.
4 - Insider : Insider settings.
5 - Profils : Profiles setting management.
6 - Channel management : Channels setting using Federall Service.
7 - Playlist Import : Channels impirts setup.
8 - Process : Process follow-up.
1.2.3.Exit Federall Service
To exit Federall Service, click the Close button (X) in the upper-right corner of the window

Federall Service closes and saves all modifications.
Note : The window is closed, but Federall Service continues running in the background.
1.3.Command buttons
3 Command buttons are available :
 This is used during the first installation of Federall Service.
This allows the installation of Federall Service as a service.
By clicking on the button, the following window opens :
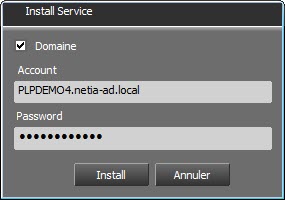
After selecting the ‘Domain’ checkbox, enter the machine name in the ‘Account’ field, then enter the password and click ‘Install’.
Once installed, the button becomes :
 Allows you to uninstall Federall Service.
 Allows you to start Federall Service.
Once Federall Service is started :
it will start processes according on time defined in Playlist Creation and Playlist Import.
it will start commands linked to Insider.
it will communicate with Nexus.
 Allows you to stop Federall Service.
Once clicked, the following wondows opens :
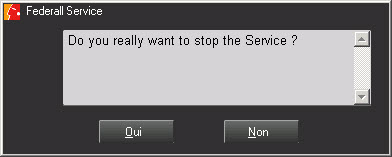
Click on "Oui" (Yes) or "Non" (No)
If "Oui" :
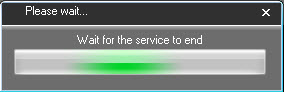
Once Federall Service is stopped, no processes will be done.
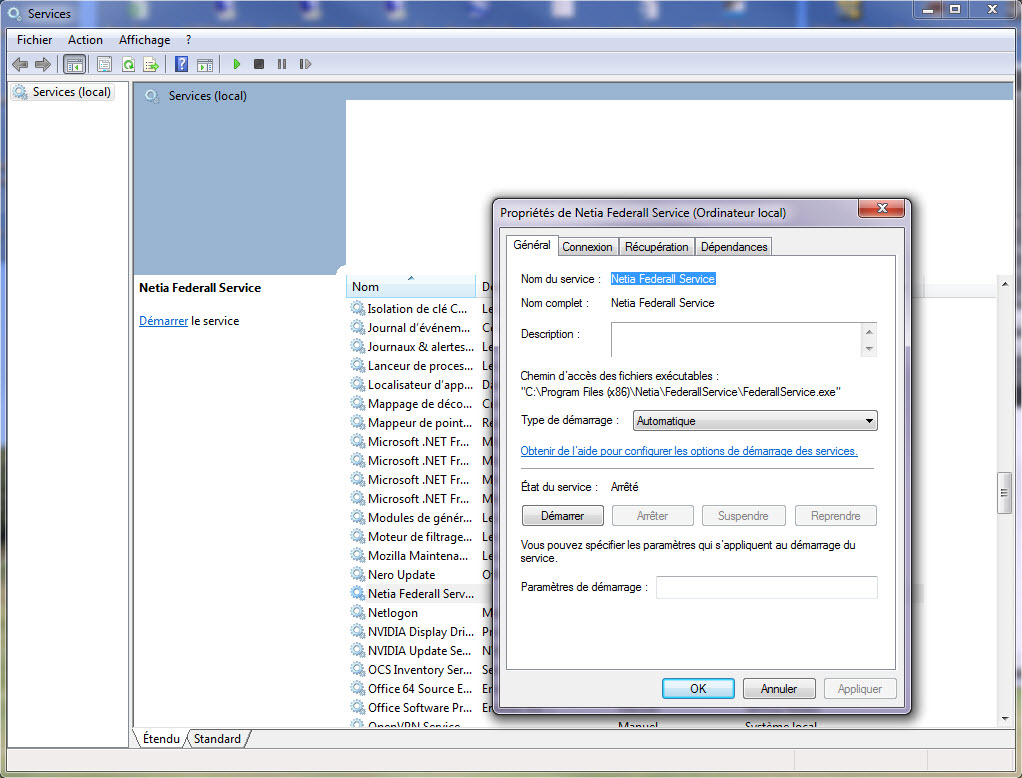
Federall Service is also present in Windows Services.
It need to be set to "Automatic" in order for it to start processes automatically :
1.4.Database Setup

By clicking on the following button, we'll access the database setup :
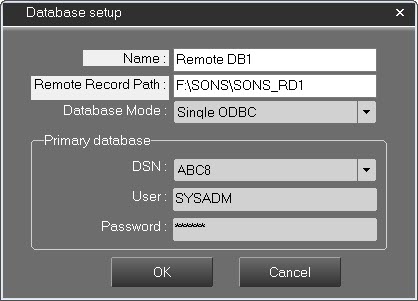
The following windows opens :
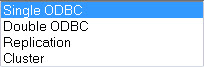
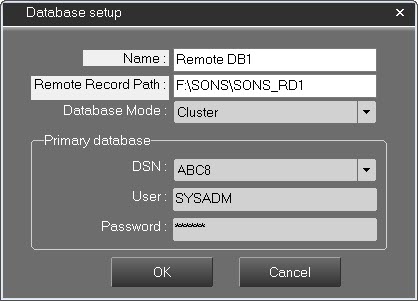
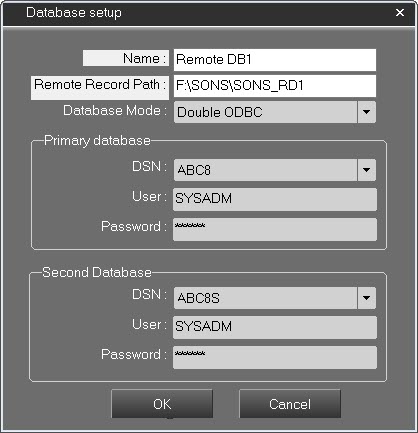
The display will be different depending on the connection type used :
NOTE: If the "Replication" mode corresponds to a SQL Server merge replication, this option is now obsolete.
In the context of a multisite connection, it is possible to enter:
Name : The name of the remote connection.
Remote Record Path : Enter the path of the sound recording folder.
1- When using an ODBC connection to the database or a "Cluster" connection, select in the DSN menu the primary database. Then we put the user name and password.
2- When using a "Double ODBC" connection to the database or a "Replication", select in the DSN menu the primary database and the second database. For both of them then put the user name and password.
Click on  to save and exit.
Click on  to exit without saving.
1.5.Standard Exports
This feature allows the exchange of item metadata or broadcast log metadata (AsRun) between NETIA and a third-party application.
Standard exports are used for integrations with MusicMaster, gSelector, or other third-party applications that need to synchronize with audio items or broadcast events (AirRun).
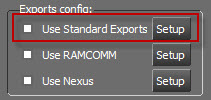
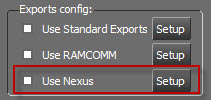
Check the ‘Use Standard Exports’ checkbox.
Click on  :
:
1.5.1.Item Export
Exports items selected by the filter to a dedicated directory in XML format.
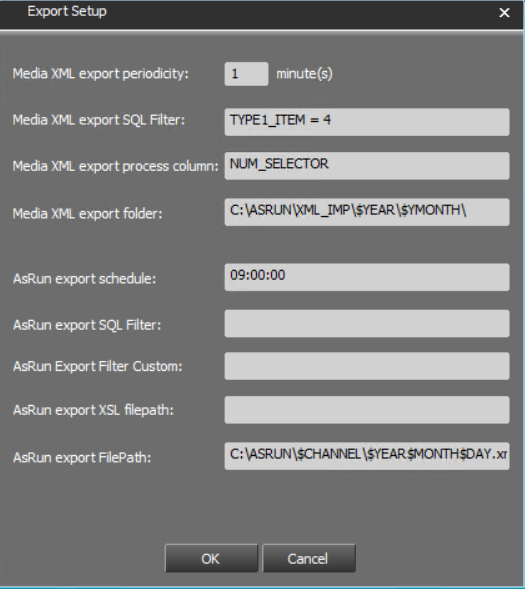
Media XML export periodicity: Delay in minutes between two database scans. A delay that is too short may impact database performance.
Media XML export SQL filter: SQL query used to define the items targeted for export. This filter applies to the T_ITEM table.
Media XML export process column: Column in the T_ITEM table used to indicate that the item has already been exported.
Media XML export folder: Path of the folder where the item XML file will be stored.
The following macro variables can be used in the path:
• $YEAR → “YYYY” • $MONTH → “MM” • $DAY → “DD”
The XML file will use the following format: "Guid-Item.xml".
1.5.2.AsRun Export
Exports AsRun records selected by the filter to a dedicated directory in XML format.

AsRun export schedule: Time at which the daily task is launched to create the broadcast log file for the previous day from T_AIR_RUN.
AsRun export SQL filter: Allows filtering of the AsRun records to be exported. This filter applies to the T_AIR_RUN table.
When this filter is used, one file per Federall channel will be created.
Example: TYPE1_ITEM = 2 allows exporting only one type of item.
AsRun export Filter Custom: Allows defining a set of export filters. These filters will not be applied per Federall channel, but will be executed individually to create one XML file per filter.
Each filter must be separated by a ";".
This makes it possible, among other things, to merge broadcast logs from two Federall channels.
When this parameter is used (not empty), AsRun export SQL filter is no longer taken into account during the export phase.
Example:
(GUID_CHANNEL = GUID_FED_CHANNEL_A OR GUID_CHANNEL = GUID_FED_CHANNEL_B) AND TYPE_ITEM = 4 ; GUID_CHANNEL = GUID_FED_CHANNEL_A OR GUID_CHANNEL = GUID_FED_CHANNEL_B OR GUID_CHANNEL = GUID_FED_CHANNEL_C
AsRun export XSL filepath: Absolute path to the XSL file used to apply an XSLT transformation to the exported files.
AsRun export Filepath: Path of the folder where the AsRun XML file will be stored.
The following macro variables can be used in the path:
- $YEAR → "YYYY"
- • $MONTH → "MM"
- • $DAY → "DD"
- • $CHANNEL
- When using AsRun export SQL Filter → "Federall Channel Name"
- When using AsRun export Filter Custom → "CUSTOMCHANNELX", where X is the query number.
The XML file will use the following format: "YYYYMMDD.xml".
1.5.3.Example of an AsRun export file:
AsRun file originating from the database:
> > > > |
Example of an XSL transformation sheet allowing to generate an ASCII file of broadcasted sounds.
xmlns:msxsl="urn:schemas-microsoft-com:xslt" xmlns:var="urn:var" xmlns:userStyle="urn:userStyle" xmlns:userJScript="urn:userJScript" exclude-result-prefixes="msxsl var userStyle userJScript" version="1.0"> '------------------------------------------------------------------------------- function VBDateTime2Time (strDateTime) VBDateTime2Time = Mid(strDateTime,InStr(strDateTime," ")+1) end function ]]> |
Result :
05:19:04 00:03:09 84FF8943-D72D-40AB-B16D-00E99C8A7023 20:18:36 00:00:06 50EF34D9-BD47-4692-91B5-A22D18EF9562 |
1.6.Ram-Comm Setup
RAM-COMM is a traffic system tool. It manages all the advertising process : clients, sells campaigns, contracts and billing.
Pour permettre un échange d'informations entre RadioAssist et RAM-COMM, il est nécessaire de paramétrer Federall Service.
To allow informations exchange between RadioAssist, it's necessary to set it in Federall Service.
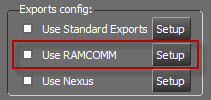
Click on 
The following window opens : :
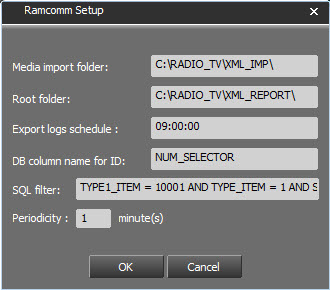
Media Import folder: path to the folder where XML RTB sound files are dropped. They are imported in RAM-COMM; If a sound RTB value is deleted in RadioAssist, an XML file is generated and the sound is deleted from Ram-Comm.
! If the XML files are not created in this folder, the SQL filters lay be wrong, or a second Federall Service is in conflict with this one.
Root Folder: Path folder where Federall Service sends certification files generated by Air Run.
Export logs schedule: Time when Air Run XML files are generated.
DB column name for ID: Database field used for data synchronisation. Use a non-used column. By default "NUM_SELECTOR" is used.
SQL Filter: Filter used to define which sounds are synchronised.
When installing RAM-COMM, be sure to have 1 RAM-COMM by channel. The filter used is :
TYPE_ITEM = 1 AND TYPE1_ITEM = "tab sub type item" AND STRING_X = "Channel name"
Periodicity: duration, in minutes between 2 "scans" of the databse.
1.7.Nexus Setup
Nexus is the specific communication interface dedicated to MusicMaster.
It allows the communication between RadioAssist and MusicMaster.
To set Nexus parameters, click on 
The following windows opens :
To create a new profil, click on 
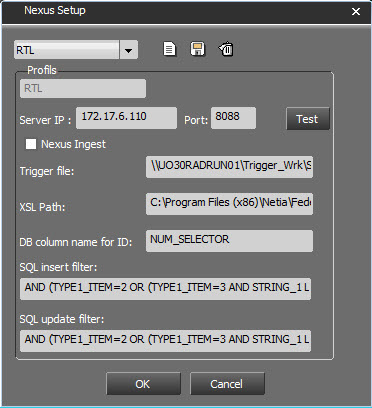
Server IP : Nexus IP adress
Port : Must be identical to the one present in the file Nexus.ini

If the box is ticked, the modification fonction of MusicMaster database with informations from RadioAssist database is active.
Trigger File : Path to the exchange file between RadioAssist and MusicMaster. Each creation or modification of a sound in the RadioAssist database will insert a Record ID in this file indicating to Federall Service that it must start a process. The file is created by the SQL Server Extended Stored Procedure.
Description of the file:
Example:
# $ 1-7977577--0
# $ 2-5979672-32664-0
1st reference = Action
# 1 = Creation
# 2 = Modification
# 3 = Deletion
2nd rerefence = Id_item
3rd reference = iDB column name for ID
4th reference = $ 0
XSL Path : Path to the conversion format files (INSERT and UPDATE). In these files, we find a mapping between RadioAssist sound metadatas and MusicMaster sound metadatas.
DB column name for ID : ID used as link between RadioAssist and MusicMaster. Each sound in the RadioAssist database has the same ID in the MusicMaster database.
When creating a new RA item this reference is usually null. This reference is filled in by MusicMaster and sent back to RadioAssist.
SQL insert filter : Filter used to select sounds arriving in Federall Service and available for insert in the MusicMaster database.
Example : Here : AND (TYPE1_ITEM=2 OR (TYPE1_ITEM=3 AND STRING_1 LIKE 'ANTENNE%') ) AND (STATE=2 OR STATE=4) AND VIRTUAL=5
Translated by : Only (MUSIC sounds (or sounds with the type JINGLE and the type ANTENNE)) and (available in the database or archived) and (sounds with PRODUCTION type) will be inserted in the MusicMaster database.
SQL update filter : Filter used to select sounds arriving in Federall Service and available for update in the MusicMaster database.
Example : Here : AND (TYPE1_ITEM=2 OR (TYPE1_ITEM=3 AND STRING_1 LIKE 'ANTENNE%') ) AND (STATE=2 OR STATE=4) AND VIRTUAL=5
Translated by : Only (MUSIC sounds (or sounds with the type JINGLE and the type ANTENNE)) and (available in the database or archived) and (sounds with PRODUCTION type) will be inserted in the MusicMaster database.
The  button allows you to test the connection with Nexus server.
Once done, click on  to save the profile. It will appear in the list.
To delete a profile, select it in the list and click on  .
.
1.8.Insider Setup

The part allows you to set the connection parameters with Insider.

This ticked box allows you to send informations fromm RadioAssist to Insider.
IP to bind : If the workstation has 2 network cards, put the IP adress of the card used.
Port IP : Port used to receive information from Insider.
Port to bind : Port used to send information to Insider.
Note : Usually, these 2 fields are filled with the same information
By clicking on  , the setting window will open :
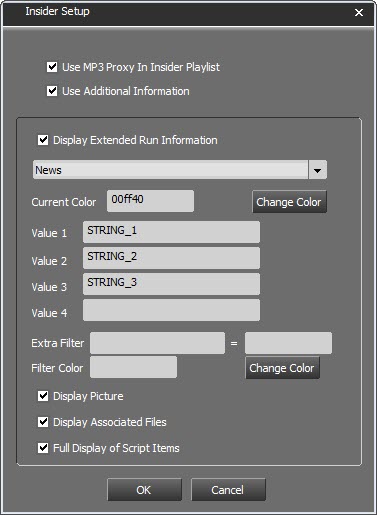
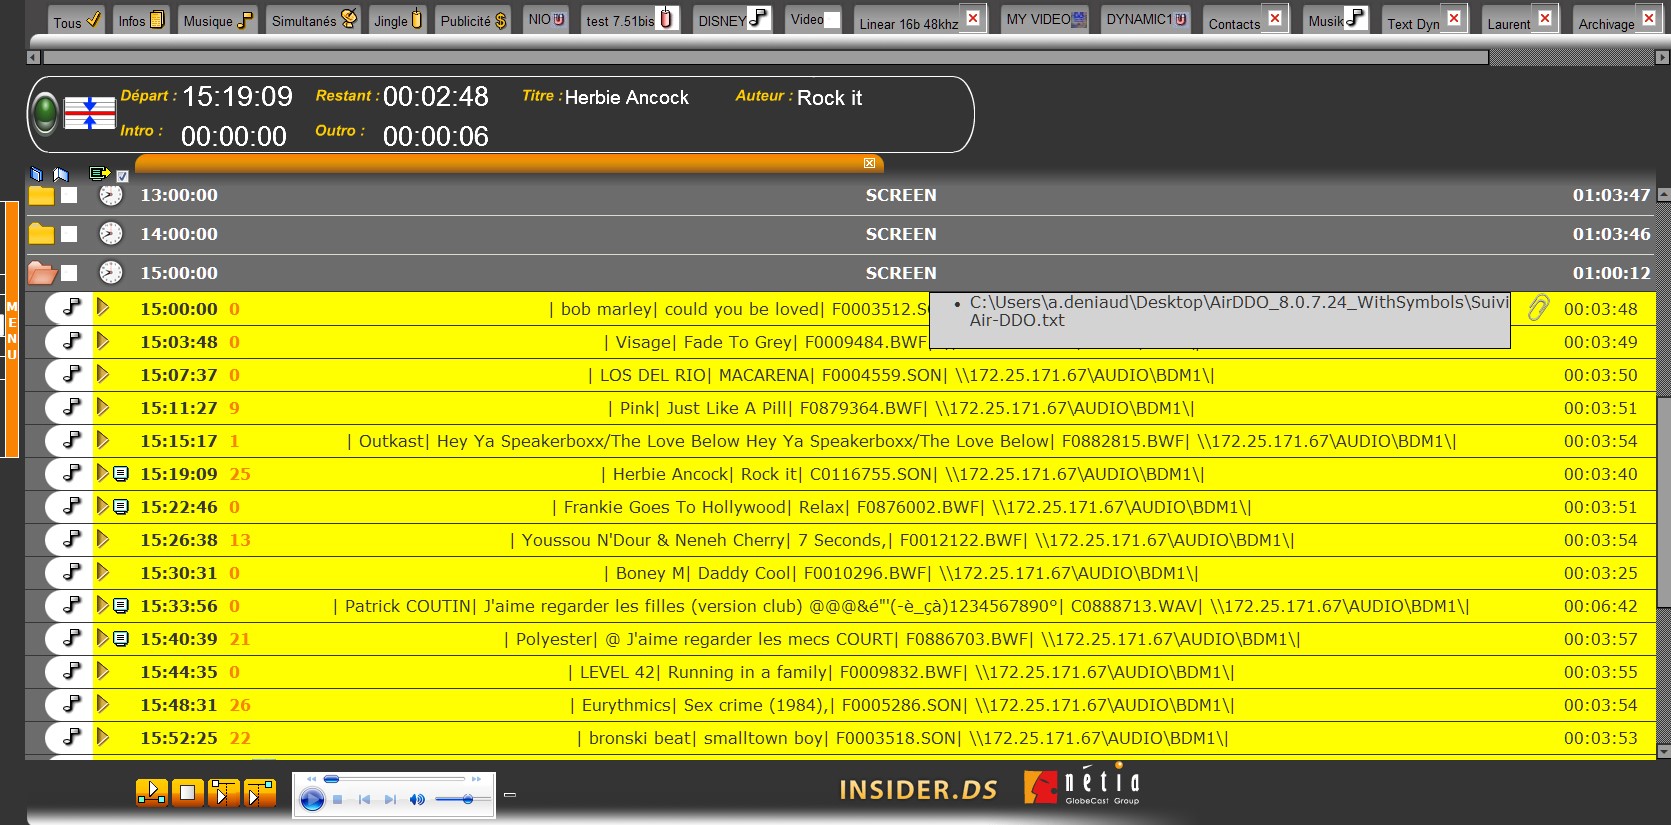
USE MP3 Proxy In Insider Playlist : Play the MP3 proxy file of the sound in Insider.
The path to the first sound found in T_LIST_FILE will be chosen first if there is one or the original path of T_ITEM will be chosen if there is none
Finally, the complete path to the sound must be in the
Use additional information : By ticking this box, all the informations indicated thereafter will replace the by default informations.
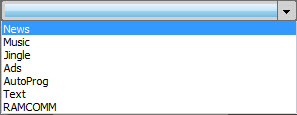
Display Extended Run Information : Allows you to specify, by type of element from the list below, which informations will be displayed, by run, in Insider.
You will need to execute the following operations by element type :
Choose the type from the list.
Make the modifications.
Click on  to validate.
List : Type of element
Current Color : Choose the run's color.
To do so, click on  .
.
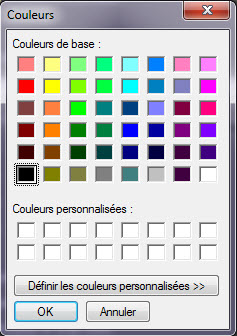
Select a new color and click on 
Value 1, 2, 3 et 4 : Choose which information to display by typing the name of the column (STRING_1, STRING_2, etc...).
Extra Filter = XXX : A color can be displayed for a specific run type. Enter the name of the column and the defined value.
Filter color : Choose the filter's color.
To do so, click on  .
.

Select a new color and click on 
Display picture : Choose to display the image linked to the element in the database.
Display Associated Files : Choose to display the link of the file associated to the run.
Full display of Script Items : Choose to display all the text of a Script type element.
1.9.Playlist creation Setup
This section will allow the automated creation of playlists as well as automated import of sounds from third party application (music scheduling, traffic, etc...)
It is possible to manage several profiles for playlist creation and import. Depending on different channels for examples.
To create a new profile, click on  .
.
Type on the right of  , the name of the profile to create.
Then click on  in order to specify for which channel(s) this profile is created.
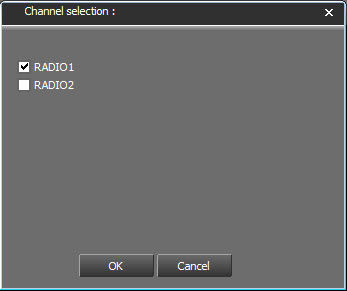
Select for which channel(s) we want to create a profile.
Click on 
Then click on  to save the profile.
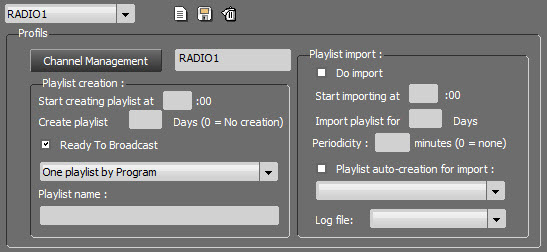
1.9.1.Playlist creation setup
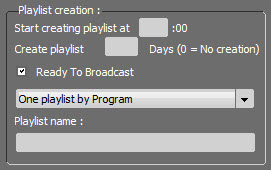
This part allows you to set at which frequency et for how many days playlists are going to be created automatically.
Start creating playlist at : Federall Service will strat palylist creation et the time specified.
Create playlist xx days : Federall Service will create playlists for the number of days specified.
If the value is "0", no playlists will be created. (Max : 999 days)
If the value is "-1", playlists will be created when launching the program and at midnight the other days.

One playlist by Program : Federall Service will create playlists from each program created in Gred Editor.
One playlist by day : Federall Service will create one playlist for all the programs of the day.
Playlist Name : The name of the playlist will be as the criterias indicated.
Example : $NAME$ $TIME_BEG$-$TIME_END$
Here, the name of the playlist will be : "Name of the programm" Time of the beginning" " Time of the end". Informations come from GridEditor.
List of crietria that can be used :
$NAME$
$DATE_BEG$
$DATE_END$
$TIME_BEG$
$TIME_END$
1.9.2.Import in playlist Setup
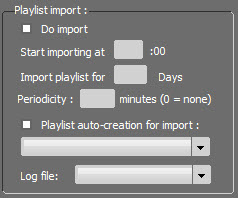
This part allows you to set the parameters for imports in generated playlists :

If this box is ticked, the import will be process by Federall Service.
Start importing at xx : 00 : Time when the import process will be start.
Import Playlist for xx days : Federall Service will start an import for the number of days specified.(Max : 999 days)
Periodicity : XX minutes : It is possible to set a periodicity of process in minutes instead of a time. (Max : 9999 minutes)
Log File : Log file creation after the import.
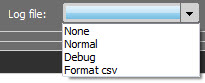
None : No log file generated.
Normal : The log file will show all the actions done.
Debug : The log file will show all the actions done plus possible errors (settings, connection issues, etc...)
Format CSV : Create a CSV file with separators ";". Only missing items during the import will be logged.
1.10.Report
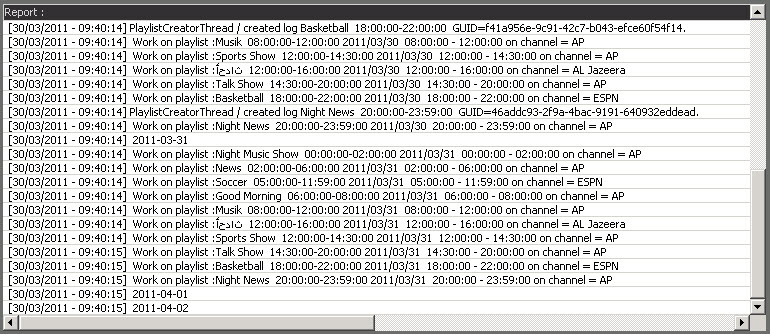
This part shows processes as they are done :
- playlist generation
- music or advertising imports
- start or stop of Federall Service.
1.11.Channel Management
After clicking on  you can declare the channels for which "Playlist generation" is required. Just tick the box in front of the desired channels.

1.12.Part 3 : Import Settings in GridEditor
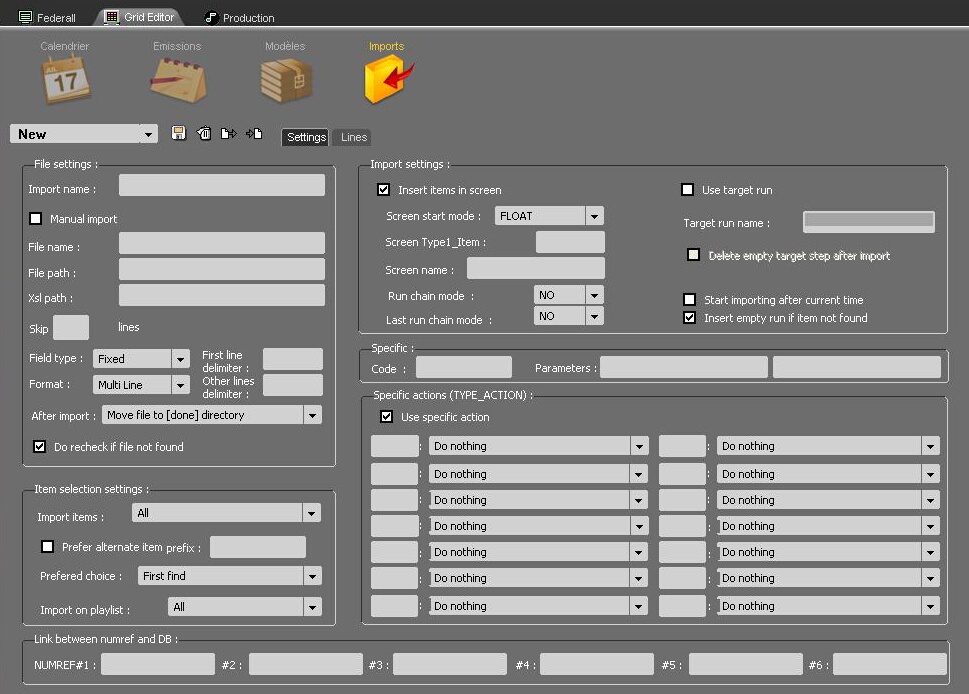
"Import" tab in RadioAssist's GridEditor
1.12.1.A - SETTINGS

You can choose from the drop-down list the type of configuration you wish to use in order to import the sounds into the playlists. By default, the list is empty.
To create a new configuration profile, you just have to select NEW. Once you're through with the setup, save your profile (via the  icon) and it will appear in the drop-down list.
The  icon allows you to delete from the list the profile that has just been selected.
The two other icons  are used to import or export configuration files.
File Settings
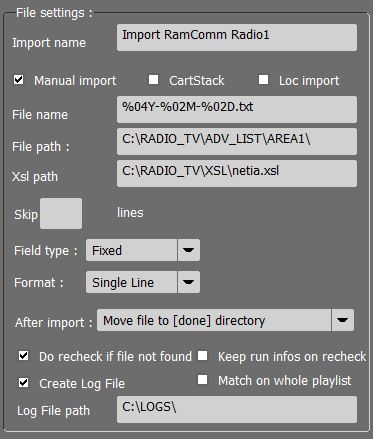
Import name : name of the configuration profile
Manual import : if this box is ticked, the import of sounds into the playlists will only start when RadioAssist users click on the dedicated button  , in the FEDERALL module (in the automatic mode, it is Federall Service which does the import of sounds)
Loc Import : This box is used only if the "Localization" option is used. An import file is sent by "LocScheduler" and a cartstack will be created with the items in the import.
Cartstack : The option allows you to create cartstacks instead of playlists.
This option is only available for auto import (via FederallService).
The values recovered to qualify the cartstack are limited:
PLAYLIST_NAME is used for the title of the cartouchier
TIME_BEGIN_ST for the startdate and boradcastdate
For carts, the RUN_NAME is used to fill the textHead
We update the items durations and NumRef for the recheck cartouches
File name : .txt or .xml file's name format used for the import (for example : %02D%02M%04Y.TXT)
File path : path to the file generated by the scheduling software (MusicMaster, Selector…) used for the import of sounds into RadioAssist
Xsl path : Complete file's path to the .xsl sheet used to convert the xml file (generated by the third-party application) into the format supported by RadioAssist
Skip : possibility not to take into account the first lines of the import file
Field type : defines the type of formatting for the import file. Fields can have a FIXED size or they can be separated by DELIMITERS
Format : the file can contain 1 (single) or 2 (multiline) types of lines First line delimiter / Other lines delimiter… In the case of a multilines file, you must enter the first character used to operate the distinction .
After import : action performed by Federall Service on the file used to import the sounds (Delete file / Do nothing / Move file to [done] directory / Rename file [.done]…)
Do recheck if file not found : here you choose whether Federall Service must rescan the database later in case some sound files were not found the first time (the re-check frequency is defined in the "Playlist Import" section, in the Federall Service Setup window).
Create Log : Create a log file generated in the folder whose location is noted in "Log File path"
Keep run infos on recheck : Keeps run information when associating a run created by the import with a sound from the database.
The informations kept are:
RUN_NAME
SPECIAL_RUN_DURATION
LIST_FADE
X_INLINK
X_OUTLINK
INTROMS
OUTTROMS
This option makes it possible to keep the work done on a third-party application in terms of mixes, fade points and cutting of the sound during an import (when associating a sound with a run, one normally takes the default information of the sound).
Match on whole playlist : Allow imports with unordered items (screens or not) in the import file.
When importing, we treat each line of the import file one by one. Traditionally, for each new line, one looks for the corresponding element in the associated playlist and this, from the last element found. With this option enabled, we go from the first element of the playlist to each new line of the import file.
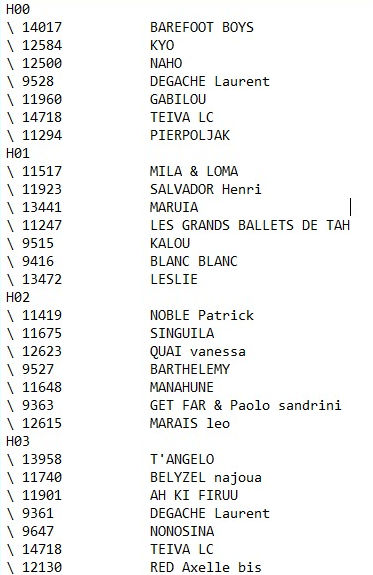
Sample file generated by Music Master:
Item Selection Settings
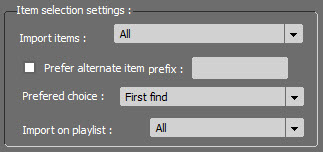
In this section, you can choose the status of all the items that must be inserted into the playlist.
Does Federall Service have to deal with :
All types of items?
RTB items?
RTB and broadcastable items?
Prefer alternate item prefix (only used when there is a double reference : you add a letter before the reference (Ex : Num_Selector)
Prefered choice : here you choose which item must be used for import :
FIRST FIND
PROD item (virtual file)
MASTER item (physical file)
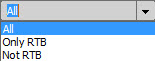
Import on playlist : Choice if the import is done in all playlists, or only RTB or not RTB.
Import Settings
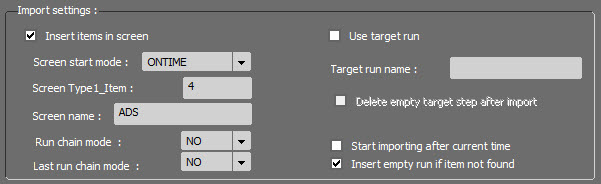
There are 2 types of import :
The first one (INSERT ITEMS IN SCREEN) creates the playlist's structure (the structure must first be defined in the txt or xml files that are ingested by Federall Service)
The second one (USE TARGET RUN) does not imply any structure creation : Federall Service only inserts the sounds in the empty runs with a specific name (ex : $MM)
In the first case, fields are configured by default (ie. screenshot here above) but it is completely possible to change the parameters. Federall Service creates the playlists without using any pre-existing structure. The service will use these parameters if no information is found in the import file.
Screen start mode : here you choose the default start mode of all the screens (Float, On time, Time limit…)
Screen Type1_Item : RadioAssist's reference tab, in which the sounds to be imported are.
Screen name : name given to the screens by default
Run chain mode : chaining mode by default between the runs. (MIX, CUT, MANUAL)
Last run chain mode : chaining mode applied to the last run of the playlist.
In the second case, the setup fields are different :
Use run target : when this box is ticked, the playlist's structure is not created. Federall Service fills the playlists, basing itself on a pre-exisiting structure (which has been defined before by RadioAssist users in GridEditor)
Target Run Name : name of the 'runs' in which the sounds must be inserted (ex : $MM)
Delete empty target step after import : this option allows you to delete runs which remain empty after the import. (For instance, if the scheduling application has prepared 5 sounds in the 4PM-5PM time slot while there are 8 'runs' called $MM in the RadioAssist's playlist, Federall Service will delete the 3 remaining empty runs for which there is no associated sound to import.
Start Importing after current time : when this box is ticked, Federall Service starts importing sounds in the playlists that are scheduled for after the current time.
Insert empty run if item not found : when Federall Service scans the ABC8 database in search of a sound to insert into the playlist, if the corresponding sound file is not found, the run that is left empty will be marked as candidate to a re-scan.
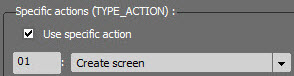
Specific Actions
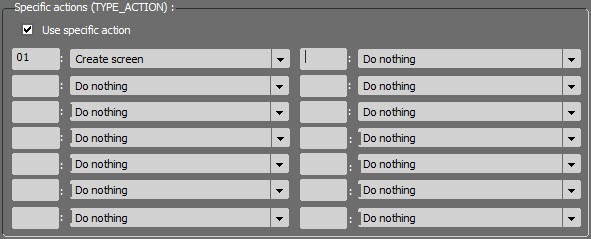
It is possible to trigger a specific action depending on the code that is found in the file used for the import.

The first column is used to enter the code that must be found in the text.
The second column is used to specify the type of action you want to trigger when Federall comes across the above-mentioned code.
Examples of actions : Do nothing, create empty run, create screen, Use screen [NAME] if not Create it, Use screen [TIME] if not create it, Set chain = NO to prev run, Grid Screen…
Link Between Numref and DB

In this section, it is possible to enter the references that must be used to find an item in the ABC8 database. Usally, one reference is enough.
Nevertheless, if Federall does not manage to find an item based on the first reference, it can use another reference in order to locate the desired item: you can use up to 6 references.
1.12.2.B - LINES
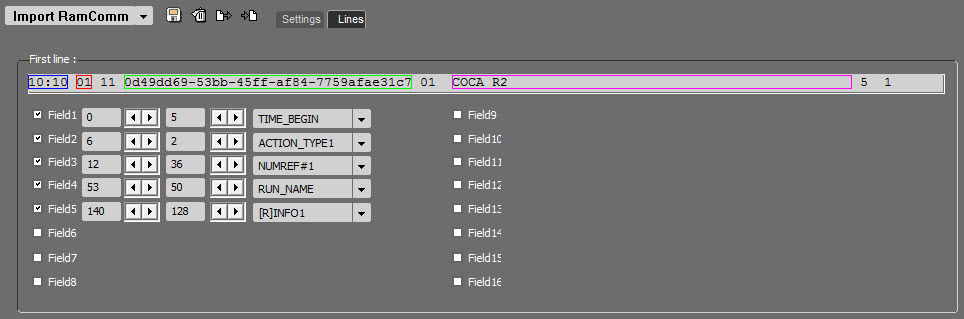
This section is used to describe the structure of the txt or xml file generated by the third-party application:
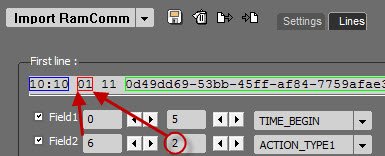
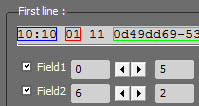
The 'field boxes' correspond to the different columns that appear in the txt or xml file:
- The first section (here in the example : '6' ) means that the field's text starts on the fourth character position
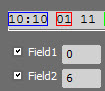
- The second section (here in the example : '2' ) means that the field is made of 8 characters
- The third section : 'TYPE_ACTION' means that the action noted in the "Specific action" field will be done. Here, creating a screen.