1.AirDDO 9
1.1.AirDDO presentation
1.1.1.Opening AirDDO
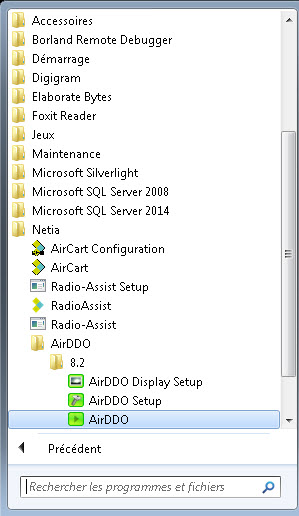
You have two ways to launch AirDDO :
- With the icon on the desktop :
 Double-click on the AirDDO icon.
OR
- Call the Start/Programs/AirDDO Shortcut
1.1.2.Log inAirDDO with Multiste option
Once Radio-assist is launched, an identification window is displayed :
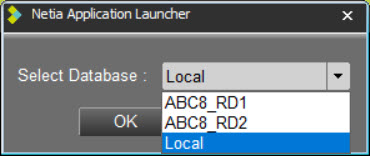
In the dropdown list, choose the remote database you want to access and click on 
When using the Active Directory service :
:
· connection to local database : automatic connection.
· connection to another AD database : automatic connection (the database must authorize the AD autologin)
· connexion to another database outside the AD : login required.
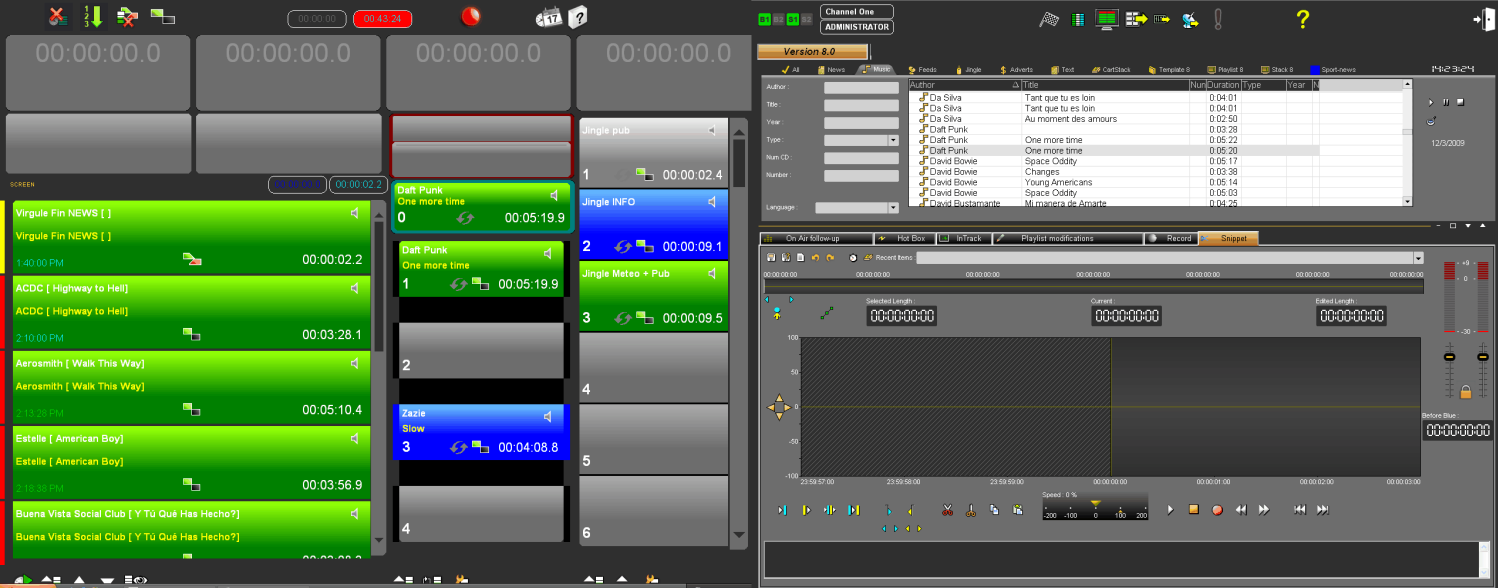
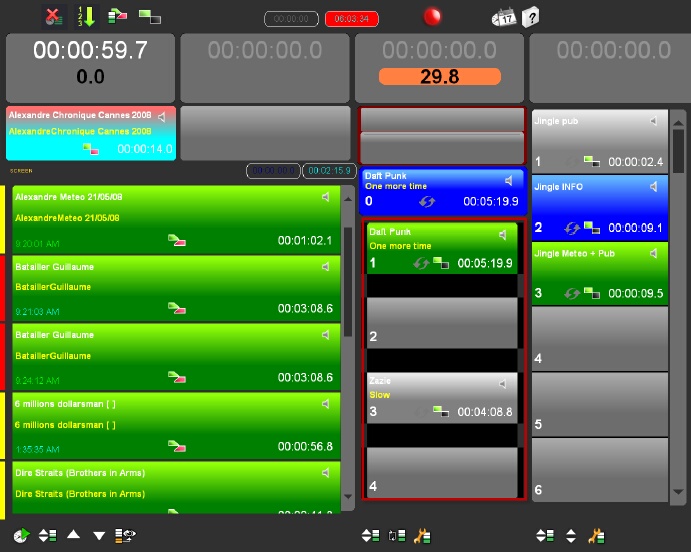
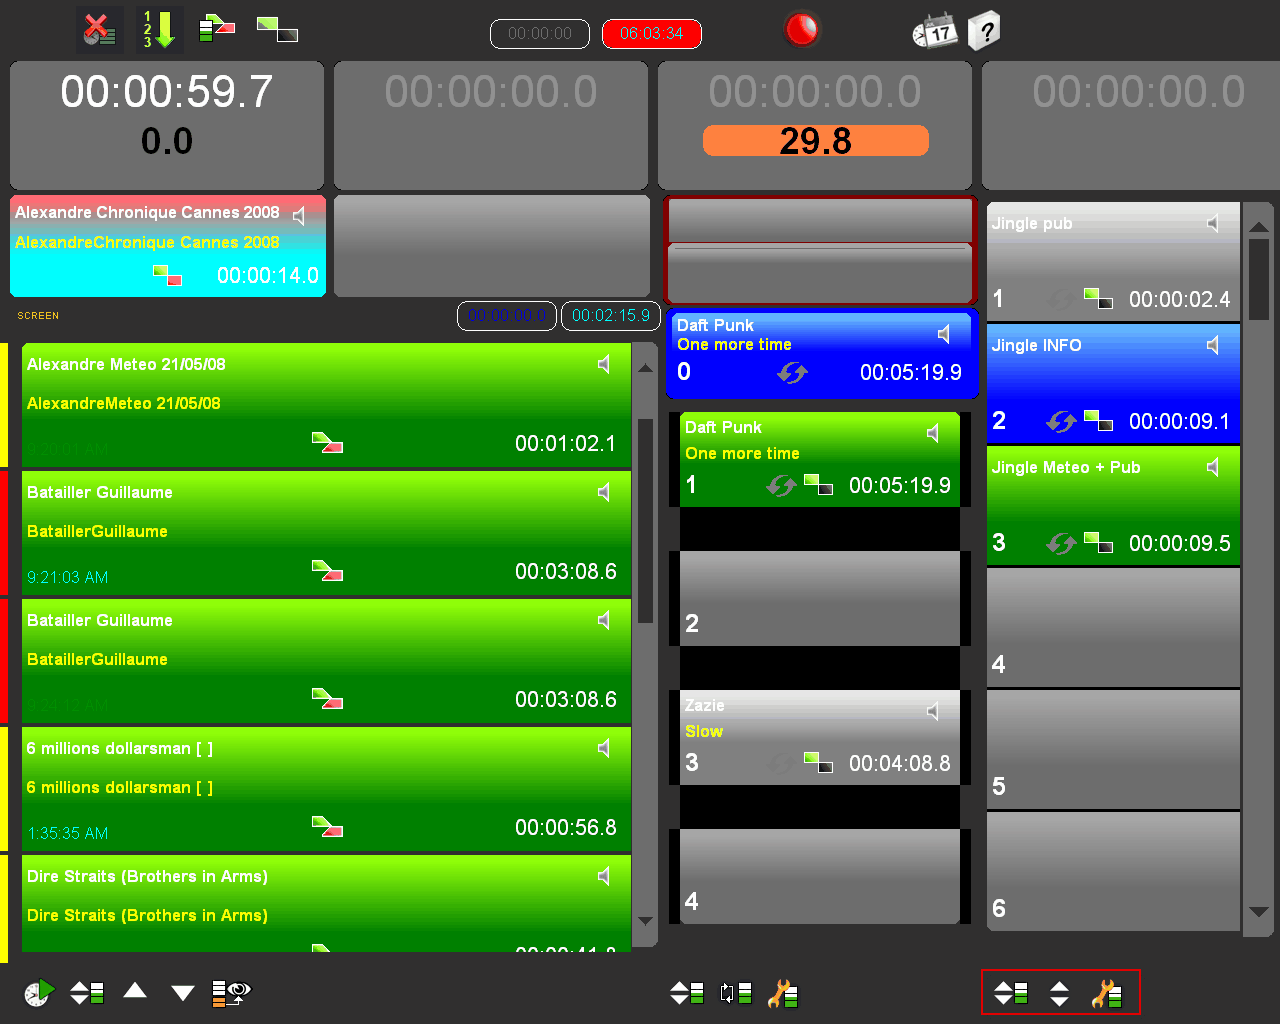
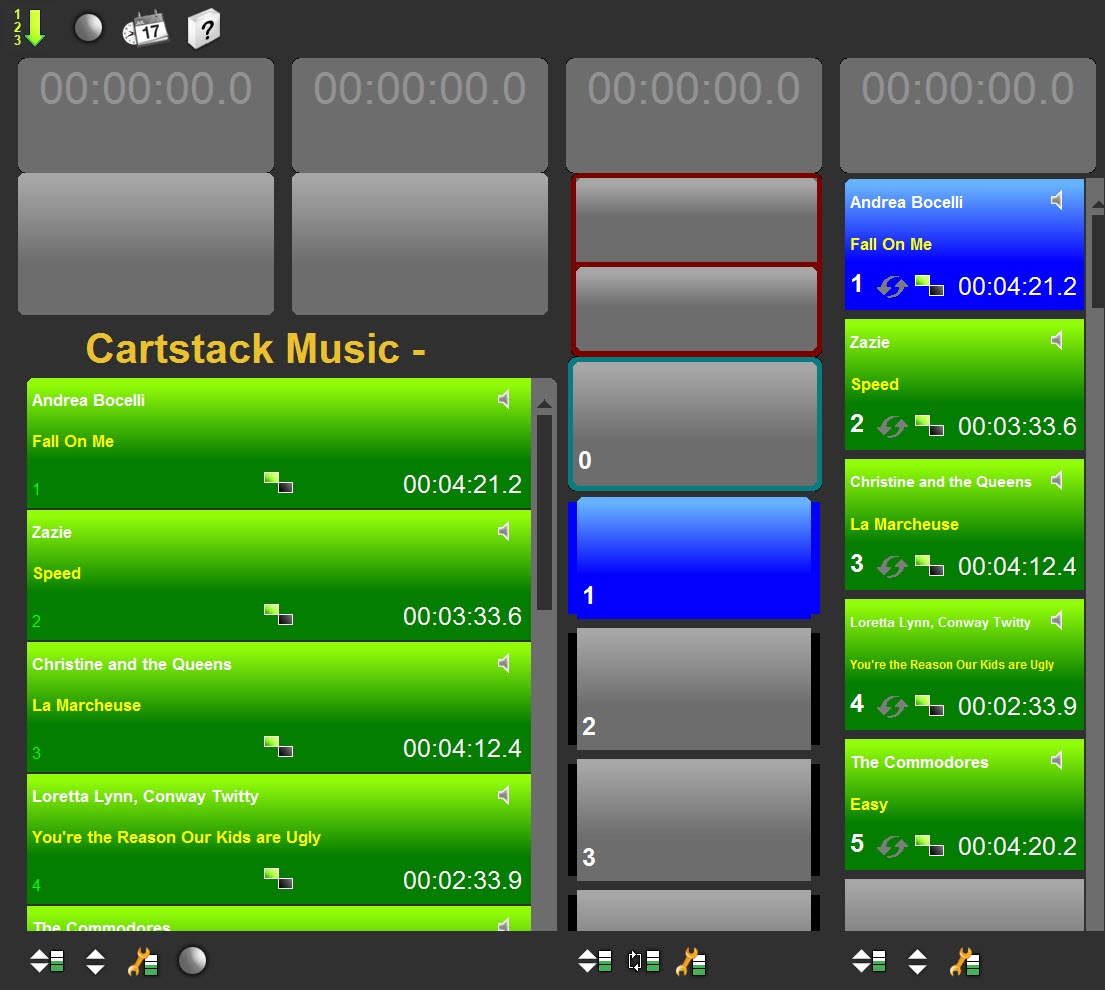
1.1.3.Introducing AirDDOO : User interface
AirDDO is a program designed to put playlists and sounds on air.
The application consists of two separate screens :
- A preparation screen for loading sounds and monitoring items dedicated to broadcast.
- A broadcasting screen for piloting broadcast channels.
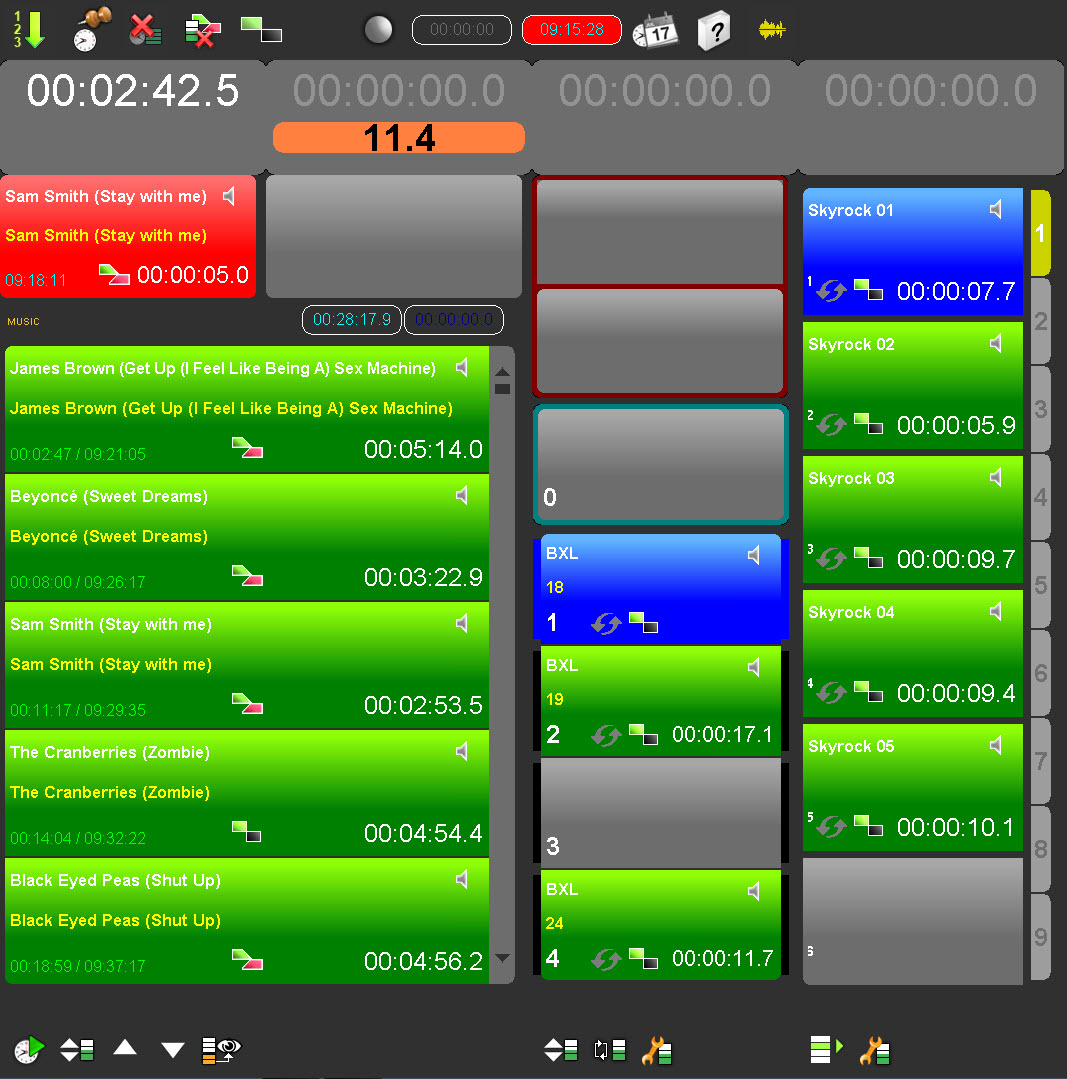
It is possible to physically separate the two screens (2 different monitors) or to have the 2 screens in only one monitor.
If you choose the "2 screens in one monitor" solution, a button is available to resize the preparation screen or the broadcasting screen. .
.
AirDDO provides the technician with simultaneous access to all the data required for good broadcast quality.
AirDDO offers the following features :
- Manual, semi-automatic or automatic control of the playlist (the playlist is built with Grid Editor and filled with Federall)l
- Access to pre-programmed cartstacks and stacks and simple players.
A cartstack is a set of carts for broadcast.
A stack is a series of non-ordered sounds which are available for the technician to use for on-demand broadcast (e.g., a set of jingles is prepared in a broadcast stack and can be played at any time).
A simple player is a cart with an item to broadcast at anytime.
- Immediate warning of items for urgent broadcast with the "Hot Box" feature.
- Search for sounds with the Radio-Assist Browser.
- Access to the record tab.
- Access to an editing tool : Snippet
- Access to a planning tool in order to modify the playlist directly in AirDDO.
- Access to a range of tools such as In-Track (to position a sound), the audio bank (for quick access to sounds in numerical order), the preset (to save cartstack configurations), etc.
AirDDO can be configured as required and supports up to four on-air outputs and one PFL playback.
In this documentation, the following configuration has been chosen :
- 2 channels for broadcasting playlists (Channels 1 and 2)
- 2 channels of "Cartstacks/Stacks" type (Channels 3 and 4)
- 1 playback channel for adjusting items
This guide also includes instructions for using a physical remote control.
1.1.4.Modifying the "Login"
At any time, you can modify the login. Thus each operator with his login can create his own audio bank (see Audio Bank - "Mode Public/Private" topic).
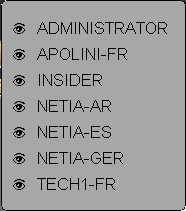
By clicking on the “user” icon  , AirDDO displays the list of available users.
To switch from one user to the other, click on the “user” icon. AirDDO displays the list of available users. Choose one of them by clicking on it.
1.1.5.Modifying the Channel
If a radio station manages several channels, it is possible to switch from one channel to the other.
By clicking on the channel name  , AirDDO displays the list of available Channels.
To modify the Channel, click on the “Channel” icon. AirDDO displays the list of available Channels. Choose one of them by clicking on it.

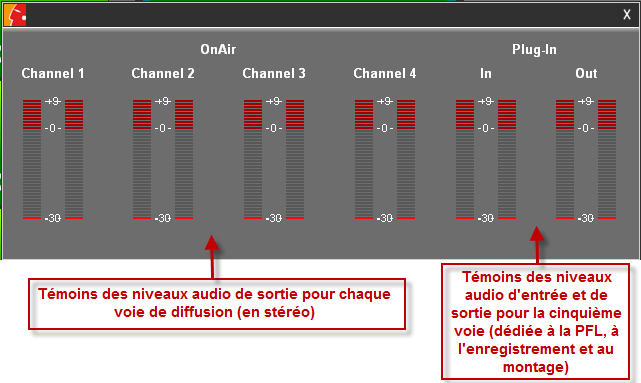
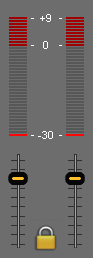
1.1.6.Displaying the vu-meters
You can display V.U.-meters which allow you to monitor your sound card outputs. Each light scale represents a broadcast channel (from left to right).
To open and close the V.U.meters, click on the following icon : 
The following window is displayed :
1.1.7.Lock the workstation
It is possible to lock the workstation even while the broadcast is in progress.
To do so, click on  .
.
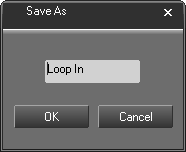
The following window appears :
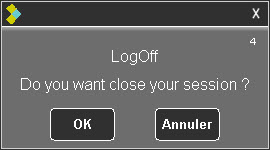
Click OK to confirm or Cancel to close this window.
By clicking OK the workstation is now locked and the following window appears :

To reconnect, select your user code and enter your password and click OK.
The workstation is unlocked.
1.1.8.Security
Database connections
AirDDO displays 4 icons to check the different connections with the server.
 These icons display the status of the database(s) and sound file server(s) : Database connection status and sound file server status indicator.
The colour of the indicator changes with the status.
Meaning of colours :
Green : Connection made to the database(s).
Red : Database connections lost.
Results :
- Impossible to load additional audio files.
- Items already loaded can be broadcast.
NB : following the chosen configuration, it is possible to switch manually or automatically from one database to the other (distant or local) - (See "Remote Database" mode).
1.1.9.Technical Informations
By clicking on  , a window is shown.
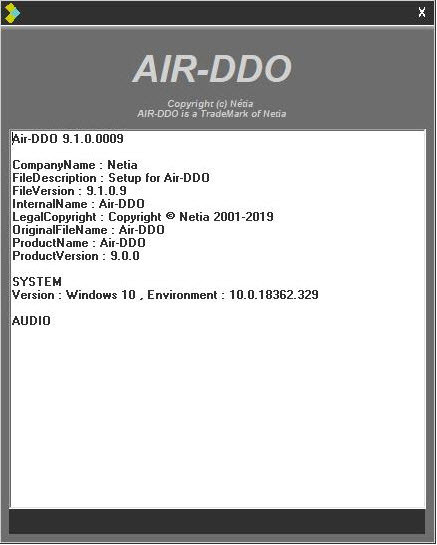
These informations will be helpful for Support.
1.1.10.Closing AirDDO
- To close AirDDO, stop all broadcast outputs and the PFL output as well.
- Then, click on the "Quit" icon (available in the top right-hand corner of the preparation screen).

A warning message is shown. If you really want to close the application, click on "OK".
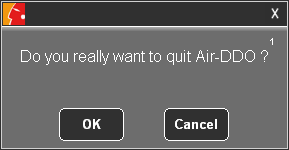
NB : it is IMPOSSIBLE to close AirDDO if some items are still being broadcasted.
1.2.Browser
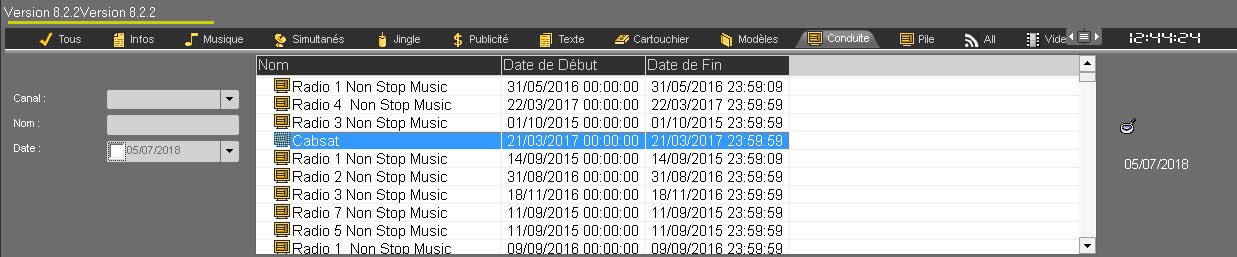
1.2.1.Browser definition
The Browser represents the database which gives access to any stocked items (audio or text).
The items are ordered by categories and some search filters are available to help you retrieve an item quicky.

Attention : Only items with the RTB and/or Broadcastable validations are visible in the Browser (except special configuration).
1.2.2.Searching an audio item
There are several ways to search an item in the Browser.
- Use the different filters in the left part of the screen. You can combine several search criteria to refine it (the search is not case sensitive).
Note : when you make a new search, do not forget to delete the previous one by taking the filters off. To do so, you can do a right click on the "refresh" icon  . All filters are cleaned out.
OR
- Drag and drop an item from the list to a chosen search field.
Ex : in the Browser, select Mariah, and drop it to the "author" field. The Browser displays the item list containing the word "mariah" in the "author" field.
NB : you can use this search method on any fields.
OR
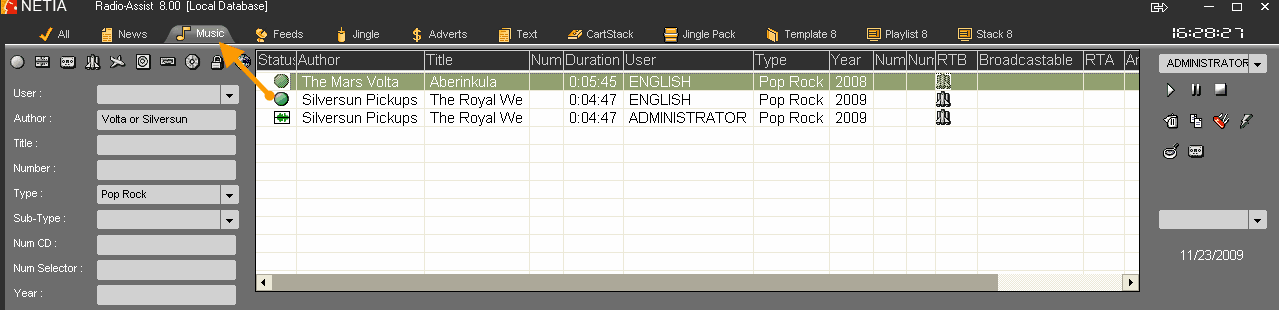
- You can search two items simultaneously by using the "OR" operator.
Example : if you type « Eagles » OR « Percy » in the « author » field, the Browser displays the item list containing « Eagles » and/or « Percy ».
Attention : if you use this search method, the « OR » must be in CAPITAL LETTERS.
NB : if you do not know in which category your item is stored, go to the "All" category, and enter a keyword in the "global" field. The search is performed on the whole database.
1.2.3.Sorting the database
To sort the items of the Browser in chronological or alphabetical order, click on the column header.
If you click on the "Date" header column, your sort the database in chronological order, increasing or decreasing.

Ex : If you click on the colum header having some data like the "title" column, then you sort the database alphabetically.
1.2.4.Playing an audio item (Ctrl + P)
You can play an item from the Browser and define the playing speed (from very slow to very fast). To do so :
- Select an item in the Browser.
- Click on « Play » 
A counter is displayed.

- Do a right click on the counter. A window is shown as follows :
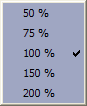
- Choose the playing speed of your item.
For information :
50% : Play very slowly
75% : Play slowly
100% : Play normally
150% : Play quickly
200% : Play very quickly
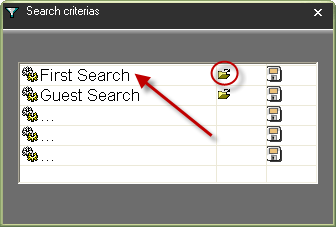
1.2.5.Saving a search
Once you have made a search, you have the possibility to save it.
To do so, hover your mouse cursor over the category. The cursor turns to blue.

- Click on the category. A window is displayed.
- Enter the search title. Then click on the "floppy disk" icon to save it.
Your search is saved. Then you can edit it anytime.
NOTE : It doesn't save the search result but the search criteria.
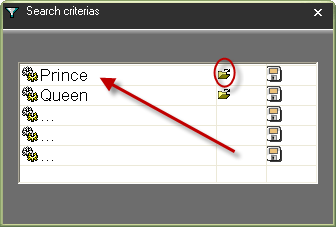
1.2.6.Load a saved search
To edit a search which has been saved :
- Hover your mouse over the category in which you have saved your search. The cursor turns to blue.
- Click on the category. A window is displayed.
- Select the search you want to load and click on the "folder" icon to load it.
Your search is loaded.
1.3.Playlist
1.3.1.Playlist definition
A playlist is a series of scheduled sound and/or text items for broadcast at a specified time.
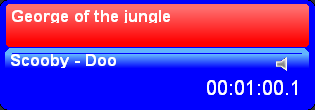
1.3.2.The playlist's counters
The playlist displays different types of counters allowing you to get different information.
The playlist counters are the following:
1) Global counter

The big counter heading each channel always display the countdown of the item which is being broadcast.
By clicking on the following icon, you can count up or count down :
 "Count down" function
 "Count up" function
2) Intro/outtro counter

This counters displays the Intro and outro points set in the "Production" tab.
3) Duration counter

This counter displays the item duration.
4) "Break" counter

This counter displays the length between two screens. A "fixed time" screen has a pre-fixed start time. The counter marks the length while the playlist is being broadcast. It can be the length between the beginning of the playlist and the first "fixed time" screen.
5) Advance/delay counter

This counter displays the advance (in green) or delay (in red) of the playlist in relation to the initially scheduled time (in hh:mm:ss).
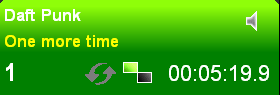
6) "End of the item" counter
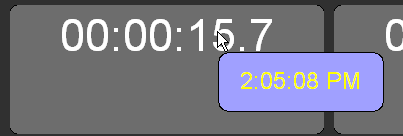
This counter display at what time the item which is on air will end.
This counter is displayed when you place the mouse on the "big counter" of the output.
7) Overrun/Filling counter
This counter displays the filling duration in green (in case there is not enough items to broadcast until the next fixed time or on time screen) and the overrun duration in red (when there are too many items, they are placed in the overrun window).
8) Break duration counter
This counter displays the whole duration of the break on air.
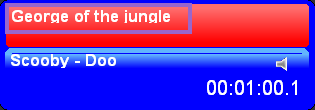
1.3.3.Meaning of colors in the playlist
The meaning of colors in the playlist are the following :
 Item ready to Broadcast.
 Item selected for the fader start mode.
 Item on air.
 Flashing Item : item in pause.
 Item broadcasted.
1.3.4.Loading a playlist manually
To load a playlist manually :
- Select the playlist you want to load from the Browser.
- Drag it down in the "On-Air Follow up" tab (the playlist is loaded in the dedicated output at the same time).
OR
- drag it directly to the broadcast output.
1.3.5.Loading a playlist semi-automatically
To load a playlist semi-automatically :
- Click on the "On-Air Follow up" tab in the preparation screen.
- Click on the following icon :

AirDDO loads automatically the playlist of the day at the right time.
1.3.6.Loading a playlist automatically
To load a playlist automatically, the 'Full auto" function  must be triggered.
To trigger this mode, click on the "full auto" icon available at the top of the broadcasting screen :
 : "full auto" mode deactivated
 : "full auto" mode activated
Then, AirDDO automatically loads and broadcasts the playlist of the day, respecting the "on time" modes.
IMPORTANT: In order for the playlists to play one after the other automatically, it is IMPERATIVE that there are at least 3 STEPS/RUNS in the playlists.
1.3.7.Broadcasting a playlist manually
To broadcast a playlist manually, you have 3 ways :
- with the mixing console ("fader start" mode).
- with the remote control.
- with the mouse (DJ mode).
Attention : when you broadcast a text, a text player is displayed.
1.3.8.Automatic broadcast modes
The automatic broadcast modes are the following :
On time : the screen is broadcasted automatically at a fixed time. 
On time + Time limit : screen with automatic broadcast at a set time + start screen. If broadcast of the previous screen ends during window countdown, this screen will be broadcast. If it is not over, the Auto window screen will not be broadcast and the broadcast program will go to the next screen in the playlist. 
On time + Time limit forced : screen with an automatic broadcast time. Same procedure as that of the window except that the screen is automatically broadcast at the end of this window. 
To define a window, fill in the following parameters :
Begin time : to specify the time the screen should starts (H:M:S).
Begin limit : to set a time lapse before the start time (H:M:S).
End limit : to set a time lapse after the start time (H:M:S).
Auto : the screen is automatically broadcasted by the broadcasting program with no human intervention.
Off time : screen with an automatic start time which is automatically calculated according to the end of broadcast time set by the user. End time: time set for screen broadcast to end.
Note : These broadcasting modes are defined in "Grid Editor" and "Federall".
1.3.9.Manual broadcast modes
The manual broadcast modes are the following :
Fix time : screen with a fixed broadcast time. The hand symbol means that "fixed time" broadcast is run by a broadcast operator (technician).
Fixed time + Time limit : the screen is broadcast manually. The window surrounding the start time represents a time lapse before and after the theoretical start time, during which the user can still personally run screen broadcast.
Float Manual : broadcast can only be effected by a broadcast operator (technician).
Note : these broadcast modes are defined in "Grid Editor" and "Federall".
1.3.10.Master-Slave
The Master-Student function makes it possible to secure the broadcast by using in the same studio 2 AirDDO on 2 different workstations.
One will be the "Master", the other the "Slave".
The setting is done upstream in the AirDDO Setup.
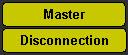
A button is available at the top of the database on the right screen.
It allows to connect or disconnect to move to Master or Slave.
Here, AirDDO is Slave.
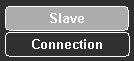
Here, AirDDO is Master.
During the broadcast, all the actions (playlists, cartstacks and stacks loading and unloading, , items launching and stopping, items adding and deleting, etc ...) carried out on the AirDDO Master will be reproduced in identical on the AirDDO Slave without any human intervention.
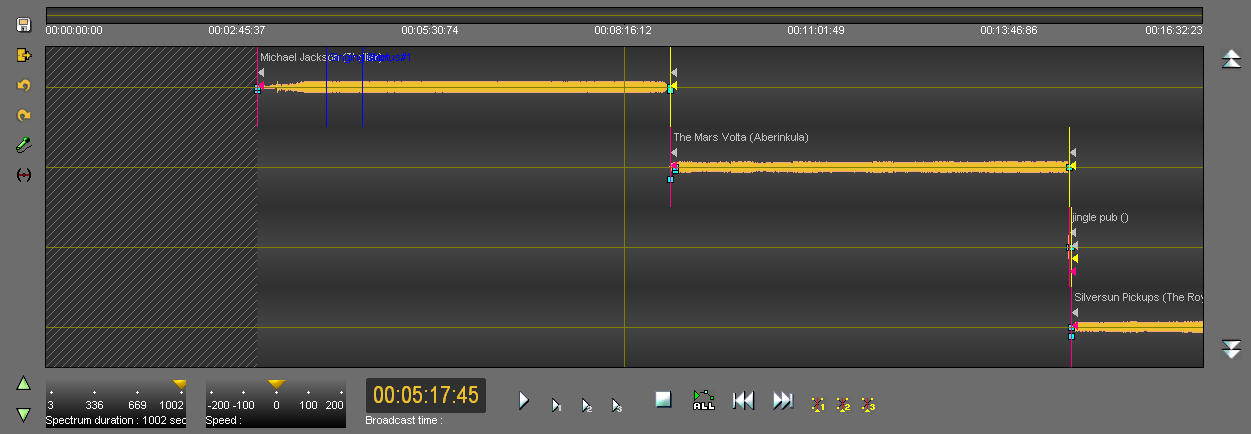
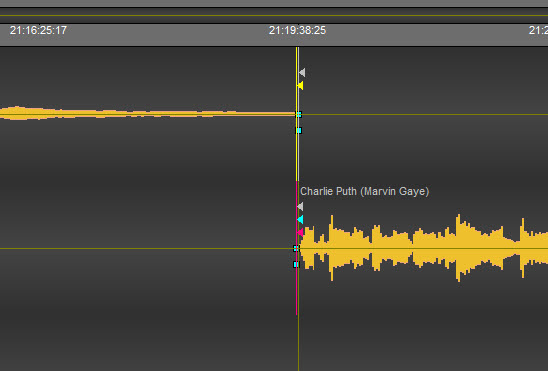
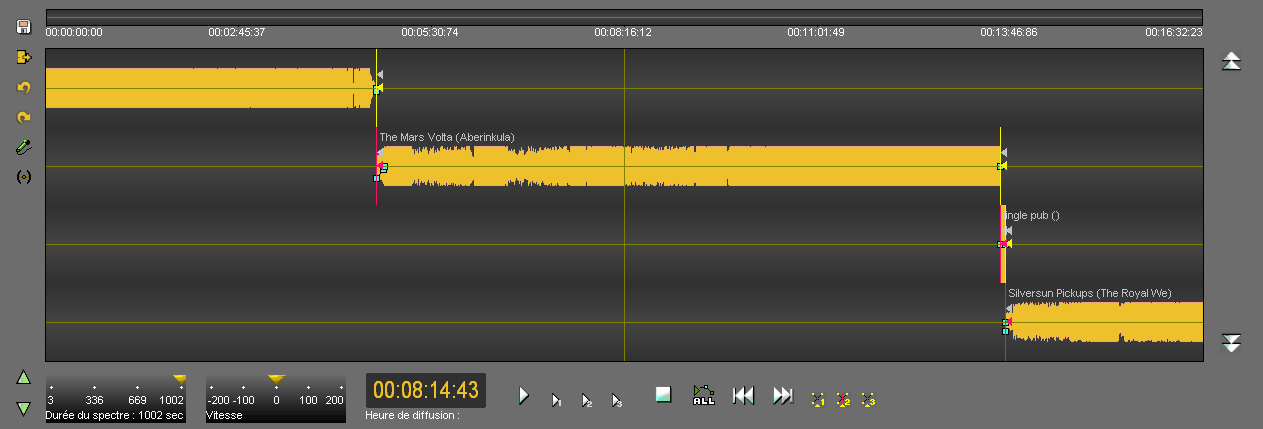
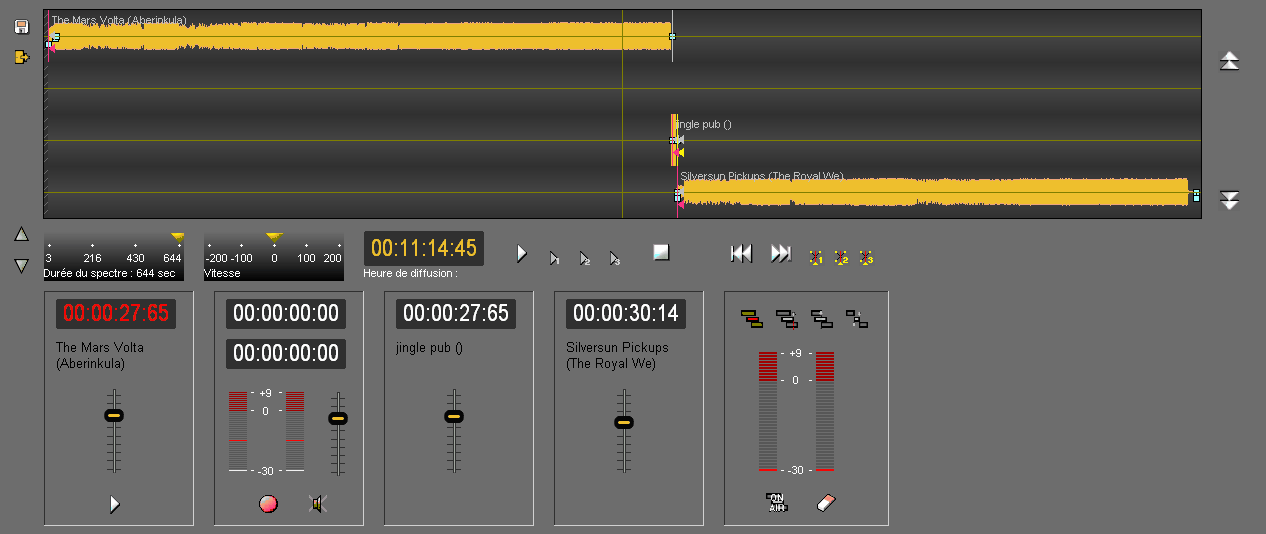
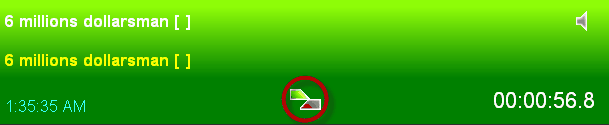
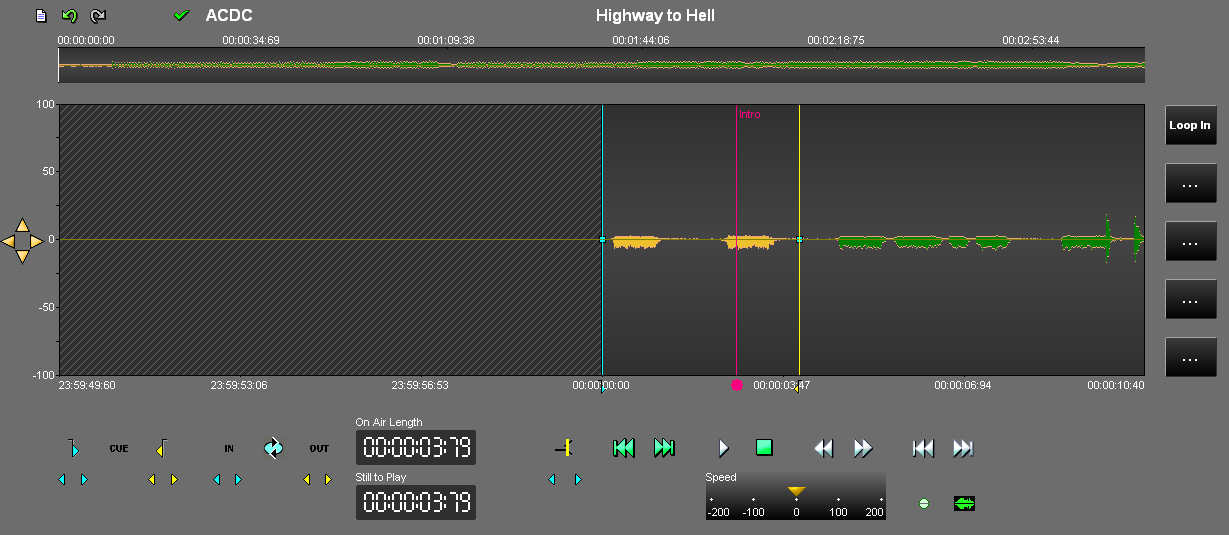
1.3.11.Displaying Playlist sounds spectrum
At any time, users can see the spectrum of a sound that is inside a playlist. This action is possible via the broadcast screen.
The following button allows you to display the spectrum of a sound, whether it is on air or not.

1) Click on the "Display Spectrum" button
2) Then select the sound cart for which you want to see the spectrum
The spectrum appears in a new window which is fully resizable.
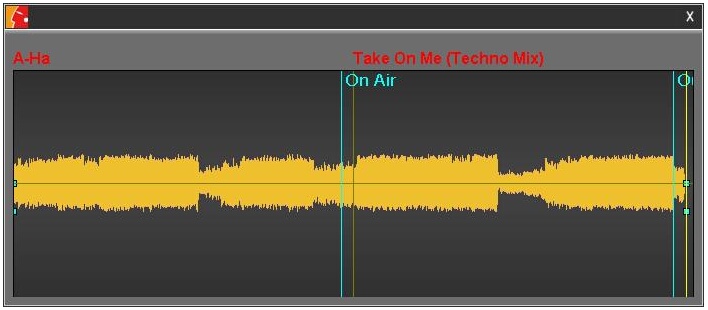
Users can also zoom in by double-clicking on the spectrum.
Thanks to this function, users can, at any time, check the spectrum shape and be sure that there will be no undesired "blanks" going on air.
1.3.12.TimeFollow Option
The TimeFollow option has been designed to update the time of broadcast of all items inserted in your playlist in real time. The playlist will be in sync with the local time of your Playout workstation.
The playlist is updated:
Every X milliseconds, when all chanels of the playlist are stopped or paused.
Every time the playlist is moved (scroll-up/down in the playlist).
Note that OnTime screen are taken into account if the LiveAssist and/or FullAuto mode is activated, and if the hour set on the screen has not been reached yet.
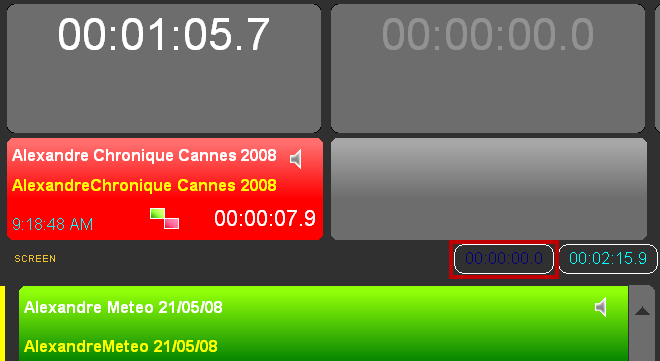
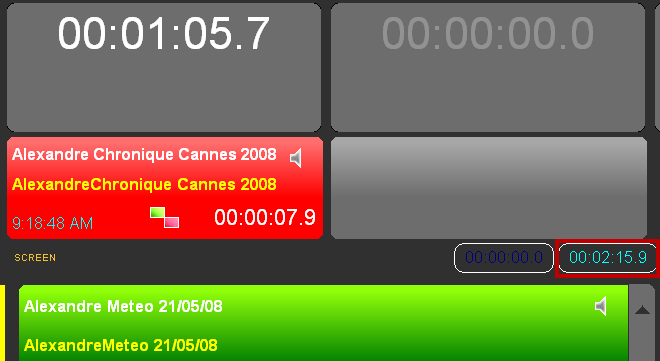
If the option in activated in the setup window, the option can be activated via this icon  .
.
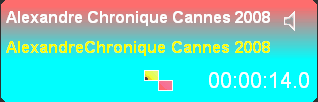
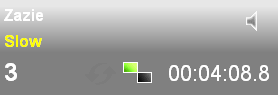
TimeFollow operational and activated in double-display mode (Real On-Air time / Scheduled On-Air time) | TimeFollow operational but not activated |
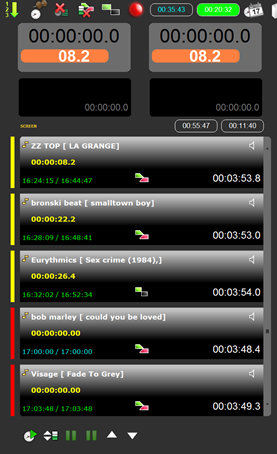 | 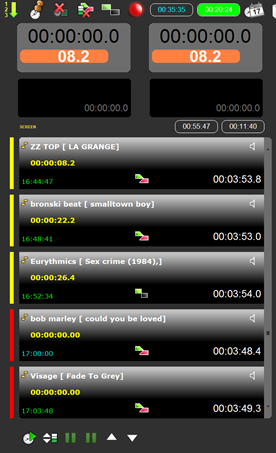 |
Note 1: When the full auto mode is activated, TimeFollow is deactivated and the icon is hidden.
Note 2: When the PFL is activated on one playlist, no refresh operation is performed on the playlist (otherwise, it would result in the PFL stopping).
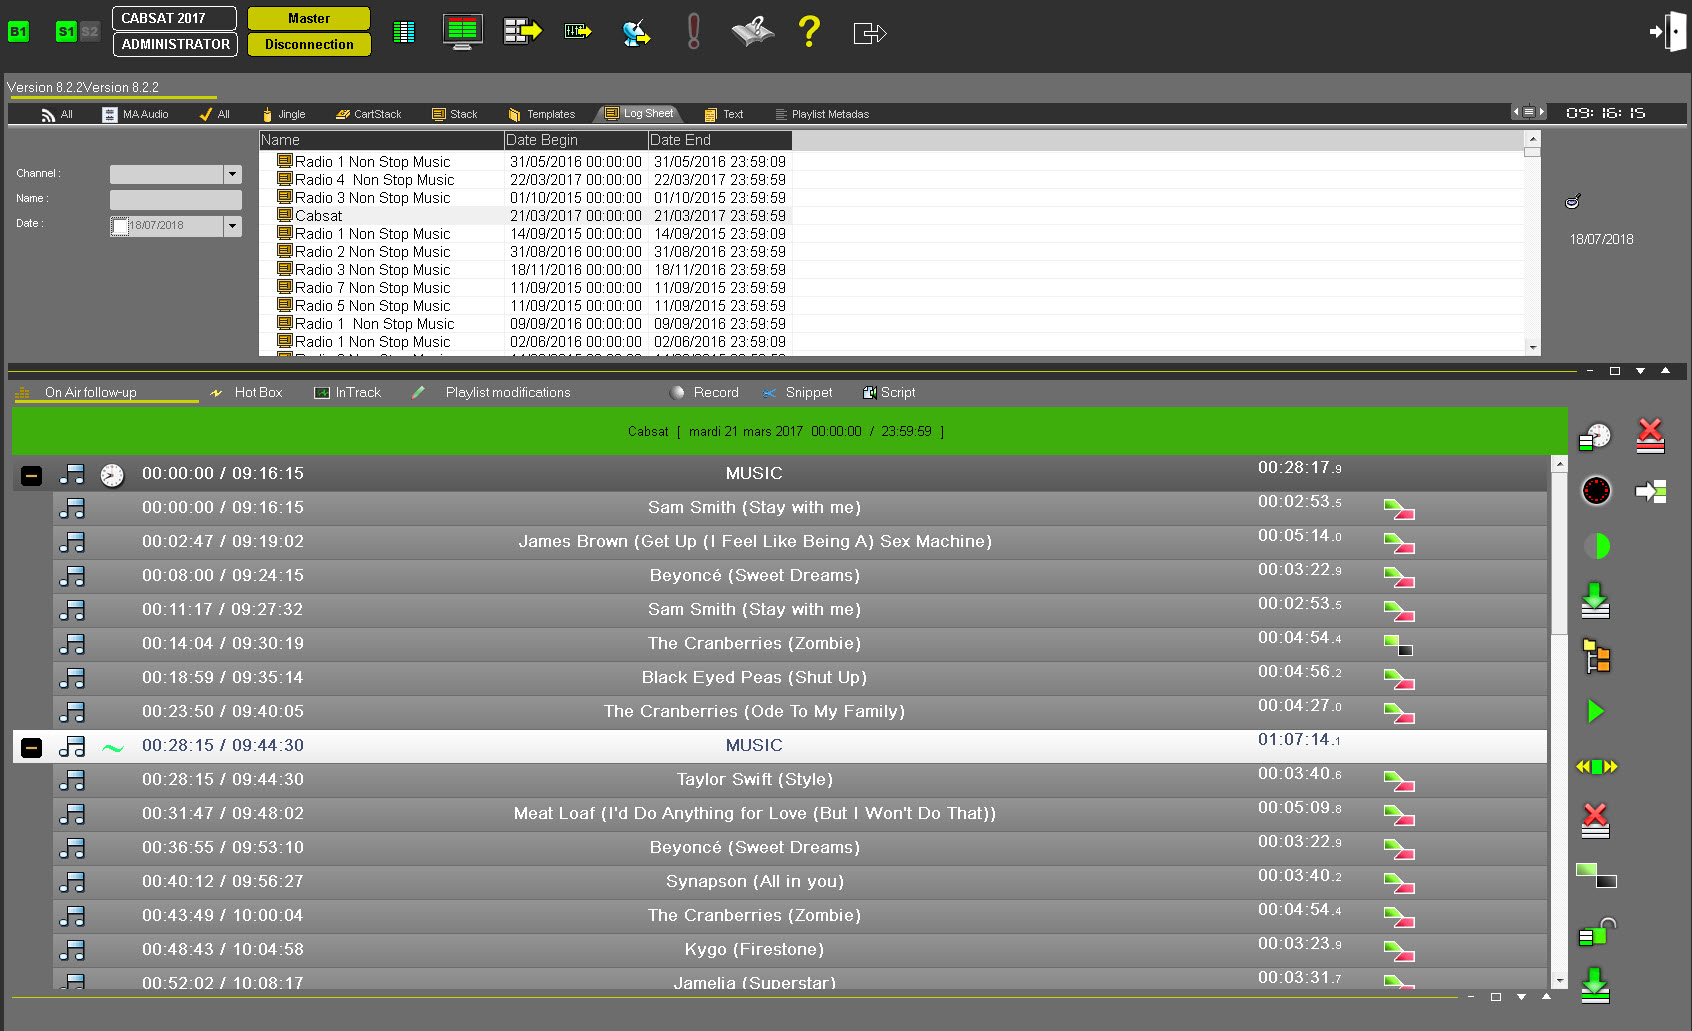
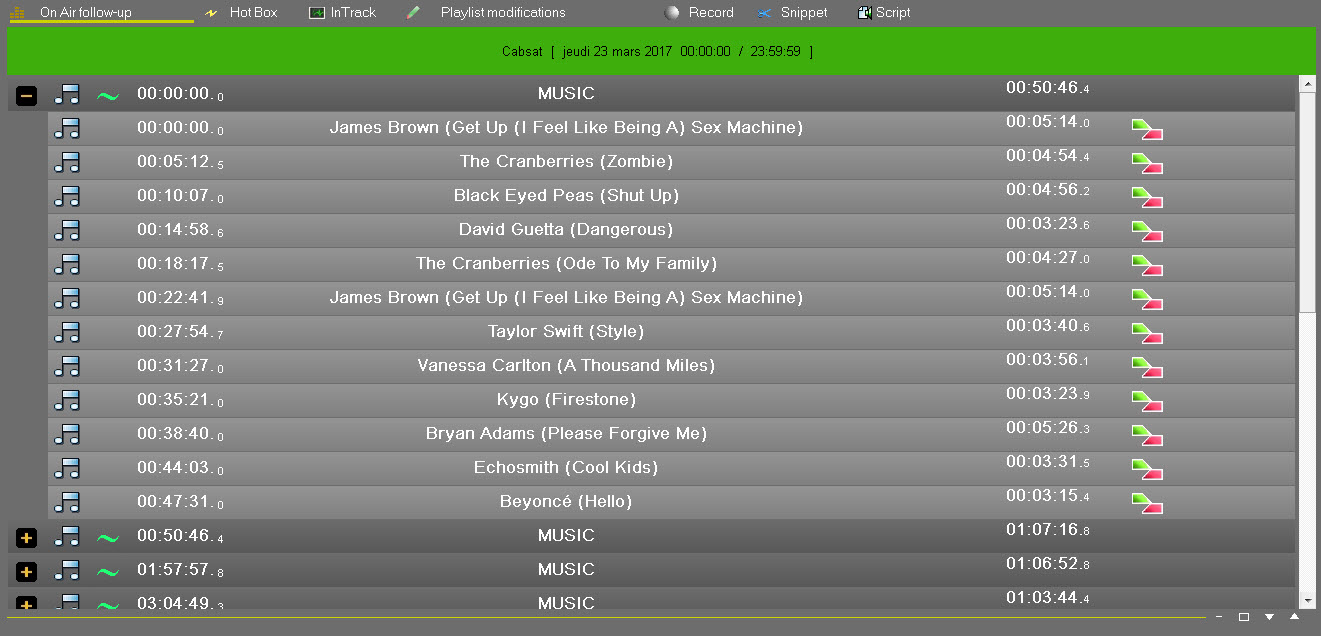
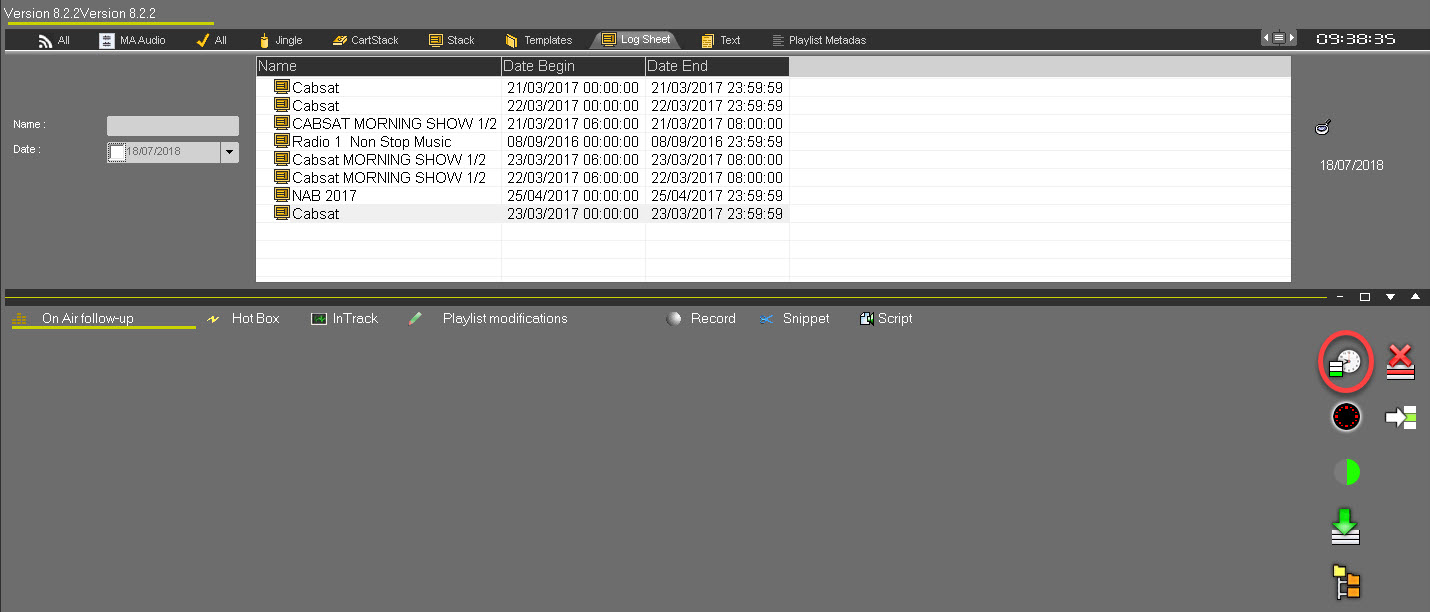
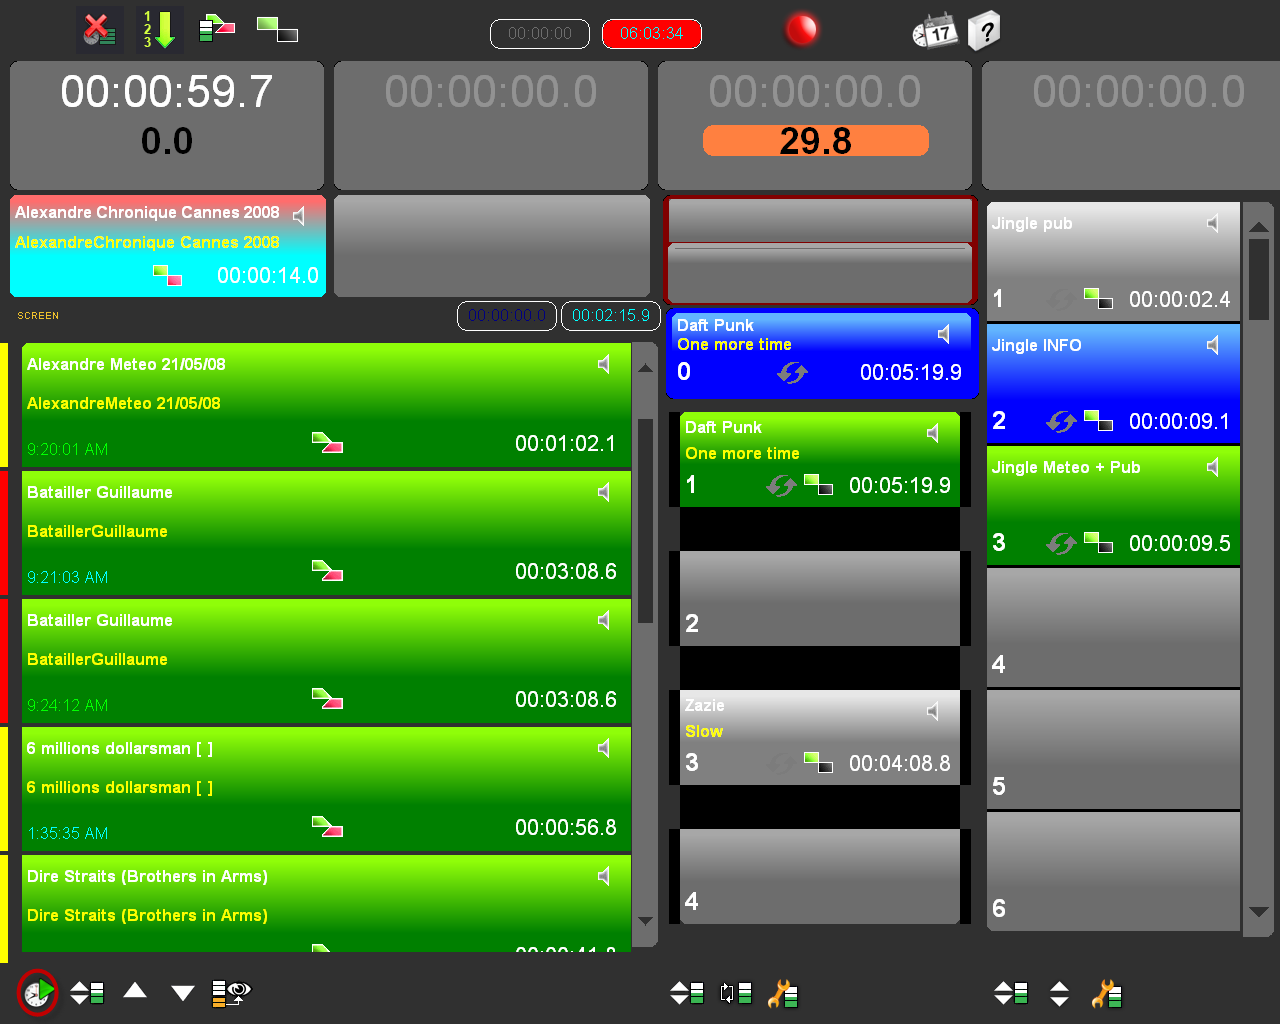
1.3.13.The "On air follow-up" tab
The "On Air Follow-up" tab is used to monitor the progress of an on air playlist and to modify it.
This tab is divided into 2 parts :
- the upper part displays the on air playlist.
- the lower part is used to load - manually or automatically - the next playlist to broadcast.
These 2 parts can be resized by moving the separation bar (the line separating the Browser and the "On Air Follow-up" tab) or thanks to the following icons :

Functions available in the "On air follow-up" tab
The following functions are available from the "On air follow-up" tab :
 Automatically loads a playlist of the current day, at the right time.
 Time setting : to focus on the item being broadcast (in locked mode only).
 Locked mode: the playlist is locked. The playlist is outlined in color and therefore synchronized with broadcast and with Insider application (see : User guide “Insider”).
 Loads the selected playlist from the Browser to the “On Air Follow-up” tab.
 Expands all playlist screens.
 Plays a selected run. Click on this icon to load the sound in the simple player.
 In-track tool dedicated to the playlist.
 Unloads the playlist from the “On Air Follow-up” tab.


 Applies the lead-in mode. By double clicking on this icon , it is possible to modify the chaining mode to cut , mix or manual)
 Locks the playlist to prevent it from being accidentally modified in AirDDO.
 Loads the next playlist to broadcast, in the lower part of the "On Air Follow-up" tab.
 Unloads the playlist in the lower part of the "On Air Follow-up" tab.
 Place a selected item as next to be broadcasted on the left screen.
Modifying an on air playlist
When a playlist is on air, it is still possible to apply some changes on it, as "insert", "modify", "delete", "replace".
However, for security reasons, any modification on the item which is on air is impossible.
Playlist modifications are done from the "On air Follow-up" tab, but also from a planning workstation where the "Federall" tab is installed.
Attention : To modify a playlist from a planning workstation, you must have the rights.
Moreover, if a playlist is modified, the "notification" icon is flashing  .
.
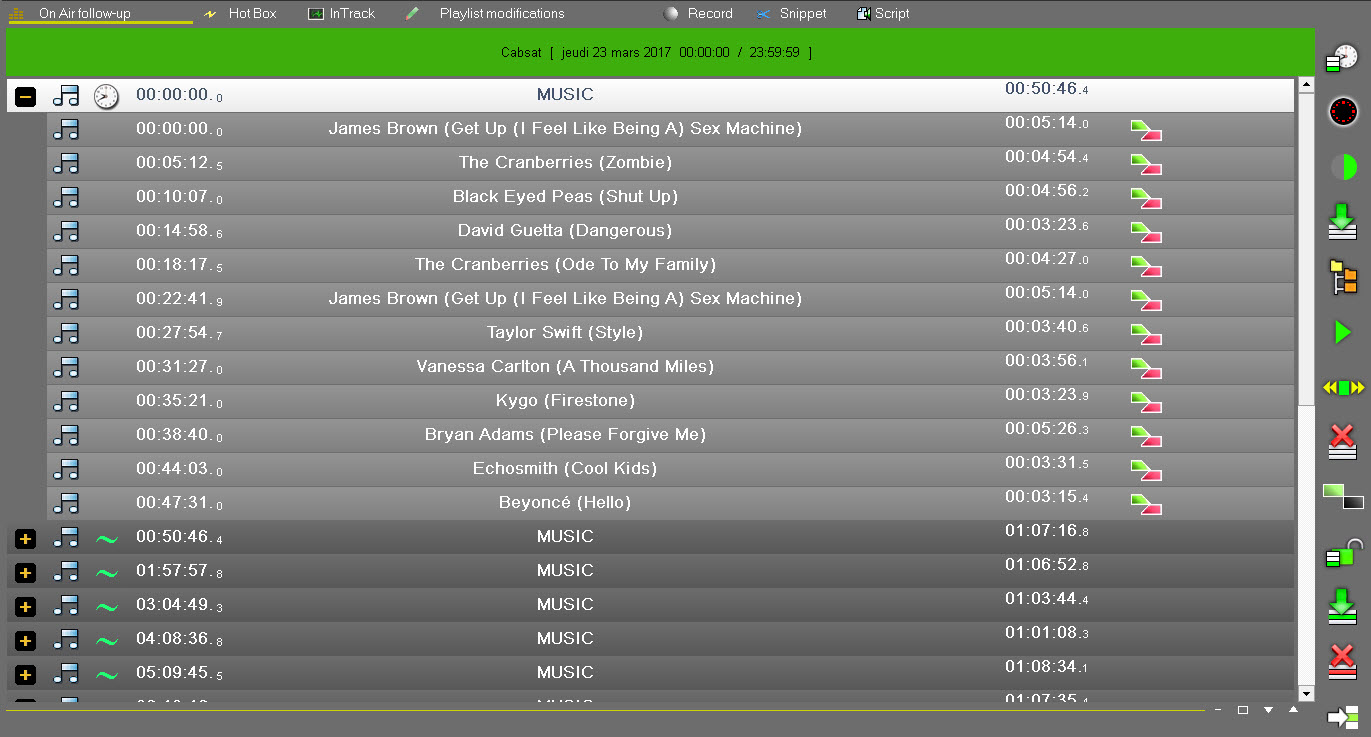
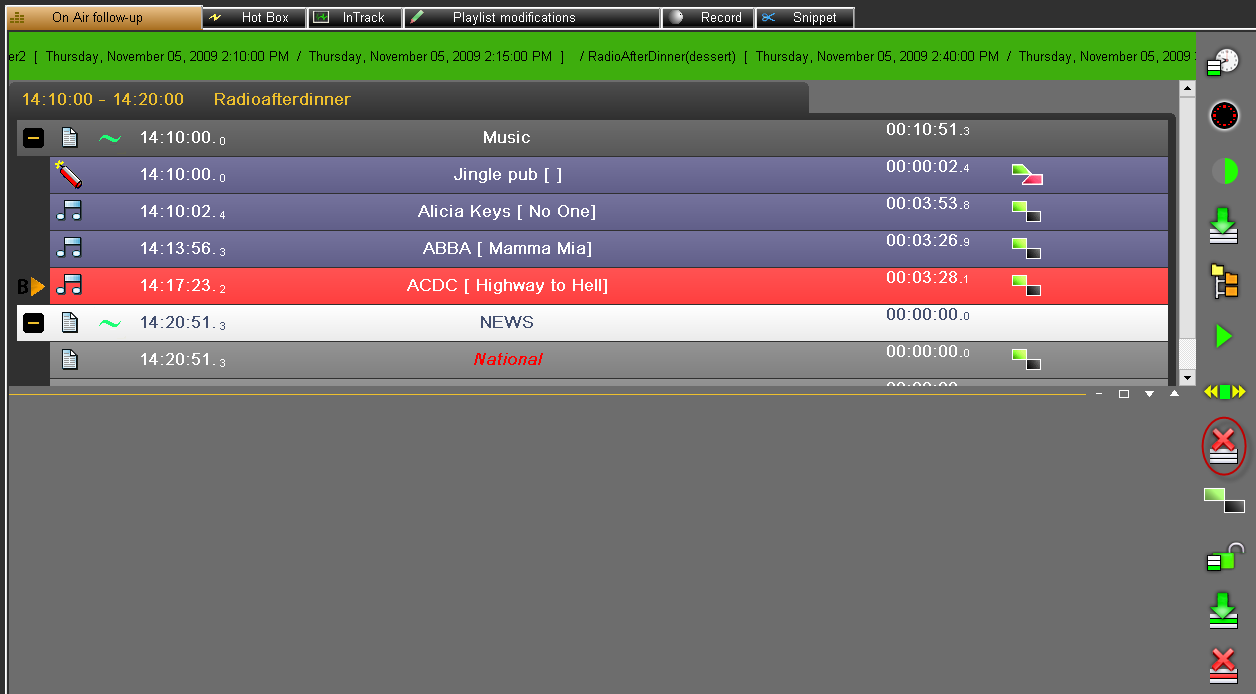
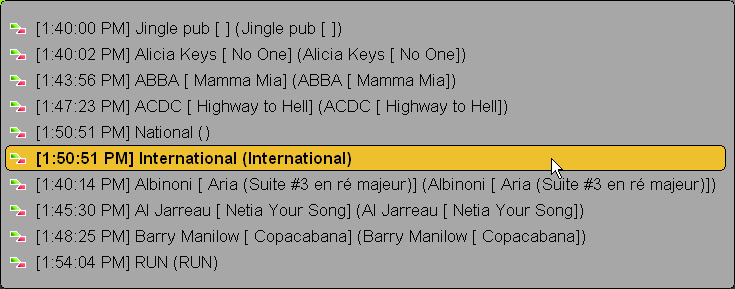
Modifiable and unmodifiable screens
Depending on the settings of the application and the management of rights operated in Administrator, it is possible to prevent users from modifying some types of screens.
For instance, it is possible to prevent users from changing the "Commercial" screens but let them modify the "Music" screens.
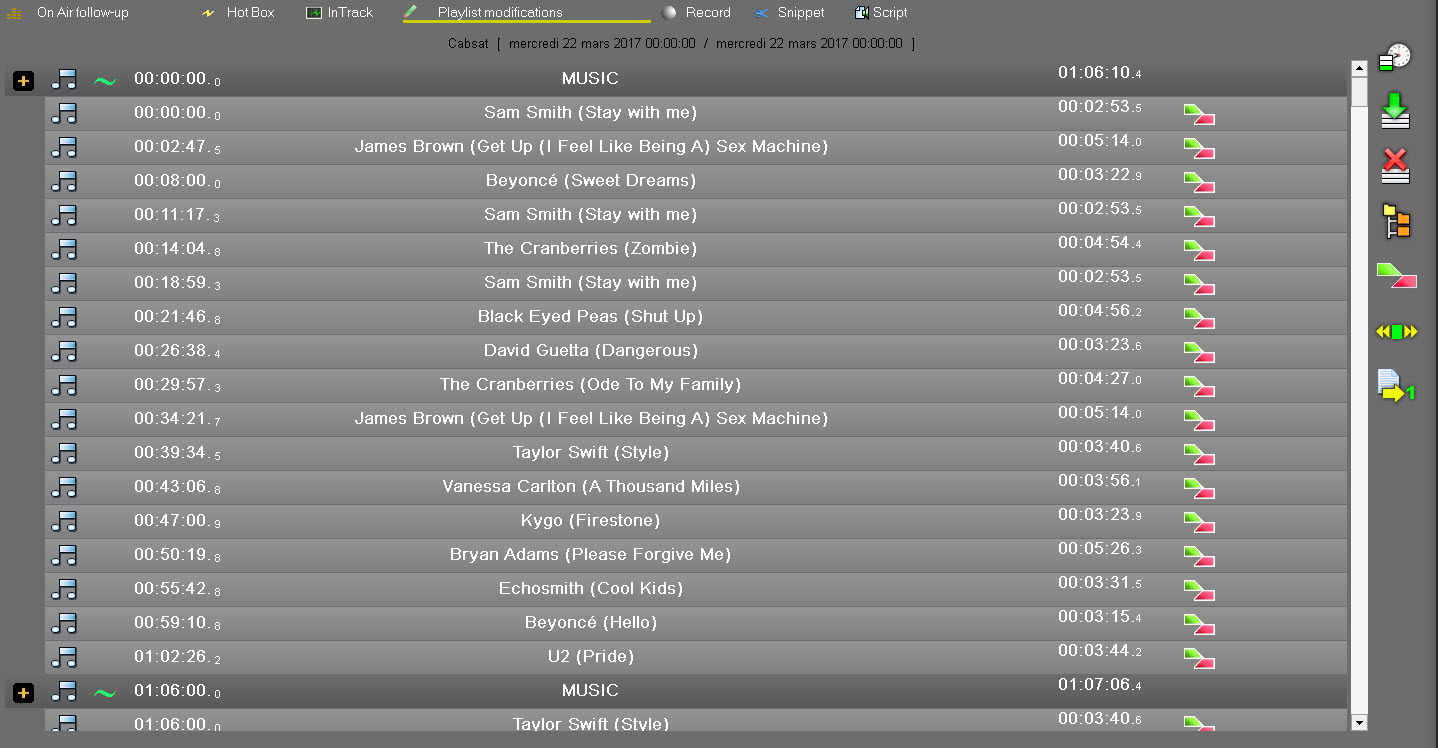
Those screens appear in dark grey in the playlist (see. screenshot)

NB: the content of the screens which can't be modified is in read-only mode.
Inserting an item in the playlist
When a playlist is loaded in the "On air follow-up" tab and in the broadcasting screen as well), select in the Browser the item you want to insert, and drag and drop it in the playlist.
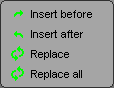
- A menu is displayed. You have several options for insertion.

Attention : following the insertion mode chosen, the item is inserted with the "cut" 
 , "mix" or "manual" mode.
Indeed, by clicking on the "insertion mode" in the "On air follow-up" tab, you can choose the insertion mode.
Each time that you click on the "insertion mode" icon, this one is modified (cut, mix or none).
NB : this function is also available at the top of the Broadcasting screen.

Replacing an item in the playlist
When a playlist is loaded in the "On air follow-up" tab and in the broadcasting screen as well), select in the Browser the item you want to insert, and drag and drop it in the playlist.
- A menu is displayed. Choose "Replace".
The item is replaced.
Deleting an item in the playlist
To delete an item in the playlist :
- In the playlist, select the item you want to delete.
- Do a right click on it.
- In the menu, choose « Delete».

A message is displayed to confirm the deletion. Click on « Yes ».
The item is deleted.
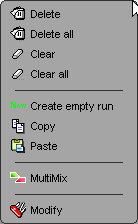
Clearing a run in the playlist
To clear a run (which means to keep the line but erase the audio file in it) in the playlist :
- In the playlist, select the run you want to clear.
- Do a right-click on it.
- In the menu, choose «Clear».

A message is displayed to confirm the action. Click on « Yes ».
The run is cleared.
Remark: if you choose the "Clear all" function, all identical runs are cleared at the same time.
Example : if you have 4 identical jingles inserted in the playlist and choose "clear all" on one of the 4 jingles, the 4 jingles will be deleted and you will have 4 empty steps.
Modifying the playlist lead-in (Multimix)
- Click on a sound in the playlist and right-click on it. A menu is displayed. Choose "Multimix".

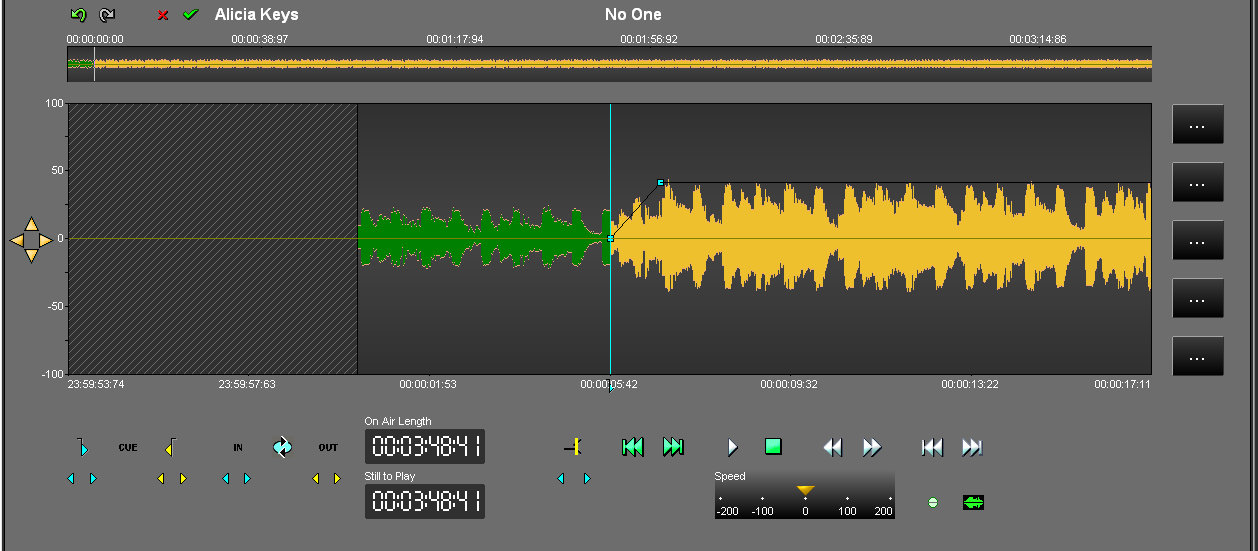
The following window is shown :

In Multimix, the selected step element is placed on the top track followed by the other 3 elements on the other 3 tracks.
If the item(s) are pre-produced documents, the fade points placed in the "Production" tab of Radio-Assist are placed automatically.
To create a sequence, select the element(s) of the 3 bottom tracks, by clicking on the spectrum, and drag them to the desired place:

It is also possible to place fade points, using the squares available at the ends of each sound and to position new points by right-clicking at the desired location.
You can record on the second track with the voice-track function.
Once you have made your mixes, click on the floppy disk icon to save.

Then, click on the "Exit" icon, represented by a door  .
.
NB: if you click on "Exit" without saving, Multimix offers to do it.
It is also possible to make a Voice Track:
Click on the "Voice-Track" function represented by the following icon: 

A new window appears:

The second track is reserved for record.
After adjusting the levels, click "Save".

While recording, it is possible to automatically decrease the level of other tracks (ducking function).
This action can also be done manually using:
the faders available for each track:

with a dedicated remote control
When the record is complete, click "Stop". a window may appear (configuration) to give a name to your record.
Otherwise, the record is automatically saved in the database anyway with the name "Voice over".
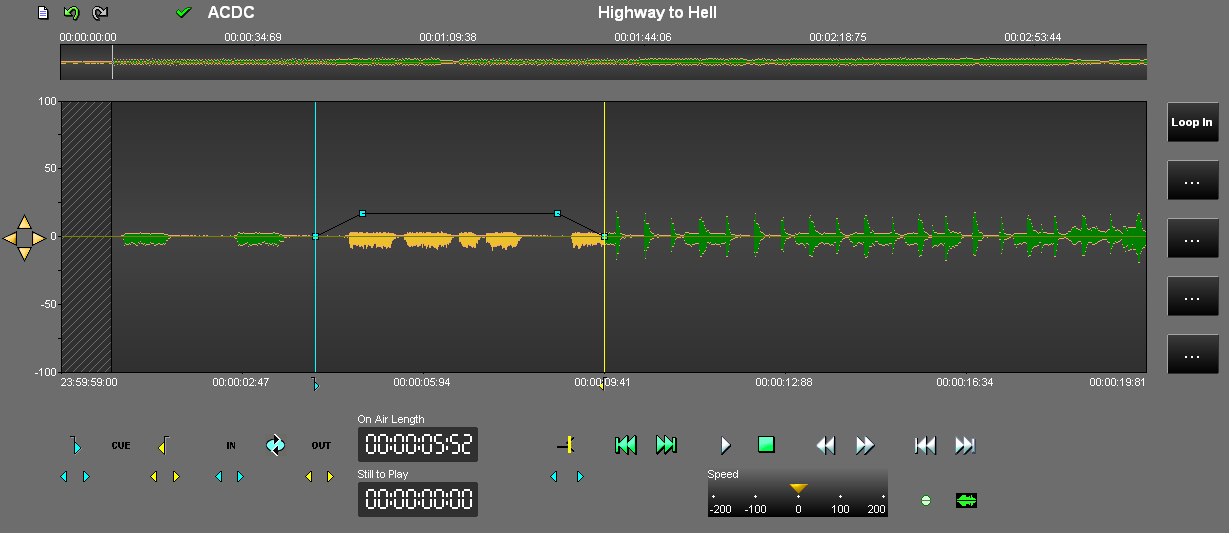
Cueing an audio item in the playlist
To cue an audio item in the playlist :
- In the "On Air Follow-up" tab, select in the playlist the audio item you want to cue.
- Click on "In-Track"  .
.
- You switch to the "In-Track" tool.
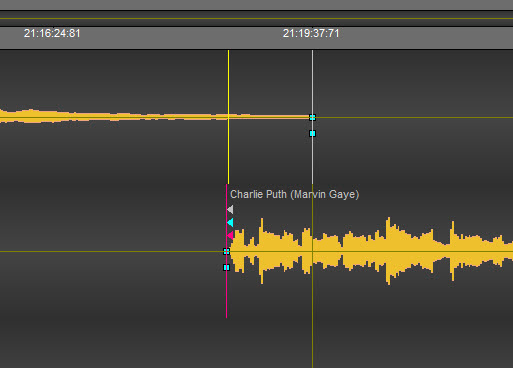
- Select the part that you want thanks to the blue  line (this mark-in is used to define the new beginning of the sound)
and the yellow  line (this mark-out is used to define the new end of the sound).
- Once you have placed the blue and the yellow lines, You can adjust them by modifying the place of the blue line or yellow line or by using the following arrows (left and right) :
 To readjust the blue
 To readjust the yellow
To play the cue, click on the following icon : 
NB : to play the original item (no cue) click on the following icon : 
Once the modifications are done, click on "Validate"  .
.
The "In-Track" tool is closed, and the audio item is modified in the playlist (the item duration is modified).
1.3.14.The "Playlist modifications" tab
The "Playlist modifications" tab is designed to modify a chosen playlist or a chosen stack without it being taken into account for a broadcasting.
Functions available in the "Playlist modifications" tab
The following functions are available from the '"Playlist modifications" tab :
 Automatically loads a playlist of the current day, at the right time.
 Loads the selected playlist from the Browser.
 Unloads the playlist.
 Expands all playlist screens.


 Applies the chaining mode mode. By double-clicking on this icon , it is possible to change the chaining mode to cut , mix or manual.
 Locks the playlist to prevent it from being modified.
 In-track tool dedicated to the playlist.
 Sends the playlist to the dedicated broadcasting screen.
Modifying a playlist or a stack
Thanks to the "Playlist modifications" tab, it is possible to modify any playlist or stack, with various insertion options: "insert", "modify", "delete", "replace".
Playlist modifications are done via the "Playlist modifications" tab, but also via a planning workstation where the "Federall" tab is installed.
Attention : To modify a playlist or a stack from a planning workstation, you must have the appropriate rights.
Inserting an item in the playlist or stack
Once your playlist or stack is loaded in the "Playlist modifications" tab, select in the Browser the item you want to insert, and drag-and-drop it in the playlist.
- A menu is displayed. You have several insertion modes.

Replacing an item in the playlist or stack
Once your playlist or stack is loaded in the "Playlist modifications" tab, select in the Browser the item, and drag-and-drop it in the playlist.
- A menu is displayed. Choose "Replace".

The item is replaced.
Deleting an item in the playlist or stack
To delete an item in the playlist or in the stack :
- In the playlist or stack, select the item you want to delete.
- Right-click on it.
- In the menu, choose "Delete".

A message is displayed to confirm deletion. Click on "Yes".
The item is deleted.
Remark: if you choose the "Delete all" function, all identical items are deleted at the same time.
Example : if you have 4 identical jingles inserted in the playlist or stack and you choose "delete all" on one of the 4 jingles, the 4 jingles will be deleted.
Clearing an item in the playlist or stack
To clear a run (which means to keep the line but erase the audio file in it) in the playlist or in the stack :
- In the playlist or the stack, select the run you want to clear.
- Right-click on it.
- In the menu, choose "Clear".

A message is displayed to confirm the action. Click on "Yes".
The run is cleared.
Remark: if you choose the "Clear all" function, all identical runs will be cleared at the same time.
Example : if you have 4 identical jingles inserted in the playlist or in the stack and if you choose "clear all" on one of the 4 jingles, the 4 jingles will be deleted and you will have 4 empty runs.
Modifying the playlist lead-in (Multimix)
- Click on a sound in the playlist and right-click on it. A menu is displayed. Choose "Multimix".
The following window is shown :
In Multimix, the selected step element is placed on the top track followed by the other 3 elements on the other 3 tracks.
If the item(s) are pre-produced documents, the fade points placed in the "Production" tab of Radio-Assist are placed automatically.
To create a sequence, select the element(s) of the 3 bottom tracks, by clicking on the spectrum, and drag them to the desired place:

It is also possible to place fade points, using the squares available at the ends of each sound and to position new points by right-clicking at the desired location.
You can record on the second track with the voice-track function.
Once you have made your mixes, click on the floppy disk icon to save.

Then, click on the "Exit" icon, represented by a door  .
.
NB: if you click on "Exit" without saving, Multimix offers to do it.
It is also possible to make a Voice Track:
Click on the "Voice-Track" function represented by the following icon: 
A new window appears:
The second track is reserved for record.
After adjusting the levels, click "Save".
While recording, it is possible to automatically decrease the level of other tracks (ducking function).
This action can also be done manually using:
the faders available for each track:

with a dedicated remote control
When the record is complete, click "Stop". a window may appear (configuration) to give a name to your record.
Otherwise, the record is automatically saved in the database anyway with the name "Voice over".
1.3.15.The playlist's tools
Repositionning the playlist
If you browse the playlist and if you want to reposition the playlist on the next item to broadcast, click on the "reposition" icon  located at the left side, at the bottom of the broadcasting screen.
Displaying the content of the playlist
To display the content of a playlist, click on the following icon :  .
.
A window opens and displays the item list of the playlist allowing to browse inside.
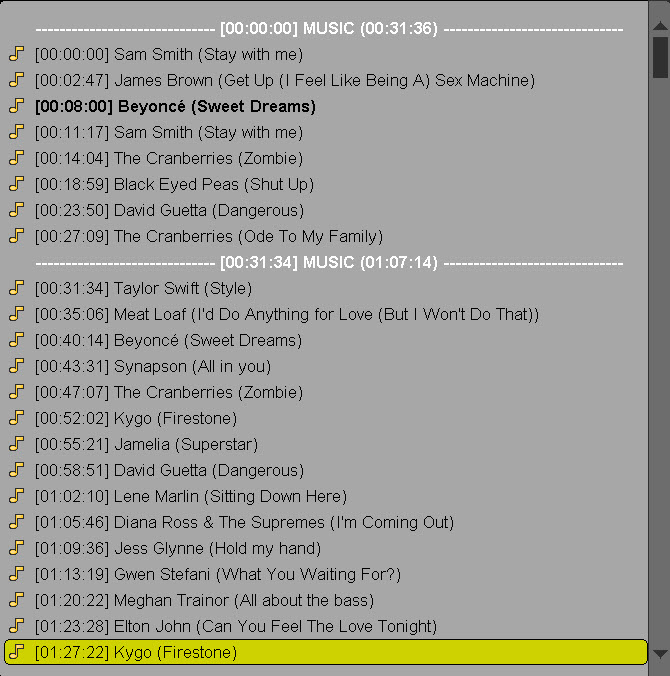
NB : if you click on one item of the list, this item becomes the next item to broadcast.
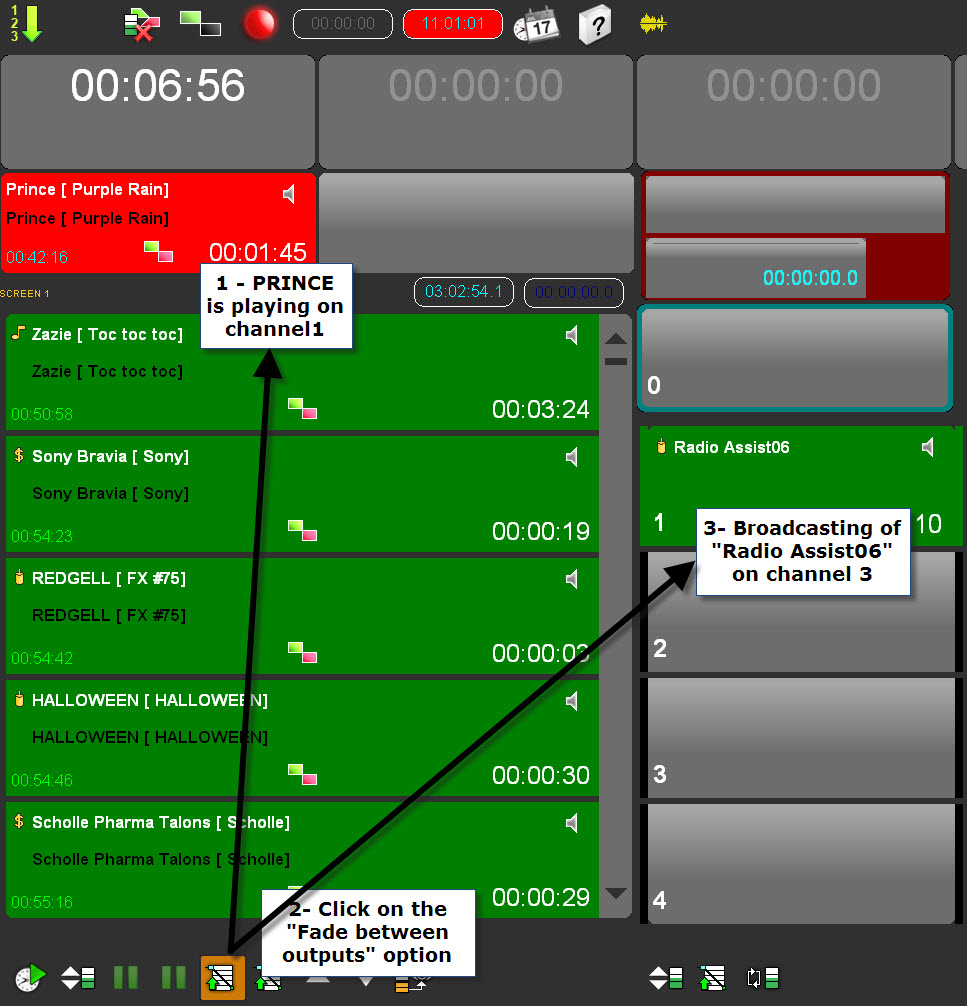
"Fade between outputs" function
With the "Fade between outputs" function, you can do an automatic fade between the different outputs of AirDDO.
To do so, click on the "Fade between outputs" to activate the function (the icon turns to red).
 "Fade between outputs" deactivated
 "Fade between outputs" activated
Example :
- On the first output of the broadcasting screen, I'm Broadcasting "Purple Rain" from PRINCE.
- Then, I click on the "Fade between outputs" icon  (the one on the first output).
- Then I broadcast the jingle "Radio Assist06" on the third output
Result : the first output is fading and stops. Of course the sound on the third output (Radio Assist06) is still playing.
NB : The settings if the fade is configured in dB and seconds in the setup of AirDDO (done by the administrator).
"Pause on Fader start" function
It is possible to put an item on pause via the fader start of the mixing console.
Therefore, when an audio item is on air :
- click on the "pause on faders" icon
 "pause on faders" function deactivated.
 "pause on faders" function activated.
- Then, close the fader.
The audio item is then on pause. When the fader is opened again, the audio item starts from where the playhead was when you clicked on pause.
NB : The "pause" function is also possible with the mouse (click on the item which is on air to put it on pause/click again to resume the play).
Browsing the playlist
To browse the playlist, use the arrows of the remote control :

OR the ones located on the Broadcasting screen :

To reposition the playlist on the next item to broadcast, click on the "reposition" icon  located at the left side, at the bottom of the broadcasting screen.
Deleting/restoring items playlist function
Thanks to the deleting/restoring items playlist function, you can delete or restore items from the broadcasting screen.
To delete an item playlist from the broadcasting screen
- Put the item to delete in the "next item to broadcast" window in the broadcast screen (on the top of the playlist).
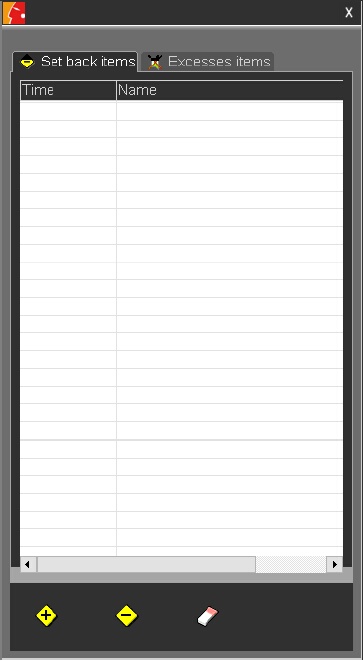
- Click on the following icon to open the "withdrawal box"  .
.
A window is displayed :

- Go to the "Set back items" tab : 
- Click on "delete"  .
.
The item is deleted from the playlist and it is displayed in the Withdrawal box.
To restore an item playlist from the broadcasting screen
- Select the item in the "withdrawal box"" window in the broadcast screen.
- Click on "Add"  .
.
The item is restored to the playlist.
NB : It is possible to add items in the withdrawal box in order to put them in "stand by".
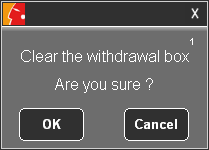
On the other hand, to delete the list of items in the withdrawal box, click on the following icon :
A message to confirm the deletion is displayed. Click on "OK" to validate the deletion.
Playlist overflow management
Two modes for overflow management are available : overflow calculation in real time and overrun based on interval (AirDDO setup configuration).
a) Overflow calculation in real time
This enables (or disable) the application to automatically manage any overrun between the current position on the playlist and the next fixed-time start screen.
- Fixed Time
- On Time
- Off Time
- Screen on window
This recalculation of "surplus" items takes place permanently in relation to the current time on the machine.
If it turns out that there is time to broadcast items initially put in overrun, they will be automatically restored to the playlist.
In automatic overrun, the system ensures there is never any blank. For instance, if there is a gap of 10 seconds before the start of the next screen and there are items in the overrun box, the first of them will be restored to the playlist to fill in the blank.
Items in overrun can be always reused by dragging and dropping them to, for instance, a cartstack player.
b) Overflow based on time interval
If this option is chosen, overrun will be calculated on the basis of a time interval instead of the time left before the next fixed screen.
For this time interval, a duration and an offset are defined. The duration is the length of the time interval the overrun is based on. The end of the interval must correspond to the start of a fixed screen, but the interval can contain several types of screen, even fixed ones. The offset is the start of the time interval calculated by adding the offset to a round hour.
For example, if the playlist starts at 9:00 and the offset is 5 min, the time interval will start 5 min after every round
hour, that is, at 9:05, 10:05, 11:05, etc. and last 55 min, so end at 10:00, 11:00, etc.
To open the overflow window, the process is the same as the withdrawal window, click on the following icon :

A window is displayed. If you click on the "Excesses items" tab, the items playlist in overflow are shown.
NB : by configuration, it is possible to prevent a category from being sent to the overflow window.
For example, all commercials can be locked. So, even if the playlist contains too many items which can not be broadcast, AirDDO will give priority to commercial items to be broadcast.
Inserting an item in the playlist
It is possible to insert an item directly from the Browser to the broadcasting screen, where the playlist is.
To do so :
- Select an item (coming from the Browser, a simple player, a cartstack, the "In-Track" tool...) and drag it to the playlist.
The item is inserted.
NB : The "notification" icon is flashing  to notify the technician that the playlist has been modified.
Modifying the lead-in playlist
It is possible to modify the lead-in playlist directly from the broadcasting output where the playlist is.
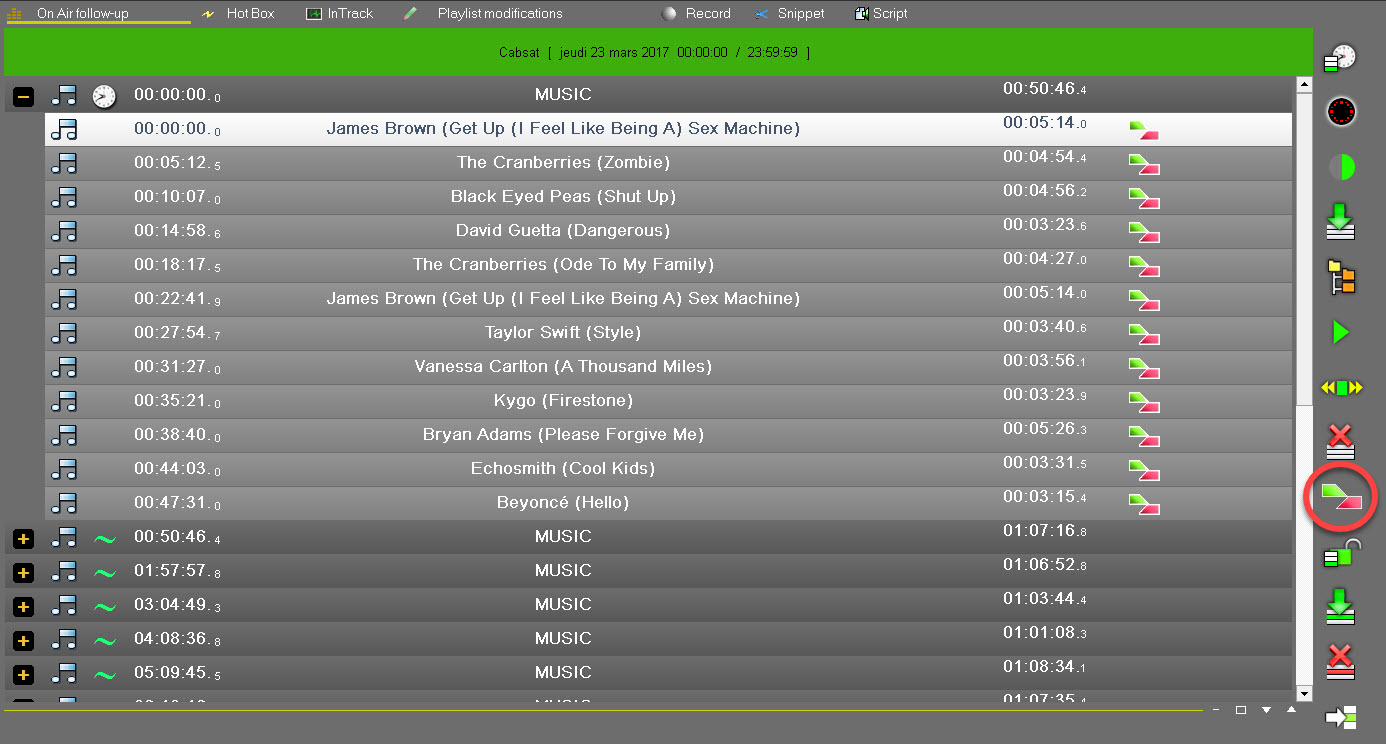
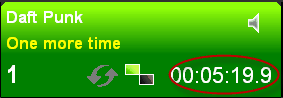
Once a playlist is loaded in the broadcasting output, on each playlist item the "lead-in" icon is available.
At any moment, you can modify it.
To do so, Click on the "Lead-In" icon.
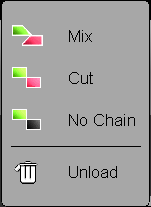
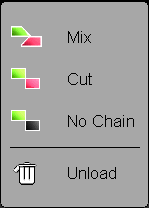
The following menu is displayed.
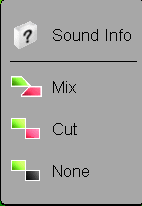
Choose the new lead-in mode. You have 3 choices. Each time you click on the icon, you modify the lead-in mode. :
 Mix : the item is mixed automatically with the next one (thanks to the inlink and outlink points that you have placed in the "Production" tab).
 Cut : the item is played automatically with the next one back to back (no mix).
 "None" : the item stops at the end (no lead-in).
On the other hand, you can apply a global lead-in mode (for the whole playlist).
To do so, click on the icon available at the top of the broadcasting screen :

This icon has 3 functions : Default mode, mixing mode, manual mode (each time you click on the icon, you switch from one mode to the other).
 The playlist items are in "default" mode (lead-in mode chosen during the planning step).
 The playlist items are in "mixing" mode (items will be played mix thanks to the inlink and outlink points that you have placed in the "Production" tab or "Cut" if you have not place the inlink and outlink points).
 Items playlist are in manual mode.
1.3.16.Daylight saving time
Twice a year, it is necessary to create special playlists for the daylight saving time.
AirDDO knows the 2 days in the year when time is changed thanks to a specific configuration which is done.
Starting Daylight Saving time (+1h)
To start the daylight saving time (+1h) :
- Create a specific playlist for this day, as follows :
Broadcasting time | playlist schedule | Playlist content |
00h00 00h59h59 | On time | more one hour of content (with some items in overflow) |
01h00 01h59h59 | On time | more one hour of content (with some items in overflow) |
03h00 03h59h59 | On time | more one hour of content (with some items in overflow) |
04h00 04h59h59 | On time | more one hour of content (with some items in overflow) |
Etc. | Etc. | Etc. |
- When it is 2 o'clock, clock jumps forward to 3 o'clock. Therefore, AirDDO jumps forward to 3 o'clock and broadcast the break automatically.
NB : there is no break between 2 and 3 o'clock. However, if a user has created a break for this time by mistake, AirDDO will not broadcast it because it is not allowed to do it.
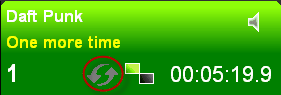
When the daylight saving time is done, a sun icon is displayed.
Ending Daylight Saving time (-1h)
To end the daylight saving time (-1h) :
- Create a specific playlist for this day, as follows :
Broadcasting time | playlist schedule | Playlist content |
00h00 00h59h59 | On time | more one hour of content (with some items in overflow) |
01h00 01h59h59 | On time | more one hour of content (with some items in overflow) |
02h00 02h59h59 | On time | more two hours of content (with some items in overflow) |
03h00 03h59h59 | On time | more one hour of content (with some items in overflow) |
04h00 04h59h59 | On time | more one hour of content (with some items in overflow) |
Etc. | Etc. | Etc. |
- When it is 3 o'clock, clock jumps backward to 2 o'clock. Therefore, AirDDO jumps backward to 2 o'clock and still plays the same break without being allowed to replay the beginning of the Break.
When the daylight saving time is done, a snowflake icon is displayed.
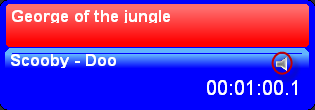
1.3.17.Pre-listening to a playlist item
To pre-listen to an item in the playlist :
- Click on the loudspeaker available on each item :
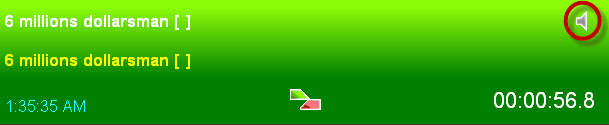
The PFL mode is activated :  .
.
A progress bar is displayed in the black counter. You can move inside the item by clicking anywhere on this counter.

Remark : if you do a right-click on the black counter AirDDO lets you hear the last 7 seconds of the item (configuration). If you do second right-click, you can listen to the last 14 seconds and so on.
1.3.18.Unloading a playlist
To unload a playlist, click on the "unload the current playlist" icon available in the "On-Air follow up" tab .
A playlist cannot be unloaded if an item is brodcasting.
In this case, the message would be :
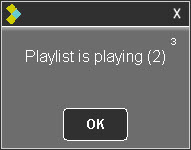
1.4.Stack
1.4.1.Stack definition
A stack is a pack of sounds which are available for the technician to use for on-demand broadcast (e.g., a set of jingles is prepared in a broadcast stack and can be played at any time).

1.4.2.Loading a stack
To load a stack :
- Select in the Browser the stack to load.
- Drag-and-drop it from the Browser to the output dedicated to the stack.
The stack is loaded.
1.4.3.Broadcasting a stack
To broadcast a stack, you have 3 options :
- with the mixing console ("fader start" mode).
- with the DDO110 remote control.
- with the mouse (DJ Mode).
1.4.4.Playing an item from the stack in PFL
To play an item from the stack in PFL :
- Click on the "loudspeaker" icon available on each cart :
The PFL mode is activated :  .
.
A progress bar is shown in the black counter. By simply clicking once on this counter, you can move inside the item.

Remark : if you right-click on the counter, AirDDO plays the last 7 seconds of the item (configuration). If you right-click again, AirDDO plays the last 14 seconds of the item and so on.
1.4.5.Browsing the stack
To browse the stack, use the arrows of the remote control :

OR the ones located on the Broadcasting screen :

OR by clicking on the upper part of the stack :
1.4.6.Displaying the content of the stack
To display the content of the stack, click on the following icon :  .
.
A window opens and displays the items list of the stack allowing you to browse inside.
NB : if you click on one item of the list, this item becomes the next item to broadcast.
1.5.Simple player
1.5.1.Simple player definition
A simple player is a cart containing an audio item that is going to be broadcast at any moment.
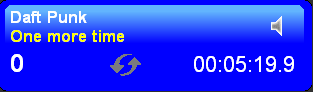
1.5.2.The simple player's counters
The simple player displays different types of counters allowing users to get all sorts of information.
The simple player's counters are the following:
1) Global counter

The big counter heading each channel always display the countdown of the item which is being broadcast.
By clicking on the following icon, you can count up or count down :
 "Count down" function
 "Count up" function
2) Intro/outtro counter

This counters displays the Intro and outro points set in the "Production" tab.
3) "End of the item" counter

This counter shows when the item which is on air will end.
This counter is displayed when you hover your cursor over the "big counter" of the output.
4) Duration counter

This counter displays the item duration.
1.5.3.Meaning of Colors for a simple player output
The meaning of colors for the simple player are the following :
 Item ready to be roadcasted.
 Item selected for the fader start mode.
 Item on air.
Item flashing : item in pause or in loop and play mode.
 Item broadcasted.
1.5.4.Loading a simple player
To load an audio item in a simple player :
- Select an audio item (from the Browser, from the In-Track tool...)
- Load the item thanks to the remote control, the mouse or just by drag and drop.
OR
- Click on the counter of the cart (the cart loads the audio item highlighted in the Browser).
1.5.5.Unloading a simple player
To unload a simple player :
- Click on the "lead-in" icon available on the player.
A menu is shown.
- Choose "Unload".
The player is unloaded.
1.5.6.The simple player's tools
Modifying the mix of a simple player
To modify a mix of a simple player :
- Click on the "mix" icon available on the player.

A menu is shown.
- Choose between Mix, Cut or None.
Looping a simple player
To loop a simple player :
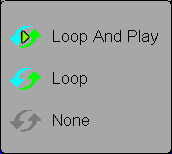
- Click on the "loop" icon available on the simple player.
A menu is displayed.

The "Loop and play" mode is designed to loop the intro or a part of the sound that you have defined in the In-Track tool.
The "Loop" mode is designed to play the whole audio item in a loop.
The "None" mode deletes the "loop".
Then, broadcast your audio item by using the usual interfaces (mixing console, remote control, mouse).
"Fade between outputs" function
With the "Fade between outputs" function, you can do an automatic fade between the different outputs of AirDDO.
To do so, click on the "Fade between outputs" to activate the function (the icon turns to red).
 "Fade between outputs" deactivated
 "Fade between outputs" activated
Example :
- On the first output of the broadcasting screen, I'm Broadcasting "Purple Rain" from PRINCE.
- Then, I click on the "Fade between outputs" icon  (the one on the first output).
- Then I broadcast the jingle "Radio Assist06" on the third output
Result : the first output is fading and stops. Of course the sound on the third output (Radio Assist06) is still playing.

NB : The settings if the fade is configured in dB and seconds in the setup of AirDDO (done by the administrator).
"Action to the output" function
It is possible to apply an action to all simple players in one shot.
By clicking on the following icon  , a menu is displayed :
The action that you choose in the menu is applied for the 4 simple players on your output.
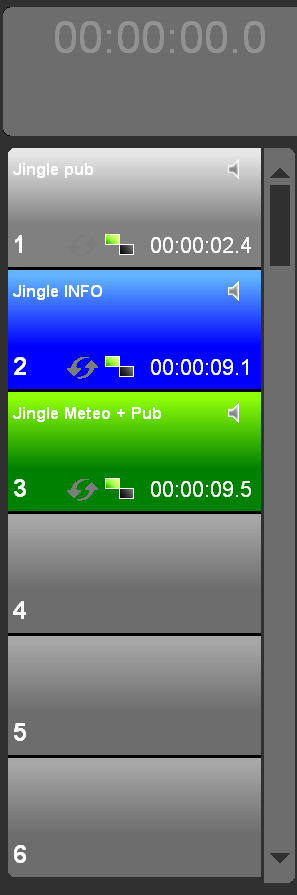
1.6.Cartstack
1.6.1.Cartstack definition
A cartstack is a,set of carts for broadcast at a specified time.
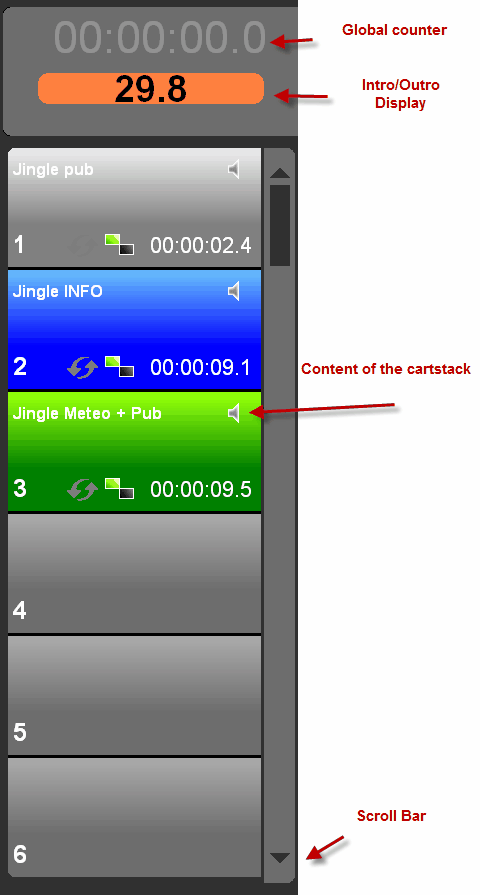
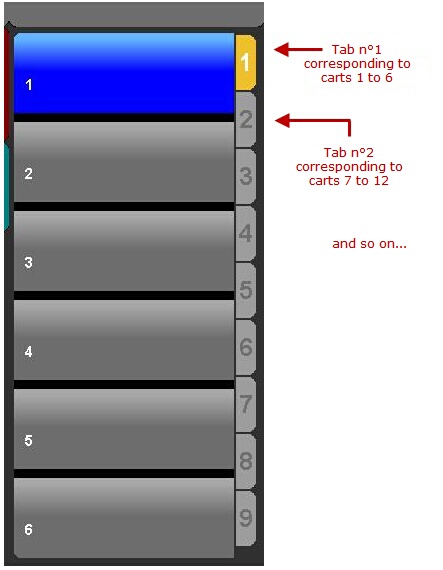
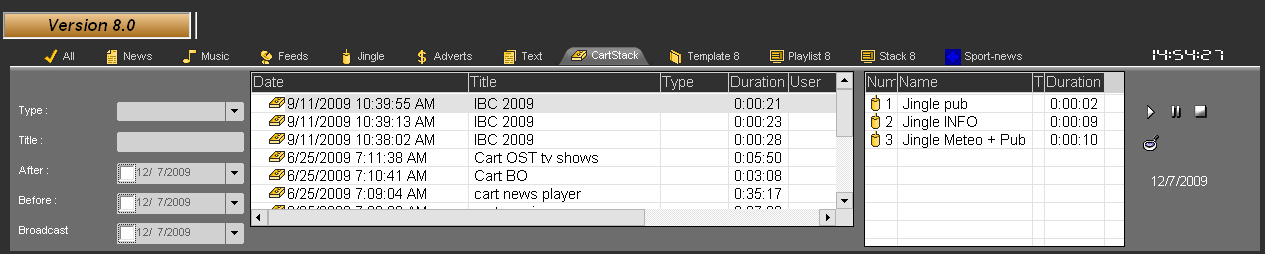
1.6.2.Navigation Tabs
Navigation tabs can be activated via the setup window of AirDDO: they allow users to go from one tab to the other to see the different carts loaded instead of using the vertical scrollbar.
1.6.3.The cartstack counters
The carstack displays different types of counters allowing to get all sorts of information.
The carstack counters are the following:
1) Global counter

The big counter heading each channel always display the countdown of the item which is being broadcast.
By clicking on the following icon, you can count up or count down :
 "Count down" function
 "Count up" function
2) Intro/outro counter

This counter displays the Intro and outro points set in the "Production" tab.
3) "End of the item" counter

This counter shows when the item which is on air will end.
This counter is displayed when you place the mouse on the "big counter" of the output.
4) Duration counter

This counter displays the item duration.
1.6.4.Meaning of colors in carstacks output
The meaning of colors of the cartstacks are the following :
 Item ready to Broadcast.
 Item selected for the fader start mode.
 Item on air.
 Item flashing : item in pause.
 Item broadcast.
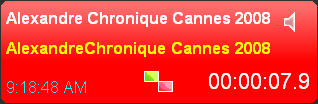
1.6.5.Applying color codes inside the carts
Inside the carts, users can choose to add a color for the different types of sound they have.
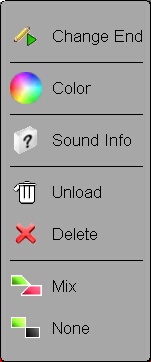
Right-click on the cart (on the chaining mode icon) to display the pop-up menu
2) Choose a color via the Color Window
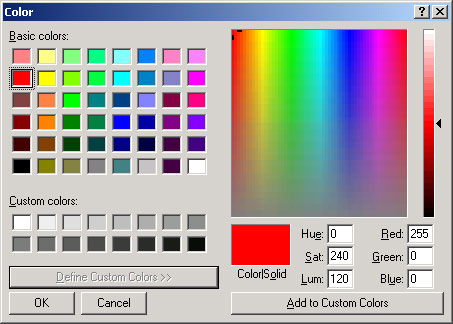
3) A color appears in the bottom left corner of the cart
This option can be useful if you want to identify sounds according to their type. For instance, jingles are in red, adverts are in green, and so on...
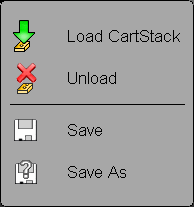
1.6.6.Loading a cartstack
To load a cartstack :
- In the Browser, Click on the "Carstack" category to display the carstacks which are available in the database.
- Select the cartstack you want to load, then drag it from the Browser to the cartstack output.
Your carstack is loaded.
OR
- Once your cartstack is highlighted in the Browser, click on the following icon which gathers some cartstack functions :

- A menu is displayed. Choose "Load".

Your carstack is loaded in the dedicated output.
1.6.7.The Cartstack 's tools
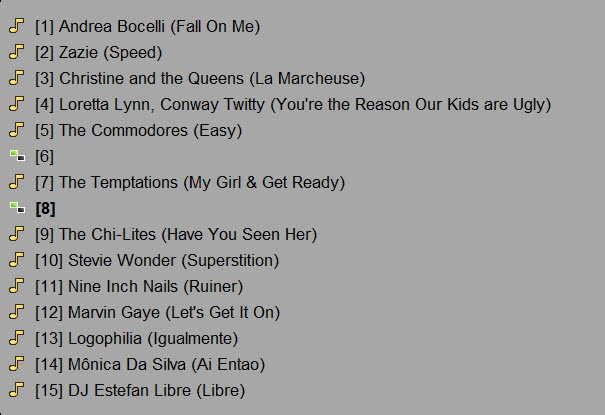
Displaying the content of a cartstack
To display the content of a carstack, click on the following icon :  .
.
A window opens and displays the first 25 items of the cartstack. You can scroll up or scroll down to reach an item very quickly.
Therefore, if you click on one item in the list, this item becomes the next item to broadcast.
Note that you cannot select another sound from the cartstack when one of its item is already On-Air.

"Fade between outputs" function
With the "Fade between outputs" function, you can generate an automatic fade between the different outputs of AirDDO.
To do so, click on the "Fade between outputs" to activate the function (the icon turns to red).
 "Fade between outputs" deactivated
 "Fade between outputs" activated
Example :
- On the first output of the broadcasting screen, I'm Broadcasting "Purple Rain" from PRINCE.
- Then, I click on the "Fade between outputs" icon  (the one on the first output).
- Then I broadcast the jingle "Radio Assist06" on the third output
Result : the first output is fading and stops. Of course the sound on the third output (Radio Assist06) is still playing.

NB : The settings regarding the fade is configured in dB and seconds in the AirDDO setup swindow (done by the administrator).
Browsing in a cartstack
To browse in a cartstack, click on the following icon : 
Change broadcasting mode
The button  allows you to modify the broadcasting mode in a cartstack.
In mode  , when a cart is broadcasted, if you click on another cartr to select it as the next item to play, it is displayed in blue and then a fader start, a click or the use of the DDO 110 will launch it.
In  mode, when a cart is broadcasted, if you click on another cart, the broadcasted cart will be stopped and the selected one will be launched.
1.6.8.Broadcasting a cartstack
To broadcast items from a cartstack, you have several ways :
- with the remote control
- with the fader start of the mixing console.
- with your mouse : you click on the cart to broadcast the item.
1.6.9.Modifying a carstack
Deleting an item in a cartstack
To delete an item in a carstack :
- Click on the "lead-in" icon available on a cart.

A menu is displayed. Click on "Unload".
The item is deleted from the carstack.
Inserting an item in a cartstack
Once your cartstack is loaded in the dedicated output, select in the Browser one item and drag it to a cart.
The item is inserted before the item on which you have placed the cursor when dragging the element to the cartstack.
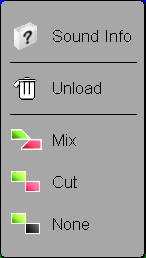
Modifying the lead-in of a carstack
To modify a lead-in of the cartstack :
- Click on the "lead-in" icon available on a cart.

A menu is displayed.

- Choose among one of the various modes offered by AirDDO .
The lead-in is modified.
1.6.10.Saving a carstack
To save a cartstack which has been modified or created on air :
- Click on the following icon which gathers some cartstack's features :

- A menu is shown. Choose "Save".

A saving window is displayed.
-Give a name to the cartstack and then click on the "floppy disk" icon to save it.
1.6.11.Unloading a cartstack
To unload a carstack :
- Click on the following icon which gathers some cartstack's features :

- A menu is shown. Choose "Unload".
The carstack is unloaded.
1.7.Stack N
It is possible to use a cartstack in playlist mode.
This operating mode is a mix between the playlist mode and the cartstack mode.
It is possible to activate this feature on 1 to 4 tracks. This will require selecting Cartouchier A, AB, ABC or ABCD in the AirDDO setup.
The mixes are managed only by the inlink/outlink points because the MultiMix function is not accessible.
Here, the screen is set to "Cartstack AB" ie 2 tracks.
If it had been set to "Cartstack ABC", the runs would have been displayed on 3 tracks.
We will drag-and-drop from the Browser a cartstack on track A or B.
The sounds of the cartstack are displayed on the 2 tracks.
The name of the cartstack is displayed between the steps and the 2 tracks.
The cart number appears to the left of each step.
We find the buttons specific to cartstack:

1 2 3 4
1- Opens a window with the display of sound elements.
2 - Button to go up or down in the cartouchier.
3 - Button opening the menu for saving or unloading.

4 - On-Air Mode Button
1.8.The Hot-Box
1.8.1.Hot-Box definition
The "Hot-Box" tab is used to view items marked as urgent in Radio-Assist (with the "Set as urgent" icon available in the Browser  .)
.)
The items appear in the tab as soon as they are marked in RA.

1.8.2.Broadcasting an item coming from the Hot-Box
Once the item has been marked as urgent and it is displayed in the Hot-Box, you have two ways to broadcast it :
- By loading it via the remote control.
- By drag and drop (from the Hot-Box to a cart).
- Double-click to load it and select it for immediate broadcast in the Instant Player.
1.8.3.Deleting an item from the Hot-Box manually
When an item is displayed in the Hot-Box, it will be deleted after a few minutes (the duration depends on the configuration chosen by the Radio station).
However, it is possible to manually delete the item, by clicking on the "trash can" icone ("ERASE" column).
NB : the item is deleted from the Hot-Box, but not from the database.
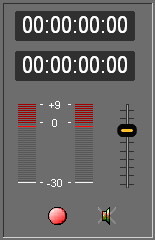
1.9.Record
1.9.1.Record definition
The "record" tool is designed to record any audio source (microphone, DAT player...).
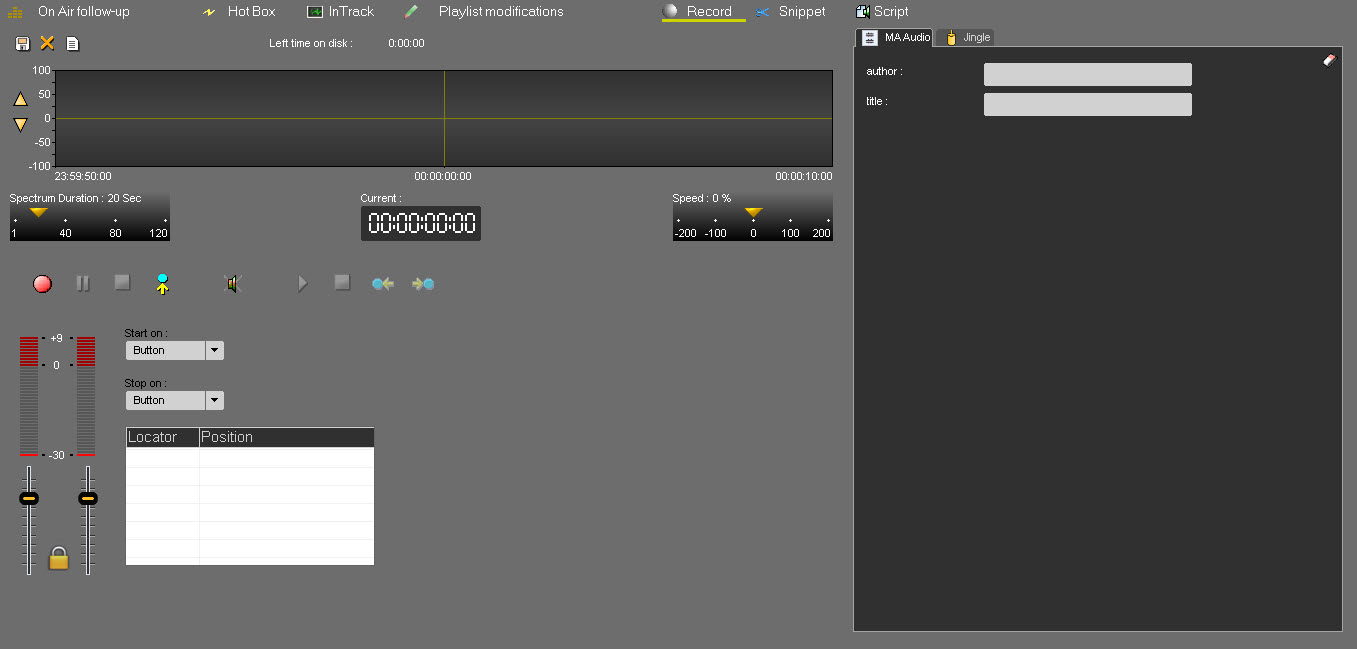
1.9.2.The recording modes
To trigger and stop a record, you have several options :
Start on button / Stop on Button.
Start on level (0db by default - it can be changed) / stop on level (-20db by default - it can be changed).
Start on time / Stop on duration (3 minutes by default - it can be changed).
NB : if you use the lasts two recording modes (level and time), you must trigger the recording by clicking on the "record" button first. 
It is important to note that once the recording has started, it starts to save itself in the database. This means that once the recording is stopped, it is immediately visible in the Browser. And if the computer is accidentally shut down, the recording is saved until the machine stops.
1.9.3.Recording an item
Go to the "Record" tab.
Do a voice test and adjust the levels to prevent saturation. stay in the region around 0 using the vu-meters:
To start the recording, click on "Record":

To put the recording on hold, click on "Pause":

Click once more on pause to start the recording again.
When your recording is over, click on « stop » :

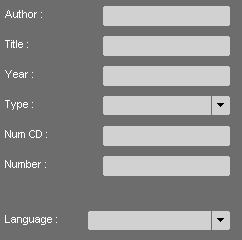
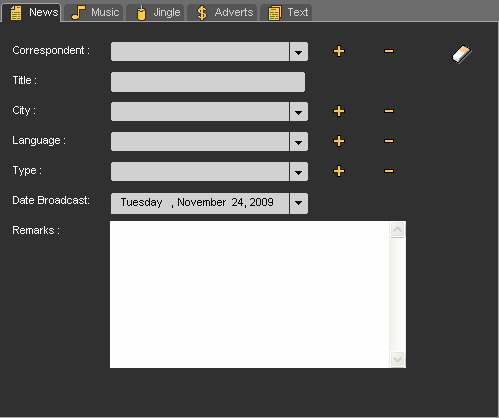
In the right-hand side of the screen :
Select the Item category corresponding to the element you have just recorded (News, Music, Jingle, etc.).
Enter the information concerning the item (title, etc.).
Then, save it by clicking on "save"  .
.
The item is now in the database and you can find it in the Browser section under the chosen category (News, Music, Jingle, etc.). Its status will be "Original", represented by the following symbol :  .
.
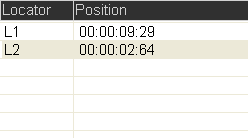
1.9.4.Dropping and renaming markers (F1)
 This function is designed to drop markers.
NB : the markers are inserted at the playhead position.
All markers dropped are displayed on the wave form and in the following window as well :

If you want to rename a marker, click on its name ("L1" for instance).

Rename it.
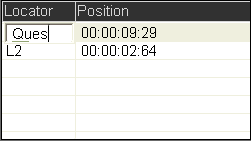
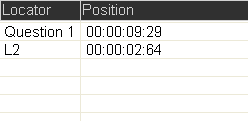
Press "enter" on your keyboard to validate.
Your marker is renamed.
1.9.5.Difference between the blank page and the red cross
When a record is started, the item is already available in the Browser, under the "All" tab category with a question mark because it is not saved yet.
When you click on the "Orange cross" icon  , it means that you delete the recording from the workspace and from the Browser as well.
The « Blank page » icon means that you have finished your recording (which has been saved) and you want to start a new recording.
1.9.6.Time left on disk
The "Time left on disk" function is designed to know the storage capacity remaining in the database.
In the following example, 18 hours 29 minutes and 20 seconds remain for storing items in the database.

1.9.7.Saving a recording (Ctrl + S)
In the right-hand side of the screen :
- Select the type of document you have just recorded (News, Music, Jingle, etc.)
- Enter the information concerning the document (title, etc.)
- Then, save it by clicking on "save"  .
.
The document is now in the database and you can find it in the Browser section under the chosen category (News, Music, Jingle, etc.). Its status will be "Original", represented by the following symbol : 
1.9.8.Keyboard shortcuts (Record)
F1 : Set locators while recording or listening
F2 : Start a new recording
Ctrl N : New recording
Ctrl S : Save recording in the database
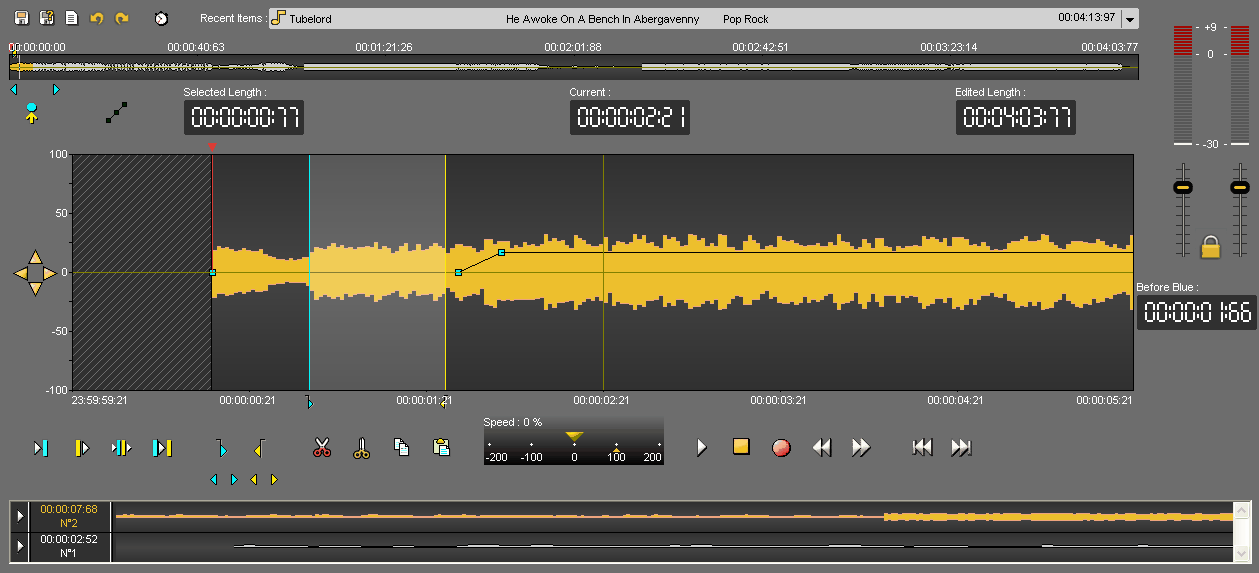
1.10.In-Track
1.10.1.In-Track definition
The “In-Track”tool is used to select a part of a sound you want to broadcast.
1.10.2.The play functions in the In-Track tool
 Play the sound from the playhead (red line) (F5).
To play the sound from where you have started, use the space bar.
NB : in the original mode 
 , the In-Track tool plays the whole sound. In the edited mode , the In-Track tool plays the cue.
 Stop the sound (space bar).
 Play backwards slowly (F7).
 Play forward slowly (F8).
 Go to the beginning (F9).
 Go to the end (F10).
NB : in the original mode 
 , the In-Track tool plays the whole sound. In the edited mode , the In-Track tool plays the cue.
 Play the beginning of the cue.
 Play the end of the cue (about 6 seconds).
 play the item at different speeds.
1.10.3.The counters in the In-Track tool
The counters available in the In-Track tool display the following information :
 Displays the item duration.
 Counts down the item. It is possible to double-click on this counter and type the location where you want to cue.
1.10.4.The other tools of the In-Track
The other tools available in the In-Track are the following :
 New page
 Undo (unlimited)
 Redo (unlimited).
 Resize the spectrum (horizontal and vertical).
1.10.5.Cueing an audio item manually
- Click on the « In-Track» tab (or on the "In-Track" icon if you have configured the In-Track in dialog box  ).
).
- Select an item from anywhere (Browser, cart, playlist...) and drag it to the In-Track tool.
- Select the part that you want thanks to the blue  line (this mark-in is used to define the new beginning of the sound)
and the yellow  line (this mark out is used to define the new end of the sound).
- Once you have placed the blue and the yellow lines, you can adjust them by modifying the place of the blue line or yellow line or by using the following arrows (left and right) :
 To readjust the position of the blue line
 To readjust the position of the yellow line
To play the cue, click on the icon 
 and on the "Play" button
NB : to play the original item (no cue) click on the icon 
 and on the "Play" button
- Once it is OK, you can broadcast it, by dragging and droping it from the In-Track tool to a cart or a simple player...
Or click on  to validate the new duration of the sound in the playlist.
1.10.6.Cueing an audio item automatically
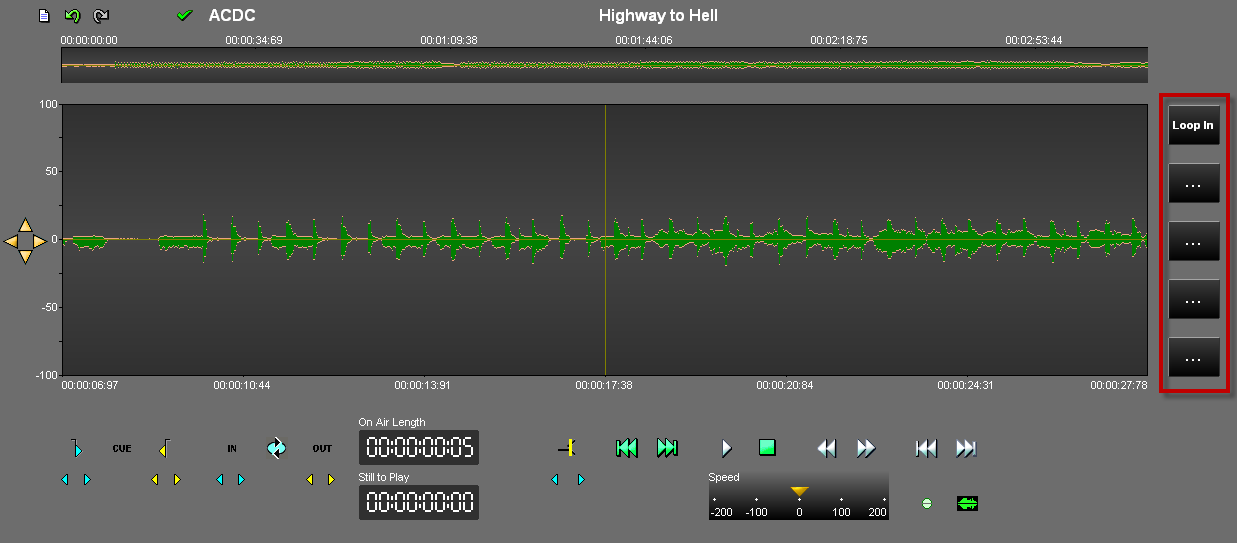
To cue an audio item automatically :
- Click on the "In-Track" tab (or on the "In-Track" icon if you have configured the In-Track dialog box  ).
).
- Select an item from anywhere (Browser, cart, playlist...) and drag it to the In-Track tool.
- Click on "CUE"  .
.
This function sets the mark-in (blue) 
 where the modulation starts and set the mark out (yellow) where the modulation stops.
By default, below -50dB is defined as a blank so it is not considered as modulation.
1.10.7.Looping an audio item and broadcasting it
- Click on the "In-Track" tab (or on the "In-Track" icon if you have configured the In-Track in dialog box  ).
).
- Select an item from anywhere (Browser, cart, playlist...) and drag it to the In-Track tool.
- Select the part you want to loop thanks to the "In" 
 and "Out" icons.
The "In" icon represents the beginning of the “Loop and Play” function .
The "Out" icon represents the end of the “Loop and Play” function .
- Once you have set the "In" and "Out", you can adjust them. Indeed, The place of theses points can be modified by drag and drop or thanks to the following arrows :
 To readjust the beginning of the loop
 To readjust the end of the loop
- To pre-listen to the loop, click on the following icon : .
.
Once it is OK, drag and drop the item to a simple player and apply the "loop and play" mode.
To apply the "loop and play" mode, click on the following icon which is available on the simple player : 
A menu is displayed. Choose "loop and play".
- Broadcast the audio item. The simple player is flashing to notify that part of the item is going to be broadcast in a loop.
- To stop the loop in order to broadcast the rest of the audio item, click again on the simple player (The simple player stops flashing) or use the remote control.
NB : the "loop and play" function is not available for the cartstack.
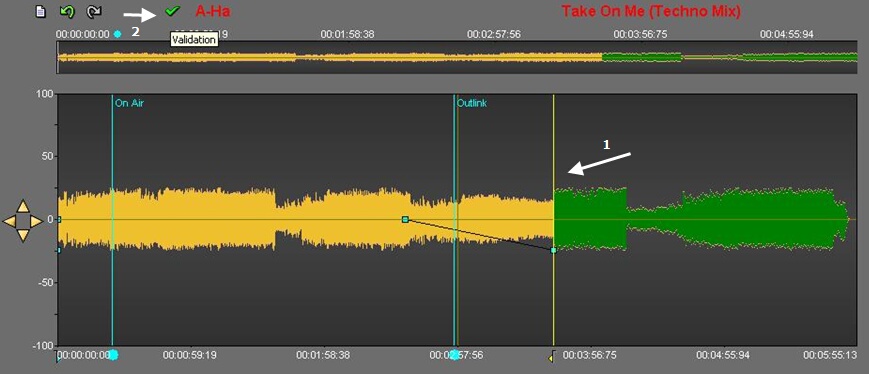
1.10.8.Modifying the outlink in the In-Track tool
To modify the outlink of an item playing on air :
- Click on the "In-Track" tab (or on the "In-Track" icon if you have configured the In-Track in dialog box  ).
).
- Select an item from anywhere (Browser, cart, playlist...) and drag it to the In-Track tool.
- Place the playhead (vertical red line) where you want the new outlink point.
- Click on the "Outlink" icon  .
.
- Once you have set the new position of the outlink point, you can adjust it. Indeed, The place of the outlink can be modified by drag and drop or thanks to the following arrows : 
Validate by clicking on  .
.
Your outlink is replaced.
1.10.9.Creating fade in and fade out in the In-Track tool
A fade in and fade out can be defined thanks to the blue squares located at the beginning and at the end of the audio item.
When you move theses points by drag and drop on the spectrum, the curve is modified.
1.10.10.Change the end of a sound in the In-Track tool
To change the ending of a song in the In-Track module:
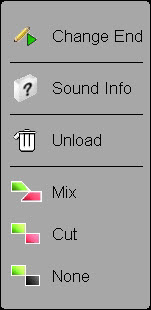
1) click on the chaining mode icon inside the cart
2) In the pop-up menu, choose "Change End" to load the sound inside the In-Track module

3) Inside the In-Track module :
- Place the playhead (vertical red line) where you want the sound to end.
- Click on the yellow  mark-out symbol to define the new end of the sound.
- Click on the "Outlink" symbol  to define the new starting point for the next sound to come.
Once those marks are set, the user has the possibility to readjust them by moving the lines manually or via the double arrows  which are under each icon.
Once everything is in position, the only thing to do is to adjust the fade-out line.
4) In oder to apply your changes, you need to click on the validation icon that is on top of the global track :
NB: When a sound is on air, users have up to 10-15 seconds before the playhead reaches the new end line of the song. After this lapse of time, validation becomes impossible and the green icon disappears.
1.10.11.Broadcasting a cue
You have several ways to broadcast a cue :
- By drag and drop from the In-Track tool to a cart or a simple player or the playlist.
- With the remote control.
- By clicking on the counter counter of a simple player. Then with one mouse click on the simple player and the item is on air.
- With the fader starts of the mixing console.
1.10.12.Saving a cue
Once you have cued your audio item, you can save it by using the "memos" available at the right side of the In-Track tool.

You can save up to 5 cues for each item. To do so :
- Click during one second (if you click for less than a second, AirDDO will load another loop) on one of the 5 "memos"
 .
.
- A window is shown. Enter the cue name.
- Click on "OK".
From now on, The "memo" displays the cue name.
Note that it is not possible to reset a cue. Therefore, your option is to manually set the cue points to their original position and save this cue by giving it a blank name, such as follows: ". . ." .
1.10.13.Loading a cue
To retrieve a cue that has been previously saved :
- Drag the audio item (containing the cue saved) in the In-Track tool.
- Click on one of the 5 "memos" (where the cue has been saved).
Remark : if you click during one second, you save a new cue and you overwrite the previous one.
- The cue is loaded.
1.10.14.Managing cues
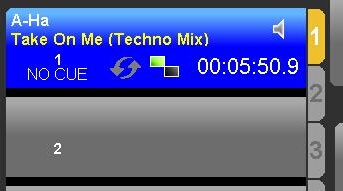
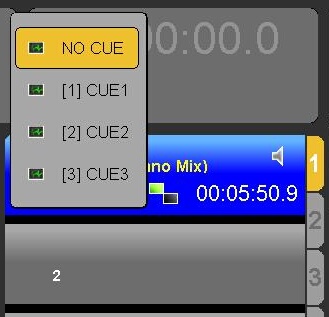
When several cues have been memorized in one sound file, users can choose the one they want to broadcast by clicking directly on the sound cart.
The sound file contains several cues (Cue1, Cue2, Cue3...)
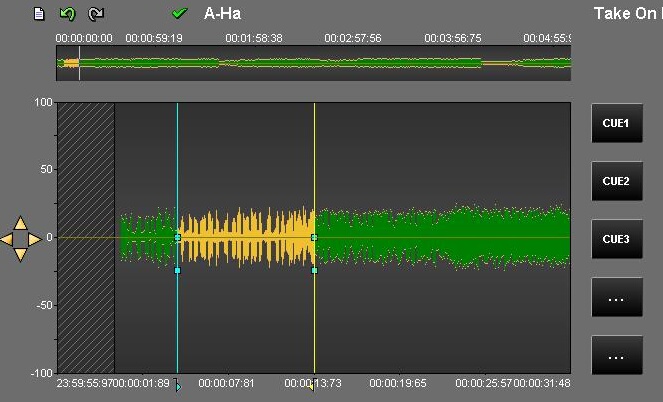
2) The user locates the cart in the broadcast screen :
3) By right-clicking on the cart (under the cart number), a pop-up menu appears, allowing you to choose the cue you want to use on air :
1.11.Snippet
1.11.1.Snippet definition
In the « Snippet » tool, 2 cut modes are available :
Removing mode (you select the part to delete).
To do so, use the "opened scissors" icon which is used to cut what you have selected between the blue and the yellow lines.
Adding mode (you select the part to keep).
To do so, use the "closed scissors" icon which is used to keep what you have selected between the blue and the yellow lines.

1.11.2.Editing in Snippet
Click on the « Snippet » tab.
In the Browser, select the item you want to edit.
Ø To edit a new item you can use original 
 or master items .
Ø To modify an edit session, you can select an edit session coming from the "snippet" tool or the "Production" tool .
Place the item on the track. To do so, 3 possibilities are available :
þ Drag and drop from the database to the track.
þ Double-click on the item.
þ Select the item and press "Enter" on you keyboard.
Place the blue and the yellow lines. Then, you have the possibility to keep the selection or to delete it.
Once your blue and your yellow lines are placed approximately, you can readjust them. To do so, go to the blue or to the yellow line and replace them.
You can also do this operation by using the following buttons :


To know the result before cutting, you can use the following play buttons :
 Plays 2 seconds before the start of a cut (before the blue line).
 Plays 2 seconds after the end of a cut (after the yellow line).
 Plays outside the cut (2 seconds after the blue and 2 seconds before the yellow) - (F6)
 Plays the content of a cut (2 seconds after the blue line and 2 seconds before the yellow line) - (F7).
NB : A right click on one of these buttons will play the sequence in loop until the stop button is activated, so cuts can be modified as you go along.
Once you are satisfied, click on :
 : To delete the selection
 : To keep the selection
Your cut goes to the bin.

To do other cuts, start the operation all over again (place the blue line, the yellow line...).
1.11.3.Setting the mark in (blue) - (F3)
To set the mark in, represented by the blue and marking the begin of your cut you have to :
Place the playhead where you want to place the blue line.
Click on the following icon :  .
.
NB : you can also set the blue line by using the right click of your mouse (function available in "Snippet" only ) or use F3 (shortcut) (see Snippet shortcuts).
In addition, note that by right-clicking on the blue or the yellow icons, the marks on the track will disappear.
1.11.4.Setting the mark out (yellow) - (F4)
To set the mark out, represented by the yellow and marking the end of your cut you have to :
Place the playhead where you want to place the yellow line.
Click on the following icon : .
.
NB : you can also set the yellow line by using the right click of your mouse (function available in "Snippet" only ) or use F4 (shortcut) (see Snippet shortcuts).
In addition, note that by right-clicking on the blue or on the yellow icons, the marks on the track will disappear.
1.11.5.Playing 2 seconds before the current cut
To play 2 seconds before the blue, to know if the blue is at the right position, click on the following icon : .
NB : if you do a right click on the icon, you play 2 seconds before the blue line in loop.
1.11.6.Playing 2 seconds after the current cut
To play 2 seconds after the yellow line, to know if the yellow is at the right position, click on the following icon : .
NB : if you do a right click on the icon, you play 2 after the yellow line in loop.
1.11.7.Simulating a cut (F6)
To simulate a cut, meaning to play the result before cutting what you have selected between the blue and the yellow lines, click on the following icon : .
NB : if you do a right click on the icon, you play 2 seconds before the blue line and 2 seconds after the yellow line in loop.
1.11.8.Playing the content of the cut (F7)
To play the content of the cut (between the blue and the yellow), click on the following icon:
If the cut duration is more than 4 seconds, only 2 seconds after the blue and 2 seconds before the yellow will be played.
NB : if you do a right click on the icon, you play between the blue and the yellow in loop.
1.11.9.Cutting a selection (F5 or Del)
Several ways are available to cut a selection.
Once you have placed the blue and the yellow lines :
Click on the « cut » icon  .
.
OR
Do a right-click on the wave form and choose the « Cut » function.
OR
Press "F5" or "Del" on you keyboard.
The cut is displayed in the bin.
1.11.10.Cutting a selection without putting it in the bin
You can cut a selection without putting it in the bin.
Once you have placed the blue and the yellow lines :
Do a right click on the « cut » icon  .
.
OR
Hold the "Shift" key down and click on the « cut » icon  .
.
1.11.11.Cutting outside the selection
"Cutting outside the selection" means that you keep what you have selected between the blue and the yellow lines.
Once you have placed the blue and the yellow lines :
Click on the « Cut outside selection » icon  .
.
1.11.12.Playhead
The playhead is the red vertical line in the middle of the track. The playhead is fixed.
When you want to insert the blue line, the yellow one, insert a blank or do any action, you HAVE TO place the playhead at the chosen place.
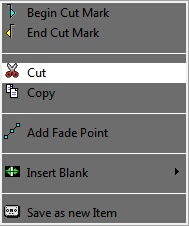
1.11.13.The bin
The bin is the cut list. Indeed, each time that you make a cut, this cut disappears from the sound and goes to the bin.

By doing a right click on a cut, the following menu is displayed :

Play : plays the selected cut.
Rename : renames the selected cut
Paste : pastes the selected cut on the sound, where your playhead is.
Save as a new item : saves the selected cut as a master in the Browser.
Delete : deletes the cut from the bin.
Playing a cut
Go to the bin :

Select the cut to play and click on the following button :  .
.
You can also do a right click on the cut. The following menu is displayed :

Click on « Play ».
Renaming a cut
Go to the bin :

Select the cut to rename.
Do a right click on it. The following menu is displayed :
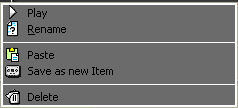
Choose « rename ». A window is shown to rename the cut.
Enter the cut name.
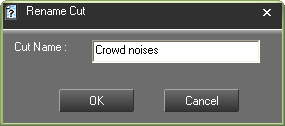
Click on « OK » or press « Enter » on your keyboard.
Your cut is renamed.
Restoring a cut
On the track, click on the cut mark (brown line).
The bin selects the cut belonging to the selected cut mark.
In the bin, do a right click on the highlighted cut.The following menu is displayed :

Choose « Paste ».
The cut is restored.
NB : you can also put the cut back by doing a drag and drop.
Deleting a cut (Del)
In the bin, select the cut to delete.
Do a right click on it. The following menu is displayed.

Choose « Delete ».
The cut is deleted.
1.11.14.Generating a master from Snippet (Ctrl + W)
To generate a master from "Snippet" :
Select the sound-bite to masterize thanks to the blue and the yellow lines (press Ctrl + A to select the entire sound file).
Do a right-click on it. The following menu is displayed.
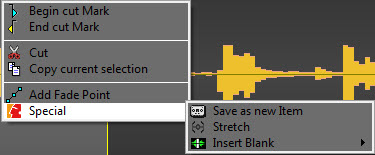
Click on « Special » and then « Save as a new item ».
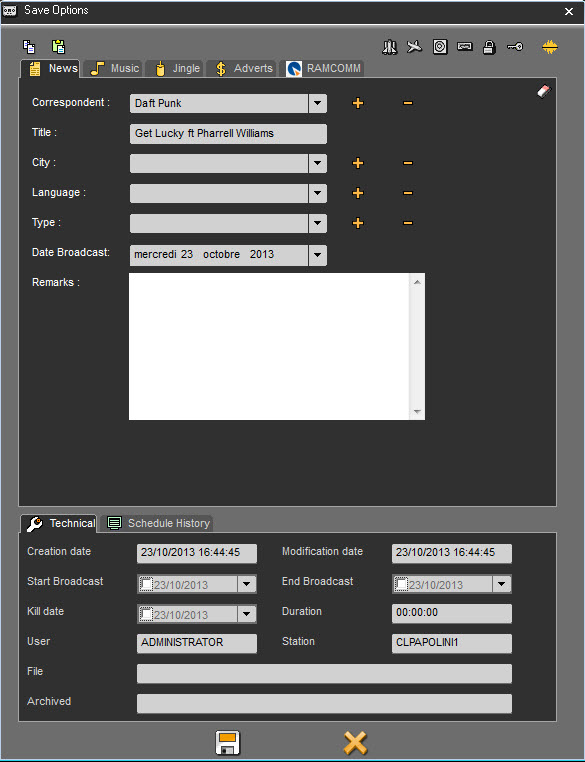
Modify the data if needed.
Save.
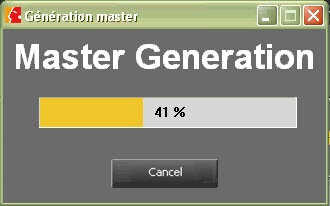
The item is saved in the database
NB : this feature is available in the bin as well.
1.11.15.Straightening a cut
If a cut is not good (the end of a word is missing for instance), you can straighten it to retrieve just the part of the word that you have cut by mistake.
To straighten a cut, click on the cut mark (arrow pointing downward). This one turns to orange.
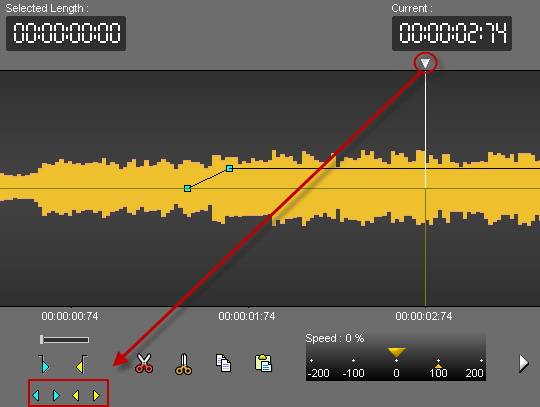
Straighten your cut thanks to the following buttons :
to straighten the beginning of the cut (blue).
to straighten the end of the cut (yellow).
1.11.16.The trimming "function"
The "Finalize" function is used to delete blanks at the beginning and at the end of the recording.
To do so, do a right click on the closed scissors icon  .
.
1.11.17.Undo (Ctrl + Z)
To undo an action, Click on the following icon : 
NB : you can undo up to 256 actions before saving.
1.11.18.Redo (Ctrl + Y)
When you undo and you change your mind, you can redo the action by clicking on the following icon : .
1.11.19.Juxtaposing several audio items
In snippet, you can juxtapose several audio items on the same track.
Once you have inserted the first item, replace the playhead where you want to insert the second audio item.
Then, select the item from the database and drag it down on the track (or double-click on it, or press "Enter" ).
The second audio item is inserted. The color is different.
You can insert as many items as you want.
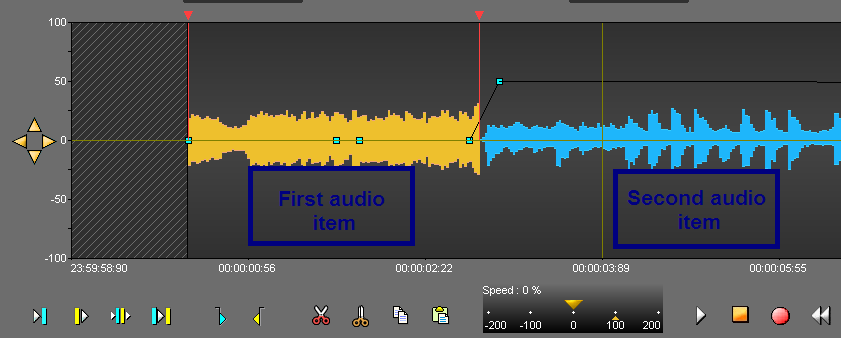
Attention : you can juxtapose original items 

 , master items but not edit sessions together.
1.11.20.Go to beginning (F8)
To go to the begin of an item, click on the following icon :

1.11.21.Go to end (F9)
To go to the end of an item, click on the following icon :

1.11.22.Adding a fade point in Snippet (Ctrl + right click)
To add a fade point :
Do a right click on the wave form, where you want to add a new fade point.
The following menu is displayed.

Click on « Add fade point ». The fade point is displayed.
NB : Ctrl + right click on the wave form allows you to create a new fade point without using the contextual menu.
1.11.23.Deleting a fade point in snippet (Ctrl + right click)
To delete a fade point :
Do a right click on the fade point you want to delete.
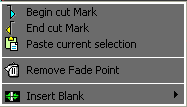
Click on "Remove fade point" (this function is only available if you are on a fade point. Otherwise, it is the "add a fade point" which is displayed).
The fade point disappears.
Attention : you can not delete the default points (set by Radio-Assist).
NB : Ctrl + right-click on the wave form allows you to delete a new fade point without using the contextual menu.
1.11.24.Hiding the fade points
To hide fade points, click on the following icon : 
a red cross is displayed on the icon  .
.
NB : The fade points are not visible but you can still listen to them.
1.11.25.Visualizing the fade points
If you have hidden your fade points and you want them back, click on the following icon :  .
.
The red cross on the icon disappears  , and your fade points are visible again.
1.11.26.Modifying the global level of the sound
To modify the global level of your sound :
Click on the red horizontal line (separating your track in 2), a double arrow is displayed.
Increase or decrease the sound level by moving the black line which appears.
Release the mouse button.

1.11.27.Modifying the sound level
To modify a fade point :
Click on the fade point to move (four arrows are displayed) and drag it to the chosen place.
Release the mouse button.
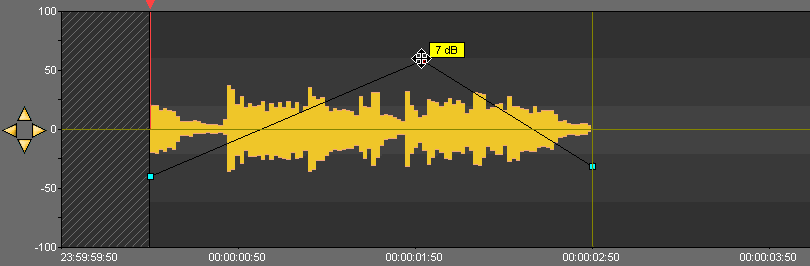
1.11.28.Display AirRun markers
It is possible to display on the sounds that comes from the Feed, the markers that delimit each element played (beginning of songs, beginning of ads, beginning of jingles, etc ...)
To make these markers appear, you must :
Select a sound from the Feed tab in the Browser.
Drag and Drop it into Snippet
Right click on the button  to display the list of channels.
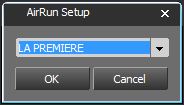
Select the channel for this sound.
Click on  .
.
The button turns green  and the markers are displayed in the sound.
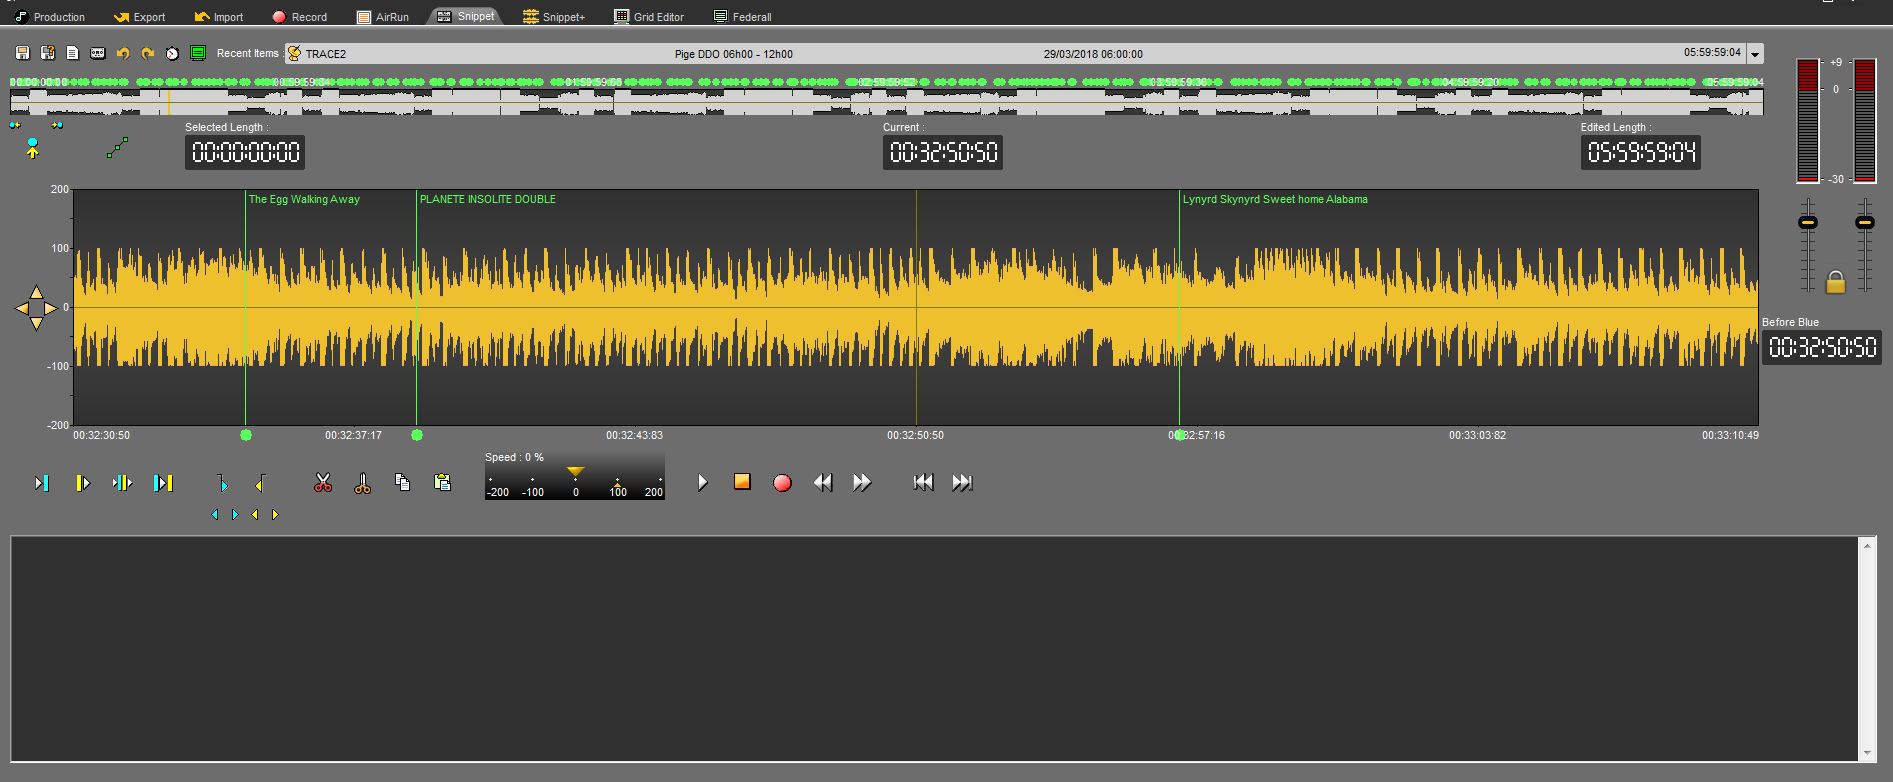
To make the markers disappear, click on 
 . It turns grey and the markers are not shown anymore.
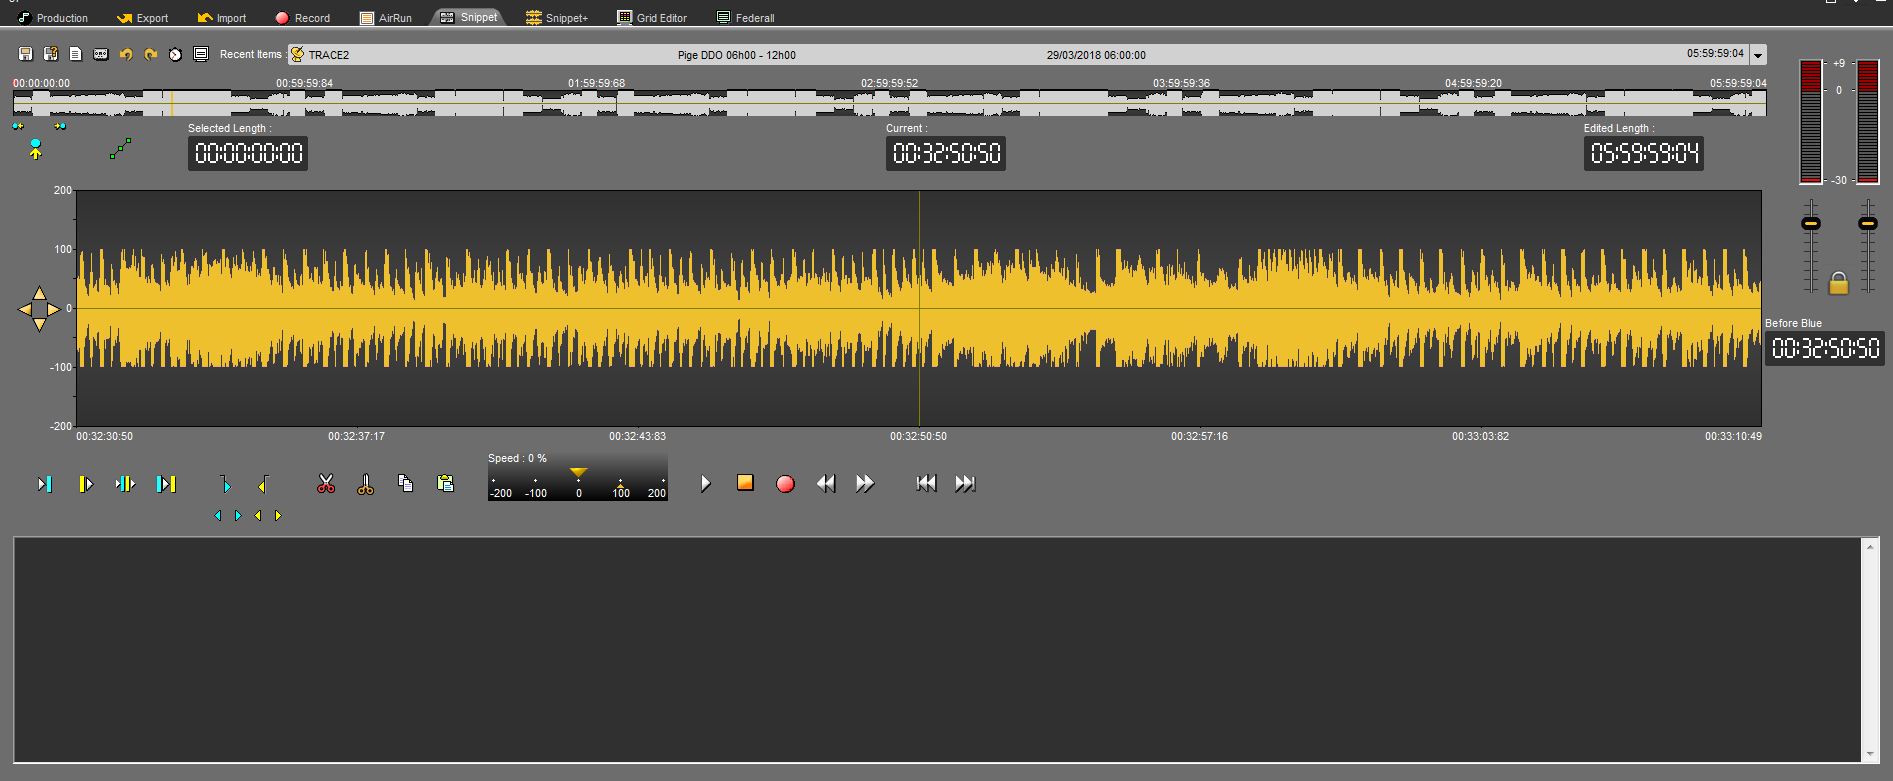
1.11.29.Set a marker in Snippet (F1)
To set a marker on your item :
Place the playhead where you want to insert the marker.
Click on « Set a marker »  .
.
1.11.30.Renaming a marker in Snippet
To rename a marker :
Do a right-click on the marker number you want to rename. A menu is displayed.

Choose « Rename locator ».
Enter the marker name.
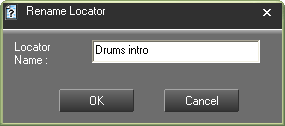
Click on « OK » or press "Enter" with you keyboard.
1.11.31.Moving from marker to marker (1...9)
To move from marker to marker, you can go straight to specified marker using the number pad, from 1 to 9.
Or, use the arrows below the "set locator" icon to go from one marker to the other with no number limitation.

1.11.32.Deleting a marker
To delete a marker :
Do a right-click on the marker number you want to delete. A menu is displayed.

Choose « delete the locator ».
1.11.33.Copying and pasting a soundbyte in snippet (Ctrl + C/Ctrl + V)
To copy and paste a sound bite :
Select between the blue and the yellow lines the part to copy.
Click on « Copy » (or Ctrl + C)  .
.
Place the playhead where you want to paste the sound bite.
Click on « Paste » (or Ctrl + V)  .
.
1.11.34.Stretching a selection
The "Stretch" function enables you to increase or decrease the duration of the sound bite you have selected, without altering the pitch.
To stretch a selection :
Select the part you want to stretch thanks to the blue and the yellow lines.
Do a right-click. A menu is shown.
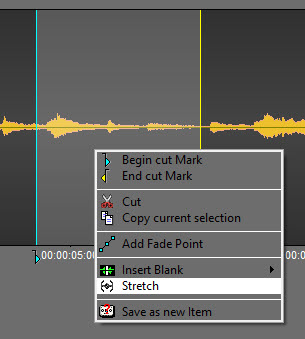
Click on Special then, click on Stretch.
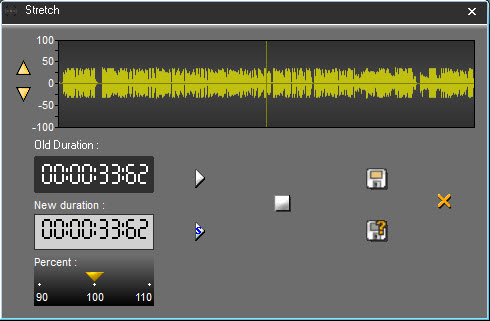
In the stretch window, enter the new duration or modify the percentage (up to 10%).
You can listen to the result by clicking on  .
.
Click on "Save"  .
.
The sound bite you have stretched is displayed on the track, with another color.
If you click on  , the following window is shown :

Click on  .
.
The sound bite you have stretched is displayed on the track, with another color and is also saved in the database.
NB : The original sound bite is available in the bin. Therefore, you can retrieve it at any moment.
1.11.35.Inserting a blank
The "insert blank" function enables you to insert a blank of a predefined length.
To insert a blank :
Place the playhead where you want to insert the blank.
Do a right click. A menu is shown. Click on "Insert blank" and choose the length of your blank.
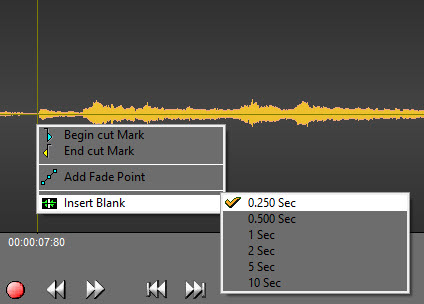
The blank is inserted :
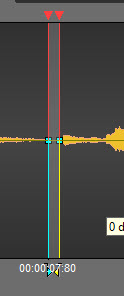
1.11.36.Crossfade
A crossfade is used to fade out a part of a sound and to fade in another part simultaneously.
The "crossfade" function is used on a cut mark only.
To do a crossfade :
Click on the cut mark. It turns to orange and the "crossfade" function is displayed :
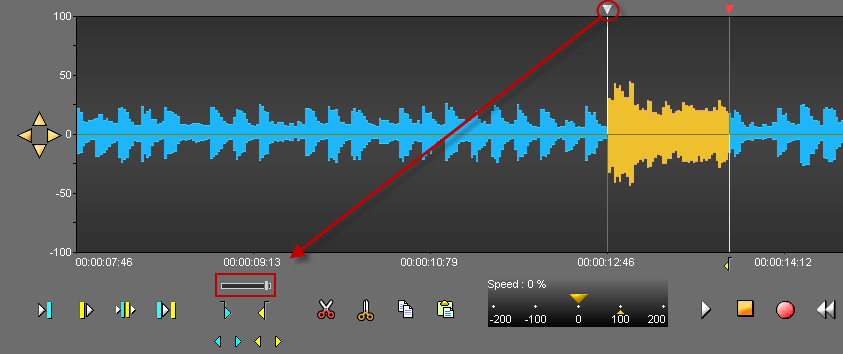
Drag the cursor according to the kind of crossfade you want (light or strong). The more you drag the cursor to the right side, the stronger the crossfade is.
1.11.37.Recording in "Snippet"
To record in "Snippet":
Click on « record »  .
.
Click on « Pause »  to stop momentarily the recording.
You can resume the pause where the playhead is or somewhere else. To do so, replace the playhead.
Once the recording is finished, click on « stop »  .
.
A window is displayed to save you recording in the Browser.
Fill in the data and save by clicking on the floppy disk icon  (or press "Cancel" to start over).
NB : Your recording has the raw status  .
.
1.11.38.Absolute time
When the "Absolute time" icon is pressed, the piece does not start at 0, but at the time of the original recording starts. This function is especially useful for simultaneous recordings.
Example : I have a feed which has been recorded at 20h02 until 21h34.
It means that when I play my feed, my counter will go from 00h00h00 to 01h34h00.
However, I would like to go at 20h15 because there was something interesting at that time.
Thus, when I click on the "absolute time" icon, the counter will start at 20h02 and will end at 21h34.
Moreover, by a double-click on the "current" counter, I can enter the time where I want to go.
1.11.39."Selected length" counter
The "Selected length" counter gives the duration of a selected sequence (between the blue and the yellow lines).
1.11.40."Current" counter
The "Current" counter gives the position of the playhead (red line). The playhead can be moved to another position on the spectrum by double-clicking on the counter and entering the exact position required. To validate, press Enter or press "Esc" to cancel.
1.11.41."Edited length" counter
The "edited length" counter gives the total duration of an edit session. Each time you cut a selection, the duration is refreshed.
1.11.42."Before blue" counter
The "Before blue" counter gives you the duration between the reading head and the blue marker.
If numbers are white, the reading head is after the blue marker.
If numbers are orange, the reading head is before the blue marker.
1.11.43.Recent items list
To get the list of items you have used :
Go to « Recent items ».
Click on the down arrow. A drop-down list is displayed containing the last items used.
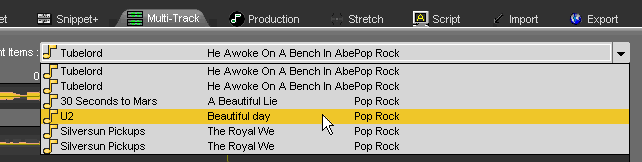
If you click on one item of the list, you insert the item on the track, where the playhead is.
1.11.44.Resizing the spectrum
Several possibilities are available to resize the spectrum.
Thanks to your keyboard by using the Ctrl + arrow keys.
OR
Use the 4 arrows available at the left side of your spectrum (2 horizontal arrows and 2 vertical arrows).

OR
Use the mouse wheel.
1.11.45.Saving an edit session (Ctrl + S)
To save an edit session, use the following functions :
 Save : to save an edit session. This edit session is inserted in the database under the chosen category.
If modifications are done from an existing edit session, this one is updated and the previous version is replaced by the new one.
 Save as : To save an edit session under a new name.
If modifications are done from an existing edit session, you will have two versions of it.
 New : to create a new edit session.
1.11.46.Snapshot
A right click on the "Save" icon  displays the "Snapshot" function.
The "Snapshot" function is designed to save different versions of the edit session each "x" minutes automatically.
Thus, it is possible to reload an edited version.
To reload a previous version of an edit session :
Do a right-click on the "save" icon  .
.
A "Load Snapshot save" window will appear with all the different versions.
Select the version to reload.
Double-click on it or click on "OK".
1.11.47.Snippet Shortcuts
F1 : Set locators - or - Ctrl + locator number
F3 : Set the blue line
F4 : Set the yellow line
F5 or Del : Cut the selection
F6 : Play 2 seconds before the blue, 2 seconds after the yellow
F7 : Play the contents of a cut (2 seconds after the blue line and 2 seconds before the yellow line)
F8 : Go to the beginning
F9 : Go to the end
F10 : Fast forward
F11 : Fast rewind
Space bar : Play/Stop
Ctrl + A : Select the track
Ctrl + N : New document
Ctrl + Z : Undo
Ctrl + Y : Redo
Ctrl + C : Copy
Ctrl + X : Cut
Ctrl + V : Paste
Ctrl + 1..9 : Replace the markers
Ctrl + O : Retrieve the audio file used in the track from the Browser
Ctrl + S : Save
Ctrl + W : Generate a master
Ctrl + left arrow* : Zoom backward
Ctrl + right arrow* : Zoom forward
Page up : Go to the blue line
Page down : Go to the yellow line
1…9 : Go straight to one specified locator using the number pad
With the mouse wheel :
Mouse wheel : horizontal zoom in/zoom out
Shift + Mouse wheel : vertical zoom in/zoom out
Ctrl + Mouse wheel : scroll right/left one page
NB : "Left arrow" and "right arrow" are keys board.
1.12.Audio bank
1.12.1.Audio bank
The audio bank is used to classify sounds by theme and for quick access to frequently-used sounds (programme dressing, etc.). The bank holds 50 racks, each containing 50 cartstacks.
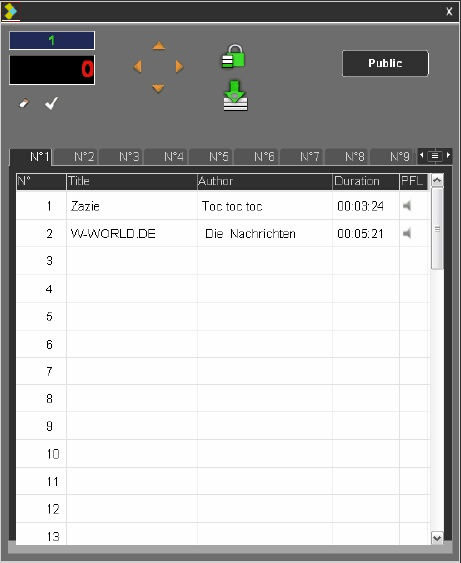
1.12.2.Inserting a sound in the audio bank
- Open the audio bank with the following icon :

- Unlock the audio bank by clicking on the "lock" icon (if the audio bank is not unlocked, you can not insert any audio item).
 Locked mode (read-only mode)
 Unlocked mode (writing mode)
- Enter the position of a cart for the new sound in the search zone.

- Press "Enter" on the keyboard or click on the "validate" icon  .
.
The location of the new sound is selected.
- Choose a sound from the Browser and double-click on it. The location in the audio bank will be assigned to it. Lock the read-only mode again.
NB: if a sound is inserted into a full cart, the new sound will overwrite the previous one.
1.12.3.Searching a sound in the audio bank
To find a sound, use the keyboard to enter a rack number followed by the cartstack number.
NB: the rack number must always be entered before the cartstack number. If the cartstack number is less than 10, it must always be preceded by a 0.
Example: to call the cart 5 in rack 32, enter 3205 and press “Enter”.


The cart is then automatically selected.
1.12.4.Public/Private mode
By default, the audio bank is in public mode, which means that everybody has an access to it.
However, each user can create his own audio bank.
To do so :
- Choose your user name in the list.
- Click on the "Public" button 
 . The audio bank switches to the "private" mode .
- Fill in the audio bank with audio items.
1.12.5.Pre-listening an item in the audio bank
- Open the audio bank with the following icon :

- Select the audio item that you want to pre-listen to

- Click on the "loudspeaker" icon.

You pre-listen to the chosen item.
1.12.6.Deleting a sound from the audio bank
- Open the audio bank with the following icon :

- unlock the audio bank by clicking on the "lock" icon (if the audio bank is not unlocked, you can not insert audio item).
 Locked mode (read-only mode)
 Unlocked mode (writing mode)
- Do a right click on the item you want to delete. The "Erase" function is displayed.
- Click on it to delete the audio item.
The audio item is deleted.
1.12.7.Closing the audio bank
To close the audio bank, Click on the « Audio bank » icon  .
.
1.13.Additionnal tools
1.13.1.Displaying the current date and time
To display the current date and time, click on the following icon :  .
.
The following window is displayed :
1.13.2.Displaying information on an item
To display the information on an item :
- Click on the following icon : 
- Then, click on the item for which you want to see the information.
A window displays the following information :
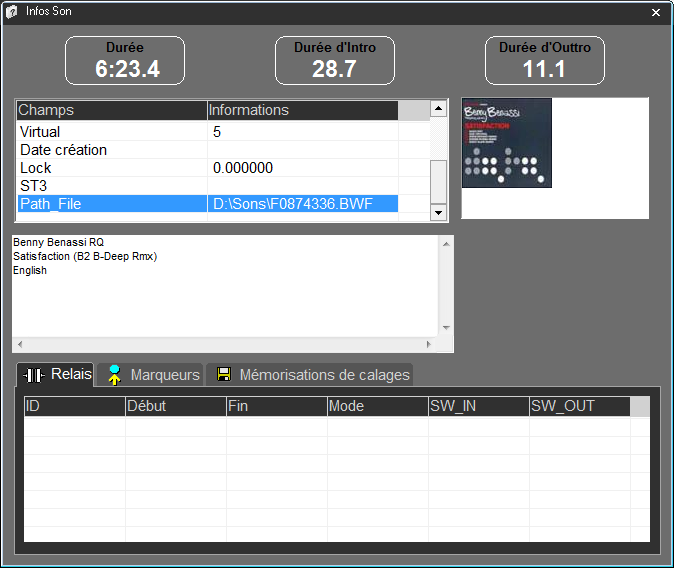
1.13.3.Modify item's speed
It is possible to modify the speed of the sounds on the 4 tracks by clicking on the button:

The following window opens :

It is possible to change the speed either:
- by clicking on the "+" or "-" buttons
- by moving the yellow cursor with the mouse
To return to the "normal" speed, click on the button "100%"
To close this window:
- click again on 
- click on the cross in the window.
1.13.4.Manage GPIs
It is possible to block incoming and outgoing GPIs.
To block outgoing GPIs, click on the button:  .
.
A red cross appears on the button:
Outgoing GPIs are blocked. To restore them, click the button again.
To block the incoming GPIs, click on the button: 
A red cross appears on the button: 
Incoming GPIs are blocked. To restore them, click the button again.
1.14.Remote control (DDO110)
1.14.1.Remote Control definition
The remote control is an interface dedicated to broadcast, with 4 columns each containing 12 commands (representing the 4 on-air outputs).
The remote control provides the following functions:
- Loading/unloading sounds in cartstacks.
- Playing sounds in cartstacks.
- Leading in sounds in cartstacks.
- Playing sounds in stacks.
- Scrolling stacks.
- Playing sounds in playlists.
- Scrolling playlists.
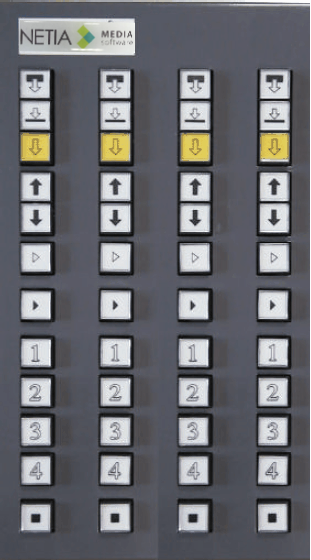
1.14.2.Loading an item with the remote control
- Select the item in the Browser and press the "load" button :

- Press a number. Each number corresponds to a cart.
For example : To load and broadcast a sound in the player of cartstack 1 :
- Select the sound in the Browser.
- Press the "load" key.

- Press player 1 to load the cartstack.

- Press the player of cartstack 1 again to broadcast the sound.
The procedure is the same for other cartstacks.
Press "Stop" to stop the sound.
1.14.3.Broadcasting an item with the remote control
To broadcast an item :
- Once you have loaded an audio item in a cart, press again on the cart number where the item has been loaded.
Example : if you press the « 1 » button 
 of the output n°« 2 », the item is loaded in the cart "1" of the chosen output. Press again on to broadcast the audio item.
1.14.4.Stopping an item with the remote control
- Stop the item by pressing the following button :

1.14.5.Scrolling in the playlist or stack with the remote control
- To scroll in the playlists or stacks , use the "browsing arrows" buttons available on the remote control :

1.14.6.Locking the remote control
When you broadcast an audio item via the mixing console (fader start mode), you can lock the remote control to prevent mistakes on air.
To do so, click on the "lock external remote control" button : 
1.14.7.Unloading an item with the remote control
- Stop the audio item by pressing the following button :

- Press the "Unload" button.

- Press the cart number corresponding to the cart that you want to unload.

1.15.Remote Control (DDO114)
This remote control console DDO114 is a single channel console with 4 buttons.
The setting of the brodcasting channel is done upstream.
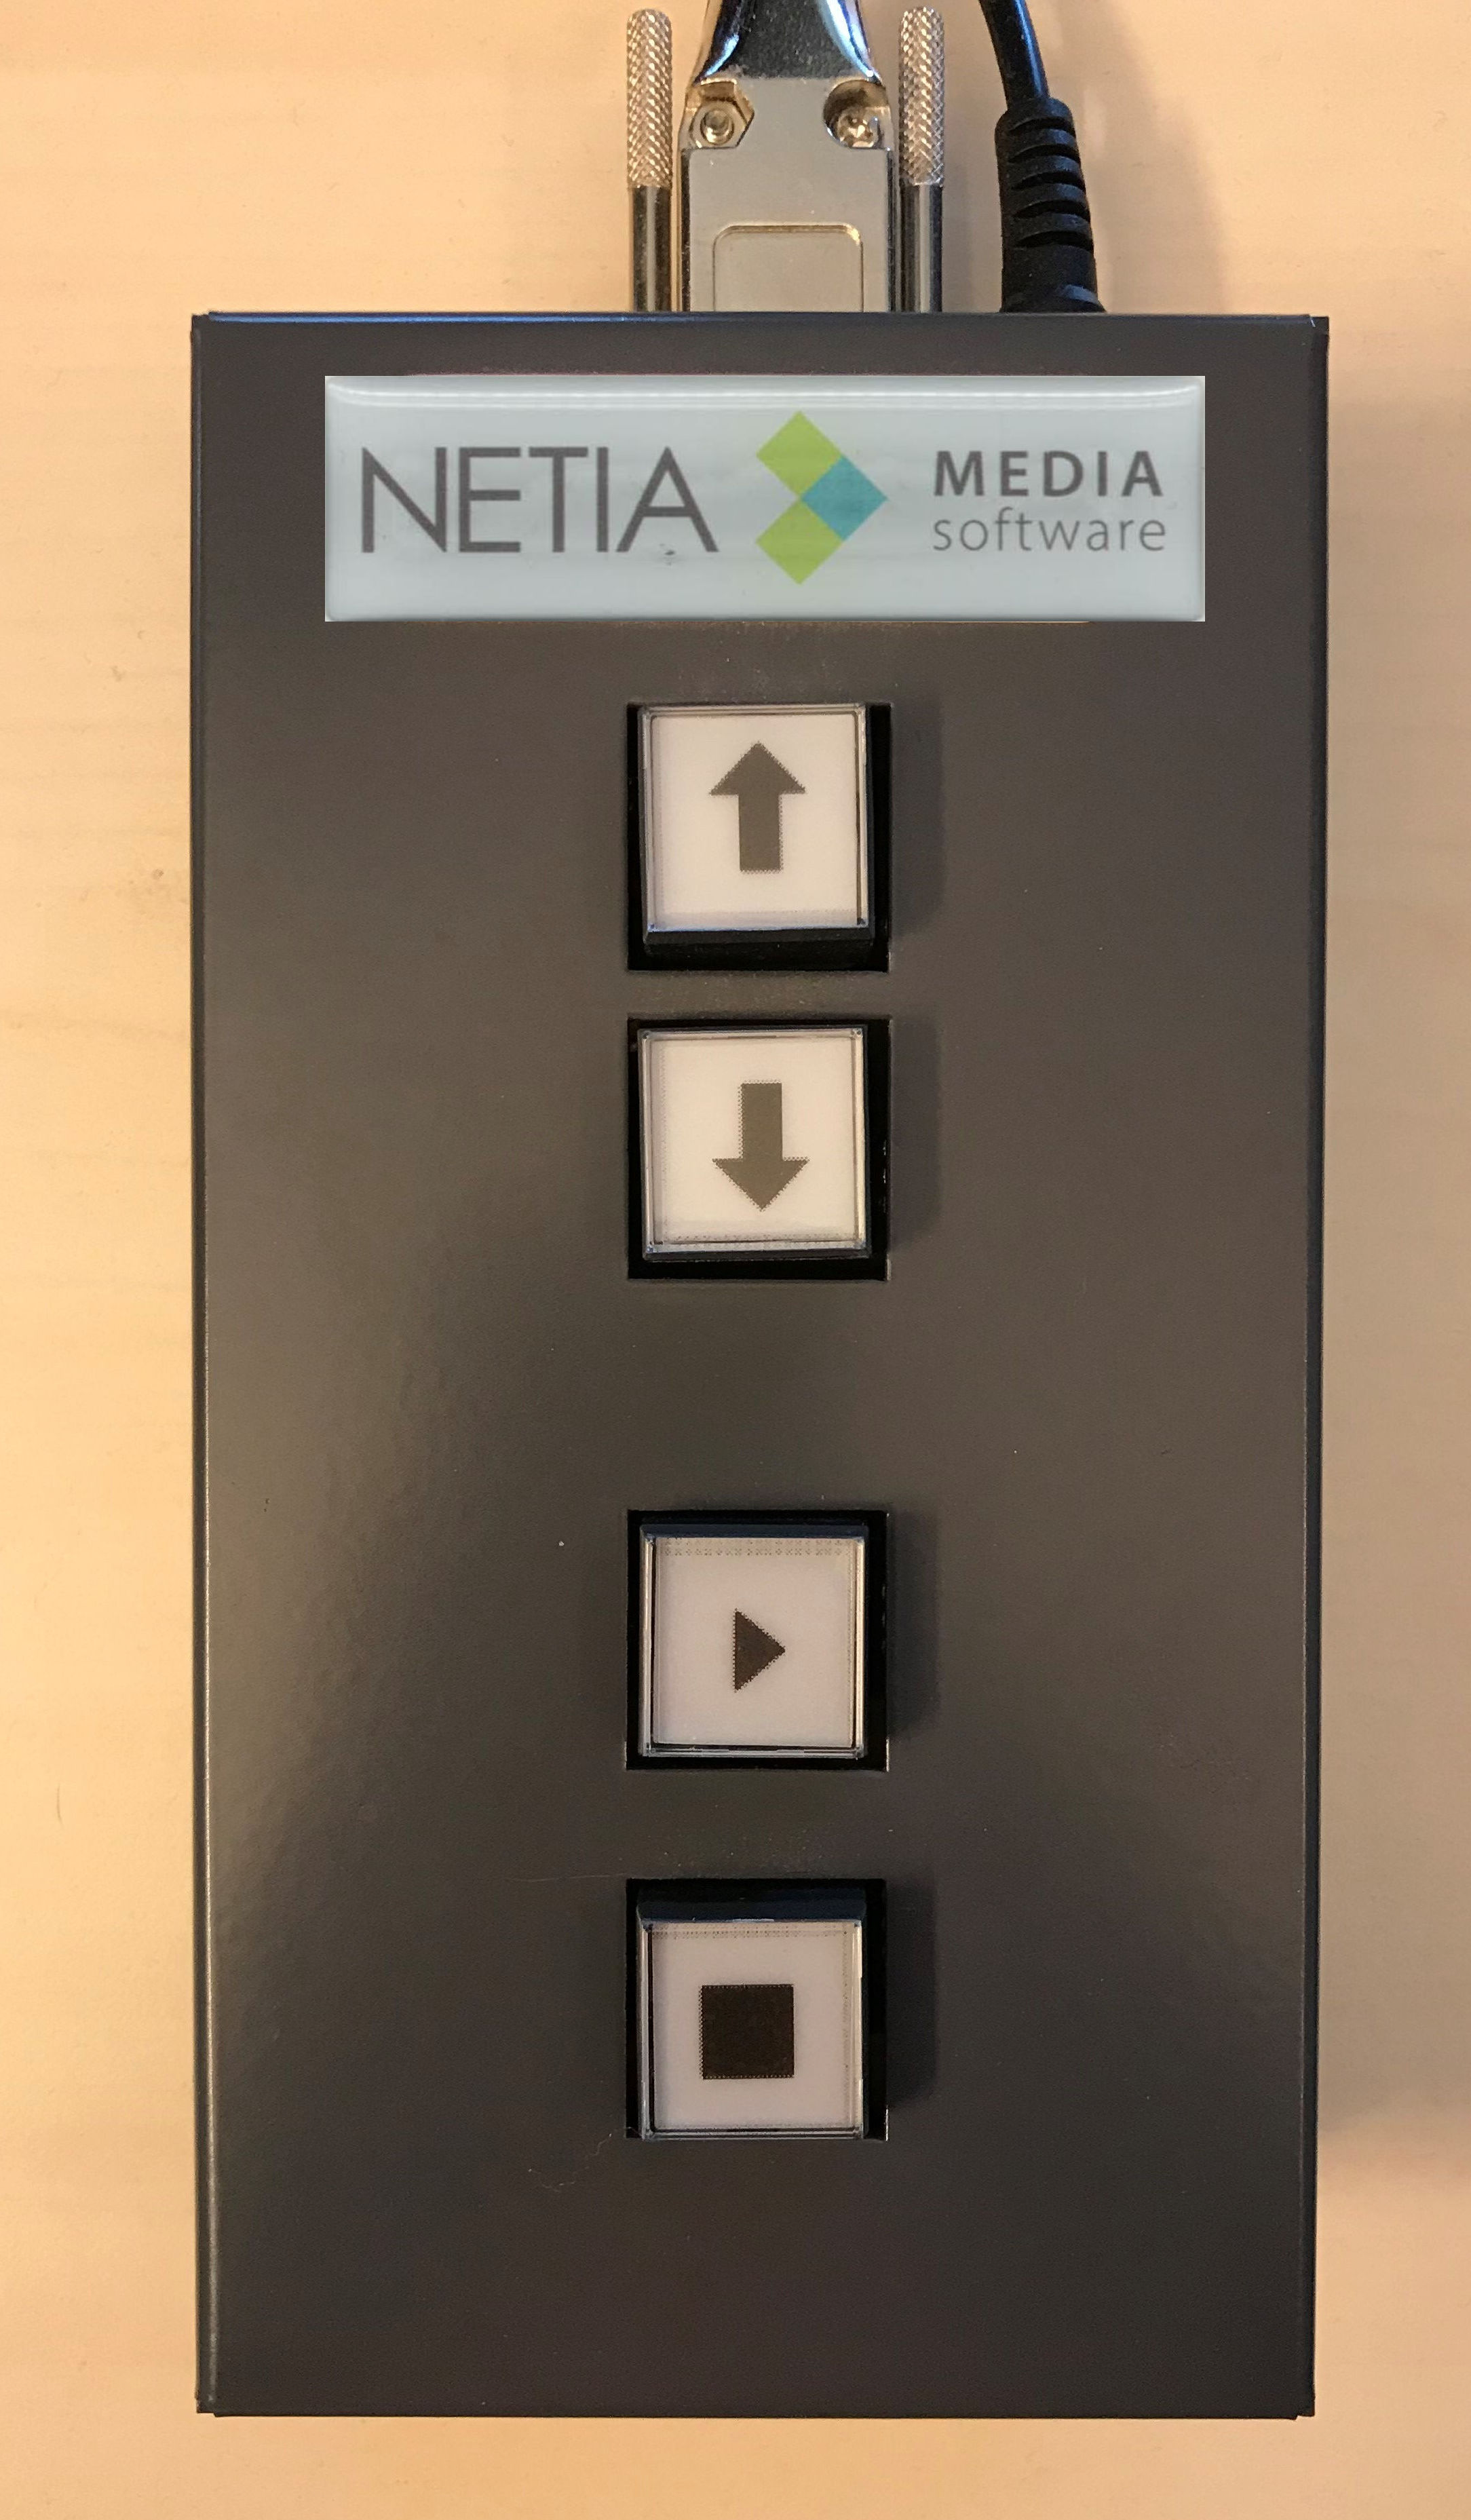
The 4 buttons are:
- Go up in the playlist or the cartstack.
- Go downp in the playlist or the cartstack.
- Play.
- Stop.
1.16.Remote Control ElGato
The "Stream Deck" console from "elgato" is a console incorporating all the functionalities of the DDO110 console.
Main functions implemented:
Loading cart.
Playing cart.
Pausing cart.
Stoping cart.
Unloading cart.
Cart navigation.
The configuration of the console is done thanks to the "elgato" interface and the NETIA shortcuts.
They are chosen to call up the functionality of DDO and are made up of 2 parts, the keys of which must be pressed at the same time:
the context: which is a combination of keys (between shift/alt/ctrl) allowing to choose a channel
the action: a key allowing to choose the desired functionality
For the context, the possible combinations are as follows:
ctrl + shift: Selection of channel 1.
ctrl + alt: Selection of channel 2.
shift + alt: Selection of channel 3.
ctrl + shift + alt: Selection of channel 4.
For actions, here are those currently available:
key 1 to 6: (not those of the numeric keyboard) The selection, playing and pause of a cart is done thanks to this shortcut.
If the cart is not selected, it will become so. Redo the shortcut to start playing a selected cart.
Calling this shortcut to a cart while it is playing will pause the sound. Just do it again to resume playing.
S key : stop on the track
+ key : (not the one on the numeric keyboard) go down into the cartstack, access the next element (or the next tab in tab mode).
° key : (before the +) go up in the cartstack, go back to the previous element (or the previous tab in tab mode).
For the following 3 shortcuts, their full functionality takes place in 2 steps. A first choice of functionality,
then a second to select the cart on which to make the modification.
K key : loading/inserting (if cart already existing) sound (selected in the browser) in the cart.
U key : unloading of the cart sound.
C key : mix change (not implemented).